2007 GMC SIERRA CLASSIC brake light
[x] Cancel search: brake lightPage 458 of 674
Camper/Fifth-Wheel Trailer Wiring Package
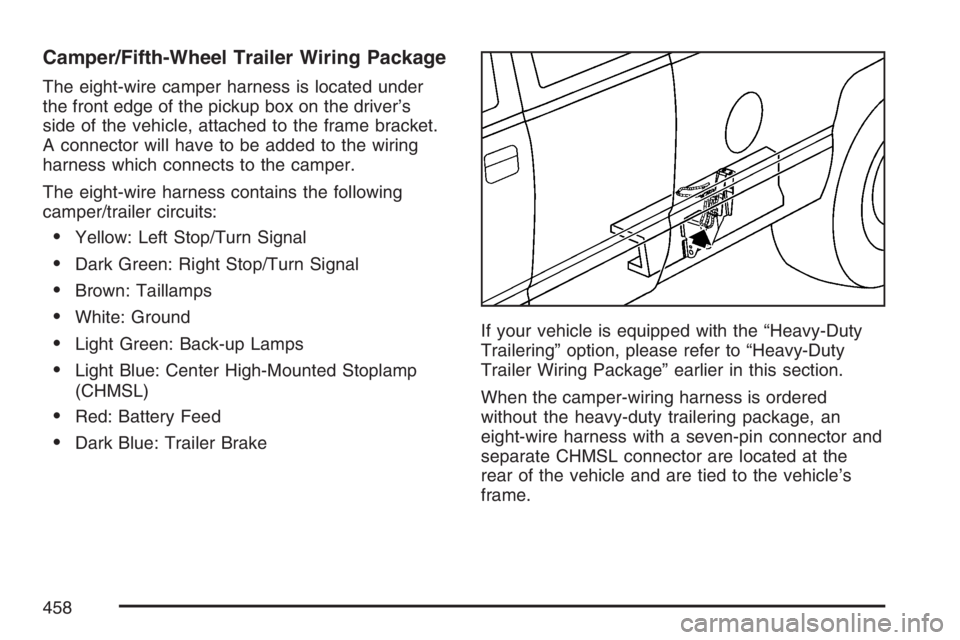
The eight-wire camper harness is located under
the front edge of the pickup box on the driver’s
side of the vehicle, attached to the frame bracket.
A connector will have to be added to the wiring
harness which connects to the camper.
The eight-wire harness contains the following
camper/trailer circuits:
Yellow: Left Stop/Turn Signal
Dark Green: Right Stop/Turn Signal
Brown: Taillamps
White: Ground
Light Green: Back-up Lamps
Light Blue: Center High-Mounted Stoplamp
(CHMSL)
Red: Battery Feed
Dark Blue: Trailer BrakeIf your vehicle is equipped with the “Heavy-Duty
Trailering” option, please refer to “Heavy-Duty
Trailer Wiring Package” earlier in this section.
When the camper-wiring harness is ordered
without the heavy-duty trailering package, an
eight-wire harness with a seven-pin connector and
separate CHMSL connector are located at the
rear of the vehicle and are tied to the vehicle’s
frame.
458
Page 461 of 674

Power Take-Off (PTO)
Before using a Power Take-Off (PTO), if equipped,
refer to the manufacturer’s or installer’s instructions.
To engage a PTO on a vehicle with a manual
transmission do the following:
1. Hold the clutch pedal down.
2. Set the parking brake.
3. Shift the transmission into NEUTRAL.
4. Engage the PTO. Refer to the manufacturer’s
or installer’s for instructions on electrically
engaged PTOs.
5. For mobile operations, shift the transmission
into the gear you want, apply the regular
brakes and release the parking brake.
For stationary operations, leave the parking
brake applied.
6. Release the clutch and regular brakes as you
normally would. When the clutch is released,
the PTO will start.
7. Turn the PTO rotary switch to ON.To engage a PTO on a vehicle with an automatic
transmission do the following:
1. For stationary use shift the transmission into
PARK (P).
2. Turn the PTO rotary switch ON.
3. If the engine speed is below the PTO engage
speed limit, the PTO will start. The blinking
LED on the PTO control switch indicates PTO
engage is requested. When PTO engages the
LED will switch from blinking to a steady light.
To use PTO speed control in Preset Mode (Factory
Setting) do the following:
1. Engage the PTO.
2. Select PARK (P) or NEUTRAL (N) range.
Apply the parking brake if NEUTRAL (N) is
selected. Torque Converter Clutch (TCC)
is not available in NEUTRAL (N) and is
available only in PARK (P) when engine speed
is above 1,100 rpm.
3. Make sure your foot is off the brake pedal
(and off the clutch on vehicles equipped
with a manual transmission).
4. Select the desired engine speed for PTO
operation. Read the following preset mode
information regarding operation.
461
Page 519 of 674

Brake Wear
Your vehicle has front disc brakes and may have
rear drum brakes or rear disc brakes.
Disc brake pads have built-in wear indicators that
make a high-pitched warning sound when the
brake pads are worn and new pads are needed.
The sound may come and go or be heard all
the time your vehicle is moving, except when you
are pushing on the brake pedal �rmly.
{CAUTION:
The brake wear warning sound means that
soon your brakes will not work well. That
could lead to an accident. When you hear
the brake wear warning sound, have your
vehicle serviced.
Notice:Continuing to drive with worn-out
brake pads could result in costly brake repair.
Some driving conditions or climates may cause
a brake squeal when the brakes are �rst applied or
lightly applied. This does not mean something is
wrong with your brakes.Properly torqued wheel nuts are necessary to help
prevent brake pulsation. When tires are rotated,
inspect brake pads for wear and evenly tighten
wheel nuts in the proper sequence to GM torque
speci�cations.
If you have rear drum brakes, they do not have
wear indicators, but if you ever hear a rear brake
rubbing noise, have the rear brake linings
inspected immediately. Rear brake drums should
be removed and inspected each time the tires
are removed for rotation or changing. Drum brakes
have an inspection hole to inspect lining wear
during scheduled maintenance. When you have
the front brake pads replaced, have the rear
brakes inspected, too.
Brake linings should always be replaced as
complete axle sets.
Brake Pedal Travel
See your dealer if the brake pedal does not return
to normal height, or if there is a rapid increase in
pedal travel. This could be a sign of brake trouble.
Brake Adjustment
Every time you make a brake stop, your brakes
adjust for wear.
519
Page 522 of 674
3. Get the vehicles close enough so the jumper
cables can reach, but be sure the vehicles are
not touching each other. If they are, it could
cause a ground connection you do not
want. You would not be able to start your
vehicle, and the bad grounding could damage
the electrical systems.
To avoid the possibility of the vehicles rolling,
set the parking brake �rmly on both vehicles
involved in the jump start procedure. Put
an automatic transmission in PARK (P) or a
manual transmission in NEUTRAL before
setting the parking brake. If you have a
four-wheel-drive vehicle, be sure the transfer
case is in a drive gear, not in NEUTRAL.Notice:If you leave your radio or other
accessories on during the jump starting
procedure, they could be damaged. The repairs
would not be covered by your warranty. Always
turn off your radio and other accessories when
jump starting your vehicle.
4. Turn off the ignition on both vehicles. Unplug
unnecessary accessories plugged into the
cigarette lighter or accessory power outlets.
Turn off the radio and all lamps that are
not needed. This will avoid sparks and help
save both batteries. And it could save
the radio!
522
Page 548 of 674
(C) Aspect Ratio:A two-digit number that
indicates the tire height-to-width measurements.
For example, if the tire size aspect ratio is 75, as
shown in item C of the light truck (LT-Metric) tire
illustration, it would mean that the tire’s sidewall is
75 percent as high as it is wide.
(D) Construction Code:A letter code is used to
indicate the type of ply construction in the tire.
The letter R means radial ply construction;
the letter D means diagonal or bias ply
construction; and the letter B means belted-bias
ply construction.
(E) Rim Diameter:Diameter of the wheel in
inches.
(F) Service Description:The service description
indicates the load range and speed rating of a
tire. The load index can range from 1 to 279.
Speed ratings range from A to Z.Tire Terminology and De�nitions
Air Pressure:The amount of air inside the tire
pressing outward on each square inch of the
tire. Air pressure is expressed in pounds
per square inch (psi) or kilopascal (kPa).
Accessory Weight:This means the combined
weight of optional accessories. Some examples of
optional accessories are, automatic transmission/
transaxle, power steering, power brakes, power
windows, power seats, and air conditioning.
Aspect Ratio:The relationship of a tire’s height
to its width.
Belt:A rubber coated layer of cords that is
located between the plies and the tread. Cords
may be made from steel or other reinforcing
materials.
Bead:The tire bead contains steel wires wrapped
by steel cords that hold the tire onto the rim.
Bias Ply Tire:A pneumatic tire in which the plies
are laid at alternate angles less than 90 degrees
to the centerline of the tread.
548
Page 607 of 674
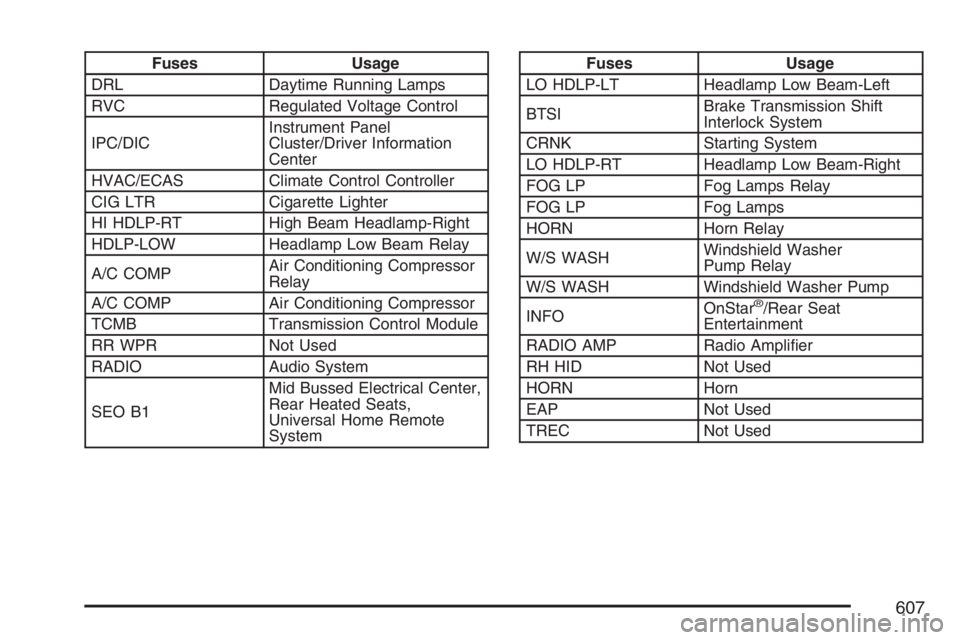
Fuses Usage
DRL Daytime Running Lamps
RVC Regulated Voltage Control
IPC/DICInstrument Panel
Cluster/Driver Information
Center
HVAC/ECAS Climate Control Controller
CIG LTR Cigarette Lighter
HI HDLP-RT High Beam Headlamp-Right
HDLP-LOW Headlamp Low Beam Relay
A/C COMPAir Conditioning Compressor
Relay
A/C COMP Air Conditioning Compressor
TCMB Transmission Control Module
RR WPR Not Used
RADIO Audio System
SEO B1Mid Bussed Electrical Center,
Rear Heated Seats,
Universal Home Remote
SystemFuses Usage
LO HDLP-LT Headlamp Low Beam-Left
BTSIBrake Transmission Shift
Interlock System
CRNK Starting System
LO HDLP-RT Headlamp Low Beam-Right
FOG LP Fog Lamps Relay
FOG LP Fog Lamps
HORN Horn Relay
W/S WASHWindshield Washer
Pump Relay
W/S WASH Windshield Washer Pump
INFOOnStar
®/Rear Seat
Entertainment
RADIO AMP Radio Ampli�er
RH HID Not Used
HORN Horn
EAP Not Used
TREC Not Used
607
Page 659 of 674
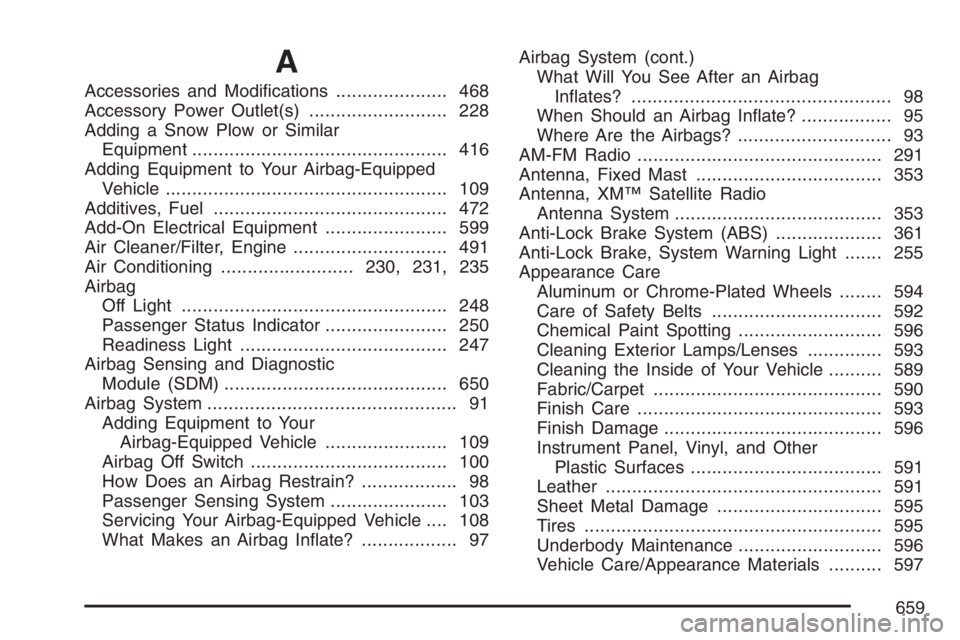
A
Accessories and Modi�cations..................... 468
Accessory Power Outlet(s).......................... 228
Adding a Snow Plow or Similar
Equipment................................................ 416
Adding Equipment to Your Airbag-Equipped
Vehicle..................................................... 109
Additives, Fuel............................................ 472
Add-On Electrical Equipment....................... 599
Air Cleaner/Filter, Engine............................. 491
Air Conditioning.........................230, 231, 235
Airbag
Off Light.................................................. 248
Passenger Status Indicator....................... 250
Readiness Light....................................... 247
Airbag Sensing and Diagnostic
Module (SDM).......................................... 650
Airbag System............................................... 91
Adding Equipment to Your
Airbag-Equipped Vehicle....................... 109
Airbag Off Switch..................................... 100
How Does an Airbag Restrain?.................. 98
Passenger Sensing System...................... 103
Servicing Your Airbag-Equipped Vehicle.... 108
What Makes an Airbag In�ate?.................. 97Airbag System (cont.)
What Will You See After an Airbag
In�ates?................................................. 98
When Should an Airbag In�ate?................. 95
Where Are the Airbags?............................. 93
AM-FM Radio.............................................. 291
Antenna, Fixed Mast................................... 353
Antenna, XM™ Satellite Radio
Antenna System....................................... 353
Anti-Lock Brake System (ABS).................... 361
Anti-Lock Brake, System Warning Light....... 255
Appearance Care
Aluminum or Chrome-Plated Wheels........ 594
Care of Safety Belts................................ 592
Chemical Paint Spotting........................... 596
Cleaning Exterior Lamps/Lenses.............. 593
Cleaning the Inside of Your Vehicle.......... 589
Fabric/Carpet........................................... 590
Finish Care.............................................. 593
Finish Damage......................................... 596
Instrument Panel, Vinyl, and Other
Plastic Surfaces.................................... 591
Leather.................................................... 591
Sheet Metal Damage............................... 595
Tires........................................................ 595
Underbody Maintenance........................... 596
Vehicle Care/Appearance Materials.......... 597
659
Page 660 of 674
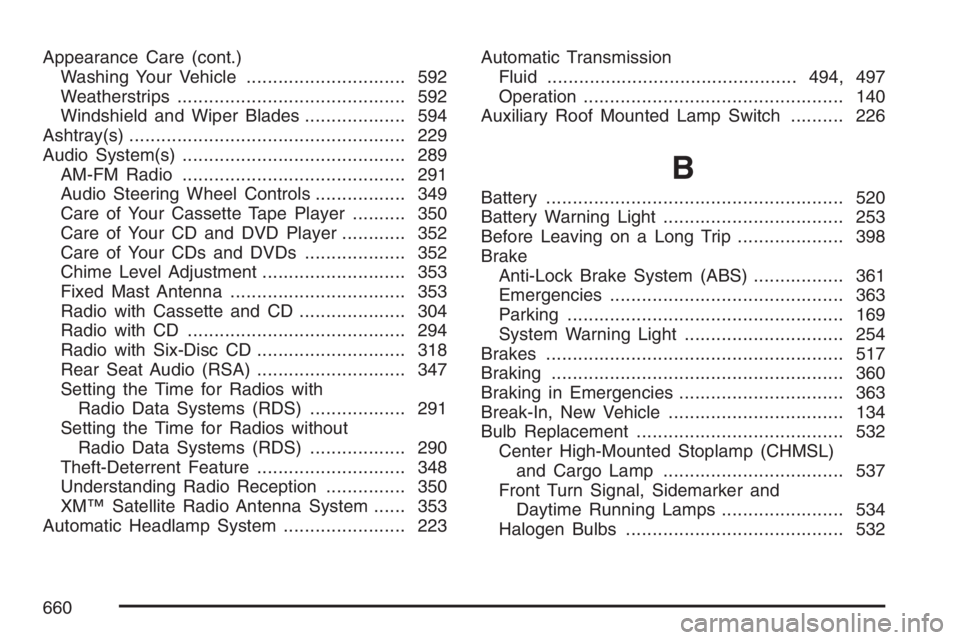
Appearance Care (cont.)
Washing Your Vehicle.............................. 592
Weatherstrips........................................... 592
Windshield and Wiper Blades................... 594
Ashtray(s).................................................... 229
Audio System(s).......................................... 289
AM-FM Radio.......................................... 291
Audio Steering Wheel Controls................. 349
Care of Your Cassette Tape Player.......... 350
Care of Your CD and DVD Player............ 352
Care of Your CDs and DVDs................... 352
Chime Level Adjustment........................... 353
Fixed Mast Antenna................................. 353
Radio with Cassette and CD.................... 304
Radio with CD......................................... 294
Radio with Six-Disc CD............................ 318
Rear Seat Audio (RSA)............................ 347
Setting the Time for Radios with
Radio Data Systems (RDS).................. 291
Setting the Time for Radios without
Radio Data Systems (RDS).................. 290
Theft-Deterrent Feature............................ 348
Understanding Radio Reception............... 350
XM™ Satellite Radio Antenna System...... 353
Automatic Headlamp System....................... 223Automatic Transmission
Fluid...............................................494, 497
Operation................................................. 140
Auxiliary Roof Mounted Lamp Switch.......... 226
B
Battery........................................................ 520
Battery Warning Light.................................. 253
Before Leaving on a Long Trip.................... 398
Brake
Anti-Lock Brake System (ABS)................. 361
Emergencies............................................ 363
Parking.................................................... 169
System Warning Light.............................. 254
Brakes........................................................ 517
Braking....................................................... 360
Braking in Emergencies............................... 363
Break-In, New Vehicle................................. 134
Bulb Replacement....................................... 532
Center High-Mounted Stoplamp (CHMSL)
and Cargo Lamp.................................. 537
Front Turn Signal, Sidemarker and
Daytime Running Lamps....................... 534
Halogen Bulbs......................................... 532
660