2007 GMC SIERRA CLASSIC ECU
[x] Cancel search: ECUPage 417 of 674
Say, for example, you have a 700 lb (318 kg)
snow plow. The total weight of all occupants and
cargo inside the cab should not exceed 300 lb
(135 kg). This means that you may only be able to
carry one passenger. But, even this may be too
much if you have got other equipment already
adding to the weight of your vehicle.
Here are some guidelines for safely carrying a
snow plow on your vehicle:
Make sure the weight on the front and
rear axles does not exceed the axle rating
for each.
For the front axle, if more cargo or passengers
must be carried, appropriate counter ballast
must be installed rear of the rear axle. Counter
ballast must be properly secured so it will
not move during driving.
Follow the snow plow manufacturer’s
recommendations regarding rear ballast.
Rear ballast may be required to ensure
a proper front and rear weight distribution
ratio, even though the actual weight at
the front axle may be less than the front
axle rating.
The snow plow manufacturer or installer can
assist you in determining the amount of rear
ballast required, to help make sure your
snowplow/vehicle combination does not
exceed the GVW rating, the front and rear
axle ratings, and the front and rear weight
distribution ratio.
The total vehicle must not exceed the
GVW rating.
417
Page 423 of 674
If your vehicle has gone over the weight ratings,
move or take out some things until all the
weight falls below the ratings.
Secure loose items to prevent weight shifts that
could affect the balance of your vehicle. When the
truck-camper is loaded, drive to a scale and
weigh the front and the rear wheels separately to
determine axle loads. Individual axle loads
should not exceed either of the GAWRs. The total
of the front and rear axle loads should not
exceed your vehicle’s GVWR. These ratings are
given on the vehicle certi�cation label attached
to the rear edge of the driver’s door. See
“Certi�cation/Tire Label” underLoading Your
Vehicle on page 409. If weight ratings are
exceeded, move or remove items to bring all
weights below the ratings.
When you install and load your slide-in camper,
check the manufacturer’s instructions.
If you want more information on curb weights,
cargo weights, Cargo Weight Rating and the
correct center of gravity zone for your vehicle,
your dealer can help you. Just ask for a copy of
“Consumer Information, Truck-Camper Loading.”Pickup Conversion to Chassis Cab
General Motors is aware that some vehicle owners
may consider having the pickup box removed
and a commercial or recreational body installed.
Owners should be aware that, as manufactured,
there are differences between a chassis cab and a
pickup with the box removed which may affect
vehicle safety. The components necessary
to adapt a pickup to permit its safe use with a
specialized body should be installed by the
body builder.
Towing
Towing Your Vehicle
Consult your dealer or a professional towing
service if you need to have your disabled vehicle
towed. SeeRoadside Assistance Program on
page 644.
If you want to tow your vehicle behind another
vehicle for recreational purposes (such as behind
a motorhome), see “Recreational Vehicle
Towing” following.
423
Page 425 of 674
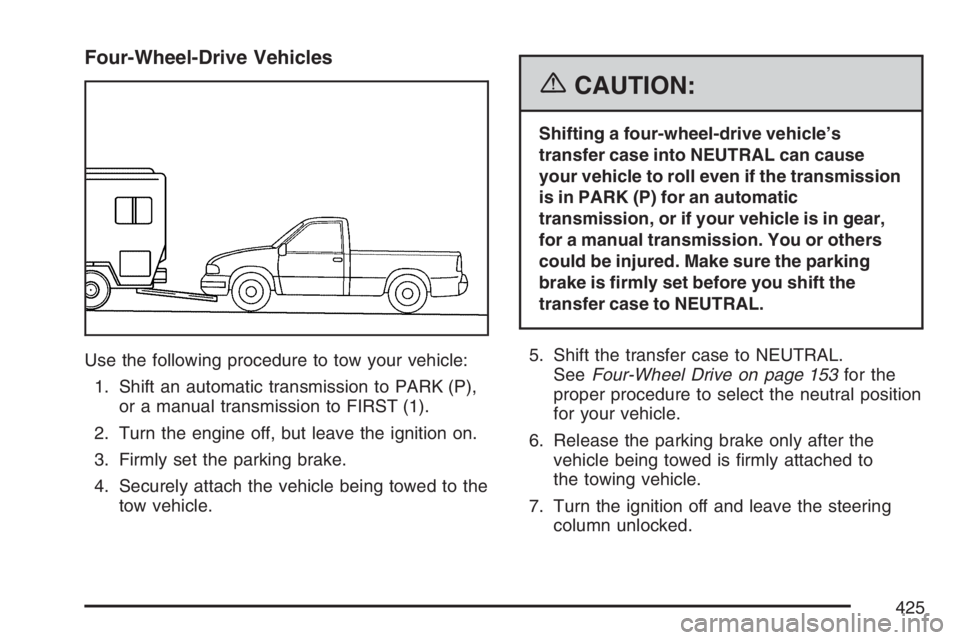
Four-Wheel-Drive Vehicles
Use the following procedure to tow your vehicle:
1. Shift an automatic transmission to PARK (P),
or a manual transmission to FIRST (1).
2. Turn the engine off, but leave the ignition on.
3. Firmly set the parking brake.
4. Securely attach the vehicle being towed to the
tow vehicle.
{CAUTION:
Shifting a four-wheel-drive vehicle’s
transfer case into NEUTRAL can cause
your vehicle to roll even if the transmission
is in PARK (P) for an automatic
transmission, or if your vehicle is in gear,
for a manual transmission. You or others
could be injured. Make sure the parking
brake is �rmly set before you shift the
transfer case to NEUTRAL.
5. Shift the transfer case to NEUTRAL.
SeeFour-Wheel Drive on page 153for the
proper procedure to select the neutral position
for your vehicle.
6. Release the parking brake only after the
vehicle being towed is �rmly attached to
the towing vehicle.
7. Turn the ignition off and leave the steering
column unlocked.
425
Page 426 of 674

Dolly Towing
Front Towing (Front Wheels Off the Ground)
Two-Wheel-Drive Vehicles
Notice:If you tow a two-wheel-drive vehicle
with the rear wheels on the ground, the
transmission could be damaged. The repairs
would not be covered by your warranty.
Never tow your vehicle with the rear wheels
on the ground.
Two-wheel-drive vehicles should not be towed
with the rear wheels on the ground.
Two-wheel-drive transmissions have no provisions
for internal lubrication while being towed.
To dolly tow a two-wheel-drive vehicle, you must
tow the vehicle with the rear wheels on the
dolly. See “Rear Towing (Rear Wheels Off the
Ground)” later in this section for more information.
Four-Wheel-Drive Vehicles
Use the following procedure to tow your vehicle:
1. Drive the vehicle up onto the tow dolly.
2. Shift an automatic transmission to PARK (P),
or a manual transmission to FIRST (1).
3. Turn the engine off, but leave the ignition on.
4. Firmly set the parking brake.
5. Securely attach the vehicle being towed to the
tow dolly.
426
Page 427 of 674
{CAUTION:
Shifting a four-wheel-drive vehicle’s
transfer case into NEUTRAL can cause
your vehicle to roll even if the transmission
is in PARK (P) for an automatic
transmission, or if your vehicle is in gear,
for a manual transmission. You or others
could be injured. Make sure the parking
brake is �rmly set before you shift the
transfer case to NEUTRAL.
6. Shift the transfer case to NEUTRAL.
SeeFour-Wheel Drive on page 153for the
proper procedure to select the neutral position
for your vehicle.
7. Release the parking brake only after the
vehicle being towed is �rmly attached to
the towing vehicle.
8. Turn the ignition off and lock the steering
column.
Rear Towing
(Rear Wheels Off the Ground)
Two-Wheel-Drive Vehicles
Use the following procedure to tow your vehicle
from the rear:
1. Drive the vehicle onto the dolly.
2. Firmly set the parking brake. SeeParking
Brake on page 169
3. Put an automatic transmission in PARK (P) or
a manual transmission in FIRST (1).
4. Follow the dolly manufacturer’s instructions to
attach and secure the vehicle being towed to
the dolly and then the loaded dolly to the
tow vehicle. Make sure the wheels are straight
before towing.
For manual transmission vehicles, make sure
the wheels are straight before proceeding
to the next steps. On automatic transmission
vehicles, use an adequate clamping device
to ensure that the front wheels are locked into
the straight position.
5. Release the parking brake only after the
vehicle being towed is �rmly attached to
the tow vehicle.
6. Turn the ignition to LOCK.
427
Page 428 of 674

Four-Wheel-Drive Vehicles
Use the following procedure to tow your vehicle
from the rear:
1. Drive the vehicle onto the dolly.
2. Firmly set the parking brake. SeeParking
Brake on page 169
3. Put an automatic transmission in PARK (P) or
a manual transmission in FIRST (1).
4. Follow the dolly manufacturer’s instructions to
attach and secure the vehicle being towed to
the dolly and then the loaded dolly to the
tow vehicle.
For manual transmission vehicles, make sure
the wheels are straight before proceeding
to the next steps. On automatic transmission
vehicles, use an adequate clamping device
to ensure that the front wheels are locked into
the straight position.{CAUTION:
Shifting a four-wheel-drive vehicle’s
transfer case into NEUTRAL can cause
your vehicle to roll even if the transmission
is in PARK (P) for an automatic
transmission, or if your vehicle is in gear,
for a manual transmission. You or others
could be injured. Make sure the parking
brake is �rmly set before you shift the
transfer case to NEUTRAL.
5. Shift the transfer case to NEUTRAL.
SeeFour-Wheel Drive on page 153
6. Release the parking brake only after the
vehicle being towed is �rmly attached to
the tow vehicle.
7. Turn the ignition to LOCK.
428
Page 452 of 674
Before you start, check all trailer hitch parts and
attachments, safety chains, electrical connector,
lamps, tires and mirror adjustment. If the trailer has
electric brakes, start your vehicle and trailer
moving and then apply the trailer brake controller
by hand to be sure the brakes are working.
This lets you check your electrical connection at
the same time.
During your trip, check occasionally to be sure
that the load is secure, and that the lamps and any
trailer brakes are still working.
While towing a trailer or when exposed to long
periods of sunshine, the �oor of the truck bed may
become very warm. Avoid putting items in the
truck bed that might be affected by high ambient
temperatures.
Following Distance
Stay at least twice as far behind the vehicle ahead
as you would when driving your vehicle without
a trailer. This can help you avoid situations
that require heavy braking and sudden turns.
Passing
You’ll need more passing distance up ahead when
you’re towing a trailer. And, because you’re a
good deal longer, you’ll need to go much farther
beyond the passed vehicle before you can
return to your lane.
Backing Up
Hold the bottom of the steering wheel with
one hand. Then, to move the trailer to the left, just
move that hand to the left. To move the trailer to the
right, move your hand to the right. Always back up
slowly and, if possible, have someone guide you.
Making Turns
Notice:Making very sharp turns while
trailering could cause the trailer to come in
contact with the vehicle. Your vehicle could be
damaged. Avoid making very sharp turns
while trailering.
When you’re turning with a trailer, make wider
turns than normal. Do this so your trailer
won’t strike soft shoulders, curbs, road signs,
trees or other objects. Avoid jerky or sudden
maneuvers. Signal well in advance.
452
Page 505 of 674
Adding Coolant
If you need more coolant, add the proper
DEX-COOL®coolant mixture at the surge tank,
but only when the engine is cool. SeeCooling
System on page 508.
{CAUTION:
You can be burned if you spill coolant
on hot engine parts. Coolant contains
ethylene glycol, and it will burn if the
engine parts are hot enough. Do not spill
coolant on a hot engine.
When replacing the pressure cap, make sure it is
hand-tight and fully seated.
Coolant Surge Tank Pressure Cap
Notice:If the pressure cap is not tightly
installed, coolant loss and possible engine
damage may occur. Be sure the cap is properly
and tightly secured.
The coolant surge tank pressure cap must be fully
installed on the coolant surge tank. SeeEngine
Compartment Overview on page 480for more
information on location.
Engine Overheating
You will �nd a coolant temperature gage on your
vehicle’s instrument panel. SeeEngine Coolant
Temperature Gage on page 256.
In addition, you will �nd an ENGINE
OVERHEATED and a REDUCED ENGINE
POWER message in the Driver Information
Center (DIC) on the instrument panel. SeeDIC
Warnings and Messages on page 270.
505