Page 2 of 312
Locks and Security 83
Keys 83
Locks 83
Seating and Safety Restraints 92
Seating 92
Safety restraints 99
Airbags 110
Child restraints 119
Tires, Wheels and Loading 131
Tire information 134
Tire inflation 135
Vehicle loading 150
Trailer towing 157
Trailer brake controller-integrated 161
Recreational towing 167
Driving 169
Starting 169
Brakes 174
Transmission operation 178
Roadside Emergencies 205
Getting roadside assistance 205
Hazard flasher switch 207
Fuel pump shut-off switch 207
Fuses and relays 208
Changing tires 217
Lug nut torque 229
Jump starting 230
Wrecker towing 236
Customer Assistance 238
Reporting safety defects (U.S. only) 244
Table of Contents
2
2007 F-250/350/450/550(f23)
Owners Guide (post-2002-fmt)
USA(fus)
Page 6 of 312

SPECIAL NOTICES
New Vehicle Limited Warranty
For a detailed description of what is covered and what is not covered by
your vehicle’s New Vehicle Limited Warranty, refer to theWarranty
Guidethat is provided to you along with yourOwner’s Guide.
Service Data Recording
Service data recorders in your vehicle are capable of collecting and
storing diagnostic information about your vehicle. This potentially
includes information about the performance or status of various systems
and modules in the vehicle, such as engine, throttle, steering or brake
systems. In order to properly diagnose and service your vehicle, Ford
Motor Company, Ford of Canada, Ford Motor Company, S.A. de C.V. and
service and repair facilities may access vehicle diagnostic information
through a direct connection to your vehicle when diagnosing or servicing
your vehicle.
Event Data Recording
Other modules in your vehicle — event data recorders — are capable of
collecting and storing data during a crash or near crash event. The
recorded information may assist in the investigation of such an event.
The modules may record information about both the vehicle and the
occupants, potentially including information such as:
•how various systems in your vehicle were operating;
•whether or not the driver and passenger seatbelts were buckled;
•how far (if at all) the driver was depressing the accelerator and/or the
brake pedal;
•how fast the vehicle was traveling; and
•where the driver was positioning the steering wheel.
To access this information, special equipment must be directly connected
to the recording modules. Ford Motor Company, Ford of Canada and
Ford Motor Company, S.A. de C.V. do not access event data recorder
information without obtaining consent, unless pursuant to court order or
where required by law enforcement, other government authorities or
other third parties acting with lawful authority. Other parties may seek to
access the information independently of Ford Motor Company, Ford of
Canada and Ford Motor Company, S.A. de C.V.
2007 F-250/350/450/550(f23)
Owners Guide (post-2002-fmt)
USA(fus)
Introduction
6
Page 10 of 312
These are some of the symbols you may see on your vehicle.
Vehicle Symbol Glossary
Safety Alert
See Owner’s Guide
Fasten Safety BeltAirbag-Front
Airbag-SideChild Seat
Child Seat Installation
WarningChild Seat Lower
Anchor
Child Seat Tether
AnchorBrake System
Anti-Lock Brake SystemBrake Fluid -
Non-Petroleum Based
Powertrain MalfunctionSpeed Control
Master Lighting SwitchHazard Warning Flasher
Fog Lamps-FrontFuse Compartment
Fuel Pump ResetWindshield Wash/Wipe
Windshield
Defrost/DemistRear Window
Defrost/Demist
2007 F-250/350/450/550(f23)
Owners Guide (post-2002-fmt)
USA(fus)
Introduction
10
Page 13 of 312

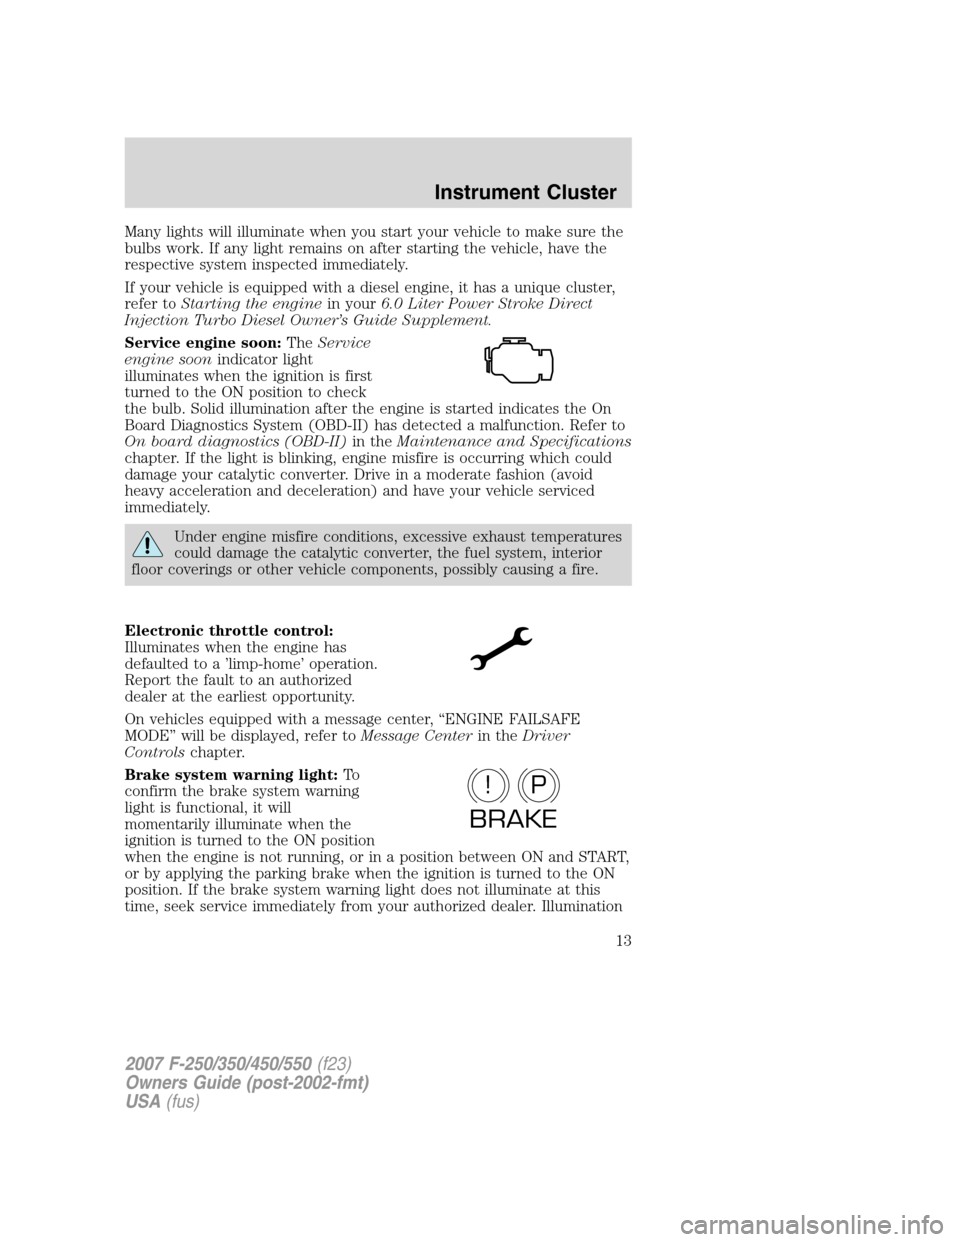
Many lights will illuminate when you start your vehicle to make sure the
bulbs work. If any light remains on after starting the vehicle, have the
respective system inspected immediately.
If your vehicle is equipped with a diesel engine, it has a unique cluster,
refer toStarting the enginein your6.0 Liter Power Stroke Direct
Injection Turbo Diesel Owner’s Guide Supplement.
Service engine soon:TheService
engine soonindicator light
illuminates when the ignition is first
turned to the ON position to check
the bulb. Solid illumination after the engine is started indicates the On
Board Diagnostics System (OBD-II) has detected a malfunction. Refer to
On board diagnostics (OBD-II)in theMaintenance and Specifications
chapter. If the light is blinking, engine misfire is occurring which could
damage your catalytic converter. Drive in a moderate fashion (avoid
heavy acceleration and deceleration) and have your vehicle serviced
immediately.
Under engine misfire conditions, excessive exhaust temperatures
could damage the catalytic converter, the fuel system, interior
floor coverings or other vehicle components, possibly causing a fire.
Electronic throttle control:
Illuminates when the engine has
defaulted to a ’limp-home’ operation.
Report the fault to an authorized
dealer at the earliest opportunity.
On vehicles equipped with a message center, “ENGINE FAILSAFE
MODE” will be displayed, refer toMessage Centerin theDriver
Controlschapter.
Brake system warning light:To
confirm the brake system warning
light is functional, it will
momentarily illuminate when the
ignition is turned to the ON position
when the engine is not running, or in a position between ON and START,
or by applying the parking brake when the ignition is turned to the ON
position. If the brake system warning light does not illuminate at this
time, seek service immediately from your authorized dealer. Illumination
P!
BRAKE
2007 F-250/350/450/550(f23)
Owners Guide (post-2002-fmt)
USA(fus)
Instrument Cluster
13
Page 14 of 312

after releasing the parking brake indicates low brake fluid level and the
brake system should be inspected immediately by your servicing
authorized dealer.
Driving a vehicle with the brake system warning light on is
dangerous. A significant decrease in braking performance may
occur. It will take you longer to stop the vehicle. Have the vehicle
checked by your authorized dealer immediately.
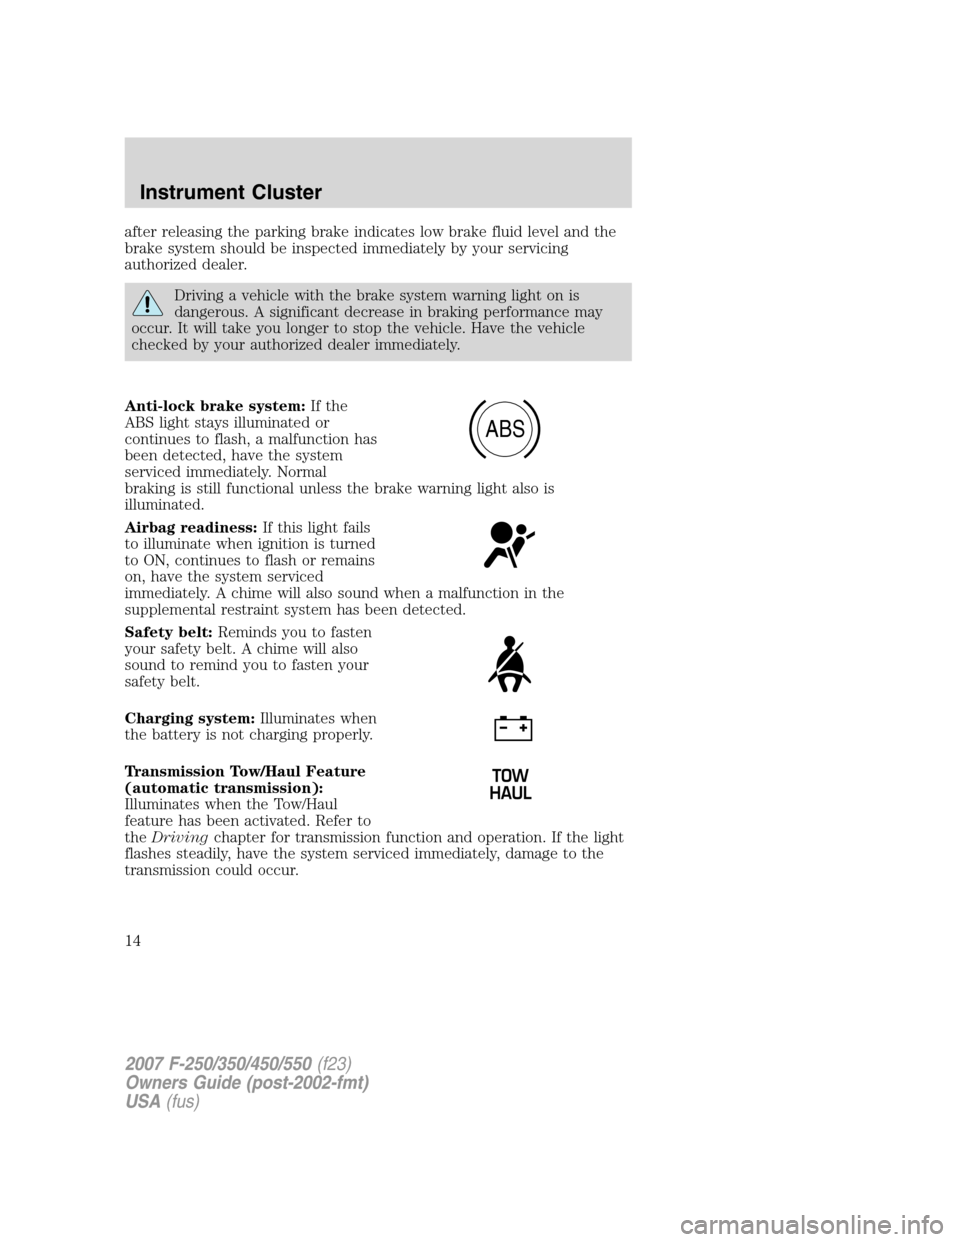
Anti-lock brake system:If the
ABS light stays illuminated or
continues to flash, a malfunction has
been detected, have the system
serviced immediately. Normal
braking is still functional unless the brake warning light also is
illuminated.
Airbag readiness:If this light fails
to illuminate when ignition is turned
to ON, continues to flash or remains
on, have the system serviced
immediately. A chime will also sound when a malfunction in the
supplemental restraint system has been detected.
Safety belt:Reminds you to fasten
your safety belt. A chime will also
sound to remind you to fasten your
safety belt.
Charging system:Illuminates when
the battery is not charging properly.
Transmission Tow/Haul Feature
(automatic transmission):
Illuminates when the Tow/Haul
feature has been activated. Refer to
theDrivingchapter for transmission function and operation. If the light
flashes steadily, have the system serviced immediately, damage to the
transmission could occur.
ABS
2007 F-250/350/450/550(f23)
Owners Guide (post-2002-fmt)
USA(fus)
Instrument Cluster
14
Page 15 of 312

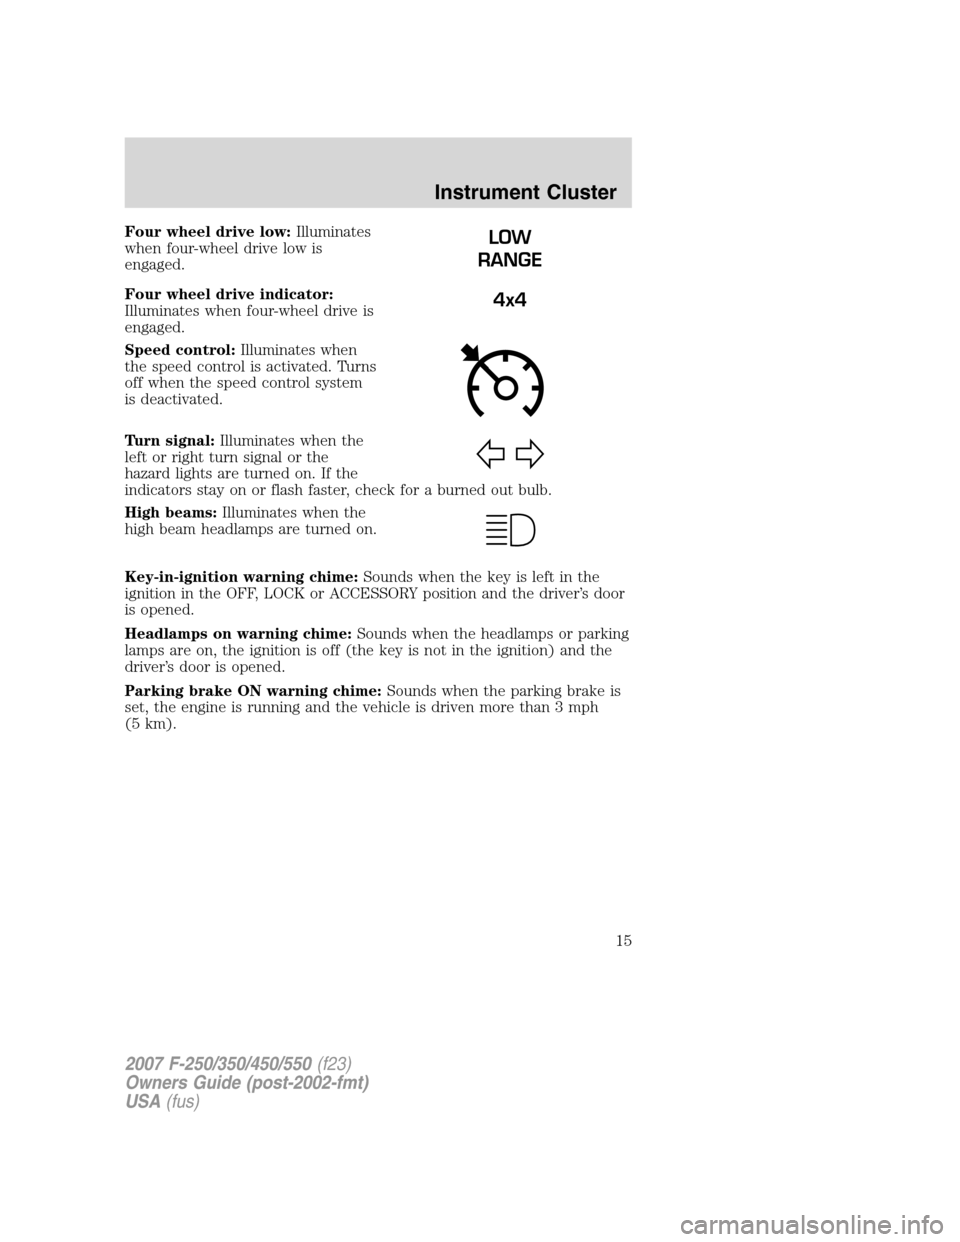
Four wheel drive low:Illuminates
when four-wheel drive low is
engaged.
Four wheel drive indicator:
Illuminates when four-wheel drive is
engaged.
Speed control:Illuminates when
the speed control is activated. Turns
off when the speed control system
is deactivated.
Turn signal:Illuminates when the
left or right turn signal or the
hazard lights are turned on. If the
indicators stay on or flash faster, check for a burned out bulb.
High beams:Illuminates when the
high beam headlamps are turned on.
Key-in-ignition warning chime:Sounds when the key is left in the
ignition in the OFF, LOCK or ACCESSORY position and the driver’s door
is opened.
Headlamps on warning chime:Sounds when the headlamps or parking
lamps are on, the ignition is off (the key is not in the ignition) and the
driver’s door is opened.
Parking brake ON warning chime:Sounds when the parking brake is
set, the engine is running and the vehicle is driven more than 3 mph
(5 km).LOW
RANGE
4x4
2007 F-250/350/450/550(f23)
Owners Guide (post-2002-fmt)
USA(fus)
Instrument Cluster
15
Page 43 of 312

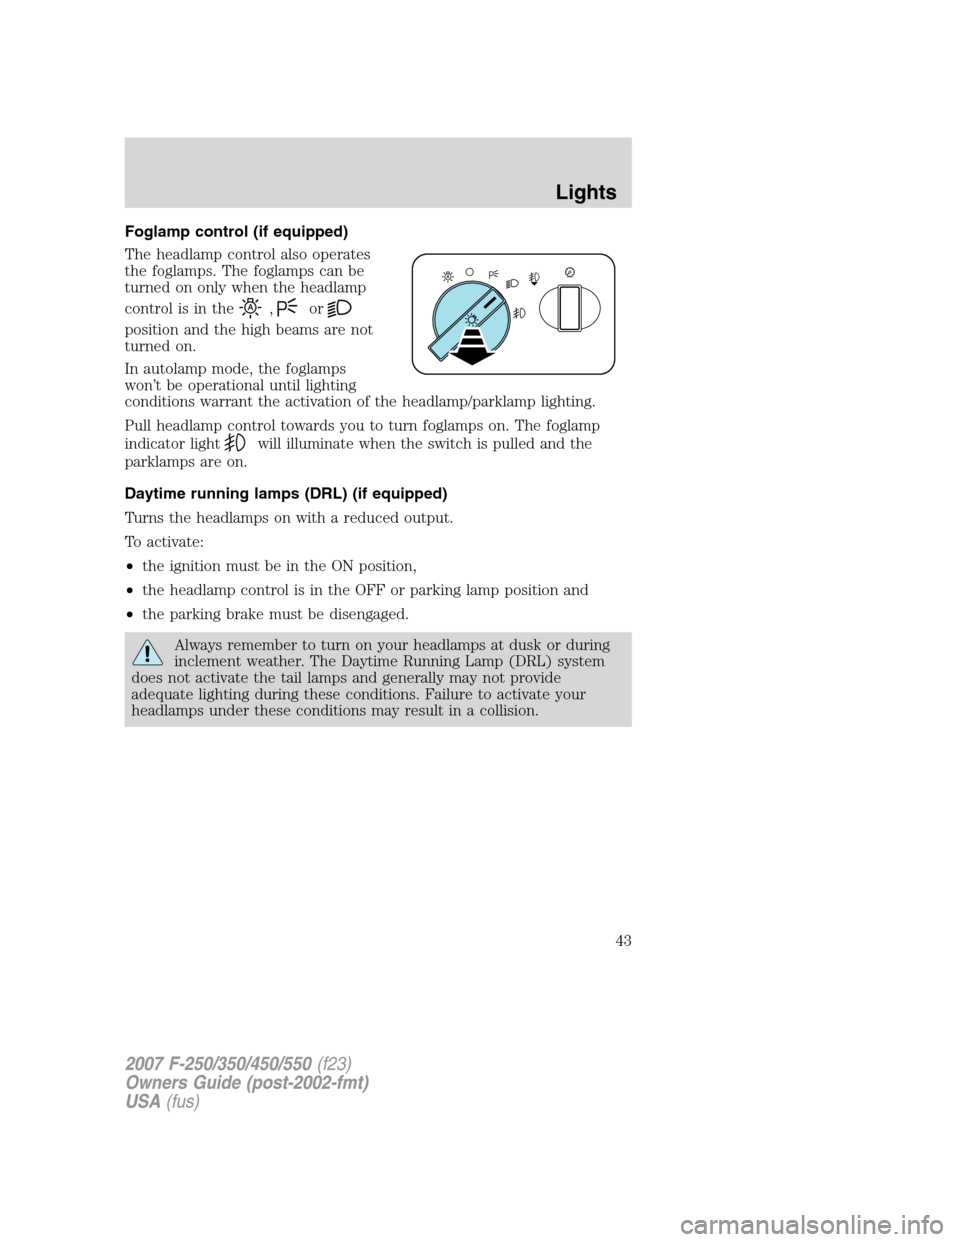
Foglamp control (if equipped)
The headlamp control also operates
the foglamps. The foglamps can be
turned on only when the headlamp
control is in the
,or
position and the high beams are not
turned on.
In autolamp mode, the foglamps
won’t be operational until lighting
conditions warrant the activation of the headlamp/parklamp lighting.
Pull headlamp control towards you to turn foglamps on. The foglamp
indicator light
will illuminate when the switch is pulled and the
parklamps are on.
Daytime running lamps (DRL) (if equipped)
Turns the headlamps on with a reduced output.
To activate:
•the ignition must be in the ON position,
•the headlamp control is in the OFF or parking lamp position and
•the parking brake must be disengaged.
Always remember to turn on your headlamps at dusk or during
inclement weather. The Daytime Running Lamp (DRL) system
does not activate the tail lamps and generally may not provide
adequate lighting during these conditions. Failure to activate your
headlamps under these conditions may result in a collision.
2007 F-250/350/450/550(f23)
Owners Guide (post-2002-fmt)
USA(fus)
Lights
43
Page 54 of 312
Replacing tail lamp/turn/backup lamp bulbs — F–250/F–350 only
1. Make sure the headlamp switch is
in the OFF position and then open
the tailgate to expose the lamp
assemblies.
2. Remove the two bolts from the
tail lamp assembly and carefully pull
the lamp assembly from the tailgate
pillar by releasing the two retaining
tabs.
3. Rotate the bulb socket counterclockwise and remove from lamp
assembly.
4. Pull the bulb straight out of the socket.
Install the new bulb(s) in reverse order.
Replacing brake/tail/backup lamp bulbs — F–450/F–550 only
1. Make sure the headlamp switch is
in the OFF position.
2. Remove the four screws and the
lamp lens from lamp assembly.
3. Carefully pull the bulb straight
out of the socket and push in the
new bulb.
2007 F-250/350/450/550(f23)
Owners Guide (post-2002-fmt)
USA(fus)
Lights
54