2007 FORD FREESTYLE clock
[x] Cancel search: clockPage 18 of 296
Setting the clock:Press MENU until SELECT HOUR or SELECT
MINUTE is displayed. Use
/to manually increase/decrease. Press
MENU again to disengage clock mode.
4.Aux:Press to toggle between
FES/DVD and AUX modes. If no
auxiliary sources are available, NO
AUX AUDIO will be displayed.
If equipped with Satellite Radio, press AUX to cycle through SAT 1,
SAT2 and SAT3 modes.
Satellite radio is available only in the continental United States with
a valid SIRIUS subscription.
5.Seek:In radio mode, press
to
access the next strong station.
In CD mode, press
to access the
next CD track.
In Satellite Radio mode (if equipped), press SEEK
to seek to the
next channel. If a specific category is selected, (Jazz, Rock, News, etc.),
SEEK
to seek to the next channel in the selected category. Press
and hold SEEK
to fast seek through the next channels.
In TEXT MODE, press SEEK
to view the additional display text.
In CATEGORY MODE, press SEEK
to select a category.
Satellite radio is available only with a valid SIRIUS subscription.
Check with your authorized dealer for availability.
6.Text:In CD mode, press and
release to display track title, artist
name, and disc title and file name
(if available).
In Satellite radio mode (if equipped), press and release to enter TEXT
MODE and display the current song title. While in TEXT MODE, press
again to scroll through the current song title, artist, channel category and
the SIRIUS long channel name.
In TEXT MODE, sometimes the display requires additional text to be
displayed. When the “>” indicator is active, press SEEK
to view the
additional display text. When the “<” indicator is active, press
SEEK
to view the previous display text.
2007 Freestyle(219)
Owners Guide (post-2002-fmt)
USA(fus)
Entertainment Systems
18
Page 23 of 296
Speed sensitive volume:Radio volume automatically changes slightly
with vehicle speed to compensate for road and wind noise.
Use
//SEEKto adjust. Recommended level is 1–3. Level 0
turns the feature off and level 7 is the maximum setting.
Setting the clock:Press until SELECT HOUR or SELECT MINS is
displayed. Press
//SEEKto adjust the hours/minutes.
RDS(Available on Audiophile radios only): Allows you to search
RDS-equipped stations for a certain category of music format: Classic,
Country, Info, Jazz/RB, Religious, Rock, Soft, Top 40. RDS (only available
in FM mode) must be activated to access Find and Show functions.
To activate, press and hold MENU until RDS (ON/OFF) appears in the
display. Press MENU repeatedly to scroll through Find, Show and RDS.
Use
//SEEKto toggle RDS ON/OFF. When RDS is Off, you
will not be able to access Find and Show functions.
Find:Allows you to search RDS-equipped stations for the desired music
category. Use
/to find the desired program type, then use
SEEKor SCAN to begin the search.
Show:Allows you to display the name of the radio station or program
type. Use
//SEEKto show type, name or none.
Track/Folder Mode:Available only on MP3 discs in CD mode. In Track
Mode, pressing
SEEKwill scroll through all tracks on the disc.
In Folder mode, pressing
SEEKwill scroll only through tracks
within the selected folder.
Compression:Available only in CD mode, brings soft and loud CD
passages together for a more consistent listening level.
Repeat:Available only in CD mode. Press to repeat the current CD track.
4.Aux:Press to toggle between
FES/DVD and AUX modes. If no
auxiliary sources are available, NO
AUX AUDIO will be displayed. To return to radio mode, press AM/FM.
If equipped with Satellite Radio, press AUX to cycle through SAT1, SAT2
and SAT3 modes.
Satellite radio is available only with a valid SIRIUS subscription.
Check with your authorized dealer for availability.
2007 Freestyle(219)
Owners Guide (post-2002-fmt)
USA(fus)
Entertainment Systems
23
Page 58 of 296

HEADLAMP CONTROL
Turns the lamps off.
Turns on the parking lamps,
instrument panel lamps, license
plate lamps and tail lamps.
Turns the headlamps on.
Autolamp control (if equipped)
The autolamp system provides light
sensitive automatic on-off control of
the exterior lights normally
controlled by the headlamp control.
•To turn autolamps on, rotate the
control counterclockwise to
.
•To turn autolamps off, rotate the
control clockwise to
.
The autolamp system also keeps the
lights on for a predetermined
amount of time after the ignition switch is turned to LOCK. You can
change the amount of time the lamps stay on by using the programming
procedure that follows:
Autolamps - Programmable exit delay
Programmable exit delay allows the length of the autolamp exit delay to
be changed.
To program the auto lamp exit time delay:
1. Start with the ignition in the LOCK position and the headlamp control
in the autolamp position.
2. Turn the headlamp switch to
.
3. Turn the ignition switch to RUN and then back to LOCK.
4. Turn the headlamp switch to the autolamp position. The headlamps
will turn on.
P
2007 Freestyle(219)
Owners Guide (post-2002-fmt)
USA(fus)
Lights
58
Page 61 of 296

•(1) 8 feet (2.4 meters)
•(2) Center height of lamp to
ground
•(3) 25 feet (7.6 meters)
•(4) Horizontal reference line
2. Measure the height of the
headlamp bulb center from the
ground and mark an 8 foot (2.4
meter) horizontal reference line on
the vertical wall or screen at this
height (a piece of masking tape works well).
3. Turn on the low beam headlamps to illuminate the wall or screen and
open the hood.
To see a clearer light pattern for adjusting, you may want to block the
light from one headlamp while adjusting the other.
4. On the wall or screen you will
observe an area of high intensity
light. The top of the high intensity
area should touch the horizontal
reference line, if not, the beam will
need to be adjusted.
5. Locate the vertical adjuster on
each headlamp. Using a Phillips #2
screwdriver, turn the adjuster either
clockwise (to adjust down) or
counterclockwise (to adjust up).
The horizontal edge of the brighter
light should touch the horizontal
reference line.
6. Close the hood and turn off the
lamps.
HORIZONTAL AIM IS NOT REQUIRED FOR THIS VEHICLE AND IS
NON-ADJUSTABLE.
2007 Freestyle(219)
Owners Guide (post-2002-fmt)
USA(fus)
Lights
61
Page 64 of 296

3. Locate the outboardmost
electrical connector and remove it
by releasing the locking tab and
pulling it off.
4. Remove the bulb socket by
turning it counterclockwise and
pulling it straight out.
Handle a halogen headlamp bulb carefully and keep out of
children’s reach. Grasp the bulb only by its plastic base and do
not touch the glass. The oil from your hand could cause the bulb to
break the next time the headlamps are operated.
Install the new bulb(s) in reverse order.
Replacing front parking lamp/turn signal bulbs
1. Make sure headlamp switch is in the OFF position, then open the
hood.
2. Reach behind the headlamp assembly to access the bulb sockets and
connectors.
3. Remove the bulb socket by
turning it counterclockwise and
pulling it straight out.
4. To remove the bulb, pull it
straight out of the bulb socket.
Install the new bulb(s) in reverse order.
Replacing front sidemarker bulbs
1. Make sure headlamp switch is in the OFF position, then open the
hood.
2. Reach behind the headlamp assembly to access the bulb sockets and
connectors.
2007 Freestyle(219)
Owners Guide (post-2002-fmt)
USA(fus)
Lights
64
Page 65 of 296
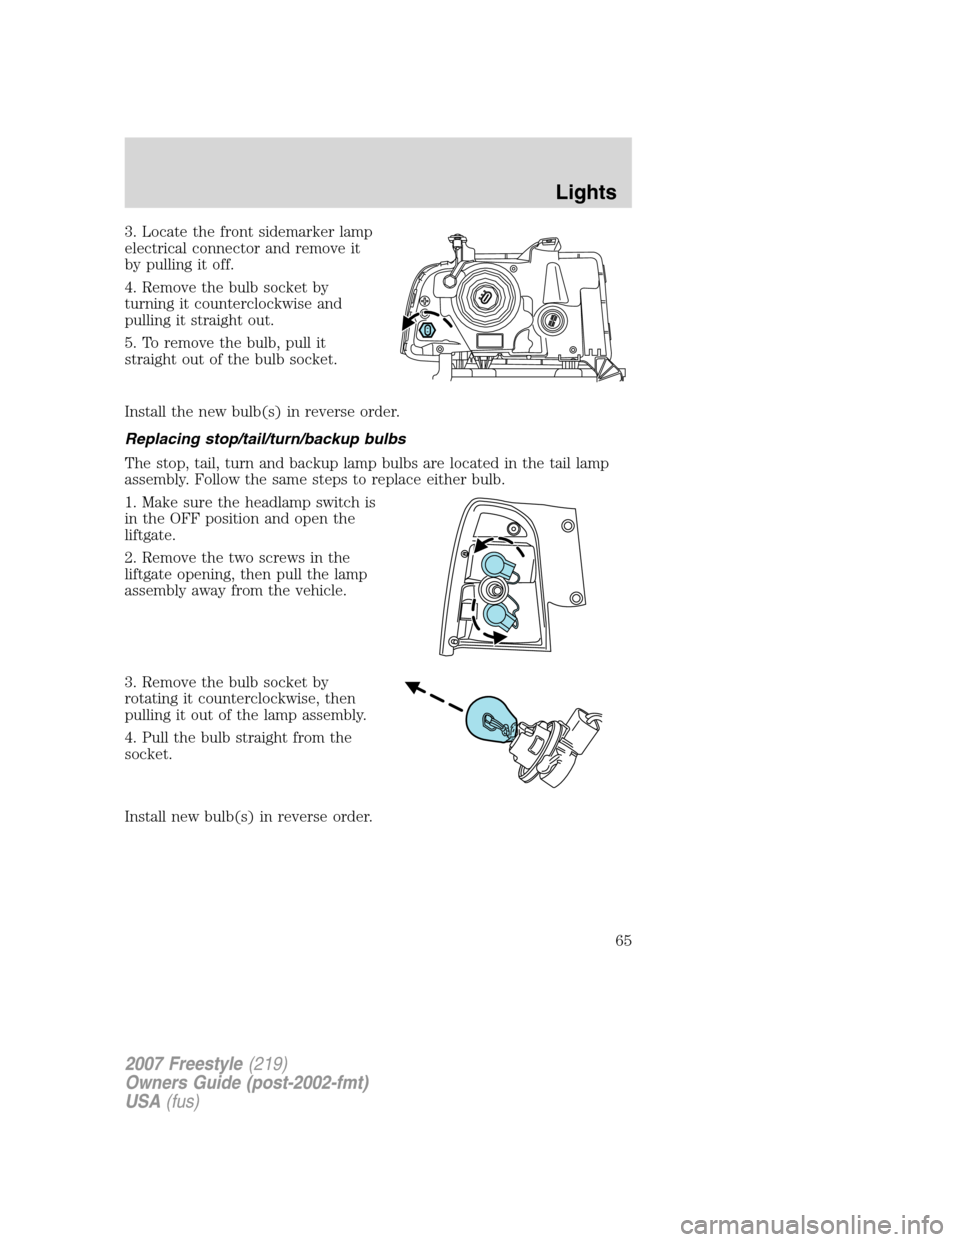
3. Locate the front sidemarker lamp
electrical connector and remove it
by pulling it off.
4. Remove the bulb socket by
turning it counterclockwise and
pulling it straight out.
5. To remove the bulb, pull it
straight out of the bulb socket.
Install the new bulb(s) in reverse order.
Replacing stop/tail/turn/backup bulbs
The stop, tail, turn and backup lamp bulbs are located in the tail lamp
assembly. Follow the same steps to replace either bulb.
1. Make sure the headlamp switch is
in the OFF position and open the
liftgate.
2. Remove the two screws in the
liftgate opening, then pull the lamp
assembly away from the vehicle.
3. Remove the bulb socket by
rotating it counterclockwise, then
pulling it out of the lamp assembly.
4. Pull the bulb straight from the
socket.
Install new bulb(s) in reverse order.
2007 Freestyle(219)
Owners Guide (post-2002-fmt)
USA(fus)
Lights
65
Page 66 of 296
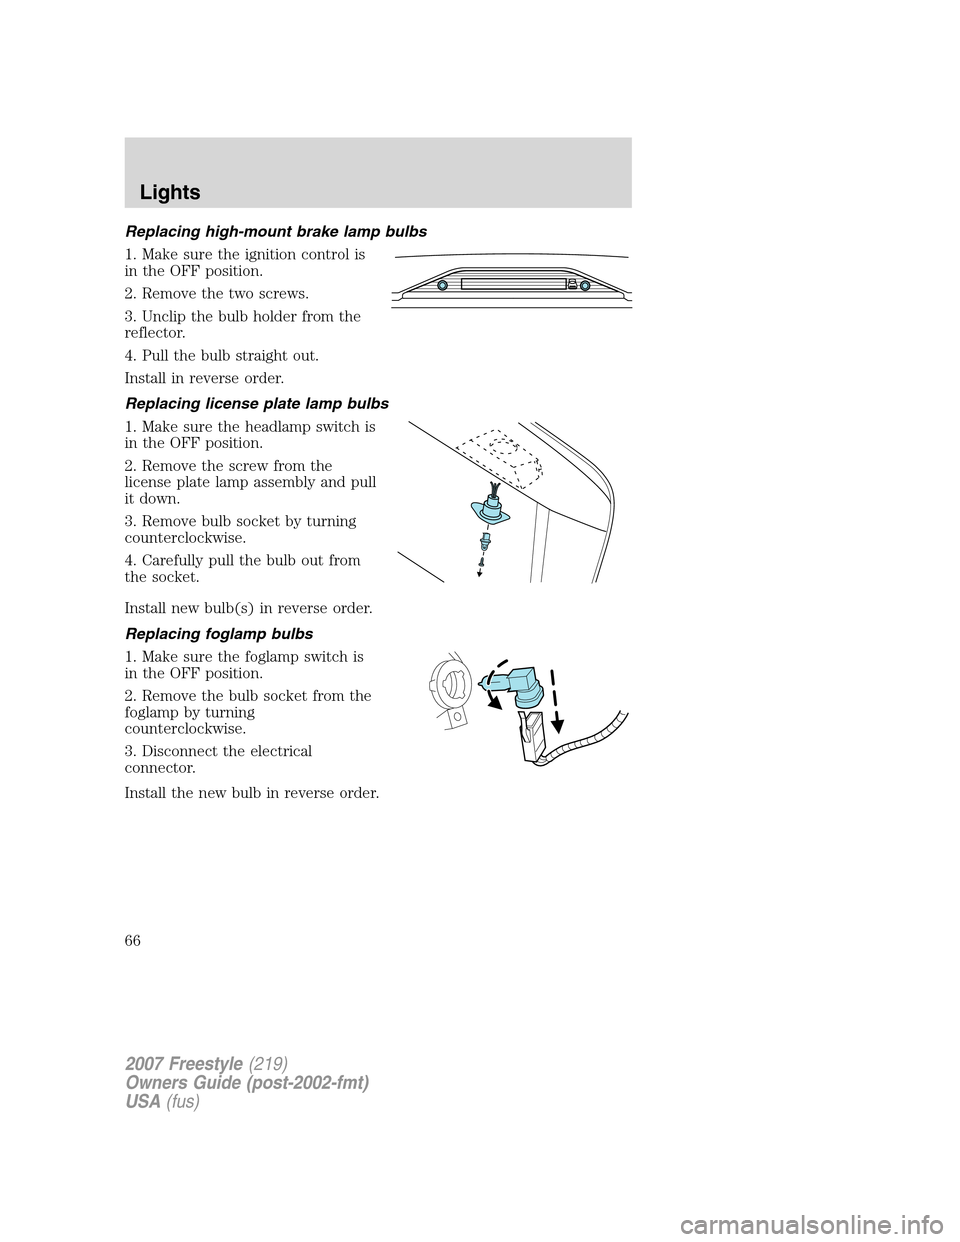
Replacing high-mount brake lamp bulbs
1. Make sure the ignition control is
in the OFF position.
2. Remove the two screws.
3. Unclip the bulb holder from the
reflector.
4. Pull the bulb straight out.
Install in reverse order.
Replacing license plate lamp bulbs
1. Make sure the headlamp switch is
in the OFF position.
2. Remove the screw from the
license plate lamp assembly and pull
it down.
3. Remove bulb socket by turning
counterclockwise.
4. Carefully pull the bulb out from
the socket.
Install new bulb(s) in reverse order.
Replacing foglamp bulbs
1. Make sure the foglamp switch is
in the OFF position.
2. Remove the bulb socket from the
foglamp by turning
counterclockwise.
3. Disconnect the electrical
connector.
Install the new bulb in reverse order.
2007 Freestyle(219)
Owners Guide (post-2002-fmt)
USA(fus)
Lights
66
Page 74 of 296
Accessory delay
With accessory delay, the radio, Family Entertainment DVD System (if
equipped), power windows, and moonroof (if equipped) operate for up
to ten minutes after the ignition switch is turned from the ON to the
OFF position or until one of the front doors are opened.
AUTOMATIC DIMMING INSIDE REAR VIEW MIRROR (IF EQUIPPED)
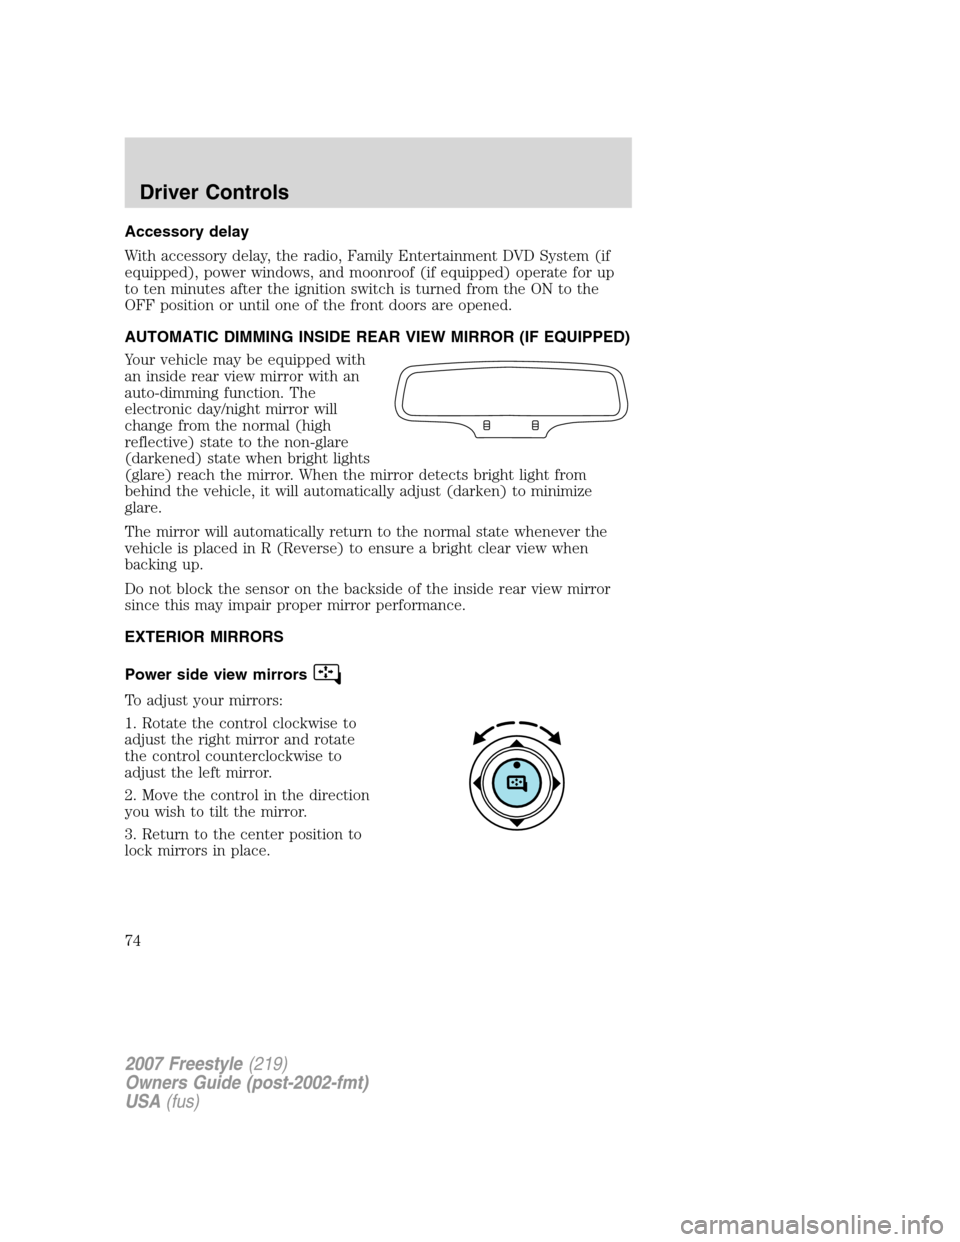
Your vehicle may be equipped with
an inside rear view mirror with an
auto-dimming function. The
electronic day/night mirror will
change from the normal (high
reflective) state to the non-glare
(darkened) state when bright lights
(glare) reach the mirror. When the mirror detects bright light from
behind the vehicle, it will automatically adjust (darken) to minimize
glare.
The mirror will automatically return to the normal state whenever the
vehicle is placed in R (Reverse) to ensure a bright clear view when
backing up.
Do not block the sensor on the backside of the inside rear view mirror
since this may impair proper mirror performance.
EXTERIOR MIRRORS
Power side view mirrors
To adjust your mirrors:
1. Rotate the control clockwise to
adjust the right mirror and rotate
the control counterclockwise to
adjust the left mirror.
2. Move the control in the direction
you wish to tilt the mirror.
3. Return to the center position to
lock mirrors in place.
2007 Freestyle(219)
Owners Guide (post-2002-fmt)
USA(fus)
Driver Controls
74