2007 FORD FIESTA air bleeding
[x] Cancel search: air bleedingPage 784 of 1226

303-03B-14 Engine Cooling - 2.OL Duratec-HE (M14) 303-03B-14
DIAGNOSIS AND TESTING
4. Observe the cooling system pressure tester make sure the pressure test reading
is
gauge reading for approximately two minutes. repeatable
and within acceptable gauge reading
The pressure should not drop during this time. limits of
the coolant expansion tank cap.
( If the system holds Pressure, proceed to Step 5. If the pressure test gauge readings are not 7. If the system does not hold pressure, check
within the acceptable gauge reading limits,
it thoroughly for coolant leaks.
INSTALL a new coolant expansion tank cap.
5. Check the engine for coolant leaks. Drain the
cooling system, repair any coolant leaks found
and fill and bleed the cooling system as
Thermostat Test
necessaw.
REFER to: Cooling System Draining, Filling and
Bleeding (303-03 Engine Cooling
- 2.OL
Duratec-HE (M14), General Procedures).
.Recheck the system by repeating Steps 3 and
4 at least twice.
Radiator Leak Test, Removed From Vehicle
CAUTI0N:Radiator internal pressure must
not exceed
130 kpa (20 psi) or damage may
result.
Clean the radiator thoroughly before leak testing
it, to prevent contamination of the water in the test
tank. Leak test the radiator in clean water with 138
kpa (20 psi) air pressure. Check it thoroughly for
air leaks. INSTALL a new radiator if necessary.
REFER to: Radiator (303-03 Engine Cooling
- 2.OL
Duratec-HE (M14), Removal and Installation).
Coolant Expansion Tank Cap Pressure Test
A WARNING:When releasing the system
pressure, cover the expansion tank cap
with a thick cloth to prevent the possibility
of coolant scalding, Failure to follow this
instruction may result in personal injury.
1. Remove the coolant expansion tank cap.
2. Use water to clean the area of the rubber seal
and pressure relief valve. Install the pressure
tester and adapter and immerse the coolant
-
expansion tank cap in water.
N0TE:lf the plunger of the pump is depressed too
quickly, an erroneous pressure reading will result.
3. Slowly depress the plunger of the pressure test
pump until the pressure gauge reading stops
increasing, and note the highest pressure
reading obtained.
4. Release pressure by turning the pressure relief
screw counterclockwise. Tighten the pressure
relief screw and repeat step 3 at least twice to
I. Connect the WDS to the data link connector
(DLC).
2. Using the WDS datalogger function, SELECT
the following sensors (as applicable to the
application):
IAT
- intake air temperature (IAT) sensor
ECT
- engine coolant temperature (ECT) sensor
CHT
- cylinder head temperature (CHT) sensor
LOAD
- engine load
VSS
- vehicle speed sensor (VSS)
RPM
- engine speed
DSRPM
- desired engine speed
The IAT sensor output is useful if the engine being
tested is cold or after an over-night cold soak. The
ECT sensor or CHT sensor and the IAT sensor
(
should either indicate the same value or be within
1 to 2 degrees Celsius of each other.
The ECT sensor output is important to display as
it indicates the engine warm-up and opening
temperature for the thermostat. It will initially
indicate a slightly higher reading just before the
thermostat opens and then drops back before
settling to a near flat line output (see graphic
below).
Item Description 1'. .
) A 1 Thermostat opens I\
B Thermostat settles into a cyclic open and
I I closure pattern
2006.0 Fiesta 1212006 G426582en
procarmanuals.com
Page 794 of 1226

303-03B-24 Engine Cooling - 2.OL Duratec-HE (M14) 303-03B-24
REMOVAL AND INSTALLATION
Coolant Outlet Connector
Removal
1. Remove the air cleaner.
For additional information, refer to: Air
Cleaner
- 2.OL Duratec-HE (M14) (303-12
Intake Air Distribution and Filtering,
Removal and Installation).
2. Disconnect the spark plug wires from the
ignition coil pack.
4. Remove the ignition coil pack.
5. Drain the cooling system.
For additional information, refer to: Cooling
System Draining, Filling and Bleeding
(303-03 Engine Cooling
- 2.OL Duratec-HE
(M14), General Procedures).
6. Disconnect the engine coolant temperature
3. Disconnect the ignition coil pack electrical
(ECT) sensor electrical connector.
connector.
2006.0 Fiesta 1212006 G421228en
procarmanuals.com
Page 796 of 1226

303-03B-26 Engine Cooling - 2.OL Duratec-HE (M14) 303-03B-26
REMOVAL AND INSTALLATION
Removal 2. Push the cooling fan motor and shroud l.
upwards and then downwards to remove.
1. Disconnect the battery ground cable. I
For additional information, refer to: Battery
Disconnect
(414-01 Battery, Mounting and
Cables, General Procedures).
2. Drain the cooling system.
For additional information, refer to: Cooling
System Draining, Filling and Bleeding
(303-03 Engine Cooling - 2.OL Duratec-HE
(M14), General Procedures).
3. Disconnect the cooling fan motor and
cooling fan resistor electrical connectors.
4. Remove
the air cleaner intake pipe resonator.
5. Remove the cooling fan motor and shroud.
1. Release the cooling fan motor and shroud
from the retaining brackets.
6. Disconnect the radiator upper hose.
1. Pull out the quick release spring clip.
2. Pull the radiator upper hose from the quick
release connector.
7. Disconnect the radiator degas hose from the
radiator.
Release the locking tangs.
8. Remove the radiator retainers.
2006.0 Fiesta 1212006 G457934en
procarmanuals.com
Page 902 of 1226

Engine Emission Control - 2.OL Duratec-HE
(MI41
REMOVAL AND INSTALLATION
Exhaust Gas Recirculation (EGR) Valve
1. Drain the cooling system.
For additional information, refer to: Cooling
Special
Tool(s) 3.
Remove the air cleaner intake tube.
System Draining, Filling and Bleeding
24003
(303-03 Engine cooling - 2.01 Duratec-HE
(M14), General Procedures).
4. Using the special tool, disconnect the
2. Remove the air cleaner outlet pipe.
radiator upper coolant hose from the coolant
outlet connector.
Removerllnstaller, Coolant
Hose Clamp
303-397
5. Remove the components in the order
indicated in the following
illustration(s) and
table(s).
2006.0 Fiesta 1212006 G421887en
procarmanuals.com
Page 1062 of 1226

Manual Transmission/Transaxle and Clutch -
308-0014 General Information 308-00-4
DIAGNOSIS AND TESTING
Symptom
Possible Sources Action
Insufficient brake fluid. FILL the brake master cylinder
reservoir to the MAX mark.
INSPECT the brake and clutch
hydraulic systems for leaks.
REPAIR as necessary. I
Air in the clutch hydraulic
system.
Clutch pedal free travel.
Clutch pressure plate.
Clutch disc.
Crankshaft end play.
Clutch pressure plate.
Clutch disc.
Crankshaft end play.
Clutch drag.
BLEED the system.
REFER to: Clutch System
Bleeding (308-00 Manual
Transmission/Transaxle and
Clutch
- General Information,
General Procedures).
GO to Pinpoint Test C.
INSTALL a new clutch disc and
pressure plate.
REFER to: Clutch Disc and
Pressure Plate (308-01
Clutch, Removal and Installa-
tion).
CHECK the crankshaft end
play.
REFER to: Crankshaft End
Play (303-00 Engine System
- General Information,
General Procedures).
GO to Pinpoint Test C.
Gearshift cable adjustment CHECK the gearshift cable
adjustment.
REFER to: Gearshift Cable
Adjustment (308-00 Manual
Transmission/Transaxle and
Clutch
- General Information,
General Procedures).
External controls. CHECK the external controls
for wear or damage. INSTALL
new components as necessary.
Gear wheels. DISASSEMBLE the transaxle. I
REFER to: Transaxle (308-03
Manual Transmis-
sion/Transaxle, Disas-
sem bly).
INSTALL new components as
necessary.
2006.0 Fiesta 1212006 G25629en
procarmanuals.com
Page 1070 of 1226

Manual Transmission/Transaxle and Clutch -
308-00-1 2 General Information 308-00-1 2
GENERAL PROCEDURES
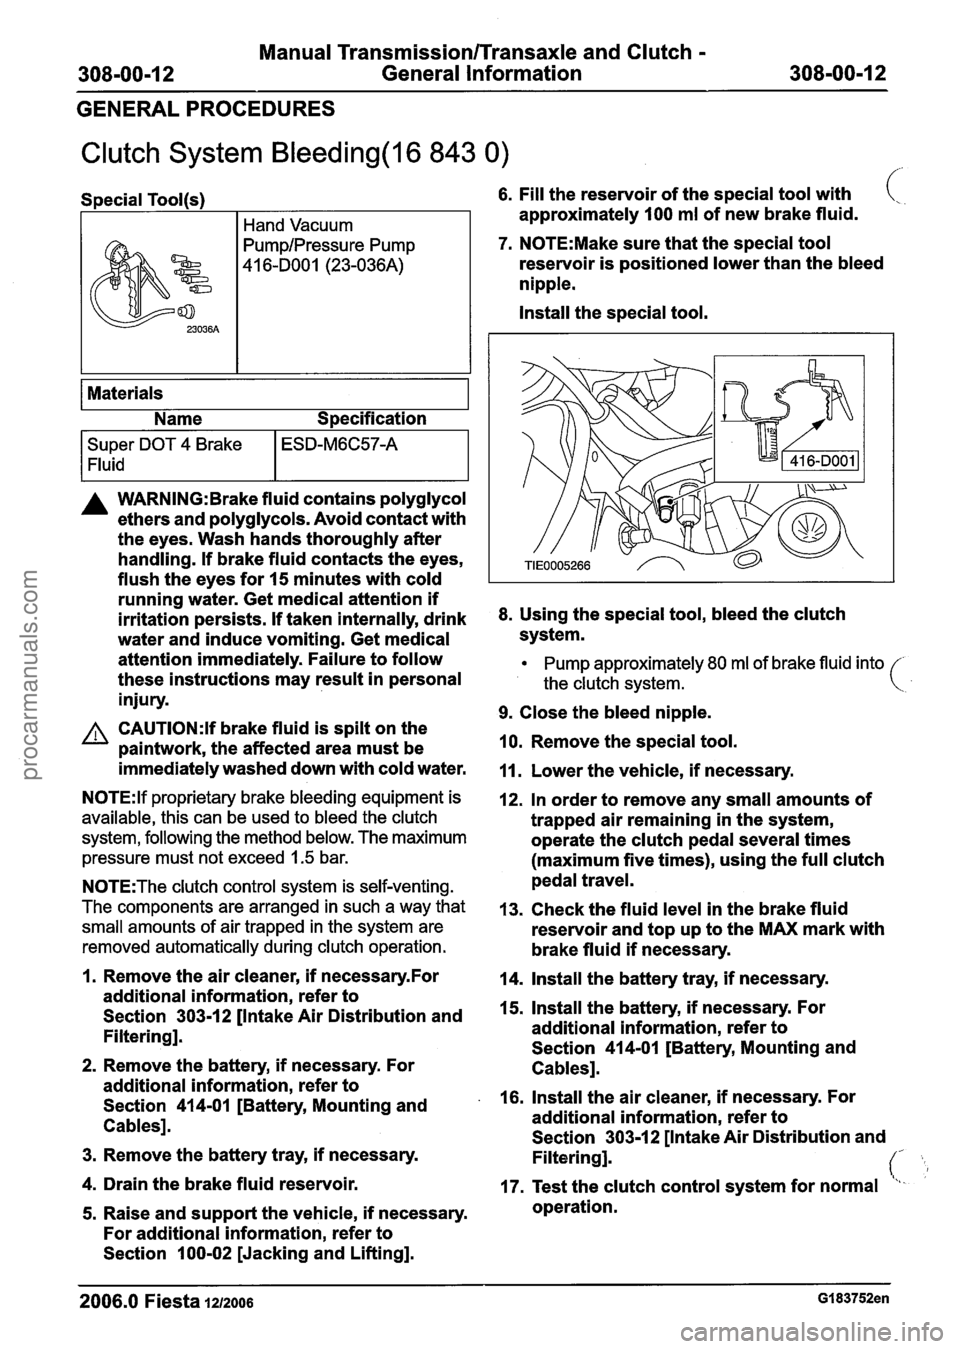
Clutch System Bleeding(l6 843 0)
Special Tool(s) 6. Fill the reservoir of the special tool with (,, .
I Hand Vacuum approximately 100 ml of new brake fluid.
7. N0TE:Make sure that the special tool
reservoir is positioned lower than the bleed
nipple.
Install the special tool.
Super DOT 4 Brake
1 Fluid
I
Materials
Name Specification
ESD-M6C57-A
A WARNING: Brake fluid contains polyglycol
ethers and polyglycols. Avoid contact with
the eyes. Wash hands thoroughly after
handling. If brake fluid contacts the eyes,
flush the eyes for 15 minutes with cold
running water. Get medical attention if
irritation persists. If taken internally, drink
8. Using the special tool, bleed the clutch
water and induce vomiting. Get medical system.
attention immediately. Failure to follow
Pump approximately 80 ml of brake fluid into
these instructions may result in personal the clutch svstem. (
injury. w
9. Close the bleed nipple. A CAUTI0N:Y brake fluid is spilt on the
paintwork, the affected area must be 10.
Remove the special tool.
immediately washed down with cold water.
11. Lower the vehicle, if necessary.
N0TE:lf proprietary brake bleeding equipment is
available, this can be used to bleed the clutch
system, following the method below. The maximum
pressure must not exceed
1.5 bar.
N0TE:The clutch control system is self-venting.
The components are arranged in such a way that
small amounts of air trapped in the system are
removed automatically during clutch operation.
12. In order to remove any small amounts of
trapped air remaining in the system,
operate the clutch pedal several times
(maximum five times), using the full clutch
pedal travel.
13. Check the fluid level in the brake fluid
reservoir and top up to the MAX mark with
brake fluid if necessary.
1. Remove the air cleaner, if necessaryfor 14. Install the battery tray, if necessary.
additional information, refer to
Section
303-12 [Intake Air Distribution and 15.
Install the battery, if necessary. For
Filtering]. additional
information, refer to
Section 414-01 [Battery, Mounting and
2. Remove the battery, if necessary. For
Cablesl.
additional information, refer to
Section
414-01 [Battery, Mounting and . 16. Install the air cleaner, if necessary. For
Cables]. additional
information, refer to
Section 303-1
2 [Intake Air Distribution and - 3. Remove the battery tray, if necessary.
Filtering]. (' L 4. Drain the brake fluid reservoir.
17. Test the clutch control system for normal "I-
5. Raise and support the vehicle, if necessary. operation.
For additional information, refer to
Section 100-02 [Jacking and Lifting].
2006.0 Fiesta 1212006 GI 83752en
procarmanuals.com
Page 1090 of 1226

308-02-1 0 Clutch Controls 308-02-1 0
REMOVAL AND INSTALLATION
7. Bleed the clutch system. For additional
information, refer to: (308-00 Manual
Transmission/Transaxle and Clutch - General
Information)
Clutch System Bleeding (General
Procedures),
Clutch System Bleeding - Vehicles With:
Automated Gearshift
(General Procedures).
Left-hand drive vehicles
8. Install the battery tray. For additional
information, refer to:
Battery Tray (414-01,
Removal and
Installation),
Battery Tray - 2.OL Duratec-HE (M14) (414-01
Battery, Mounting and
Cables, Removal
and Installation).
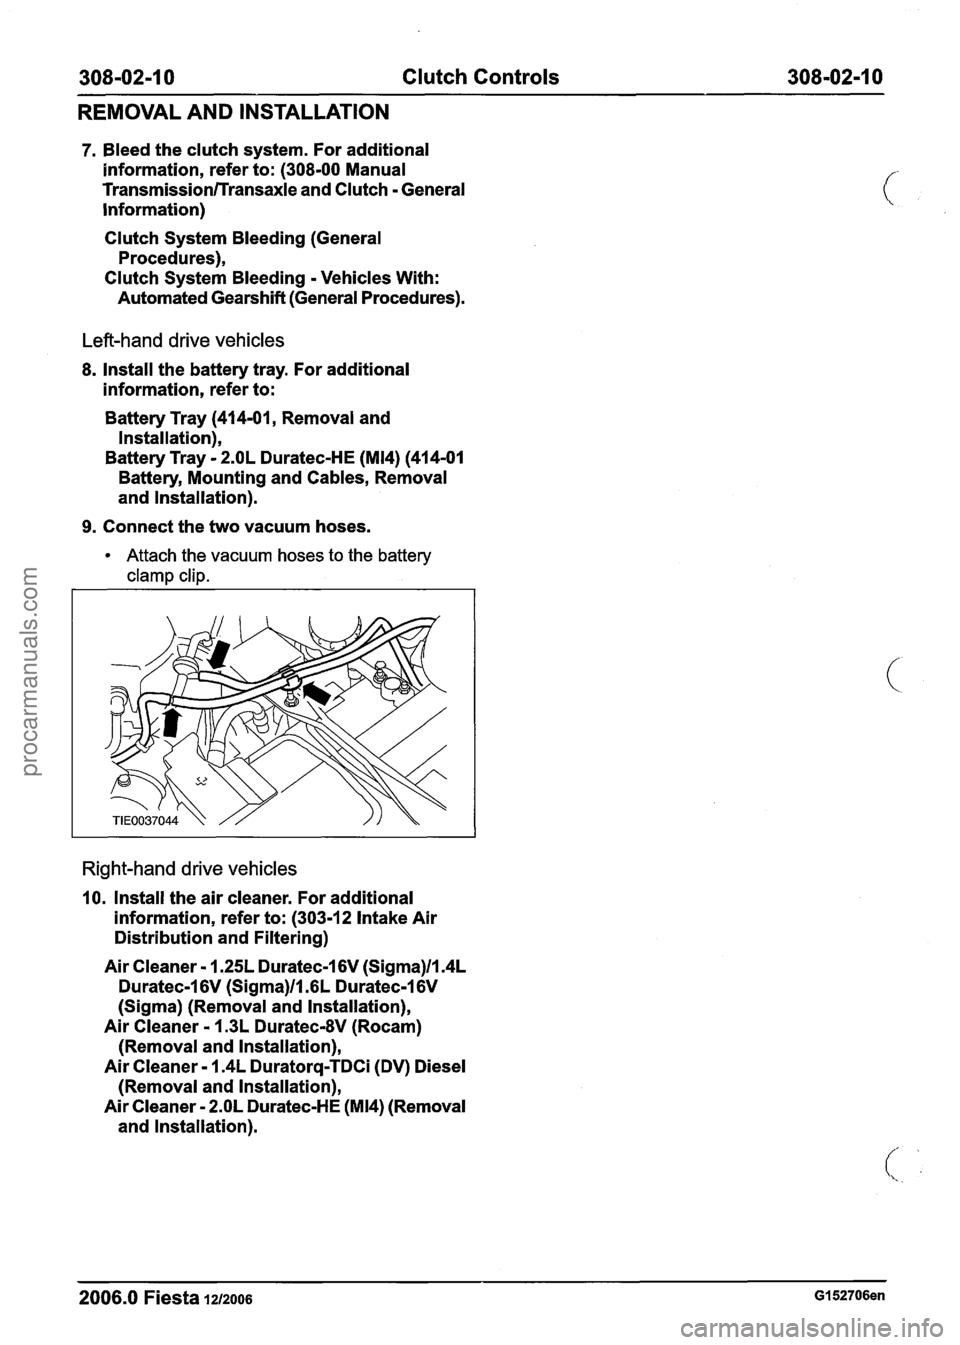
9. Connect the two vacuum hoses.
Attach the vacuum hoses to the battery
clamp clip.
Right-hand drive vehicles
10. Install the air cleaner. For additional
information, refer to: (303-12 Intake Air
Distribution and
Filtering)
Air Cleaner - 1.25L Duratec-1 6V (Sigma)/l.4L
Duratec-1 6V (Sigma)ll .6L Duratec-1 6V
(Sigma) (Removal and lnstallation),
Air Cleaner - 1.3L Duratec-8V (Rocam)
(Removal and lnstallation),
Air Cleaner - 1.4L Duratorq-TDCi (DV) Diesel
(Removal and lnstallation),
Air Cleaner - 2.OL Duratec-HE (M14) (Removal
and lnstallation).
2006.0 Fiesta 12/2006 GI 52706en
procarmanuals.com