Page 202 of 312
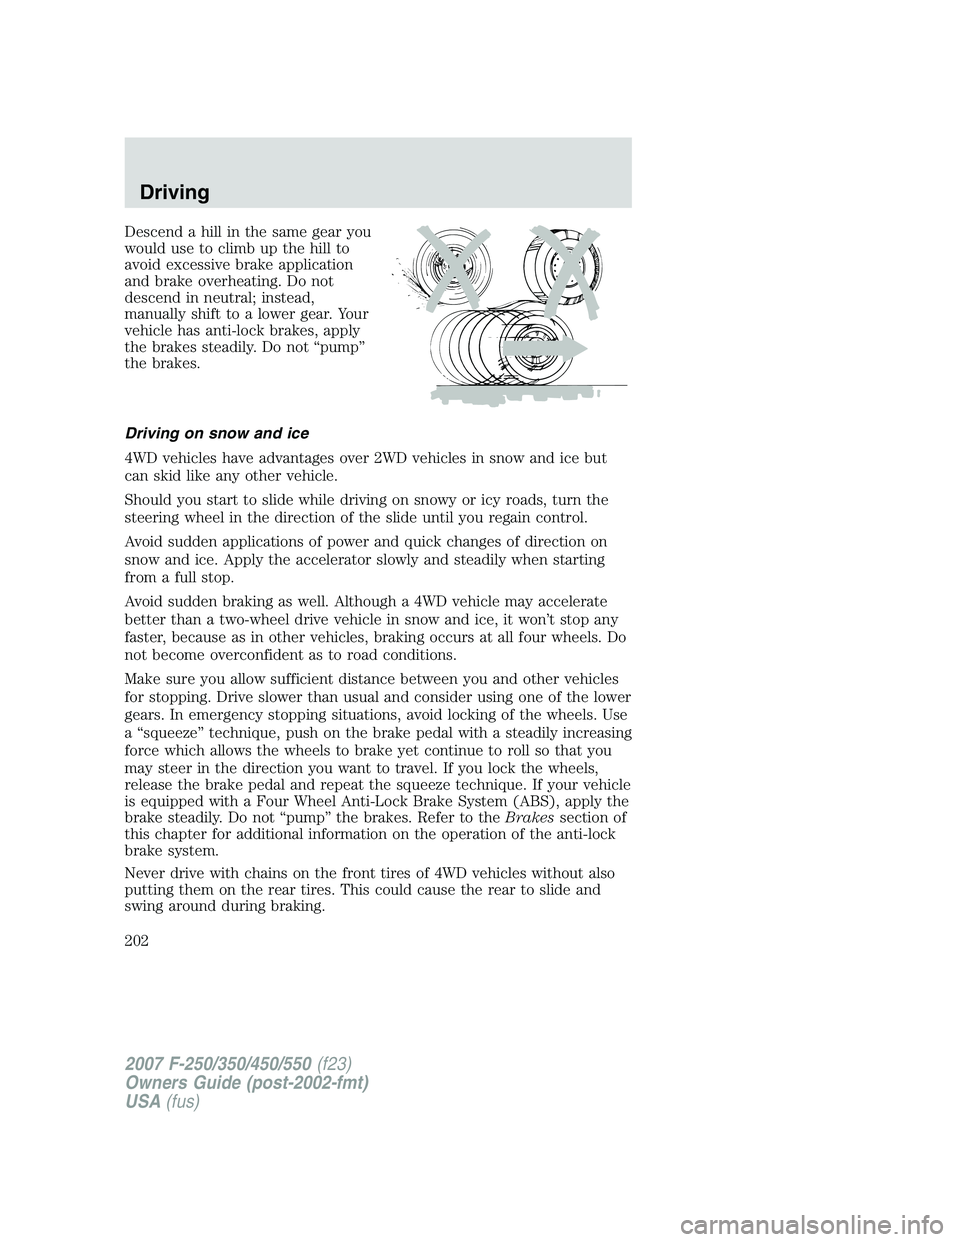
Descend a hill in the same gear you
would use to climb up the hill to
avoid excessive brake application
and brake overheating. Do not
descend in neutral; instead,
manually shift to a lower gear. Your
vehicle has anti-lock brakes, apply
the brakes steadily. Do not “pump”
the brakes.
Driving on snow and ice
4WD vehicles have advantages over 2WD vehicles in snow and ice but
can skid like any other vehicle.
Should you start to slide while driving on snowy or icy roads, turn the
steering wheel in the direction of the slide until you regain control.
Avoid sudden applications of power and quick changes of direction on
snow and ice. Apply the accelerator slowly and steadily when starting
from a full stop.
Avoid sudden braking as well. Although a 4WD vehicle may accelerate
better than a two-wheel drive vehicle in snow and ice, it won’t stop any
faster, because as in other vehicles, braking occurs at all four wheels. Do
not become overconfident as to road conditions.
Make sure you allow sufficient distance between you and other vehicles
for stopping. Drive slower than usual and consider using one of the lower
gears. In emergency stopping situations, avoid locking of the wheels. Use
a “squeeze” technique, push on the brake pedal with a steadily increasing
force which allows the wheels to brake yet continue to roll so that you
may steer in the direction you want to travel. If you lock the wheels,
release the brake pedal and repeat the squeeze technique. If your vehicle
is equipped with a Four Wheel Anti-Lock Brake System (ABS), apply the
brake steadily. Do not “pump” the brakes. Refer to theBrakessection of
this chapter for additional information on the operation of the anti-lock
brake system.
Never drive with chains on the front tires of 4WD vehicles without also
putting them on the rear tires. This could cause the rear to slide and
swing around during braking.
2007 F-250/350/450/550(f23)
Owners Guide (post-2002-fmt)
USA(fus)
Driving
202
Page 204 of 312
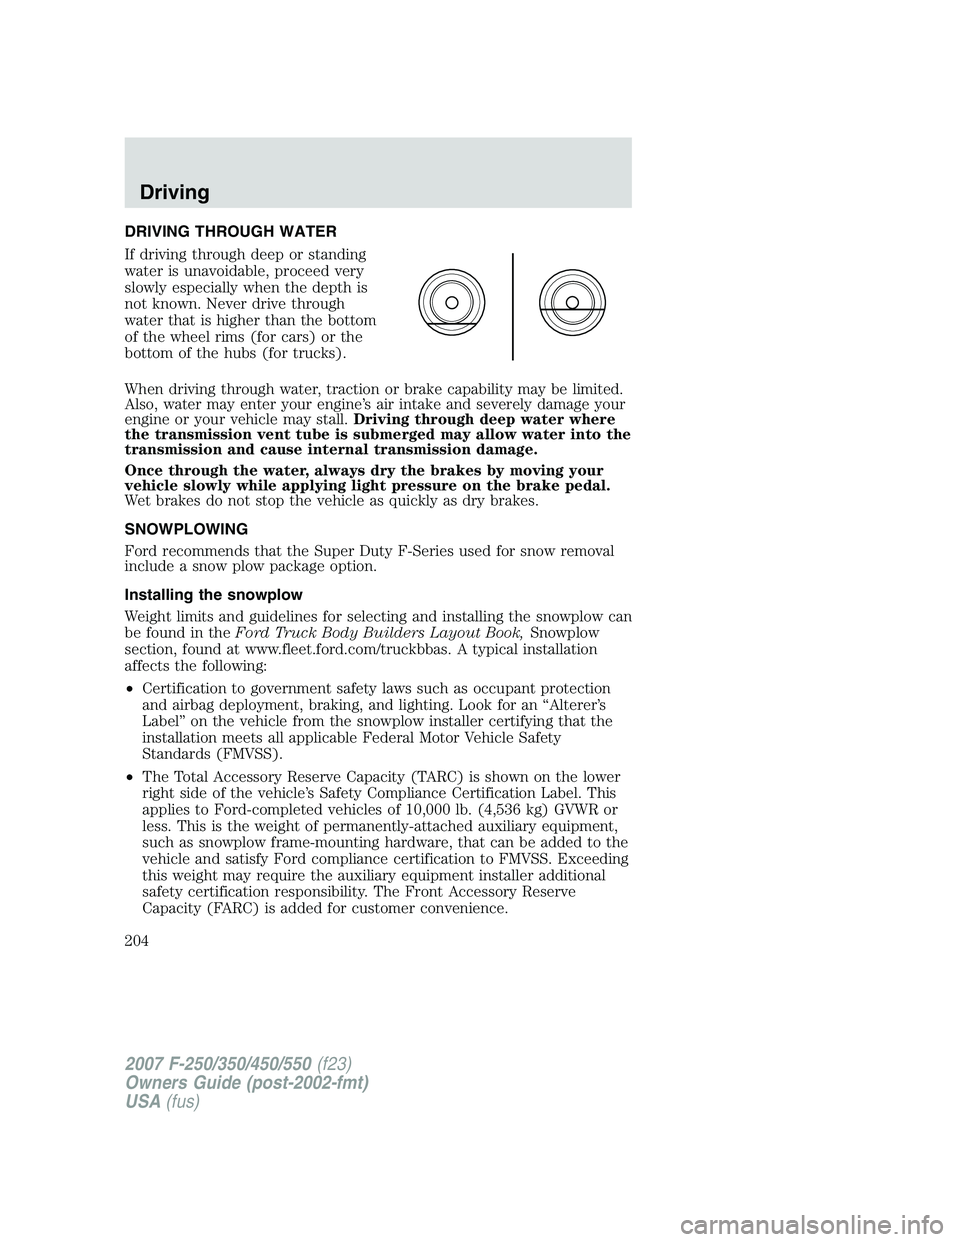
DRIVING THROUGH WATER
If driving through deep or standing
water is unavoidable, proceed very
slowly especially when the depth is
not known. Never drive through
water that is higher than the bottom
of the wheel rims (for cars) or the
bottom of the hubs (for trucks).
When driving through water, traction or brake capability may be limited.
Also, water may enter your engine’s air intake and severely damage your
engine or your vehicle may stall.Driving through deep water where
the transmission vent tube is submerged may allow water into the
transmission and cause internal transmission damage.
Once through the water, always dry the brakes by moving your
vehicle slowly while applying light pressure on the brake pedal.
Wet brakes do not stop the vehicle as quickly as dry brakes.
SNOWPLOWING
Ford recommends that the Super Duty F-Series used for snow removal
include a snow plow package option.
Installing the snowplow
Weight limits and guidelines for selecting and installing the snowplow can
be found in theFord Truck Body Builders Layout Book,Snowplow
section, found at www.fleet.ford.com/truckbbas. A typical installation
affects the following:
•Certification to government safety laws such as occupant protection
and airbag deployment, braking, and lighting. Look for an “Alterer’s
Label” on the vehicle from the snowplow installer certifying that the
installation meets all applicable Federal Motor Vehicle Safety
Standards (FMVSS).
•The Total Accessory Reserve Capacity (TARC) is shown on the lower
right side of the vehicle’s Safety Compliance Certification Label. This
applies to Ford-completed vehicles of 10,000 lb. (4,536 kg) GVWR or
less. This is the weight of permanently-attached auxiliary equipment,
such as snowplow frame-mounting hardware, that can be added to the
vehicle and satisfy Ford compliance certification to FMVSS. Exceeding
this weight may require the auxiliary equipment installer additional
safety certification responsibility. The Front Accessory Reserve
Capacity (FARC) is added for customer convenience.
2007 F-250/350/450/550(f23)
Owners Guide (post-2002-fmt)
USA(fus)
Driving
204
Page 212 of 312
Standard fuse amperage rating and color
COLOR
Fuse
ratingMini
fusesStandard
fusesMaxi
fusesCartridge
maxi
fusesFuse link
cartridge
2A Grey Grey — — —
3A Violet Violet — — —
4A Pink Pink — — —
5A Tan Tan — — —
7.5A Brown Brown — — —
10A Red Red — — —
15A Blue Blue — — —
20A Yellow Yellow Yellow Blue Blue
25A Natural Natural — — —
30A Green Green Green Pink Pink
40A — — Orange Green Green
50A — — Red Red Red
60A — — Blue — Yellow
70A — — Tan — Brown
80A — — Natural — Black
Passenger compartment fuse panel
The fuse panel is located below and to the left of the steering wheel by
the brake pedal. Remove the panel cover to access the fuses.
To remove the fuse panel cover, pull
the panel downward by the finger
slots on top of the panel. When the
top clips of the panel disengage, let
the panel fall easily.
2007 F-250/350/450/550(f23)
Owners Guide (post-2002-fmt)
USA(fus)
Roadside Emergencies
212
Page 215 of 312
Fuse/Relay
LocationFuse Amp
RatingPassenger Compartment Fuse
Panel Description
15 — Not used
16 — Not used
17 15A* Exterior lamps
18 20A* Flasher, Brake On-Off (BOO)
lamps
19 10A* Body Security Module (BSM)
(Security)
20 15A* Trailer tow Electric Brake
Controller (EBC)
21 20A* Heated seats
22 20A* Engine control
23 20A* Engine control (gasoline engine
only)/Climate control (Diesel
engine only)
24 15A* Tow haul, Blower relay, Electronic
Automatic Temperature Control
(EATC)
25 — Not used
26 10A* Airbags
27 15A* Ignition switch RUN feed
28 10A* Trailer tow EBC logic
29 10A* Customer access
30 15A* High beam headlamps
31 15A* Starter relay
32 5A* Radio (start)
33 15A* Cluster, 4x4, Wipers
34 10A* BOO switch (Low current)
35 10A* Instrument cluster
36 — Not used
37 15A* Horn
38 20A* Trailer tow park lamps
39 15A* Heated mirrors
2007 F-250/350/450/550(f23)
Owners Guide (post-2002-fmt)
USA(fus)
Roadside Emergencies
215
Page 218 of 312
The high-current fuses and relays are coded as follows.
Fuse/Relay
LocationFuse Amp
RatingPower Distribution Box
Description
1 30A* Wipers
2 40A* Blower
3 30A* Electronic Shift on the Fly
(ESOF)
4 — Not used
5 50A* Injector Driver Module (IDM)
(Diesel engine only)
6 — Not used
7 — Not used
8 — Shunt
9 20A** Trailer tow turn signals
10 10A** Powertrain Control Module (PCM)
keep alive power, Canister vent
solenoid (gasoline engine only)
11 10A** Anti-lock Brake System (ABS)
12 2A** Brake pressure switch
13 15A** Daytime Running Lamps (DRL)
2007 F-250/350/450/550(f23)
Owners Guide (post-2002-fmt)
USA(fus)
Roadside Emergencies
218
Page 220 of 312
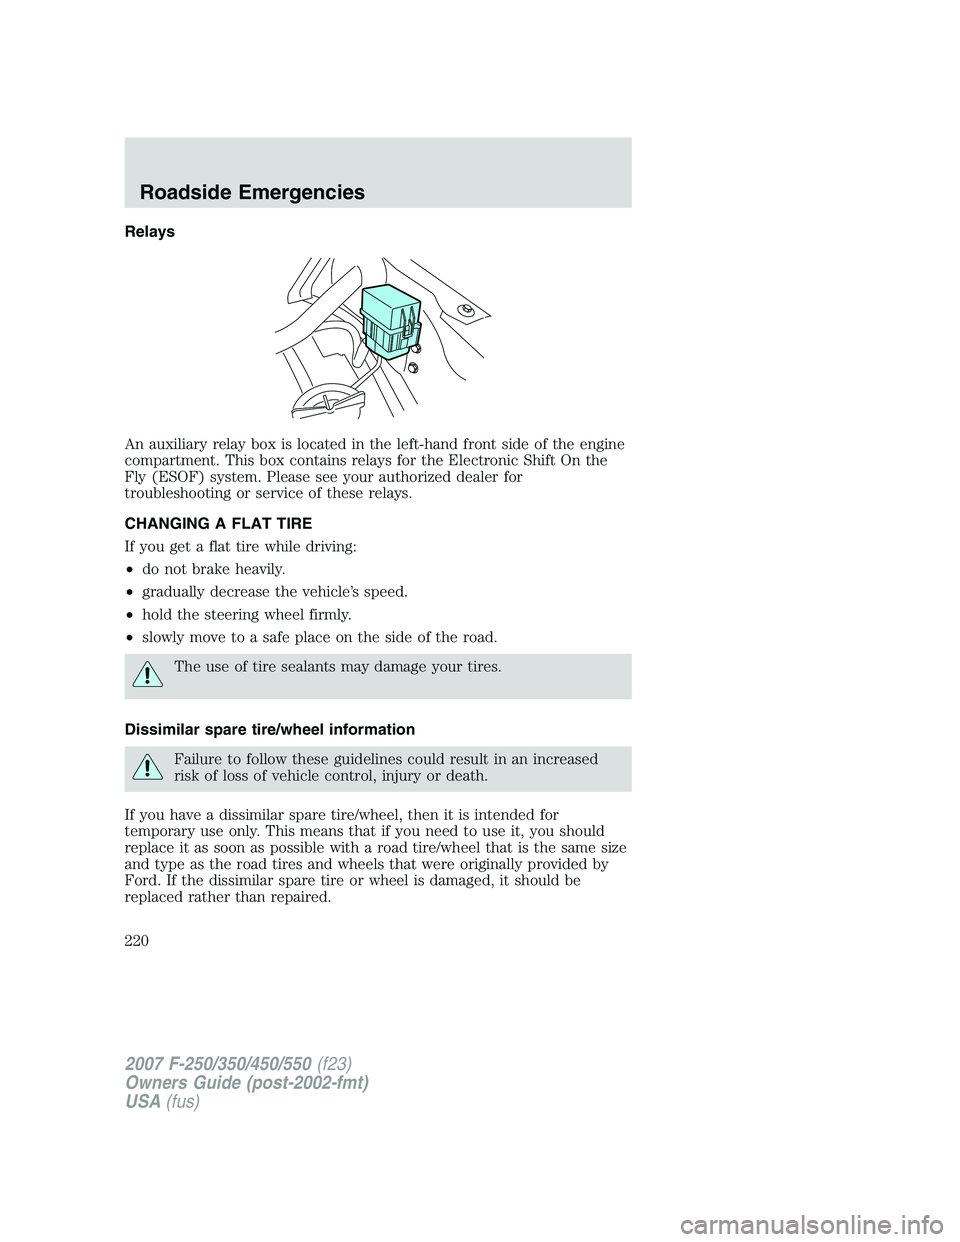
Relays
An auxiliary relay box is located in the left-hand front side of the engine
compartment. This box contains relays for the Electronic Shift On the
Fly (ESOF) system. Please see your authorized dealer for
troubleshooting or service of these relays.
CHANGING A FLAT TIRE
If you get a flat tire while driving:
•do not brake heavily.
•gradually decrease the vehicle’s speed.
•hold the steering wheel firmly.
•slowly move to a safe place on the side of the road.
The use of tire sealants may damage your tires.
Dissimilar spare tire/wheel information
Failure to follow these guidelines could result in an increased
risk of loss of vehicle control, injury or death.
If you have a dissimilar spare tire/wheel, then it is intended for
temporary use only. This means that if you need to use it, you should
replace it as soon as possible with a road tire/wheel that is the same size
and type as the road tires and wheels that were originally provided by
Ford. If the dissimilar spare tire or wheel is damaged, it should be
replaced rather than repaired.
2007 F-250/350/450/550(f23)
Owners Guide (post-2002-fmt)
USA(fus)
Roadside Emergencies
220
Page 225 of 312
Tire change procedure
1. Park on a level surface, activate
hazard flashers and set the parking
brake.
•Automatic transmission: Place
gearshift lever in P (Park).
•Manual transmission: Place
gearshift lever in R (Reverse).
•Electronic Shift-On-the-Fly
(ESOF) 4WD: Place transfer case
in any position.
•Manual shift transfer case 4WD:
Place transfer case in 2H, 4H or
4L.
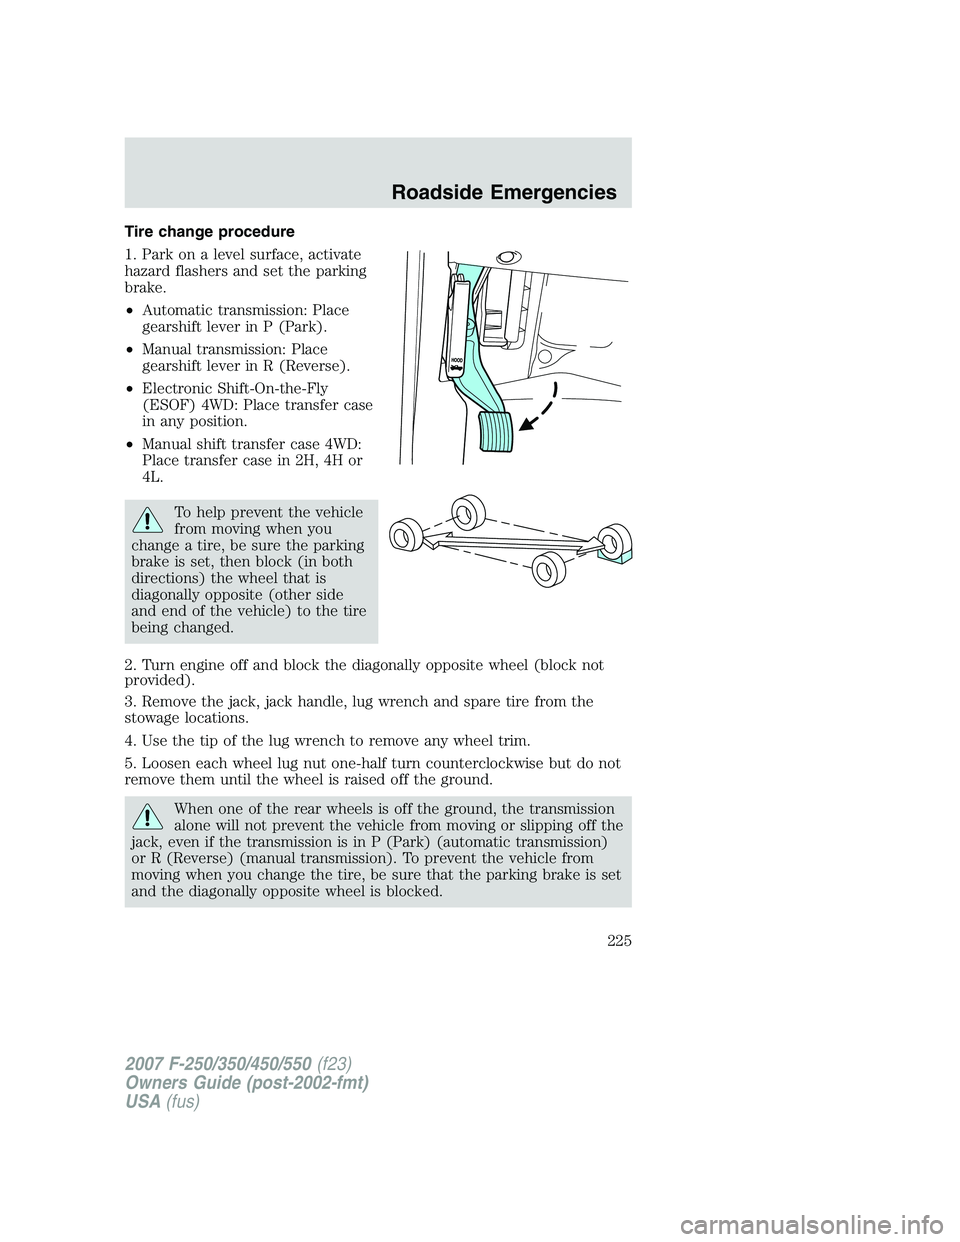
To help prevent the vehicle
from moving when you
change a tire, be sure the parking
brake is set, then block (in both
directions) the wheel that is
diagonally opposite (other side
and end of the vehicle) to the tire
being changed.
2. Turn engine off and block the diagonally opposite wheel (block not
provided).
3. Remove the jack, jack handle, lug wrench and spare tire from the
stowage locations.
4. Use the tip of the lug wrench to remove any wheel trim.
5. Loosen each wheel lug nut one-half turn counterclockwise but do not
remove them until the wheel is raised off the ground.
When one of the rear wheels is off the ground, the transmission
alone will not prevent the vehicle from moving or slipping off the
jack, even if the transmission is in P (Park) (automatic transmission)
or R (Reverse) (manual transmission). To prevent the vehicle from
moving when you change the tire, be sure that the parking brake is set
and the diagonally opposite wheel is blocked.
2007 F-250/350/450/550(f23)
Owners Guide (post-2002-fmt)
USA(fus)
Roadside Emergencies
225
Page 232 of 312
WHEEL LUG NUT TORQUE SPECIFICATIONS
On vehicles equipped with single rear wheels, retighten the lug nuts to
the specified torque at 500 miles (800 km) after any wheel disturbance
(tire rotation, changing a flat tire, wheel removal, etc.).
On vehicles equipped with dual rear wheels, retighten the wheel lug nuts
to the specified torque at 100 miles (160 km), and again at 500 miles
(800 km) of new vehicle operation and after any wheel disturbance (tire
rotation, changing a flat tire, wheel removal, etc.).
Bolt size Wheel lug nut torque*
lb.ft. N•m
M14 x 1.5 150 200
* Torque specifications are for nut and bolt threads free of dirt and
rust. Use only Ford recommended replacement fasteners.
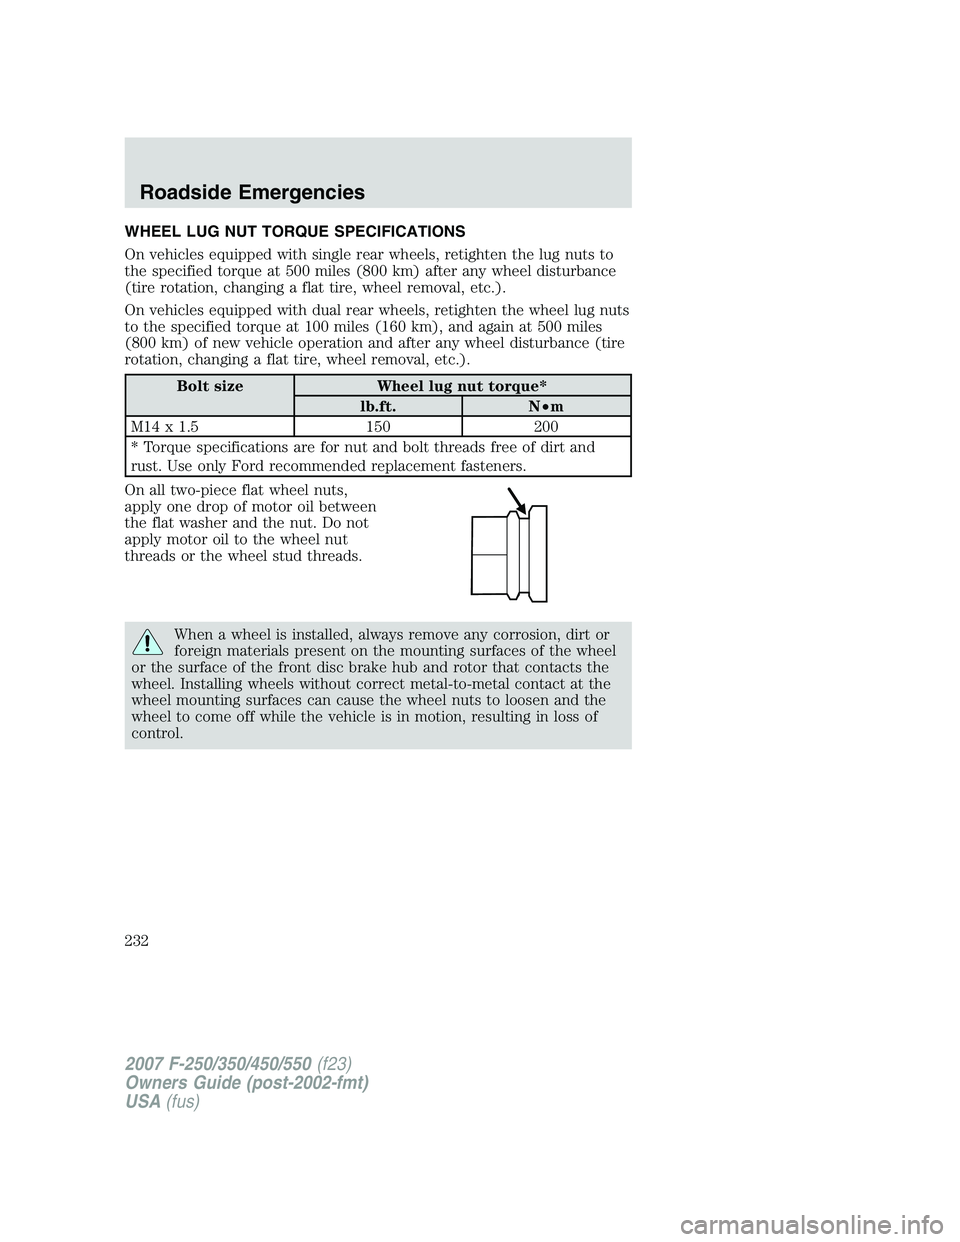
On all two-piece flat wheel nuts,
apply one drop of motor oil between
the flat washer and the nut. Do not
apply motor oil to the wheel nut
threads or the wheel stud threads.
When a wheel is installed, always remove any corrosion, dirt or
foreign materials present on the mounting surfaces of the wheel
or the surface of the front disc brake hub and rotor that contacts the
wheel. Installing wheels without correct metal-to-metal contact at the
wheel mounting surfaces can cause the wheel nuts to loosen and the
wheel to come off while the vehicle is in motion, resulting in loss of
control.
2007 F-250/350/450/550(f23)
Owners Guide (post-2002-fmt)
USA(fus)
Roadside Emergencies
232