Page 187 of 344

Low Tire Pressure
Warning LightPossible cause Customer Action Required
Flashing Warning
LightSpare tire in use Your temporary spare tire is in
use. Repair the damaged road
wheel and re-mount it on the
vehicle to restore system
functionality. For a description
of how the system functions
under these conditions, refer to
When your temporary spare
tire is installedin this section.
TPMS
malfunctionIf your tires are properly
inflated and your spare tire is
not in use and the TPMS
warning light is still ON, have
the system inspected by your
authorized dealer.
When inflating your tires
When putting air into your tires (such as at a gas station or in your
garage), the Tire Pressure Monitoring System may not respond
immediately to the air added to your tires.
It may take up to two minutes of driving over 20 mph (32 km/h) for the
light to turn OFF after you have filled your tires to the recommended
inflation pressure.
How temperature affects your tire pressure
The Tire Pressure Monitoring System (TPMS) monitors tire pressure in
each pneumatic tire. While driving in a normal manner, a typical
passenger tire inflation pressure may increase approximately 2 to 4 psi
(14 to 28 kPa) from a cold start situation. If the vehicle is stationary
over night with the outside temperature significantly lower than the
daytime temperature, the tire pressure may decrease approximately 3 psi
(20.7 kPa) for a drop of 30° F (16.6° C) in ambient temperature. This
lower pressure value may be detected by the TPMS as being significantly
lower than the recommended inflation pressure and activate the TPMS
warning for low tire pressure. If the low tire pressure warning light is
ON, visually check each tire to verify that no tire is flat. If one or more
tires are flat, repair as necessary. Check air pressure in the road tires. If
2007 F-150(f12)
Owners Guide (post-2002-fmt)
USA(fus)
Tires, Wheels and Loading
187
Page 208 of 344

STARTING
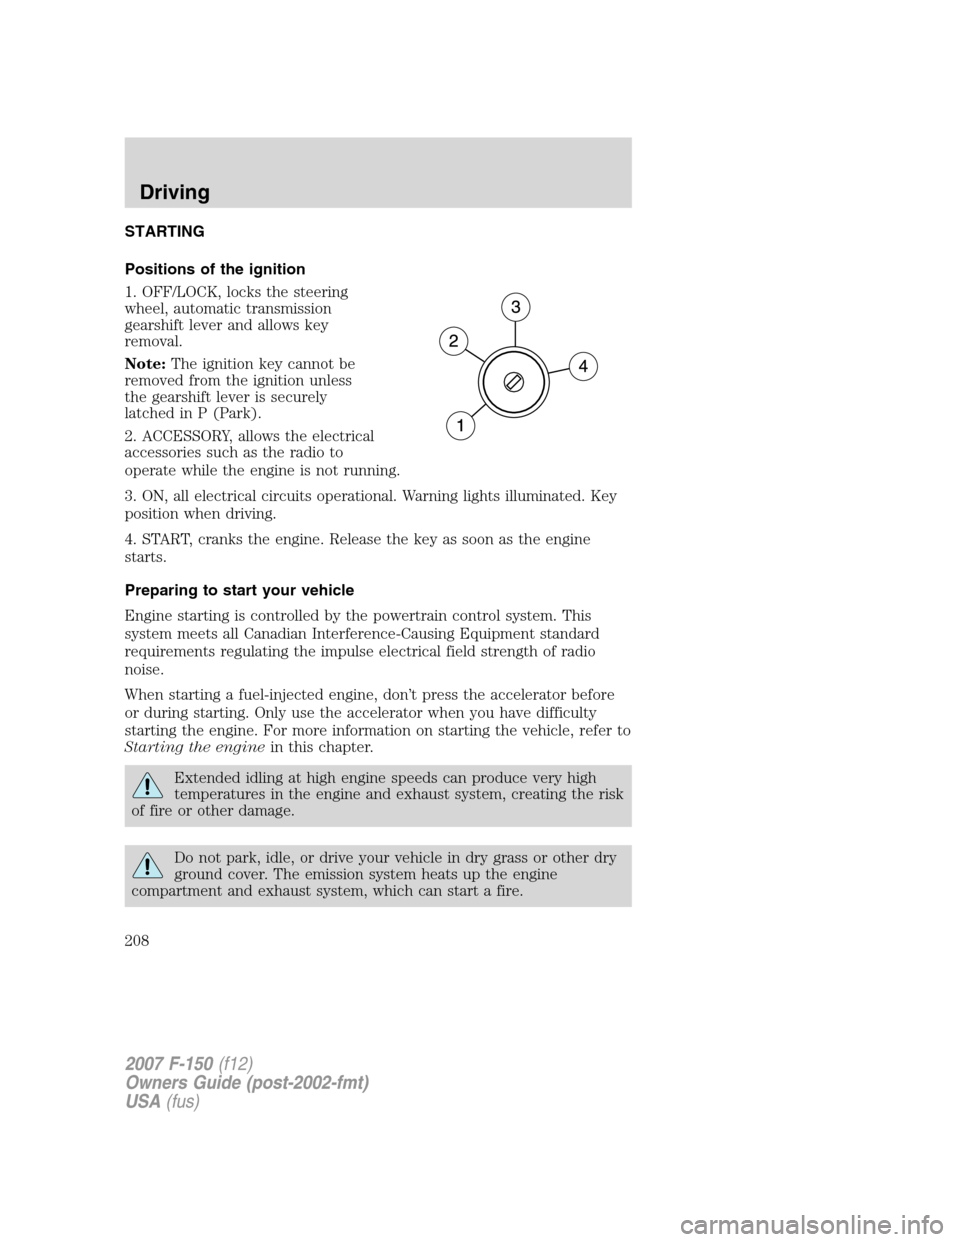
Positions of the ignition
1. OFF/LOCK, locks the steering
wheel, automatic transmission
gearshift lever and allows key
removal.
Note:The ignition key cannot be
removed from the ignition unless
the gearshift lever is securely
latched in P (Park).
2. ACCESSORY, allows the electrical
accessories such as the radio to
operate while the engine is not running.
3. ON, all electrical circuits operational. Warning lights illuminated. Key
position when driving.
4. START, cranks the engine. Release the key as soon as the engine
starts.
Preparing to start your vehicle
Engine starting is controlled by the powertrain control system. This
system meets all Canadian Interference-Causing Equipment standard
requirements regulating the impulse electrical field strength of radio
noise.
When starting a fuel-injected engine, don’t press the accelerator before
or during starting. Only use the accelerator when you have difficulty
starting the engine. For more information on starting the vehicle, refer to
Starting the enginein this chapter.
Extended idling at high engine speeds can produce very high
temperatures in the engine and exhaust system, creating the risk
of fire or other damage.
Do not park, idle, or drive your vehicle in dry grass or other dry
ground cover. The emission system heats up the engine
compartment and exhaust system, which can start a fire.
2007 F-150(f12)
Owners Guide (post-2002-fmt)
USA(fus)
Driving
208
Page 210 of 344
•Make sure the parking brake is
set.
If starting a vehicle with a manual transmission:
•Make sure the parking brake is
set.
•Push the clutch pedal to the floor
3. Turn the key to 3 (ON) without
turning the key to 4 (START).
Some warning lights will briefly illuminate. SeeWarning lights and
chimesin theInstrument Clusterchapter for more information
regarding the warning lights.
BRAKE
2007 F-150(f12)
Owners Guide (post-2002-fmt)
USA(fus)
Driving
210
Page 213 of 344

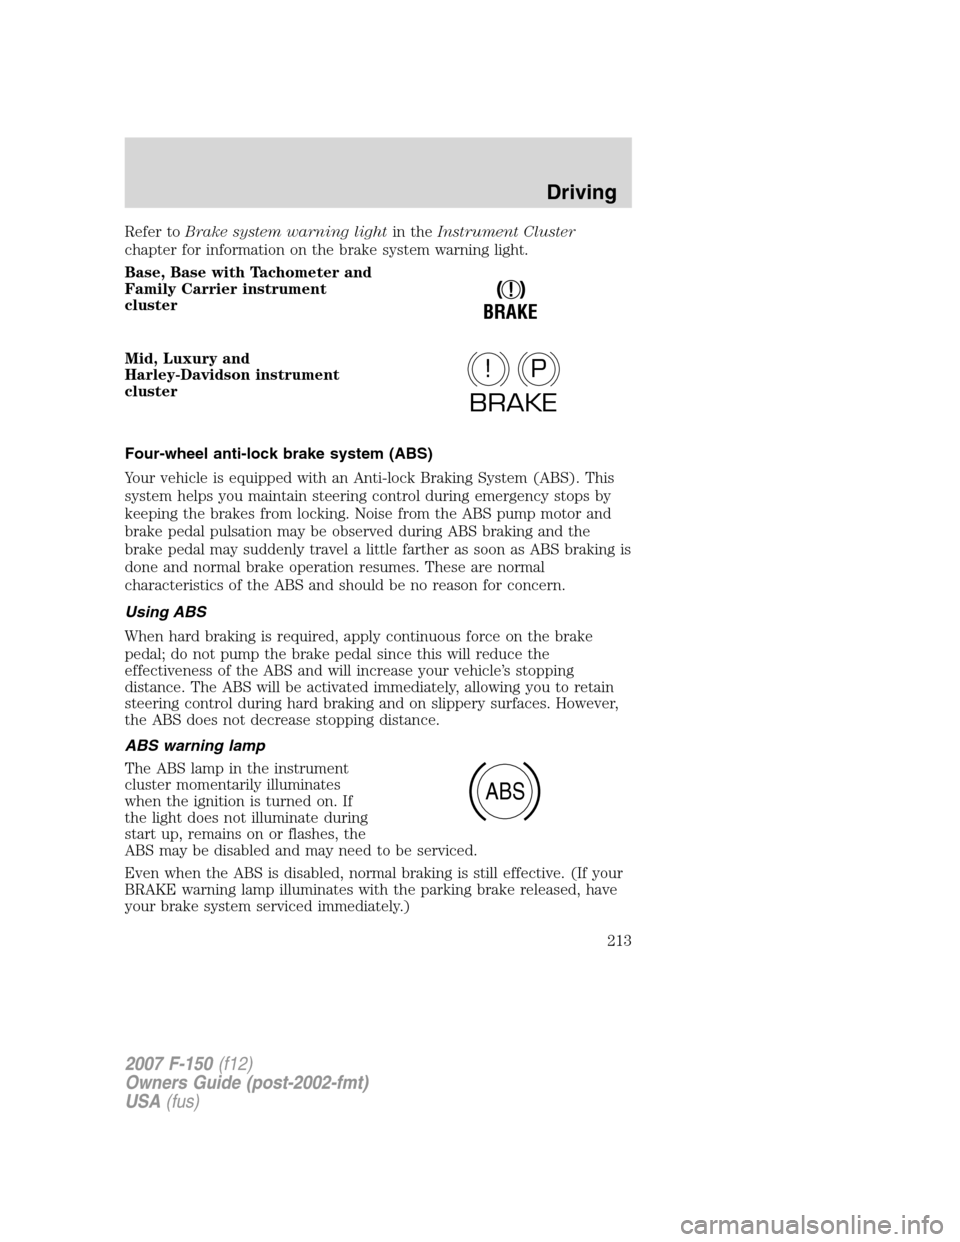
Refer toBrake system warning lightin theInstrument Cluster
chapter for information on the brake system warning light.
Base, Base with Tachometer and
Family Carrier instrument
cluster
Mid, Luxury and
Harley-Davidson instrument
cluster
Four-wheel anti-lock brake system (ABS)
Your vehicle is equipped with an Anti-lock Braking System (ABS). This
system helps you maintain steering control during emergency stops by
keeping the brakes from locking. Noise from the ABS pump motor and
brake pedal pulsation may be observed during ABS braking and the
brake pedal may suddenly travel a little farther as soon as ABS braking is
done and normal brake operation resumes. These are normal
characteristics of the ABS and should be no reason for concern.
Using ABS
When hard braking is required, apply continuous force on the brake
pedal; do not pump the brake pedal since this will reduce the
effectiveness of the ABS and will increase your vehicle’s stopping
distance. The ABS will be activated immediately, allowing you to retain
steering control during hard braking and on slippery surfaces. However,
the ABS does not decrease stopping distance.
ABS warning lamp
The ABS lamp in the instrument
cluster momentarily illuminates
when the ignition is turned on. If
the light does not illuminate during
start up, remains on or flashes, the
ABS may be disabled and may need to be serviced.
Even when the ABS is disabled, normal braking is still effective. (If your
BRAKE warning lamp illuminates with the parking brake released, have
your brake system serviced immediately.)
!
BRAKE
P!
BRAKE
ABS
2007 F-150(f12)
Owners Guide (post-2002-fmt)
USA(fus)
Driving
213
Page 214 of 344
Base, Base with Tachometer and
Family Carrier instrument
cluster
Mid, Luxury and
Harley-Davidson instrument
cluster
Parking brake
To set the parking brake (1), press
the parking brake pedal down until
the pedal stops.
The BRAKE warning lamp will illuminate and will remain illuminated
until the parking brake is released.
Base, Base with Tachometer and
Family Carrier instrument
cluster
Mid, Luxury and
Harley-Davidson instrument
cluster
To release, pull the lever (2).
Always set the parking brake fully and make sure that the
gearshift is securely latched in P (Park) (automatic
transmission) or in 1 (First) (manual transmission).
!
BRAKE
P!
BRAKE
!
BRAKE
P!
BRAKE
2007 F-150(f12)
Owners Guide (post-2002-fmt)
USA(fus)
Driving
214
Page 218 of 344

2. Locate the round access plug on
the underside of the steering
column cover.
3. Remove the access plug using a flat head screwdriver, then push the
override button using a flat head screwdriver, apply the brake pedal and
shift the transmission into N (Neutral).
4. Reinstall the access plug cover, start the vehicle and release the
parking brake.
Do not drive your vehicle until you verify that the brakelamps
are working.
Always set the parking brake fully and make sure the gearshift is
latched in P (Park). Turn the ignition to the OFF/LOCK position
and remove the key whenever you leave your vehicle.
If the parking brake is fully released, but the brake warning lamp
remains illuminated, the brakes may not be working properly.
See your authorized dealer.
Brake-shift interlock - floor-shift transmission
This vehicle is equipped with a brake-shift interlock feature that prevents
the gearshift lever from being moved from P (Park) when the ignition is
in the ON position unless the brake pedal is depressed.
If you cannot move the gearshift lever out of P (Park) with ignition in
the ON position and the brake pedal depressed, it is possible that a fuse
has blown or the vehicle’s brakelamps are not operating properly. Refer
toFuses and relaysin theRoadside Emergencieschapter.
If the fuse is not blown, perform the following procedure:
1. Apply the parking brake, turn the ignition to LOCK, then remove the
key.
2007 F-150(f12)
Owners Guide (post-2002-fmt)
USA(fus)
Driving
218
Page 219 of 344

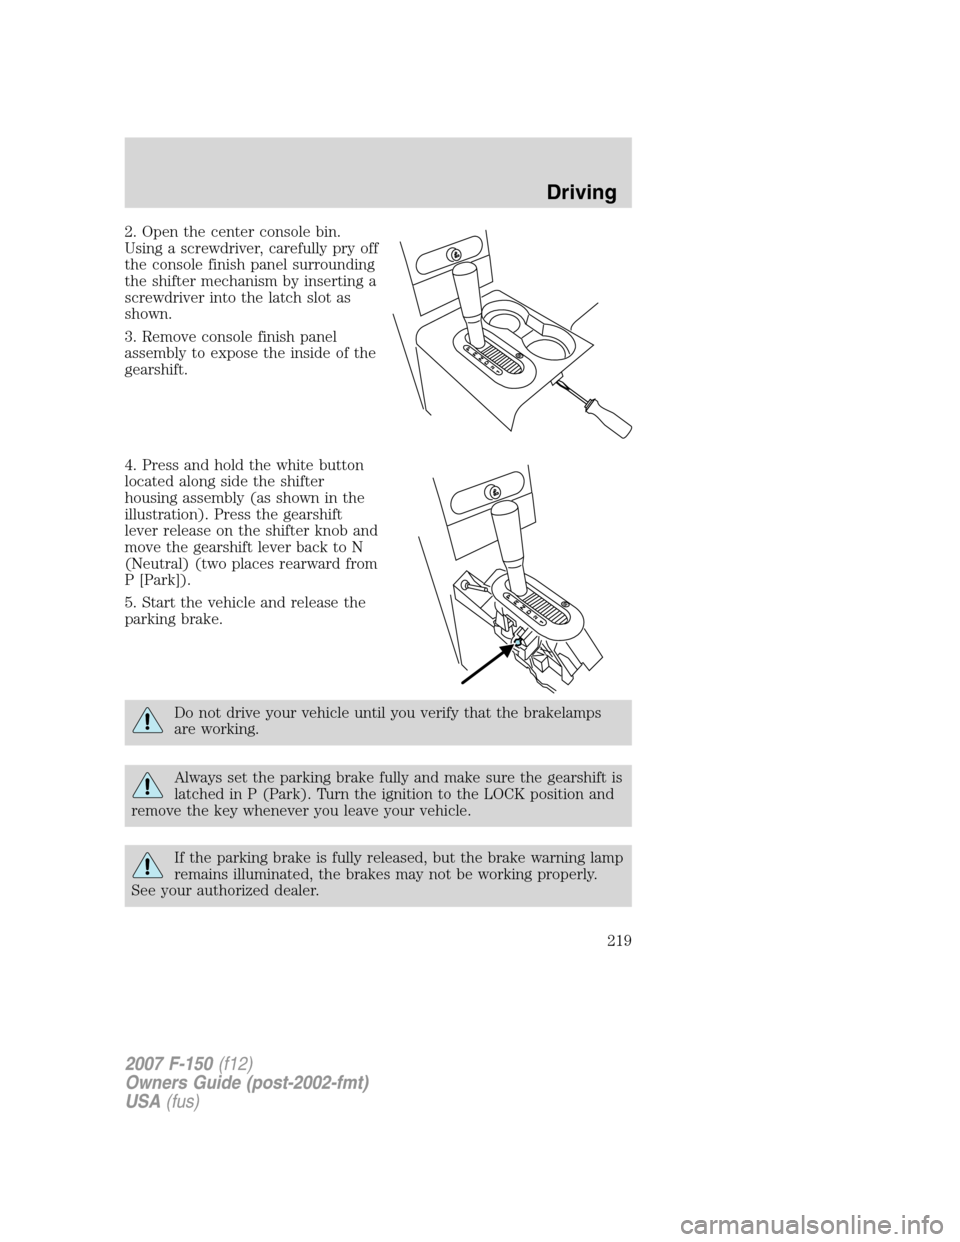
2. Open the center console bin.
Using a screwdriver, carefully pry off
the console finish panel surrounding
the shifter mechanism by inserting a
screwdriver into the latch slot as
shown.
3. Remove console finish panel
assembly to expose the inside of the
gearshift.
4. Press and hold the white button
located along side the shifter
housing assembly (as shown in the
illustration). Press the gearshift
lever release on the shifter knob and
move the gearshift lever back to N
(Neutral) (two places rearward from
P [Park]).
5. Start the vehicle and release the
parking brake.
Do not drive your vehicle until you verify that the brakelamps
are working.
Always set the parking brake fully and make sure the gearshift is
latched in P (Park). Turn the ignition to the LOCK position and
remove the key whenever you leave your vehicle.
If the parking brake is fully released, but the brake warning lamp
remains illuminated, the brakes may not be working properly.
See your authorized dealer.
2007 F-150(f12)
Owners Guide (post-2002-fmt)
USA(fus)
Driving
219
Page 226 of 344

To help avoid personal injury, always use caution when in
reverse and when using the RSS.
This system is not designed to prevent contact with small or
moving objects. The system is designed to provide a warning to
assist the driver in detecting large stationary objects to avoid damaging
the vehicle. The system may not detect smaller objects, particularly
those close to the ground.
Certain add-on devices such as large trailer hitches, bike or
surfboard racks and any device that may block the normal
detection zone of the RSS system may create false beeps.
The RSS detects obstacles up to 6
feet (2 meters) from the rear
bumper with a decreased coverage
area at the outer corners of the
bumper, (refer to the figures for
approximate zone coverage areas).
As you move closer to the obstacle,
the rate of the tone increases. When
the obstacle is less than 10 inches
(25.0 cm) away, the tone will sound
continuously. If the RSS detects a
stationary or receding object further
than 10 inches (25.0 cm) from the
side of the vehicle, the tone will
sound for only three seconds. Once
the system detects an object
approaching, the tone will sound
again.
The RSS may have reduced
performance or an increased chance
of false detection if the tailgate is
not locked and in the upright position. If the tailgate is down, the RSS
tone may be heard intermittently or continuously. The tone may also be
heard if items in the truck bed protrude rearward outside the bed.
2007 F-150(f12)
Owners Guide (post-2002-fmt)
USA(fus)
Driving
226