2007 FORD F150 key
[x] Cancel search: keyPage 241 of 344

ROADSIDE ASSISTANCE
Getting roadside assistance
To fully assist you should you have a vehicle concern, Ford Motor
Company offers a complimentary roadside assistance program. This
program is separate from the New Vehicle Limited Warranty. The service
is available:
•24–hours, seven days a week
•for the New Vehicle Limited Warranty period of three years or 36,000
miles (60,000 km), whichever occurs first on Ford and Mercury
vehicles, and four years or 50,000 miles (80,000 km) on Lincoln
vehicles.
Roadside assistance will cover:
•a flat tire change with a good spare (except Ford GT which has a tire
inflation kit)
•battery jump start
•lock-out assistance (key replacement cost is the customer’s
responsibility)
•fuel delivery – Independent Service Contractors, if not prohibited by
state, local or municipal law shall deliver up to 2.0 gallons (7.5L) of
gasoline or 5 gallons (18.9L) of diesel fuel to a disabled vehicle. Fuel
delivery service is limited to two no-charge occurrences within a
12-month period.
•winch out – available within 100 feet (30.5 meters) of a paved or
county maintained road, no recoveries.
•towing – Ford/Mercury/Lincoln eligible vehicle towed to an authorized
dealer within 35 miles (56.3 km) of the disablement location or to the
nearest authorized dealer. If a member requests to be towed to an
authorized dealer more than 35 miles (56.3 km) from the disablement
location, the member shall be responsible for any mileage costs in
excess of 35 miles (56.3 km).
Trailers shall be covered up to $100 if the disabled eligible vehicle
requires service at the nearest authorized dealer. If the trailer is disabled,
but the towing vehicle is operational, the trailer does not qualify for any
roadside services.
2007 F-150(f12)
Owners Guide (post-2002-fmt)
USA(fus)
Roadside Emergencies
241
Page 243 of 344

HAZARD FLASHER
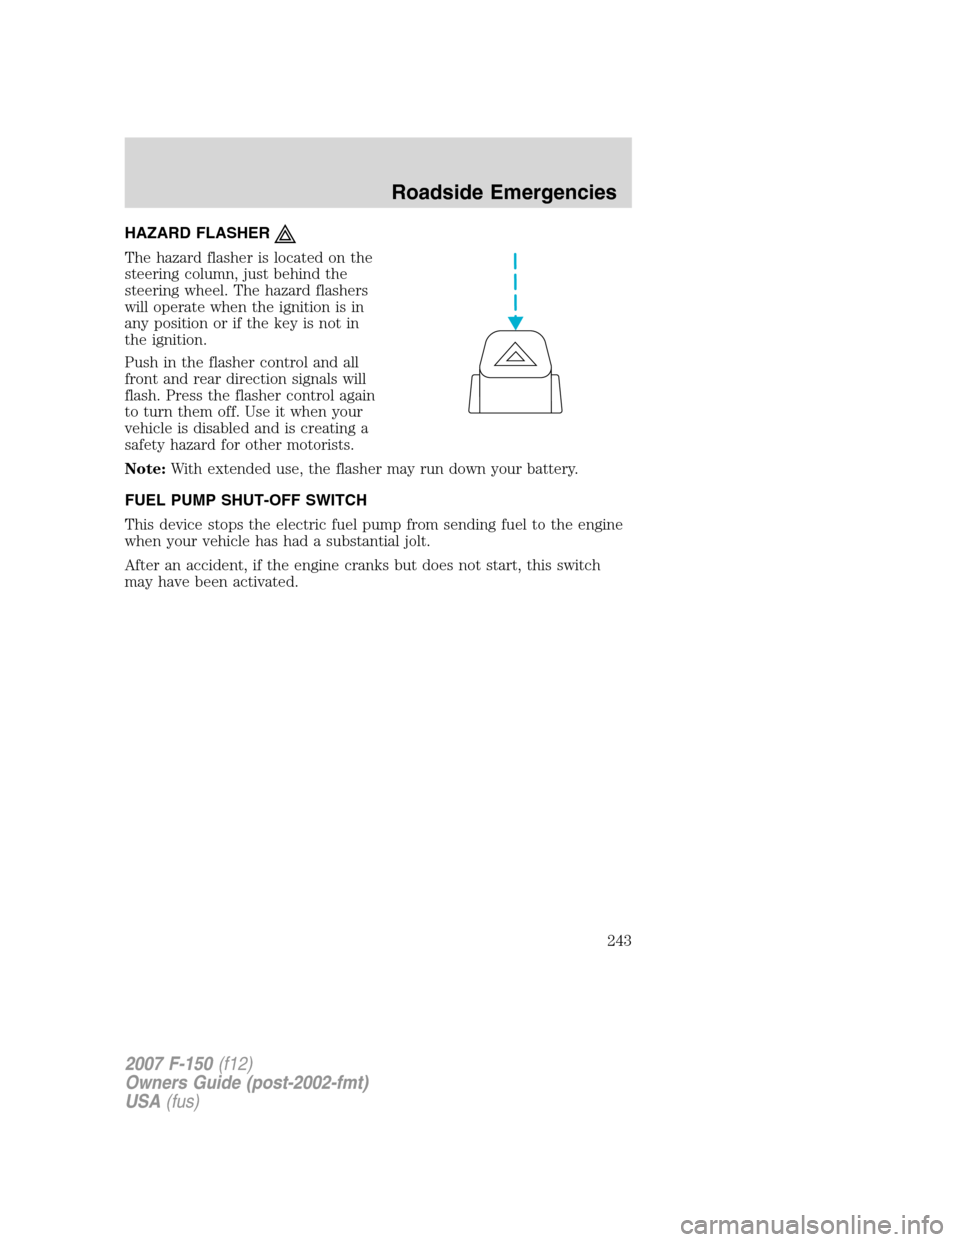
The hazard flasher is located on the
steering column, just behind the
steering wheel. The hazard flashers
will operate when the ignition is in
any position or if the key is not in
the ignition.
Push in the flasher control and all
front and rear direction signals will
flash. Press the flasher control again
to turn them off. Use it when your
vehicle is disabled and is creating a
safety hazard for other motorists.
Note:With extended use, the flasher may run down your battery.
FUEL PUMP SHUT-OFF SWITCH
This device stops the electric fuel pump from sending fuel to the engine
when your vehicle has had a substantial jolt.
After an accident, if the engine cranks but does not start, this switch
may have been activated.
2007 F-150(f12)
Owners Guide (post-2002-fmt)
USA(fus)
Roadside Emergencies
243
Page 244 of 344

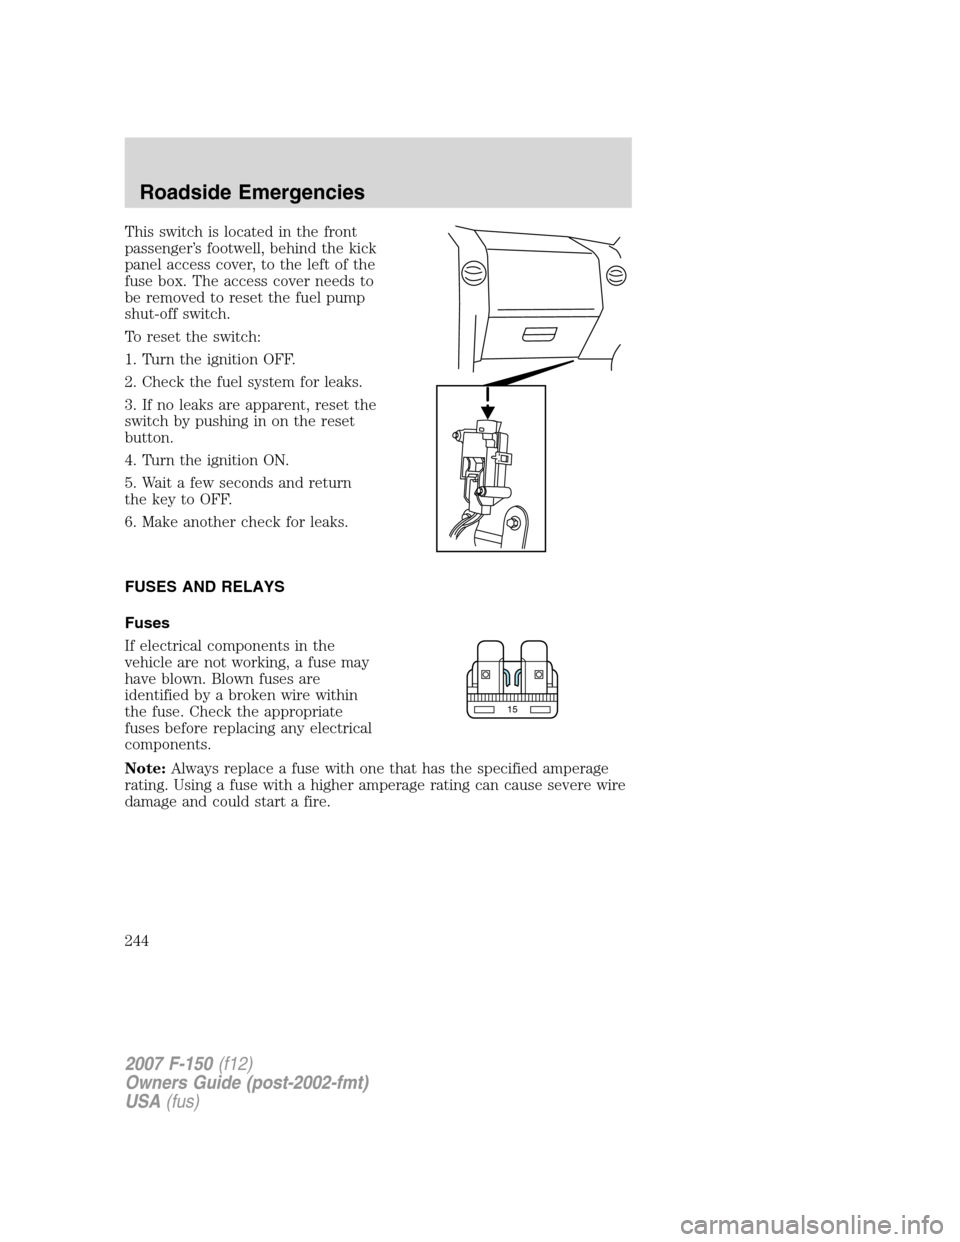
This switch is located in the front
passenger’s footwell, behind the kick
panel access cover, to the left of the
fuse box. The access cover needs to
be removed to reset the fuel pump
shut-off switch.
To reset the switch:
1. Turn the ignition OFF.
2. Check the fuel system for leaks.
3. If no leaks are apparent, reset the
switch by pushing in on the reset
button.
4. Turn the ignition ON.
5. Wait a few seconds and return
the key to OFF.
6. Make another check for leaks.
FUSES AND RELAYS
Fuses
If electrical components in the
vehicle are not working, a fuse may
have blown. Blown fuses are
identified by a broken wire within
the fuse. Check the appropriate
fuses before replacing any electrical
components.
Note:Always replace a fuse with one that has the specified amperage
rating. Using a fuse with a higher amperage rating can cause severe wire
damage and could start a fire.
15
2007 F-150(f12)
Owners Guide (post-2002-fmt)
USA(fus)
Roadside Emergencies
244
Page 255 of 344

Removing the spare tire
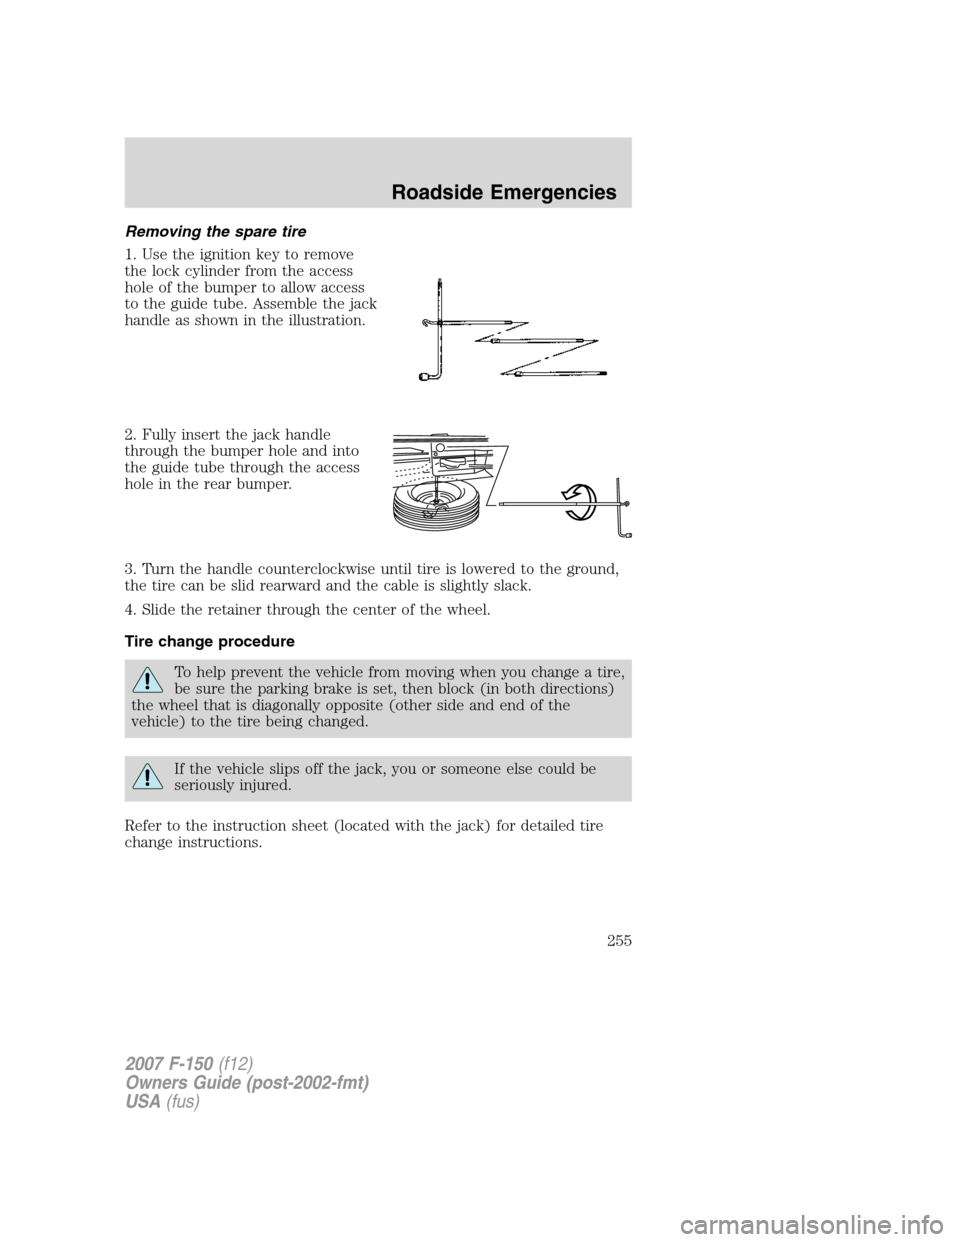
1. Use the ignition key to remove
the lock cylinder from the access
hole of the bumper to allow access
to the guide tube. Assemble the jack
handle as shown in the illustration.
2. Fully insert the jack handle
through the bumper hole and into
the guide tube through the access
hole in the rear bumper.
3. Turn the handle counterclockwise until tire is lowered to the ground,
the tire can be slid rearward and the cable is slightly slack.
4. Slide the retainer through the center of the wheel.
Tire change procedure
To help prevent the vehicle from moving when you change a tire,
be sure the parking brake is set, then block (in both directions)
the wheel that is diagonally opposite (other side and end of the
vehicle) to the tire being changed.
If the vehicle slips off the jack, you or someone else could be
seriously injured.
Refer to the instruction sheet (located with the jack) for detailed tire
change instructions.
2007 F-150(f12)
Owners Guide (post-2002-fmt)
USA(fus)
Roadside Emergencies
255
Page 259 of 344

ratchets or slips with little effort, take the vehicle to your authorized
dealer for assistance at your earliest convenience.
4. Check that the tire lies flat against the frame and is properly
tightened. Try to push or pull, then turn the tire to be sure it will not
move. Loosen and retighten, if necessary. Failure to properly stow the
spare tire may result in failure of the winch cable and loss of the tire.
5. Repeat this tightness check procedure when servicing the spare tire
pressure (every six months, as per yourscheduled maintenance
information),or at any time that the spare tire is disturbed through
service of other components.
6. If removed, install the spare tire lock (if equipped) into the bumper
drive tube with the spare tire lock key (if equipped) and jack handle.
WHEEL LUG NUT TORQUE SPECIFICATIONS
Retighten the lug nuts to the specified torque within 100 miles (160 km)
after any wheel disturbance (rotation, flat tire, wheel removal, etc.).
Bolt size Wheel lug nut torque*
lb.ft. N•m
M14 x 2.0 150 200
* Torque specifications are for nut and bolt threads free of dirt and
rust. Use only Ford recommended replacement fasteners.
When a wheel is installed, always remove any corrosion, dirt or
foreign materials present on the mounting surfaces of the wheel
or the surface of the wheel hub, brake drum or brake disc that
contacts the wheel. Ensure that any fasteners that attach the rotor to
the hub are secured so they do not interfere with the mounting
surfaces of the wheel. Installing wheels without correct metal-to-metal
contact at the wheel mounting surfaces can cause the wheel nuts to
loosen and the wheel to come off while the vehicle is in motion,
resulting in loss of control.
JUMP STARTING
The gases around the battery can explode if exposed to flames,
sparks, or lit cigarettes. An explosion could result in injury or
vehicle damage.
2007 F-150(f12)
Owners Guide (post-2002-fmt)
USA(fus)
Roadside Emergencies
259
Page 283 of 344

SERVICE RECOMMENDATIONS
To help you service your vehicle, we providescheduled maintenance
informationwhich makes tracking routine service easy.
If your vehicle requires professional service, your authorized dealer can
provide the necessary parts and service. Check yourWarranty
Guide/Owner Information Guideto find out which parts and services
are covered.
Use only recommended fuels, lubricants, fluids and service parts
conforming to specifications. Motorcraft parts are designed and built to
provide the best performance in your vehicle.
PRECAUTIONS WHEN SERVICING YOUR VEHICLE
•Do not work on a hot engine.
•Make sure that nothing gets caught in moving parts.
•Do not work on a vehicle with the engine running in an enclosed
space, unless you are sure you have enough ventilation.
•Keep all open flames and other burning (cigarettes) material away
from the battery and all fuel related parts.
Working with the engine off
•Automatic transmission:
1. Set the parking brake and shift to P (Park).
2. Turn off the engine and remove the key.
3. Block the wheels.
•Manual transmission:
1. Set the parking brake, depress the clutch and place the gearshift in 1
(First).
2. Turn off the engine and remove the key.
3. Block the wheels.
Working with the engine on
•Automatic transmission:
1. Set the parking brake and shift to P (Park).
2. Block the wheels.
•Manual transmission:
1. Set the parking brake, depress the clutch and place the gearshift in N
(Neutral).
2. Block the wheels.
2007 F-150(f12)
Owners Guide (post-2002-fmt)
USA(fus)
Maintenance and Specifications
283
Page 313 of 344

These temporary malfunctions can be corrected by filling the fuel tank
with good quality fuel, properly tightening the fuel cap or letting the
electrical system dry out. After three driving cycles without these or any
other temporary malfunctions present, the
indicator should stay off
the next time the engine is started. A driving cycle consists of a cold
engine startup followed by mixed city/highway driving. No additional
vehicle service is required.
If the
indicator remains on, have your vehicle serviced at the first
available opportunity. Although some malfunctions detected by the
OBD-II may not have symptoms that are apparent, continued driving
with the
indicator on can result in increased emissions, lower fuel
economy, reduced engine and transmission smoothness, and lead to more
costly repairs.
Readiness for Inspection/Maintenance (I/M) testing
Some state/provincial and local governments may have
Inspection/Maintenance (I/M) programs to inspect the emission control
equipment on your vehicle. Failure to pass this inspection could prevent
you from getting a vehicle registration. Your vehicle may not pass the I/M
test if the
indicator is on or not working properly (bulb is burned
out), or if the OBD-II system has determined that some of the emission
control systems have not been properly checked. In this case, the vehicle
is considered not ready for I/M testing.
If the
indicator is on or the bulb does not work, the vehicle may
need to be serviced. Refer to the On board diagnostics (OBD-II)
description in theMaintenance and Specificationschapter.
If the vehicle’s engine or transmission has just been serviced, or the
battery has recently run down or been replaced, the OBD-II system may
indicate that the vehicle is not ready for I/M testing. To determine if the
vehicle is ready for I/M testing, turn the ignition key to the ON position
for 15 seconds without cranking the engine. If the
indicator blinks
eight times, it means that the vehicle is not ready for I/M testing; if
the
indicator stays on solid, it means that the vehicle is ready for
I/M testing.
The OBD-II system is designed to check the emission control system
during normal driving. A complete check may take several days. If the
vehicle is not ready for I/M testing, the following driving cycle consisting
of mixed city and highway driving may be performed:
15 minutes of steady driving on an expressway/highway followed by 20
minutes of stop-and-go driving with at least four 30 second idle periods.
2007 F-150(f12)
Owners Guide (post-2002-fmt)
USA(fus)
Maintenance and Specifications
313
Page 337 of 344

Illuminated visor mirror .............69
Infant seats
(see Safety seats) .....................153
Inspection/maintenance (I/M)
testing ........................................313
Instrument panel
cleaning ...................................277
cluster ........................................12
lighting up panel and
interior .......................................60
J
Jack ............................................252
positioning ...............................252
storage .....................................252
Jump-starting your vehicle ......259
K
Keyless entry system ...............110
autolock ...................................101
keypad .....................................110
locking and unlocking doors ..111
programming entry code .......111
Keys ...................................101, 113
positions of the ignition .........208
L
Lamps
autolamp system .......................58
bulb replacement
specifications chart ..................63
daytime running light ...............59
fog lamps ...................................59
headlamps .................................58
headlamps, flash to pass ..........59
instrument panel, dimming .....60
interior lamps .....................62–63
replacing bulbs ...................64, 67Lane change indicator
(see Turn signal) ........................61
Lights, warning and indicator ....12
anti-lock brakes (ABS) ..........213
Load limits .................................188
Loading instructions .................194
Locks
autolock ...................................101
childproof ................................103
doors ........................................101
Lubricant specifications ...........324
Lug nuts ....................................259
Lumbar support, seats .............117
M
Manual transmission .................223
reverse .....................................225
Message center ...........................89
english/metric button ...............93
system check button ................93
warning messages .....................94
Mirrors .........................................77
automatic dimming rearview
mirror ........................................76
fold away ...................................77
heated ........................................78
programmable memory ..........106
side view mirrors (power) .......77
signal .........................................78
Moon roof ....................................82
Motorcraft parts ........281, 301, 322
N
Navigation system .......................47
O
Octane rating ............................306
2007 F-150(f12)
Owners Guide (post-2002-fmt)
USA(fus)
Index
337