2007 FORD EXPEDITION remote control
[x] Cancel search: remote controlPage 42 of 328
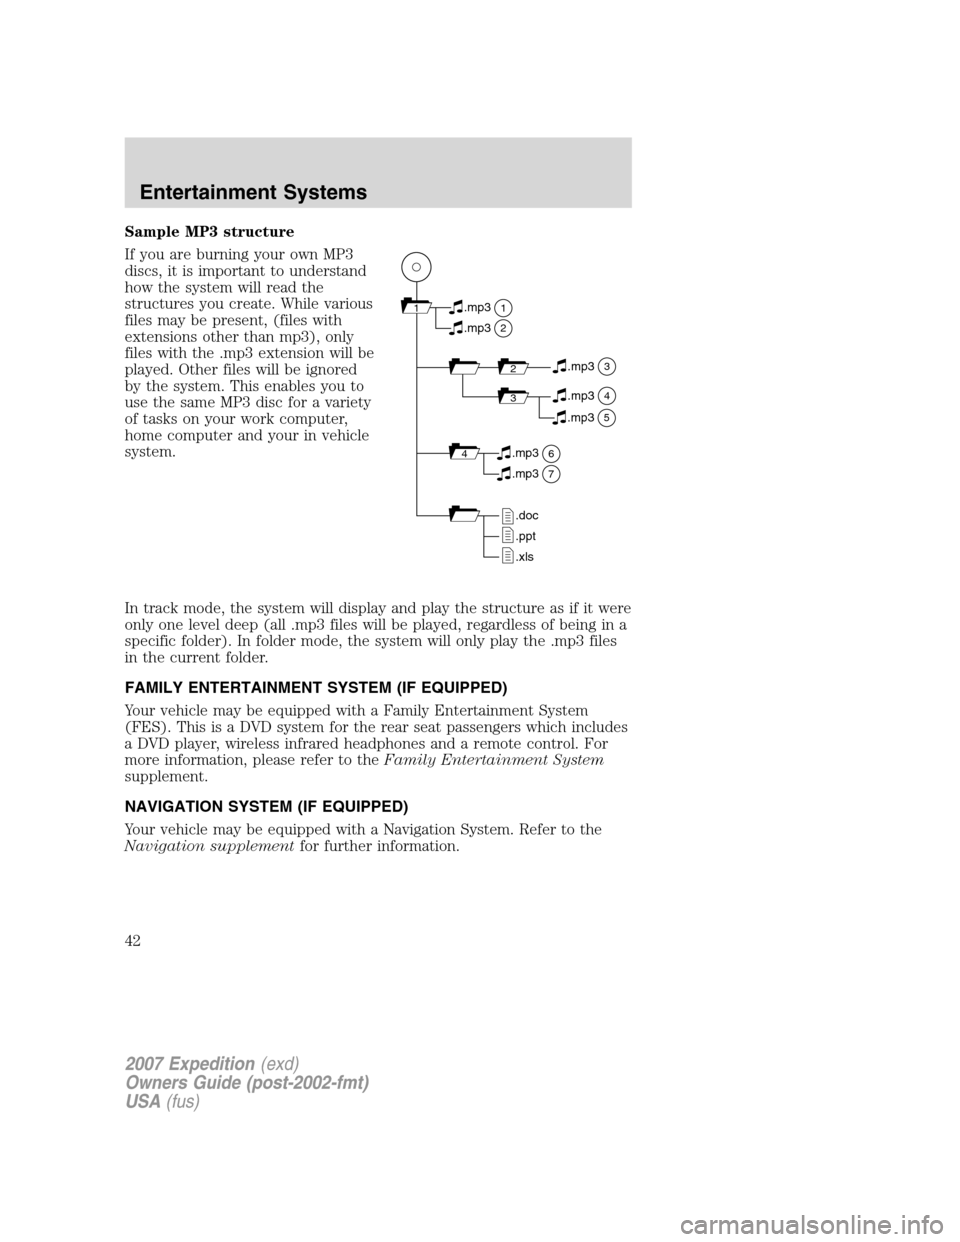
Sample MP3 structure
If you are burning your own MP3
discs, it is important to understand
how the system will read the
structures you create. While various
files may be present, (files with
extensions other than mp3), only
files with the .mp3 extension will be
played. Other files will be ignored
by the system. This enables you to
use the same MP3 disc for a variety
of tasks on your work computer,
home computer and your in vehicle
system.
In track mode, the system will display and play the structure as if it were
only one level deep (all .mp3 files will be played, regardless of being in a
specific folder). In folder mode, the system will only play the .mp3 files
in the current folder.
FAMILY ENTERTAINMENT SYSTEM (IF EQUIPPED)
Your vehicle may be equipped with a Family Entertainment System
(FES). This is a DVD system for the rear seat passengers which includes
a DVD player, wireless infrared headphones and a remote control. For
more information, please refer to theFamily Entertainment System
supplement.
NAVIGATION SYSTEM (IF EQUIPPED)
Your vehicle may be equipped with a Navigation System. Refer to the
Navigation supplementfor further information.
11
2
.mp3
2.mp3
3.mp3
34.mp3
64.mp3
7.mp3
.doc
.ppt
.xls
5.mp3
2007 Expedition(exd)
Owners Guide (post-2002-fmt)
USA(fus)
Entertainment Systems
42
Page 56 of 328
INTERIOR LAMPS
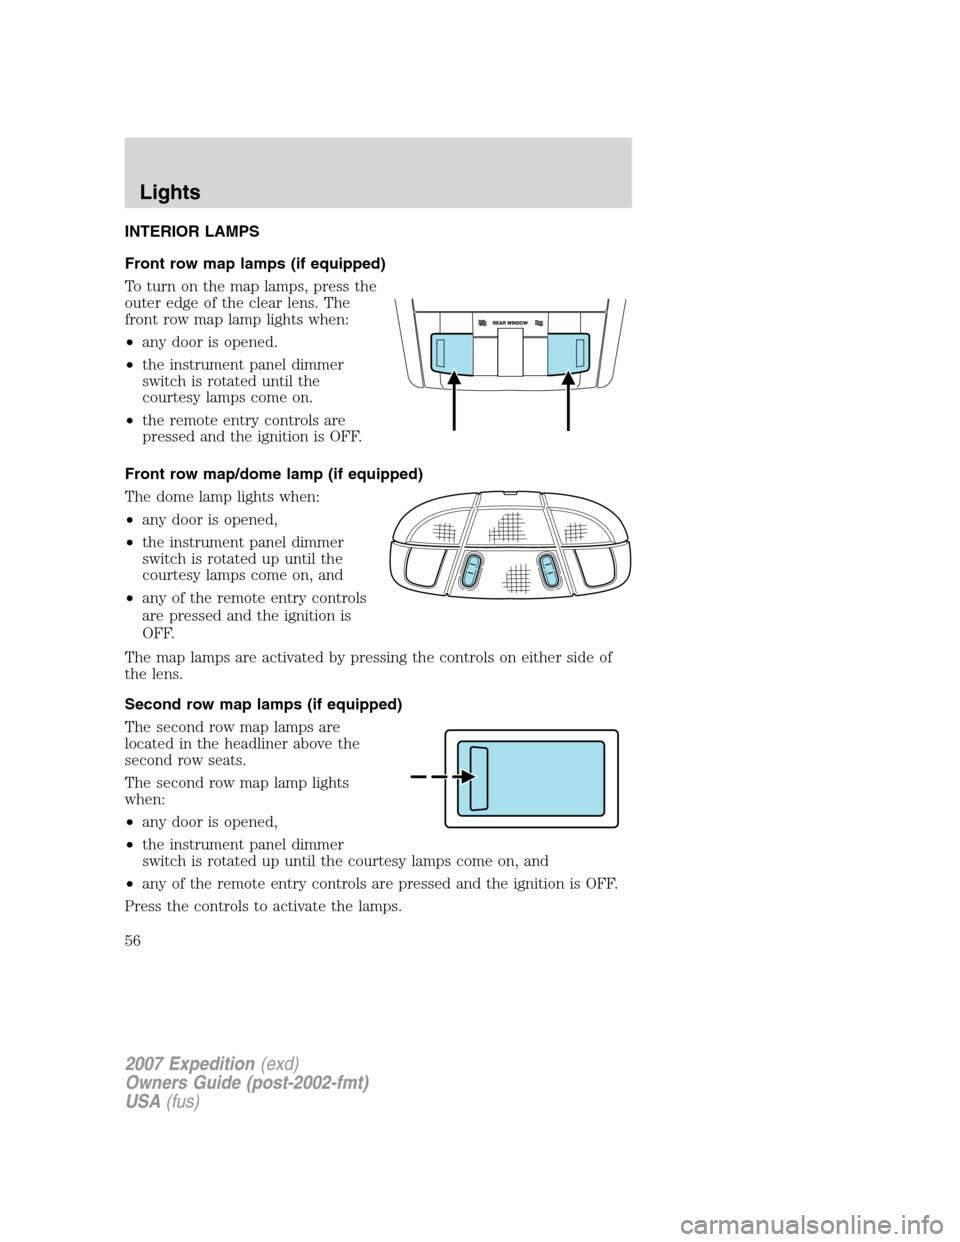
Front row map lamps (if equipped)
To turn on the map lamps, press the
outer edge of the clear lens. The
front row map lamp lights when:
•any door is opened.
•the instrument panel dimmer
switch is rotated until the
courtesy lamps come on.
•the remote entry controls are
pressed and the ignition is OFF.
Front row map/dome lamp (if equipped)
The dome lamp lights when:
•any door is opened,
•the instrument panel dimmer
switch is rotated up until the
courtesy lamps come on, and
•any of the remote entry controls
are pressed and the ignition is
OFF.
The map lamps are activated by pressing the controls on either side of
the lens.
Second row map lamps (if equipped)
The second row map lamps are
located in the headliner above the
second row seats.
The second row map lamp lights
when:
•any door is opened,
•the instrument panel dimmer
switch is rotated up until the courtesy lamps come on, and
•any of the remote entry controls are pressed and the ignition is OFF.
Press the controls to activate the lamps.
2007 Expedition(exd)
Owners Guide (post-2002-fmt)
USA(fus)
Lights
56
Page 57 of 328

Rear cargo lamp
The dome lamp lights when:
•any door is opened, and the
switch is in the middle position.
•the instrument panel dimmer
switch is rotated until the
courtesy lamps come on.
•any of the remote entry controls
are pressed and ignition is OFF
(and switch is in the middle
position).
With the ignition key in the ACC or ON position, the rear dome lamp can
be turned ON or OFF by sliding the control.
BULB REPLACEMENT
Headlamp Condensation
The headlamps are vented to equalize pressure. When moist air enters
the headlamp(s) through the vents, there is a possibility that
condensation can occur. This condensation is normal and will clear
within 45 minutes of headlamp operation.
Using the right bulbs
Replacement bulbs are specified in the chart below. Headlamp bulbs
must be marked with an authorized “D.O.T.” for North America to ensure
lamp performance, light brightness and pattern and safe visibility. The
correct bulbs will not damage the lamp assembly or void the lamp
assembly warranty and will provide quality bulb burn time.
Function Number of bulbs Trade number
Headlamps (low and
high-beam)2 9008
Front sidemarker 2 194
Front park/turn lamps 2 3157 A
Foglamps 2 899
Front row map lamps 2 W5W
Front row map/dome
lamps3 578
2007 Expedition(exd)
Owners Guide (post-2002-fmt)
USA(fus)
Lights
57
Page 98 of 328

To open the liftgate from the
Instrument panel:
Press the button once to open the
liftgate, press it again to close.
To open the liftgate with the Key fob:
Refer toRemote Entry Systemin theLocks and securitychapter.
To open the liftgate with outside
release handle (manual
actuation):
1. To open, unlock the liftgate with
the key fob or power door unlock
control.
2. Pull and release the liftgate
handle to open the liftgate.
Note:For the best performance allow the power system to open the
liftgate after releasing the handle. Continued upward force after
unlatching may activate the obstacle detection feature and stop the
power system.
Note:If weight is added to the gate (bike rack, snow, etc.) the gate may
automatically start a power close event immediately after a power open.
In this mode a unique continuous chime will sound.
To close the liftgate with the
rear cargo area control button:
Press and release the control on the
left rear quarter panel to close the
liftgate. The chime will beep once if
conditions are not correct to start
an operation (i.e., the vehicle is out
of park). In a normal close, the
chime will begin just before the gate
starts to move and continue for total
of three seconds.
Press and release the control to open or reverse the liftgate.
Rear cargo area control button will not open the liftgate when the
liftgate is latched.
2007 Expedition(exd)
Owners Guide (post-2002-fmt)
USA(fus)
Driver Controls
98
Page 108 of 328
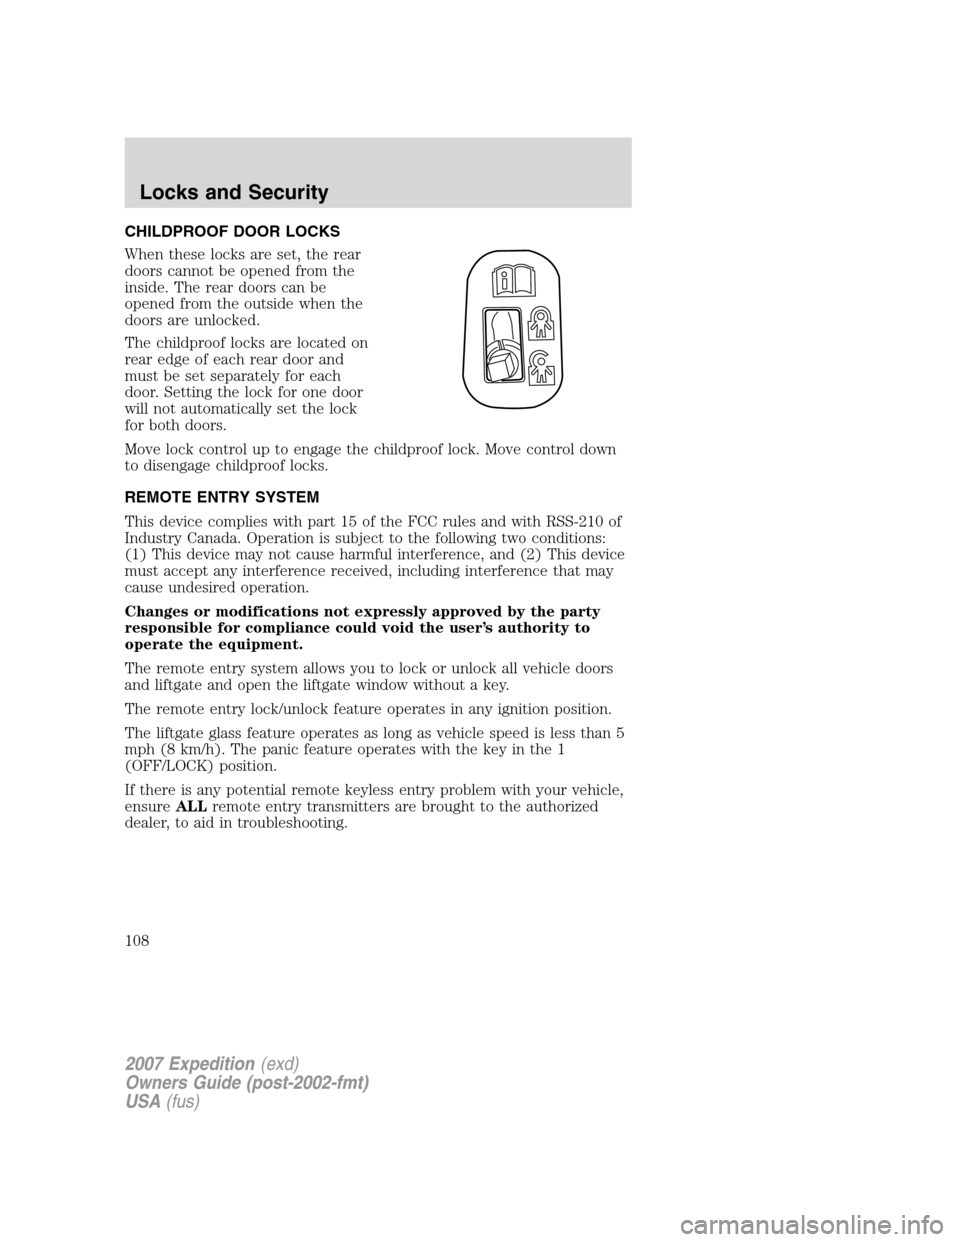
CHILDPROOF DOOR LOCKS
When these locks are set, the rear
doors cannot be opened from the
inside. The rear doors can be
opened from the outside when the
doors are unlocked.
The childproof locks are located on
rear edge of each rear door and
must be set separately for each
door. Setting the lock for one door
will not automatically set the lock
for both doors.
Move lock control up to engage the childproof lock. Move control down
to disengage childproof locks.
REMOTE ENTRY SYSTEM
This device complies with part 15 of the FCC rules and with RSS-210 of
Industry Canada. Operation is subject to the following two conditions:
(1) This device may not cause harmful interference, and (2) This device
must accept any interference received, including interference that may
cause undesired operation.
Changes or modifications not expressly approved by the party
responsible for compliance could void the user’s authority to
operate the equipment.
The remote entry system allows you to lock or unlock all vehicle doors
and liftgate and open the liftgate window without a key.
The remote entry lock/unlock feature operates in any ignition position.
The liftgate glass feature operates as long as vehicle speed is less than 5
mph (8 km/h). The panic feature operates with the key in the 1
(OFF/LOCK) position.
If there is any potential remote keyless entry problem with your vehicle,
ensureALLremote entry transmitters are brought to the authorized
dealer, to aid in troubleshooting.
2007 Expedition(exd)
Owners Guide (post-2002-fmt)
USA(fus)
Locks and Security
108
Page 110 of 328
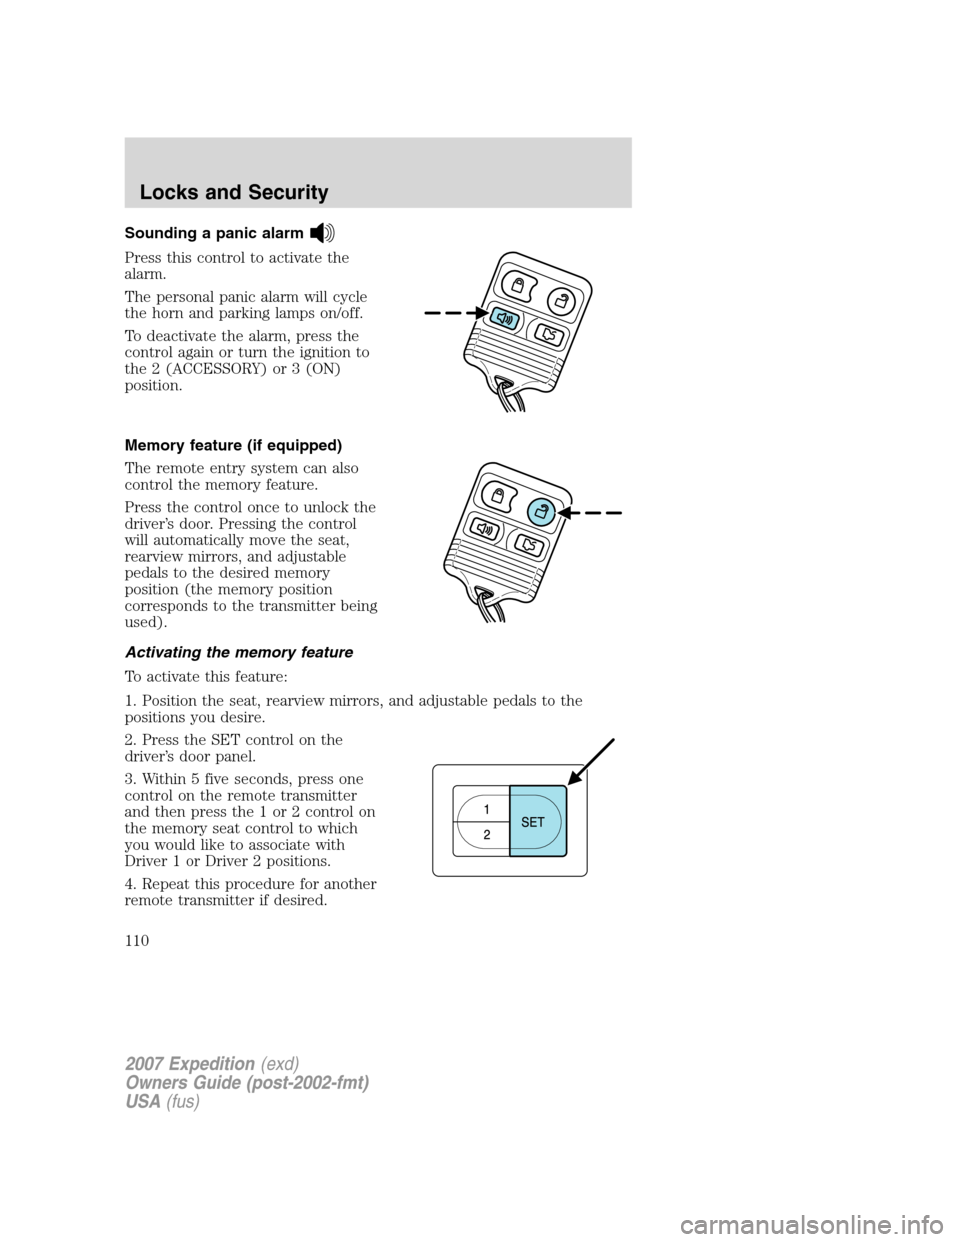
Sounding a panic alarm
Press this control to activate the
alarm.
The personal panic alarm will cycle
the horn and parking lamps on/off.
To deactivate the alarm, press the
control again or turn the ignition to
the 2 (ACCESSORY) or 3 (ON)
position.
Memory feature (if equipped)
The remote entry system can also
control the memory feature.
Press the control once to unlock the
driver’s door. Pressing the control
will automatically move the seat,
rearview mirrors, and adjustable
pedals to the desired memory
position (the memory position
corresponds to the transmitter being
used).
Activating the memory feature
To activate this feature:
1. Position the seat, rearview mirrors, and adjustable pedals to the
positions you desire.
2. Press the SET control on the
driver’s door panel.
3. Within 5 five seconds, press one
control on the remote transmitter
and then press the 1 or 2 control on
the memory seat control to which
you would like to associate with
Driver 1 or Driver 2 positions.
4. Repeat this procedure for another
remote transmitter if desired.
2007 Expedition(exd)
Owners Guide (post-2002-fmt)
USA(fus)
Locks and Security
110
Page 111 of 328
Deactivating the memory seat feature
To deactivate this feature:
1. Press the SET control on the driver’s door panel.
2. Within 5 five seconds, press any control on the remote transmitter
which you would like to deactivate and then press the SET control on
the driver’s door panel.
3. Repeat this procedure for another remote transmitter if desired.
Replacing the battery
The remote entry transmitter uses one coin type three-volt lithium
battery CR2032 or equivalent.
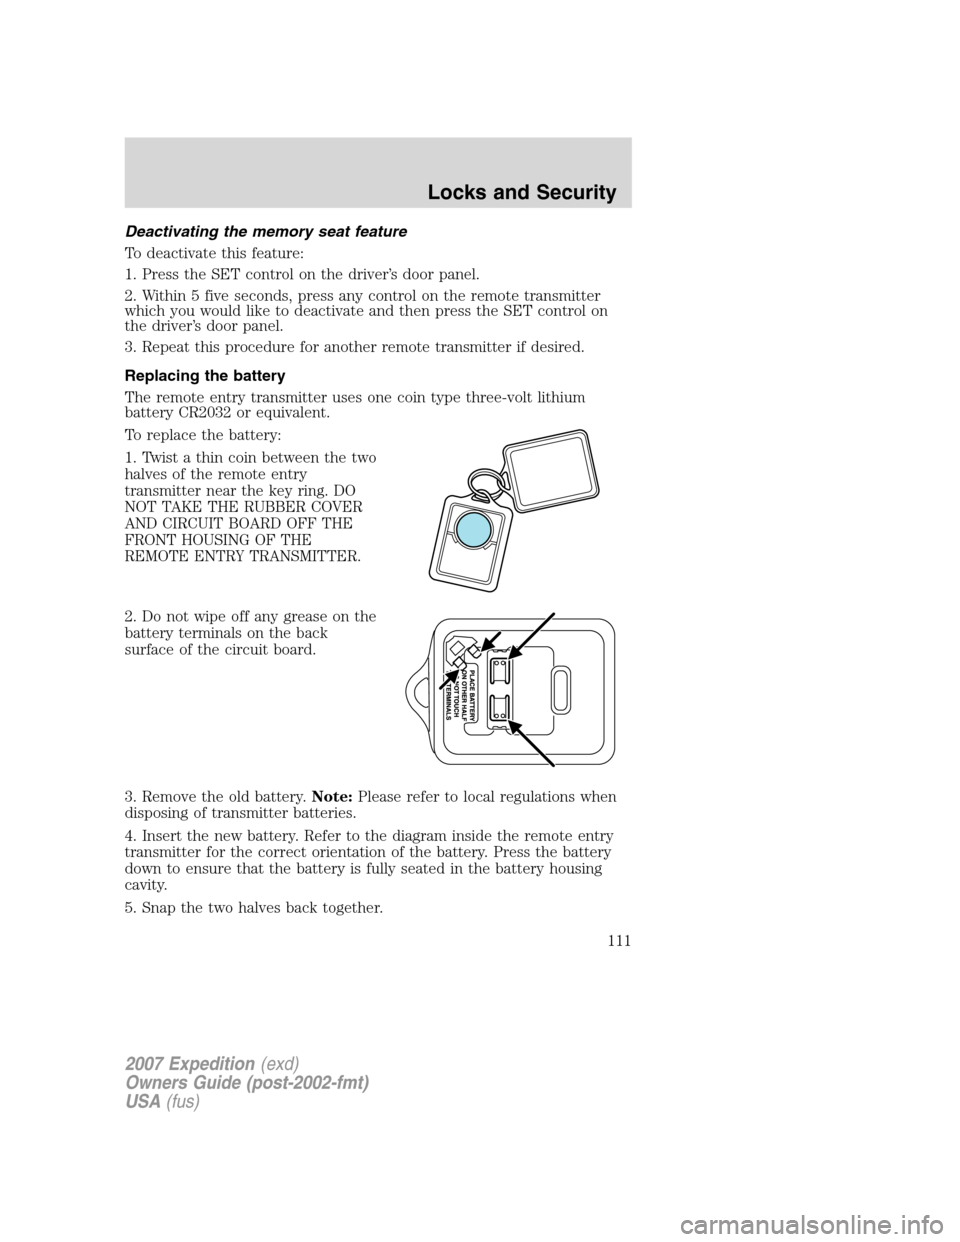
To replace the battery:
1. Twist a thin coin between the two
halves of the remote entry
transmitter near the key ring. DO
NOT TAKE THE RUBBER COVER
AND CIRCUIT BOARD OFF THE
FRONT HOUSING OF THE
REMOTE ENTRY TRANSMITTER.
2. Do not wipe off any grease on the
battery terminals on the back
surface of the circuit board.
3. Remove the old battery.Note:Please refer to local regulations when
disposing of transmitter batteries.
4. Insert the new battery. Refer to the diagram inside the remote entry
transmitter for the correct orientation of the battery. Press the battery
down to ensure that the battery is fully seated in the battery housing
cavity.
5. Snap the two halves back together.
2007 Expedition(exd)
Owners Guide (post-2002-fmt)
USA(fus)
Locks and Security
111
Page 112 of 328
Note:Replacement of the battery willnotcause the remote transmitter
to become deprogrammed from your vehicle. The remote transmitter
should operate normally after battery replacement.
Replacing lost transmitters
If a remote transmitter has been lost and you would like to remove it
from the vehicle’s memory, or you would like to purchase additional
remote transmitters and have them programmed to your vehicle:
•Takeallyour vehicle’s transmitters to your dealer for programming, or
•Perform the programming procedure yourself.
Programming remote transmitters
It is necessary to haveall(maximum of six — original and/or new) of
your remote transmitters available prior to beginning this procedure. If
all remote entry transmitters are not present during the programming
procedure, the transmitters that are not present during programming will
no longer operate the vehicle.Note:Do not press the brake pedal
anytime during this sequencing, as doing so will invalidate the procedure.
To program the transmitters yourself:
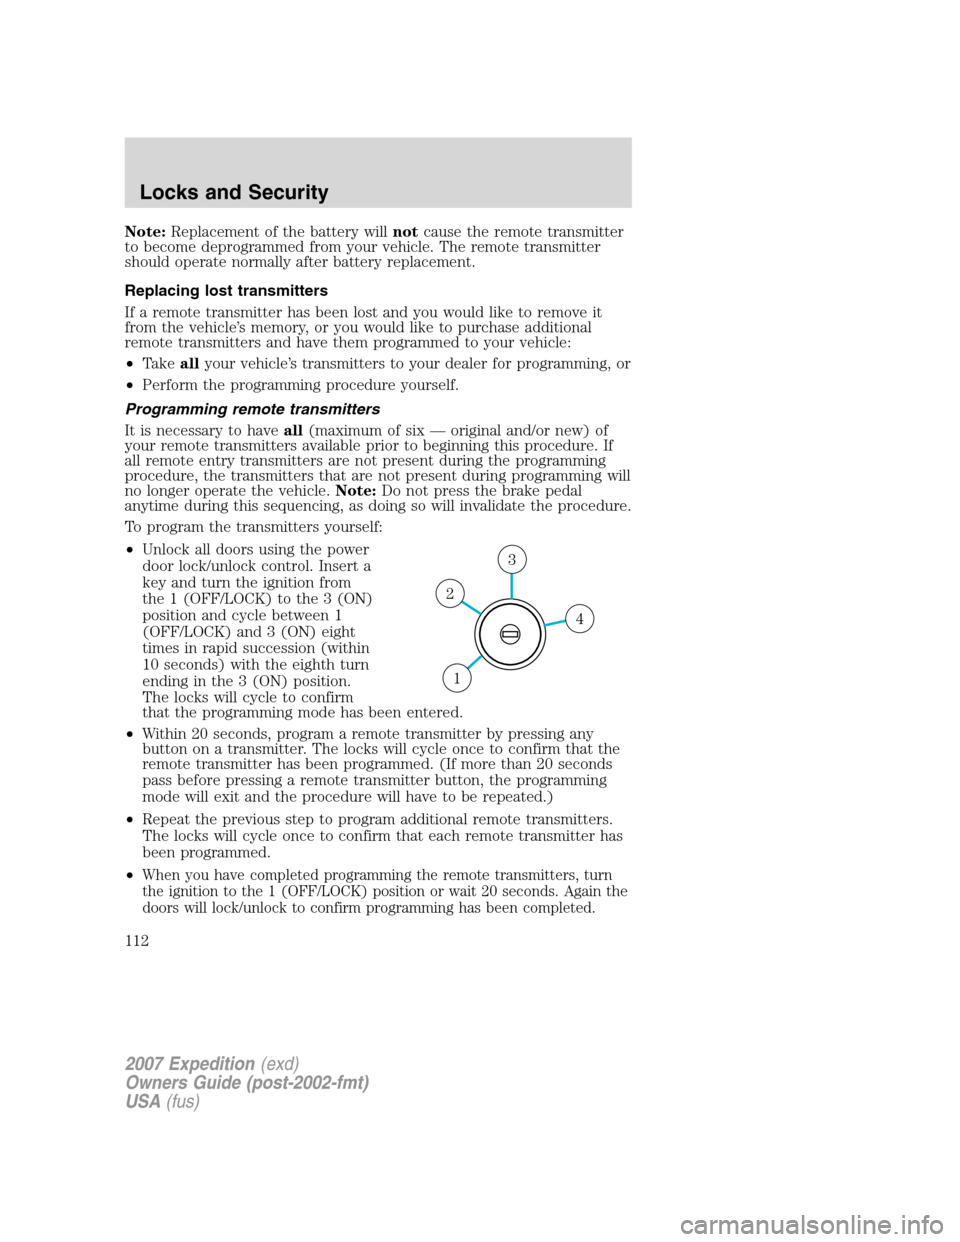
•Unlock all doors using the power
door lock/unlock control. Insert a
key and turn the ignition from
the 1 (OFF/LOCK) to the 3 (ON)
position and cycle between 1
(OFF/LOCK) and 3 (ON) eight
times in rapid succession (within
10 seconds) with the eighth turn
ending in the 3 (ON) position.
The locks will cycle to confirm
that the programming mode has been entered.
•Within 20 seconds, program a remote transmitter by pressing any
button on a transmitter. The locks will cycle once to confirm that the
remote transmitter has been programmed. (If more than 20 seconds
pass before pressing a remote transmitter button, the programming
mode will exit and the procedure will have to be repeated.)
•Repeat the previous step to program additional remote transmitters.
The locks will cycle once to confirm that each remote transmitter has
been programmed.
•
When you have completed programming the remote transmitters, turn
the ignition to the 1 (OFF/LOCK) position or wait 20 seconds. Again the
doors will lock/unlock to confirm programming has been completed.
4
3
2
1
2007 Expedition(exd)
Owners Guide (post-2002-fmt)
USA(fus)
Locks and Security
112