Page 167 of 266

166
IMPROVING FUEL
ECONOMY
The following instructions will help you
improve fuel economy.
Avoid excessive idling
If you are to wait for more than a minute
while you are parked, stop the engine and
start it again later. When warming up a
cold engine, allow the engine to idle until
the temperature gauge pointer comes up
to the “C” position (if the idling is not pro-
hibited). In this position, the engine is suf-
ficiently warm for starting off.
Avoid “fast” starts
Fast starts away from lights or stop signs
will consume fuel unnecessarily and short-
en engine life. Start off slowly.
Avoid unnecessary stops
Avoid unnecessary deceleration and stop-
ping. Try to maintain a slow, steady speed
whenever possible. Slowing down and
then accelerating again uses more fuel.
Keep a steady cruising speed
Keep as constant a speed as road and traf-
fic conditions will permit.Keep the air cleaner clean
A dirty air cleaner will cause the carbu-
retion system to supply too much fuel to
the engine for the amount of air being sup-
plied. The result is waste of fuel due to in-
complete combustion.
Keep weight to a minimum
The heavier the load, the more fuel the
vehicle consumes. Take out any luggage or
cargo when it is not necessary.
Keep tire pressures correct
Underinflation of the tires can waste fuel
due to increased running resistance of the
tires. Keep your tires inflated to the cor-
rect pressure shown on the label on the
driver’s side door or the driver’s door
lock pillar.
60A183
❒Do not idle the engine with any spark
plug wires disconnected or removed,
such as during diagnostic testing.
❒Do not idle the vehicle for prolonged
periods if idling seems rough or there
are other malfunctions.
❒Do not allow the fuel tank to get near
the empty level.
54G071S
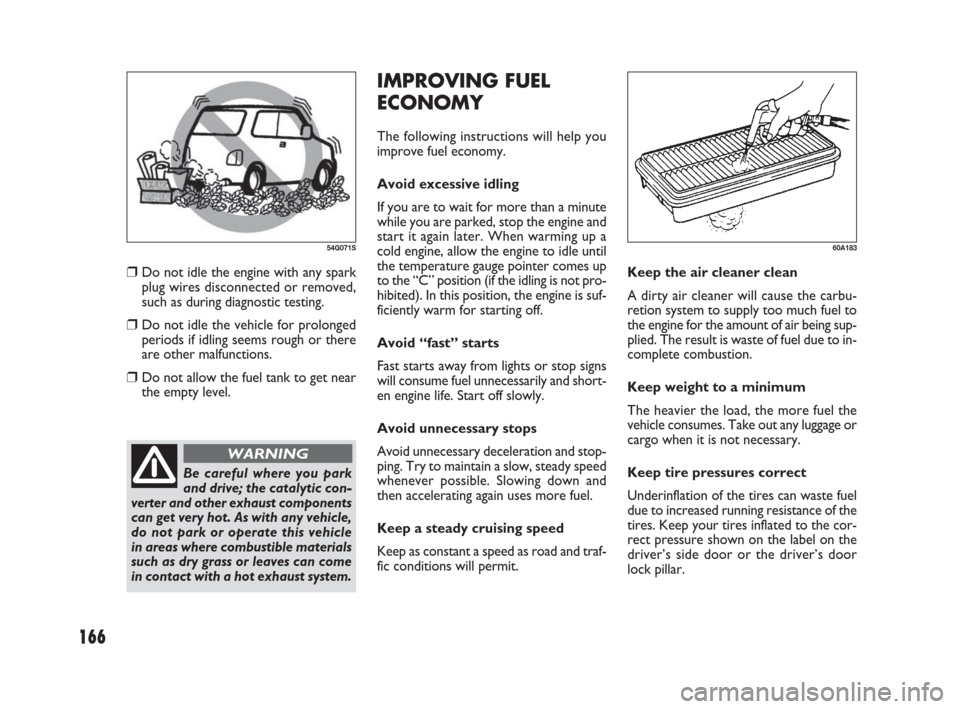
Be careful where you park
and drive; the catalytic con-
verter and other exhaust components
can get very hot. As with any vehicle,
do not park or operate this vehicle
in areas where combustible materials
such as dry grass or leaves can come
in contact with a hot exhaust system.
WARNING
149-166 Fiat16 New GB 27-11-2007 11:27 Pagina 166
Page 207 of 266

206
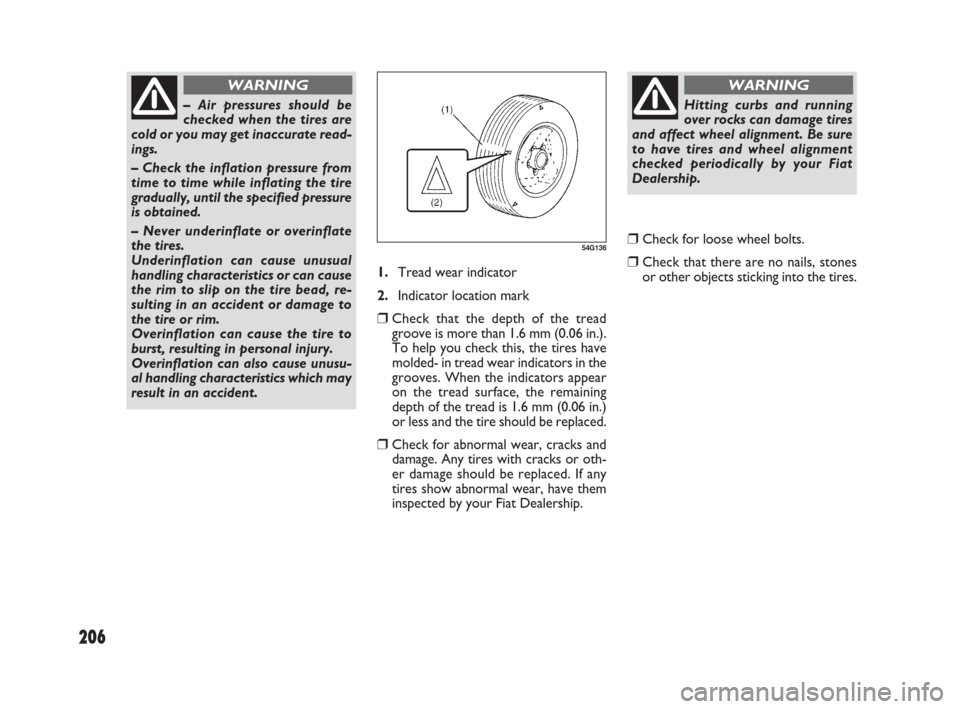
1.Tread wear indicator
2.Indicator location mark
❒Check that the depth of the tread
groove is more than 1.6 mm (0.06 in.).
To help you check this, the tires have
molded- in tread wear indicators in the
grooves. When the indicators appear
on the tread surface, the remaining
depth of the tread is 1.6 mm (0.06 in.)
or less and the tire should be replaced.
❒Check for abnormal wear, cracks and
damage. Any tires with cracks or oth-
er damage should be replaced. If any
tires show abnormal wear, have them
inspected by your Fiat Dealership.
❒Check for loose wheel bolts.
❒Check that there are no nails, stones
or other objects sticking into the tires.
54G136
– Air pressures should be
checked when the tires are
cold or you may get inaccurate read-
ings.
– Check the inflation pressure from
time to time while inflating the tire
gradually, until the specified pressure
is obtained.
– Never underinflate or overinflate
the tires.
Underinflation can cause unusual
handling characteristics or can cause
the rim to slip on the tire bead, re-
sulting in an accident or damage to
the tire or rim.
Overinflation can cause the tire to
burst, resulting in personal injury.
Overinflation can also cause unusu-
al handling characteristics which may
result in an accident.
WARNING
Hitting curbs and running
over rocks can damage tires
and affect wheel alignment. Be sure
to have tires and wheel alignment
checked periodically by your Fiat
Dealership.
WARNING
181-224 Fiat16 New GB 27-11-2007 11:30 Pagina 206
Page 229 of 266

228
❒Turn off all vehicle accessories, except
those necessary for safety reasons (for
example, headlights or hazard lights).
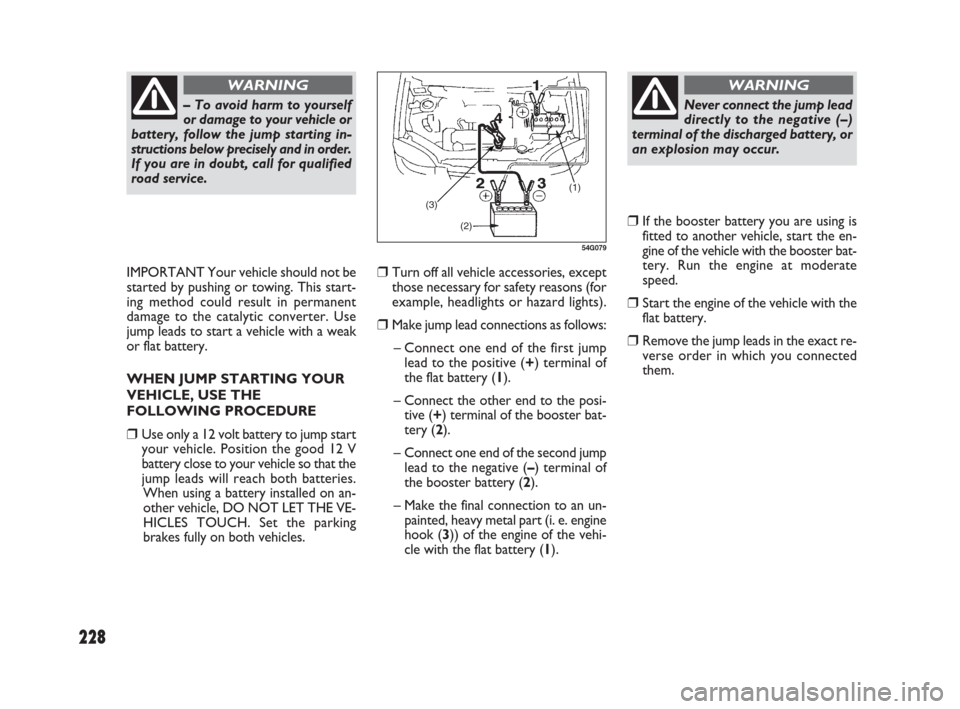
❒Make jump lead connections as follows:
– Connect one end of the first jump
lead to the positive (+) terminal of
the flat battery (1).
– Connect the other end to the posi-
tive (+) terminal of the booster bat-
tery (2).
– Connect one end of the second jump
lead to the negative (–) terminal of
the booster battery (2).
– Make the final connection to an un-
painted, heavy metal part (i. e. engine
hook (3)) of the engine of the vehi-
cle with the flat battery (1).
❒If the booster battery you are using is
fitted to another vehicle, start the en-
gine of the vehicle with the booster bat-
tery. Run the engine at moderate
speed.
❒Start the engine of the vehicle with the
flat battery.
❒Remove the jump leads in the exact re-
verse order in which you connected
them. IMPORTANT Your vehicle should not be
started by pushing or towing. This start-
ing method could result in permanent
damage to the catalytic converter. Use
jump leads to start a vehicle with a weak
or flat battery.
WHEN JUMP STARTING YOUR
VEHICLE, USE THE
FOLLOWING PROCEDURE
❒Use only a 12 volt battery to jump start
your vehicle. Position the good 12 V
battery close to your vehicle so that the
jump leads will reach both batteries.
When using a battery installed on an-
other vehicle, DO NOT LET THE VE-
HICLES TOUCH. Set the parking
brakes fully on both vehicles.
– To avoid harm to yourself
or damage to your vehicle or
battery, follow the jump starting in-
structions below precisely and in order.
If you are in doubt, call for qualified
road service.
WARNING
(1)
(3)
(2)
54G079
Never connect the jump lead
directly to the negative (–)
terminal of the discharged battery, or
an explosion may occur.
WARNING
225-232 Fiat16 New GB 27-11-2007 11:53 Pagina 228