Page 67 of 218

66GETTING TO KNOW YOUR VEHICLE
The rear window wiper will flick
three times after the lever is released.
“FOLLOW ME HOME”
function
This function allows the illumination
of the space in front of the vehicle.
Turning the function on
With the ignition key at STOP or
removed, pull the left-hand stalk to-
wards the steering wheel and operate
it within 2 minutes from when the en-
gine is turned off.
At each single movement of the stalk,
the staying on of the lights is extend-
ed by 30 seconds up to a maximumCEILING LIGHT
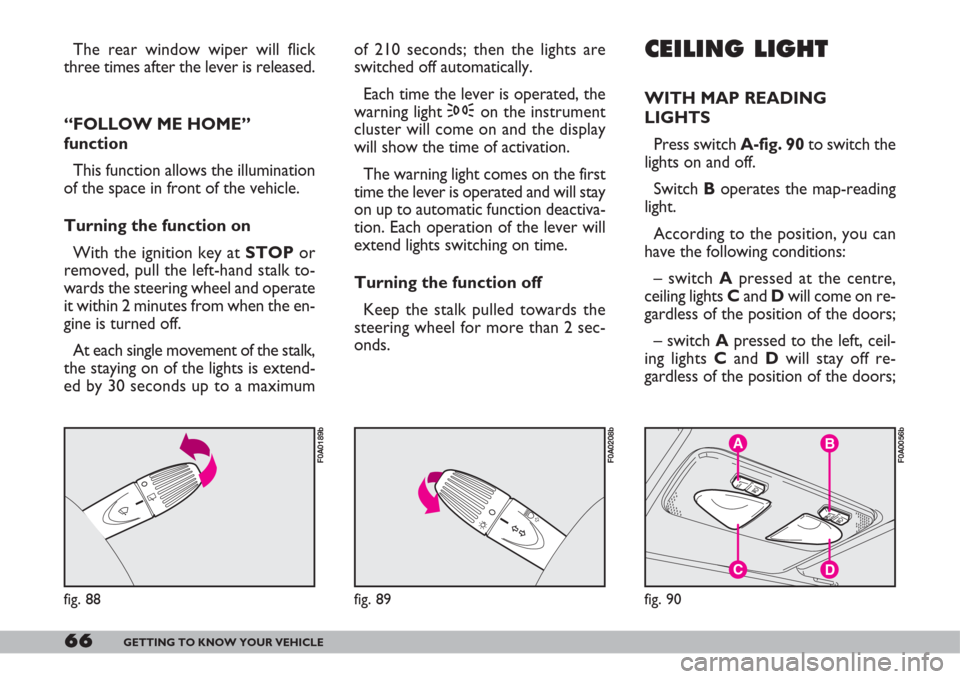
WITH MAP READING
LIGHTS
Press switch A-fig. 90to switch the
lights on and off.
Switch Boperates the map-reading
light.
According to the position, you can
have the following conditions:
– switch Apressed at the centre,
ceiling lights Cand Dwill come on re-
gardless of the position of the doors;
– switch Apressed to the left, ceil-
ing lights Cand Dwill stay off re-
gardless of the position of the doors;
',
fig. 88
F0A0189b
C
B
D
A
fig. 90
F0A0056b
6y1Δ
fig. 89
F0A0208b
of 210 seconds; then the lights are
switched off automatically.
Each time the lever is operated, the
warning light 3on the instrument
cluster will come on and the display
will show the time of activation.
The warning light comes on the first
time the lever is operated and will stay
on up to automatic function deactiva-
tion. Each operation of the lever will
extend lights switching on time.
Turning the function off
Keep the stalk pulled towards the
steering wheel for more than 2 sec-
onds.
Page 94 of 218

93GETTING TO KNOW YOUR VEHICLE
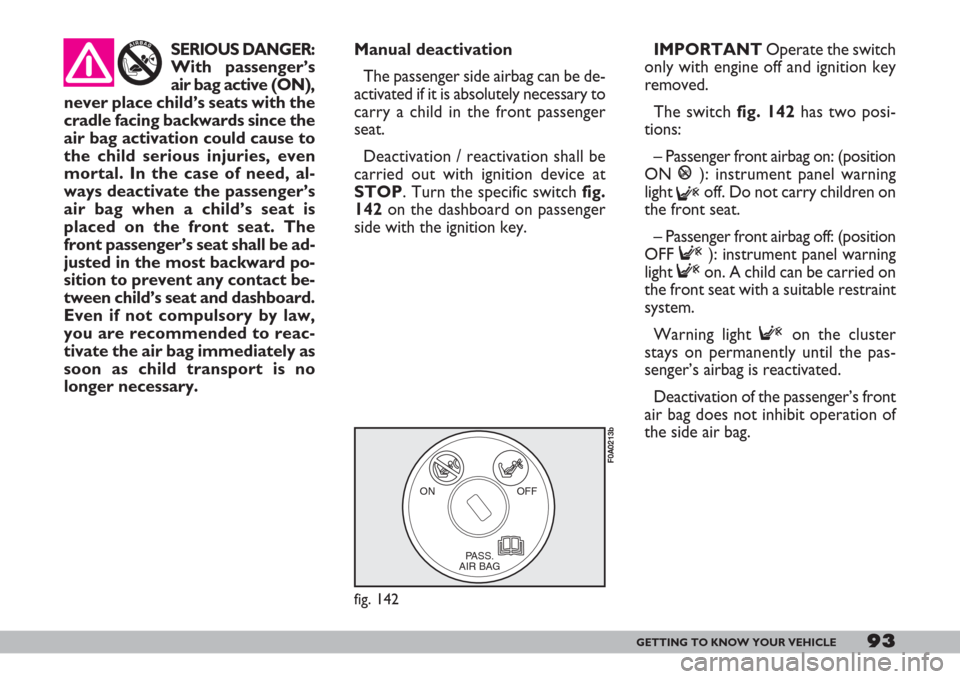
Manual deactivation
The passenger side airbag can be de-
activated if it is absolutely necessary to
carry a child in the front passenger
seat.
Deactivation / reactivation shall be
carried out with ignition device at
STOP. Turn the specific switch fig.
142on the dashboard on passenger
side with the ignition key.IMPORTANTOperate the switch
only with engine off and ignition key
removed.
The switch fig. 142has two posi-
tions:
– Passenger front airbag on: (position
ON P): instrument panel warning
light
Foff. Do not carry children on
the front seat.
– Passenger front airbag off: (position
OFF F): instrument panel warning
light Fon. A child can be carried on
the front seat with a suitable restraint
system.
Warning light Fon the cluster
stays on permanently until the pas-
senger’s airbag is reactivated.
Deactivation of the passenger’s front
air bag does not inhibit operation of
the side air bag.SERIOUS DANGER:
With passenger’s
air bag active (ON),
never place child’s seats with the
cradle facing backwards since the
air bag activation could cause to
the child serious injuries, even
mortal. In the case of need, al-
ways deactivate the passenger’s
air bag when a child’s seat is
placed on the front seat. The
front passenger’s seat shall be ad-
justed in the most backward po-
sition to prevent any contact be-
tween child’s seat and dashboard.
Even if not compulsory by law,
you are recommended to reac-
tivate the air bag immediately as
soon as child transport is no
longer necessary.
ON OFF
PASS.
AIR BAG
fig. 142
F0A0213b
Page 135 of 218

134IN AN EMERGENCY
REAR LIGHT CLUSTER
To replace a bulb, proceed as fol-
lows:
Versions equipped with rear
brackets:
1)Working inside the vehicle: re-
move the plastic cover fig. 25set on
the speaker seat fitting the screwdriv-
er under the plastic and making it slide
in parallel with the slot to spring the
2 front catches, pull the plastic cover
parallel with the supporting surface to
spring the rear catch and then remove
the upper plastic cover A-fig. 26us-
ing the screwdriver provided, in order
to make visible the fastening bolt Bof
the light unit.Versions not equipped with rear
brackets:
1)Act from inside the vehicle to re-
move upper plastic cap C-fig. 27by
means of the screwdriver available, so
that light cluster fastening bolt Dis
made visible.
AB
fig. 26
F0A0146b
DC
fig. 27
F0A0147b
fig. 25
F0A0149b
SIDE DIRECTION
INDICATORS
To change the bulb, proceed as fol-
lows:
1)Press the lens A-fig. 24in the di-
rection of the arrow so to compress
the clip and remove the cluster.
2)Turn the bulb holder counter-
clockwise, remove the snap-fitted bulb
and replace it.
fig. 24
F0A0524b
Page 136 of 218
135IN AN EMERGENCY
2)Fit the wrench provided A-fig. 28
(used also to remove the wheel) to
the fastening bolt of the light unit.
3)Loosen the bolts, then undo the
light cluster fastening nuts by means of
extension B-fig. 28supplied with the
unit.
As regards the 7-seater version is
concerned, undo the light cluster fas-
tening bolt by means of extension B-
fig. 28 inserted onto the bolt through
slotted hole C-fig. 28a.
4)Undo, after removing the fasten-
ing bolt, the cluster fastening screws
(located outside), as illustrated in
fig. 29.5)Take out the pressure-fit con-
nector.
6)Undo the four fastening screws to
remove the bulb holder and get access
to the bulbs.
7)Remove the bulbs fig. 30by push-
ing them gently and turning them
counterclockwise (bayonet fitting)
A– brake light bulb
B– indicator light bulb
C– reversing light bulb
D– sidelight bulb
E– rear fog light bulb
fig. 28a
F0A0406b
fig. 29
F0A0525b
fig. 30
F0A0526b
fig. 28
F0A0401b
Page 137 of 218
136IN AN EMERGENCY
THIRD BRAKE LIGHTS
To replace a bulb, open either the
left-hand door or the tailgate and
loosen the screws A-fig. 31.
Remove the lens from its housing
from the outside.
Remove the clipped-on bulb B-fig.
32and replace it.NUMBER PLATE LIGHT
To replace a bulb, press the tab in
the point shown in fig. 33and remove
the cluster. Turn the bulb holder A-
fig. 34anticlockwise and remove bulb
B. IF AN INTERIOR
LIGHT BURNS OUT
fig. 31
F0A0528b
B
fig. 32
F0A0144b
fig. 33
F0A0527b
fig. 34
F0A0529b
Modifications or repairs
to the electrical system
carried out incorrectly
and without bearing the features
of the system in mind can cause
malfunctions with the risk of fire.
See “If a bulb burns out” in this chap-
ter for bulb type and power.