Page 356 of 496
WARNING!
After using the jack and tools, always reinstall them
in the original carrier and location. While driving
you may experience, abrupt stopping, rapid accelera-
tion, or sharp turns. A loose jack, tools, bracket or
other objects in the vehicle may move around with
force, resulting in serious injury.
JACKING INSTRUCTIONS
Removing The Spare Tire
Remove the spare tire before attempting to jack the truck.
Attach the wheel wrench to the jack extension tube. Insert
the tube through the access hole between the lower
tailgate and the top of the bumper and into the winch
mechanism tube. Rotate the wheel wrench handle coun-
terclockwise until the spare tire is on the ground with
enough cable slack to allow you to pull it out from under the vehicle. When the spare is clear, tilt the retainer at the
end of the cable and pull it through the center of the
wheel.
It is recommended that you stow the flat or spare to
avoid tangling the loose cable.
356 WHAT TO DO IN EMERGENCIES
Page 357 of 496
NOTE:The winch mechanism is designed for use with
the jack extension tube only. Use of an air wrench or other
power tools is not recommended and can damage the
winch.
Tire Changing Procedure
WARNING!
Getting under a jacked-up vehicle is dangerous. The
vehicle could slip off the jack and fall on you. You
could be crushed. Never get any part of your body
under a vehicle that is on a jack. Never start or run
the engine while the vehicle is on a jack. If you need
to get under a raised vehicle, take it to a service
center where it can be raised on a lift.
Do not raise this vehicle using a bumper jack. The jack is
designed as a tool for changing tires on this vehicle only.
It is not recommended that the jack be used for service
purposes or to lift more than one wheel at a time.
Preparations
Park the vehicle on a firm level surface, avoiding ice or
slippery areas. Set the parking brake and place the gear
selector in PARK (automatic transmission) or REVERSE
(manual transmission). On four-wheel drive vehicles,
shift the transfer case to the “4L” position.
WARNING!
Do not attempt to change a tire on the side of the
vehicle close to moving traffic. Pull far enough off
the road to avoid the danger of being hit when
operating the jack or changing the wheel.
WHAT TO DO IN EMERGENCIES 357
6
Page 365 of 496
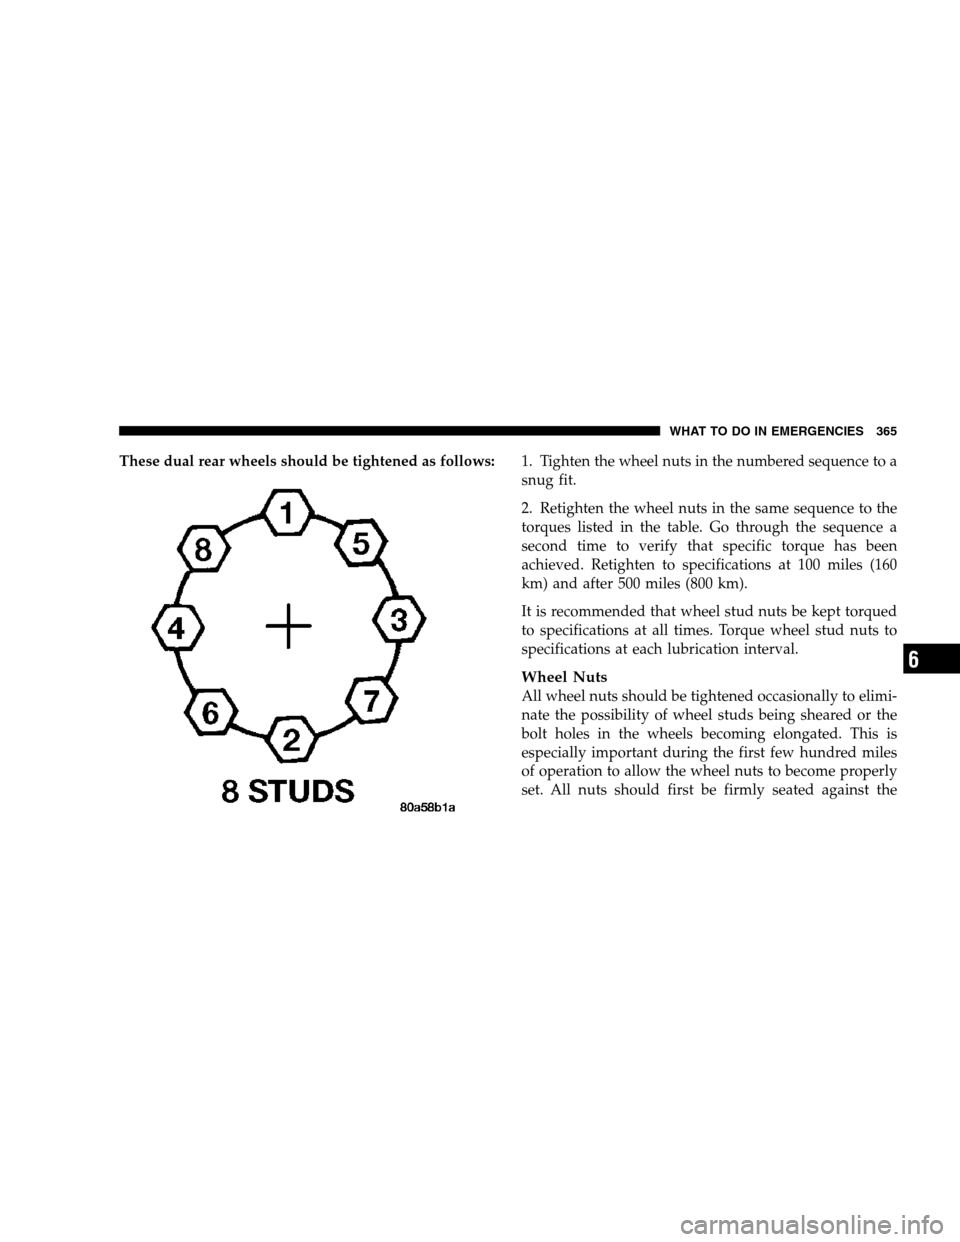
These dual rear wheels should be tightened as follows:1. Tighten the wheel nuts in the numbered sequence to a
snug fit.
2. Retighten the wheel nuts in the same sequence to the
torques listed in the table. Go through the sequence a
second time to verify that specific torque has been
achieved. Retighten to specifications at 100 miles (160
km) and after 500 miles (800 km).
It is recommended that wheel stud nuts be kept torqued
to specifications at all times. Torque wheel stud nuts to
specifications at each lubrication interval.
Wheel Nuts
All wheel nuts should be tightened occasionally to elimi-
nate the possibility of wheel studs being sheared or the
bolt holes in the wheels becoming elongated. This is
especially important during the first few hundred miles
of operation to allow the wheel nuts to become properly
set. All nuts should first be firmly seated against the
WHAT TO DO IN EMERGENCIES 365
6
Page 366 of 496
wheel. The nuts should then be tightened to recom-
mended torque. Tighten the nuts to final torque in
increments. Progress around the bolt circle, tightening
the nut opposite to the nut just previously tightened until
final torque is achieved. Recommended torques are
shown in the following chart.
Disc
Wheels Type Nut Stud Size Torque
Ft. Lbs. Torque
Newton
Meters
Cone 9/16-18 120-150 160-200
Flanged 9/16-18 130-160 190-220
To Stow The Flat Or Spare
Turn the wheel so that the valve stem is down. Slide the
wheel retainer through the center of the wheel and
position it properly across the wheel opening.
For convenience in checking the spare tire inflation, stow
with the valve stem toward the rear of the vehicle. Attach the wheel wrench to the extension tube. Rotate the
winch mechanism until the wheel is drawn into place
against the underside of the vehicle. Continue to rotate
until you feel the winch mechanism slip or click 3 or 4
times. It cannot be overtightened. Push against the tire
several times to be sure it is firmly in place.
HOISTING
A conventional floor jack may be used at the jacking
locations, refer to the graphics that show jacking loca-
tions. However, a floor jack or frame hoist must never be
used on any other parts or the underbody.
CAUTION!
Never use a floor jack directly under the differential
housing of a loaded truck or damage to your vehicle
may result.
366 WHAT TO DO IN EMERGENCIES
Page 371 of 496
not freeing the vehicle, may lead to transmission over-
heating and failure. Allow the engine to idle with the
transmission selector in NEUTRAL for at least one
minute after every five rocking-motion cycles. This will
minimize overheating and reduce the risk of transmis-
sion failure during prolonged efforts to free a stuck
vehicle.
EMERGENCY TOW HOOKS — IF EQUIPPED
Your vehicle may be equipped with emergency tow
hooks.
NOTE: For off-road recovery, it is recommended to use
both of the front tow hooks to minimize the risk of
damage to the vehicle.
WARNING!
Chains are not recommended for freeing a stuck
vehicle. Chains may break, causing serious injury or
death.
WARNING!
Stand clear of vehicles when pulling with tow
hooks. Tow straps and chains may break, causing
serious injury.
WHAT TO DO IN EMERGENCIES 371
6
Page 379 of 496
ONBOARD DIAGNOSTIC SYSTEM (OBD II)
Vehicles equipped with California emissions controls
have a sophisticated onboard diagnostic system called
OBDII. This system monitors the performance of the
emissions, engine, and automatic transmission control
systems. When these systems are operating properly,
your vehicle will provide excellent performance and fuel
economy, as well as engine emissions well within current
government regulations.
If any of these systems require service, the OBD II system
will turn on the “Malfunction Indicator Light.” It will
also store diagnostic codes and other information to
assist your service technician in making repairs. Al-
though your vehicle will usually be driveable and not
need towing, see your dealer for service as soon as
possible.CAUTION!
Prolonged driving with the “Malfunction Indicator
Light” on could cause further damage to the emis-
sion control system. It could also affect fuel economy
and driveability. The vehicle must be serviced before
any emissions tests can be performed.
If the “Malfunction Indicator Light” is flashing,
severe catalytic converter damage and power loss
will soon occur. Immediate service is required.
REPLACEMENT PARTS
Use of genuine Mopar �parts for normal/scheduled
maintenance and repairs is highly recommended to in-
sure the designed performance. Damage or failures
caused by the use of non-Mopar parts for maintenance
and repairs will not be covered by the manufacturer’s
warranty.
MAINTAINING YOUR VEHICLE 379
7
Page 385 of 496
IfANY of these apply to you, then change your engine oil
at every interval shown in schedule �B�of the �Mainte-
nance Schedules �section of this manual.
If none of these apply to you, then change your engine oil
at every interval shown on schedule �A�of the �Mainte-
nance Schedules �section of this manual.
NOTE: Most vehicles are operated under the conditions
listed for Schedule �B.�
Engine Oil Selection
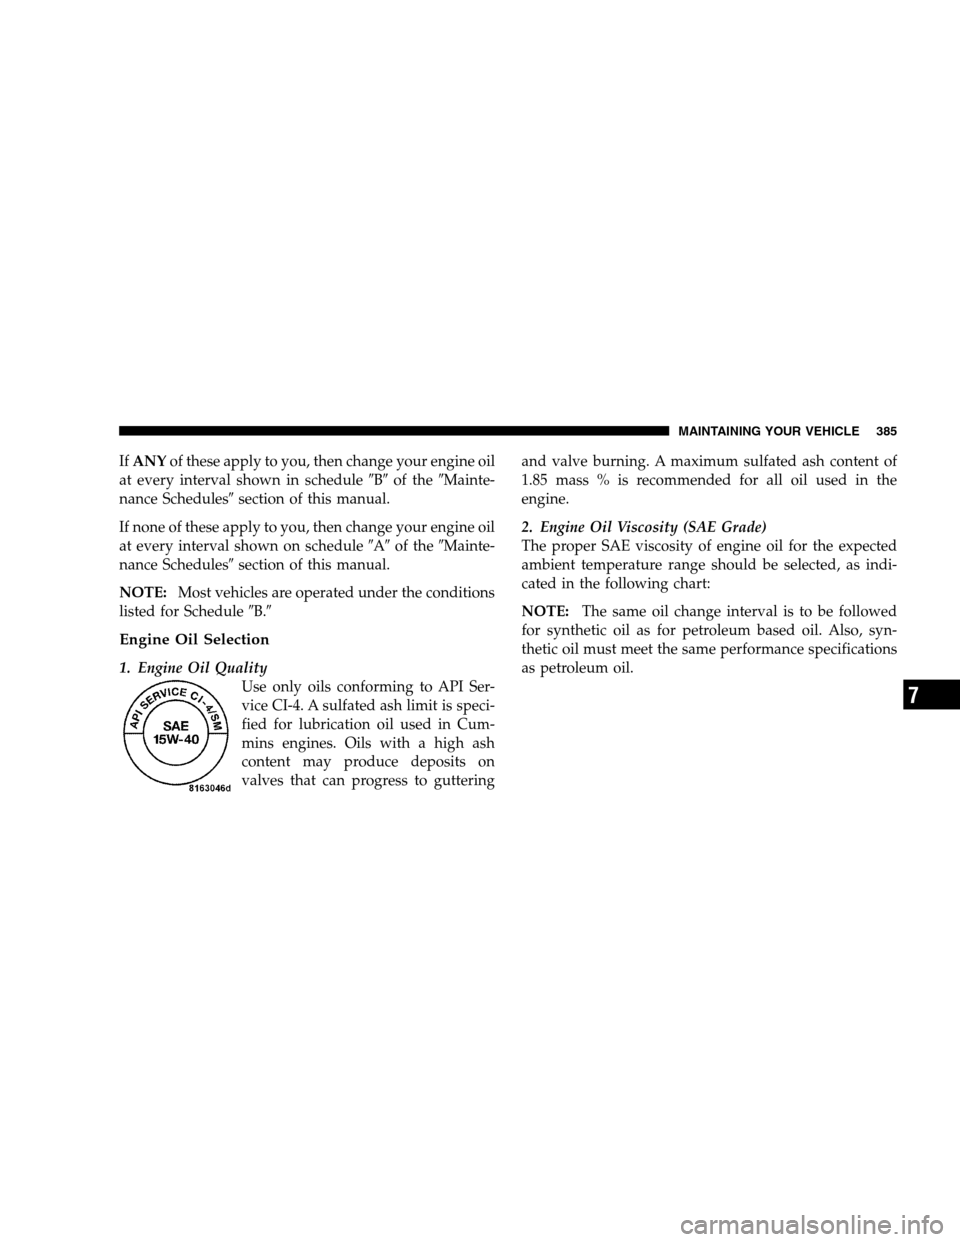
1. Engine Oil Quality
Use only oils conforming to API Ser-
vice CI-4. A sulfated ash limit is speci-
fied for lubrication oil used in Cum-
mins engines. Oils with a high ash
content may produce deposits on
valves that can progress to guttering and valve burning. A maximum sulfated ash content of
1.85 mass % is recommended for all oil used in the
engine.
2. Engine Oil Viscosity (SAE Grade)
The proper SAE viscosity of engine oil for the expected
ambient temperature range should be selected, as indi-
cated in the following chart:
NOTE:
The same oil change interval is to be followed
for synthetic oil as for petroleum based oil. Also, syn-
thetic oil must meet the same performance specifications
as petroleum oil.
MAINTAINING YOUR VEHICLE 385
7
Page 386 of 496

You may use synthetic engine oils provided the recom-
mended oil quality requirements are met, and the recom-
mended maintenance intervals for oil and filter changes
are followed.
Materials Added to Engine Oil
The manufacture strongly recommends against the addi-
tion of any additives (other than leak detection dyes or lube odorants) to the engine oil. Engine oil is an engi-
neered product and it’s performance may be impaired by
supplemental additives.
NOTE:
The manufacturer offers a lube odorant (Mopar
Diesel Fresh) for diesel engines crankcases. The lube
odorant is recommended by the manufacturer to reduce
the sulfur smell that may occur during engine idling.
Engine Oil Filter
Refer to Fluids, Lubricants and Genuine Parts for the
correct part number. The engine oil filter should be
changed at everyengine oil change.
Engine Oil And Filter — Change
Operate the engine until the coolant temperature reaches
140°F (60°C). Shut the engine off. Remove the oil drain
plug.
Use a container that can hold at least 12 quarts (11.3
Liters) to hold the used oil.
386 MAINTAINING YOUR VEHICLE