Page 253 of 504

FF/TUNE/RW
Press FF (Fast Forward) and the CD player will begin to
fast forward until FF is released. The RW (Reverse)
button works in a similar manner.
Random Play — RND/Program Button 4
Press the RND (button 4) button while the CD is playing
to activate Random Play. This feature plays the tracks on
the selected disc in random order to provide an interest-
ing change of pace.
Press the SEEK button to move to the next randomly
selected track.
Press the RND (button 4) button a second time to stop
Random Play.
Mode
Press the MODE button repeatedly to select between the
CD player, the optional remote CD changer and theSatellite Radio (if equipped). When Satellite Radio (if
equipped) is selected “SAT” will appear in your radio
display.
A CD or tape may remain in the player while in the
Satellite mode.
Ti m e
Press the TIME button to change the display from
elapsed CD playing time to time of day.
CD Changer Control Capability — If Equipped
This radio is compatible with a remote mounted CD
changer available through Mopar Accessories. The fol-
lowing instructions are for the radio controls that operate
this CD changer.
Mode Button
To activate the CD changer, press the MODE button until
CD information appears on the display.
UNDERSTANDING YOUR INSTRUMENT PANEL 253
4
Page 265 of 504
2. Enter Button
This button will enter the selection from the
on-screen menu.
3. Brightness Button
Changes the brightness of the screen picture.
Video Screen Controls
UNDERSTANDING YOUR INSTRUMENT PANEL 265
4
Page 266 of 504
Operating Instructions — Headphones
1. Power Button
2. Volume Control
3. Power Indicator
Power Button
Pressing the power button will turn the headphones
ON/OFF. An indicator light will illuminate on the head-
phone earpiece to indicate the headphones are ON.
NOTE:
•The headphones will turn off automatically in ap-
proximately 3 minutes if they lose the signal form the
system or when the radio or rear audio/video system
is turned off.
Volume Control
Rotate the volume control to adjust the volume to the
desired listening level.
Headphone Battery Service
•
Press the button at the bottom of each headphone
earpiece and lift the cover upward.
Headphone Controls
266 UNDERSTANDING YOUR INSTRUMENT PANEL
Page 272 of 504

Reception Quality
Satellite reception may be interrupted due to one of the
following reasons.
•The vehicle is parked in an underground parking
structure or under a physical obstacle.
•Dense tree coverage may interrupt reception in the
form of short audio mutes.
•Driving under wide bridges or along tall buildings can
cause intermittent reception.
•Placing objects over or too close to the antenna can
cause signal blockage.
RADIO OPERATION AND CELLULAR PHONES
Under certain conditions, the cellular phone being ON in
your vehicle can cause erratic or noisy performance from
your radio. This condition may be lessened or eliminated
by relocating the cellular phone antenna. This condition
is not harmful to the radio. If your radio performance
does not satisfactorily “clear” by the repositioning of the
antenna, it is recommended that the radio volume be
turned down or off during cellular phone operation.
REMOTE SOUND SYSTEM CONTROLS — IF
EQUIPPED
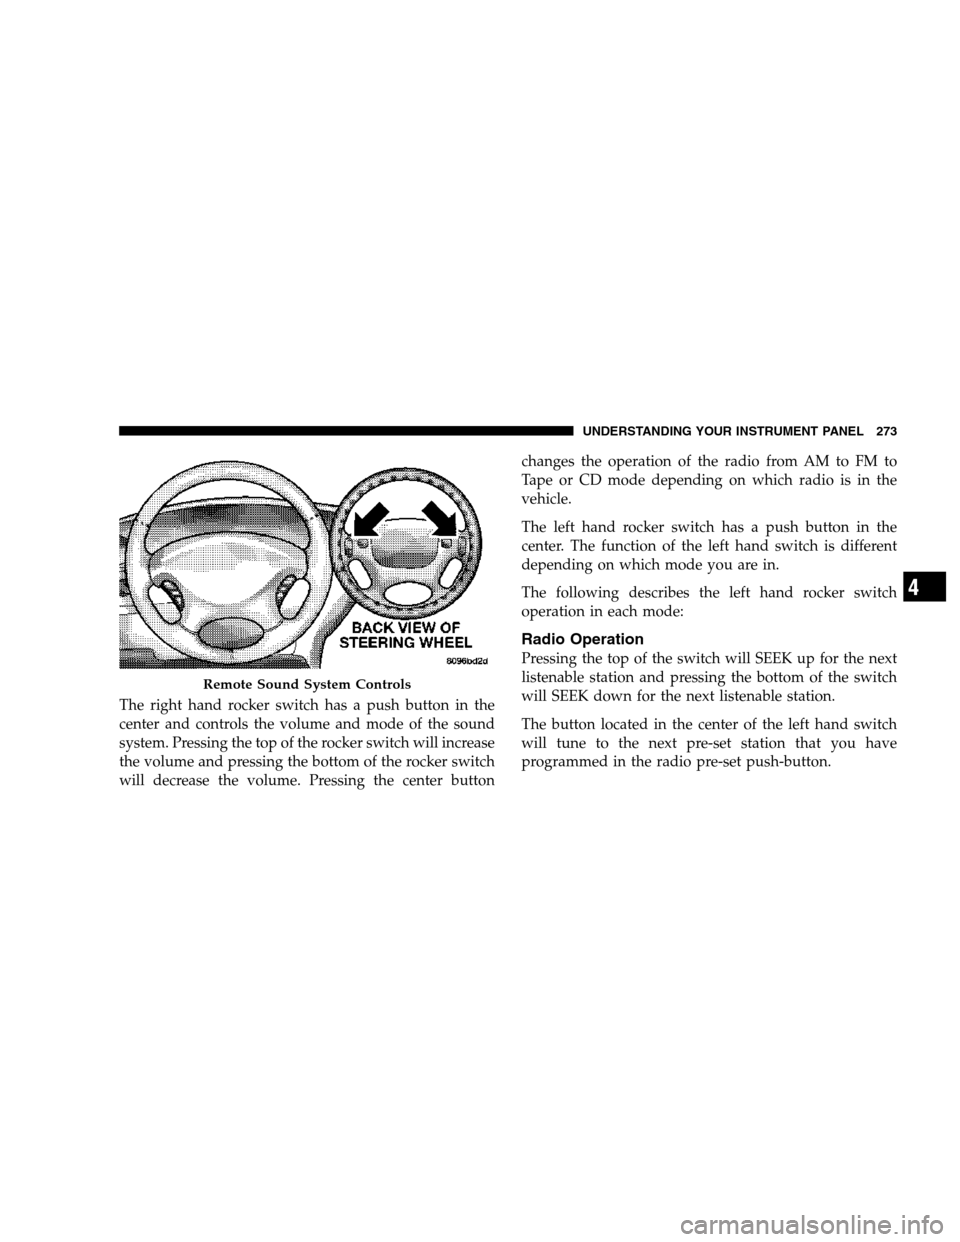
The remote sound system controls are located on the rear
surface of the steering wheel at the 3 and 9 O’clock
positions.
272 UNDERSTANDING YOUR INSTRUMENT PANEL
Page 273 of 504

The right hand rocker switch has a push button in the
center and controls the volume and mode of the sound
system. Pressing the top of the rocker switch will increase
the volume and pressing the bottom of the rocker switch
will decrease the volume. Pressing the center buttonchanges the operation of the radio from AM to FM to
Tape or CD mode depending on which radio is in the
vehicle.
The left hand rocker switch has a push button in the
center. The function of the left hand switch is different
depending on which mode you are in.
The following describes the left hand rocker switch
operation in each mode:
Radio Operation
Pressing the top of the switch will SEEK up for the next
listenable station and pressing the bottom of the switch
will SEEK down for the next listenable station.
The button located in the center of the left hand switch
will tune to the next pre-set station that you have
programmed in the radio pre-set push-button.
Remote Sound System Controls
UNDERSTANDING YOUR INSTRUMENT PANEL 273
4
Page 276 of 504
CLIMATE CONTROLS
The Air Conditioning and Heating System is designed to
make you comfortable in all types of weather.
Manual Air Conditioning and Heating SystemFront Blower Control
The Front Blower Control selects whether the Cli-
mate Control System is ON or OFF. When the blower
control is set to the O (OFF) position the front blower will
turn off and the system will be placed in the Recirculation
mode. When the blower control is set to any position
other than off, it selects the amount of air delivered to the
passenger compartment. There are four blower speeds.
The fan speed increases as you
move the control clockwise.
Manual Air Conditioning and Heating Controls
276 UNDERSTANDING YOUR INSTRUMENT PANEL
Page 284 of 504
Manual Rear Zone Climate Control — If Equipped
The Manual Rear Zone Climate Control system has floor
air outlets to the rear of the right side sliding door and
overhead outlets at each outboard rear seating position.
The unit provides warm or cool air through the floor and
upper outlets.
The rear blower and temperature controls for the rear
seat passengers are located in the headliner near the
center of the vehicle.
Rear Blower Control
The primary control for the rear blower is on the front
climate control unit located on the instrument panel.
Manual Rear Zone Climate ControlRear Blower Control
284 UNDERSTANDING YOUR INSTRUMENT PANEL
Page 285 of 504

The center knob on the front climate control unit has five
positions, “REAR”, “OFF”, and a range of blower speeds.
Only when the primary control for the rear blower is in
the “REAR” position do the second seat occupants have
control of the rear blower speed.
The rear blower control, located in the headliner near the
center of the vehicle has an OFF position and 3 blower
speed positions. This allows the second seat occupants to
control the volume of air circulated in the rear of the
vehicle.CAUTION!
Interior air enters the Manual Rear Zone Climate
Control system through an intake grille located in
the passenger side trim panel behind the third seat.
The heater outlets are located in the passenger side
trim panel just behind the sliding door. Do not block
or place objects directly in front of the inlet grille or
heater outlets. The electrical system could overload
causing damage to the blower motor.
Rear Temperature And Mode Control
When the center knob on the front climate control unit is
set to the “REAR” position, the second seat occupants
have control of the rear temperature and modes as
follows:
•The rear temperature knob controls both the rear
temperature and mode. When the temperature knob is
UNDERSTANDING YOUR INSTRUMENT PANEL 285
4