2007 CHEVROLET TAHOE Acc outlets
[x] Cancel search: Acc outletsPage 203 of 634

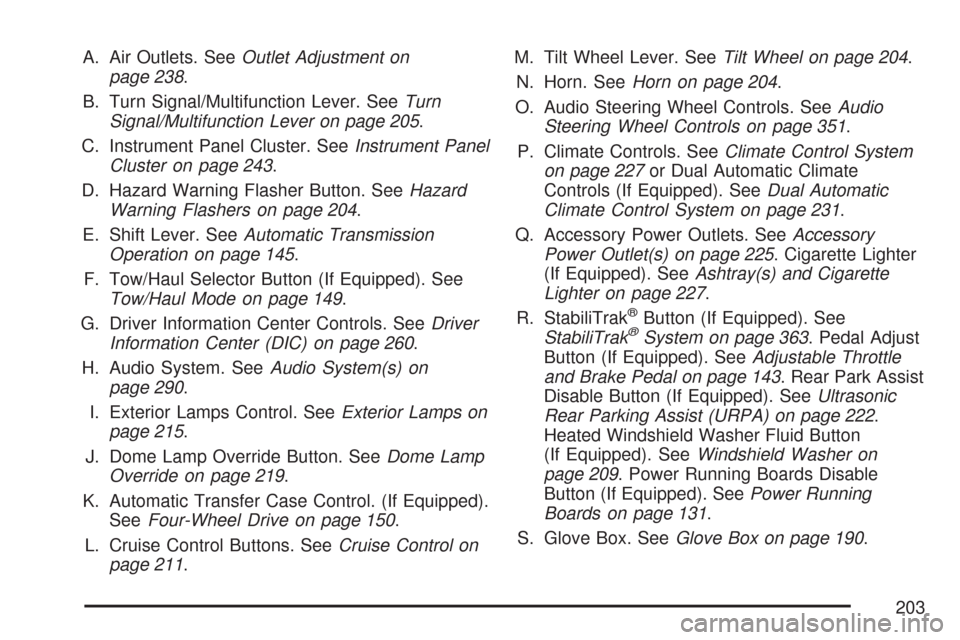
A. Air Outlets. SeeOutlet Adjustment on
page 238.
B. Turn Signal/Multifunction Lever. SeeTurn
Signal/Multifunction Lever on page 205.
C. Instrument Panel Cluster. SeeInstrument Panel
Cluster on page 243.
D. Hazard Warning Flasher Button. SeeHazard
Warning Flashers on page 204.
E. Shift Lever. SeeAutomatic Transmission
Operation on page 145.
F. Tow/Haul Selector Button (If Equipped). See
Tow/Haul Mode on page 149.
G. Driver Information Center Controls. SeeDriver
Information Center (DIC) on page 260.
H. Audio System. SeeAudio System(s) on
page 290.
I. Exterior Lamps Control. SeeExterior Lamps on
page 215.
J. Dome Lamp Override Button. SeeDome Lamp
Override on page 219.
K. Automatic Transfer Case Control. (If Equipped).
SeeFour-Wheel Drive on page 150.
L. Cruise Control Buttons. SeeCruise Control on
page 211.M. Tilt Wheel Lever. SeeTilt Wheel on page 204.
N. Horn. SeeHorn on page 204.
O. Audio Steering Wheel Controls. SeeAudio
Steering Wheel Controls on page 351.
P. Climate Controls. SeeClimate Control System
on page 227or Dual Automatic Climate
Controls (If Equipped). SeeDual Automatic
Climate Control System on page 231.
Q. Accessory Power Outlets. SeeAccessory
Power Outlet(s) on page 225. Cigarette Lighter
(If Equipped). SeeAshtray(s) and Cigarette
Lighter on page 227.
R. StabiliTrak
®Button (If Equipped). See
StabiliTrak®System on page 363. Pedal Adjust
Button (If Equipped). SeeAdjustable Throttle
and Brake Pedal on page 143. Rear Park Assist
Disable Button (If Equipped). SeeUltrasonic
Rear Parking Assist (URPA) on page 222.
Heated Windshield Washer Fluid Button
(If Equipped). SeeWindshield Washer on
page 209. Power Running Boards Disable
Button (If Equipped). SeePower Running
Boards on page 131.
S. Glove Box. SeeGlove Box on page 190.
203
Page 221 of 634

The battery can be discharged at idle if the
electrical loads are very high. This is true for
all vehicles. This is because the generator
(alternator) may not be spinning fast enough at
idle to produce all the power that is needed for very
high electrical loads.
A high electrical load occurs when several of the
following loads are on: headlamps, high beams,
fog lamps, rear window defogger, climate
control fan at high speed, heated seats, engine
cooling fans, trailer loads, and loads plugged into
accessory power outlets.
EPM works to prevent excessive discharge of the
battery. It does this by balancing the generator’s
output and the vehicle’s electrical needs. It
can increase engine idle speed to generate more
power, whenever needed. It can temporarily
reduce the power demands of some accessories.Normally, these actions occur in steps or levels,
without being noticeable. In rare cases at the
highest levels of corrective action, this action may
be noticeable to the driver. If so, a Driver
Information Center (DIC) message might be
displayed, such as Battery Saver Active or Service
Battery Charging System. If this message is
displayed, it is recommended that the driver
reduce the electrical loads as much as possible.
SeeDIC Warnings and Messages on page 270.
Battery Run-Down Protection
This feature shuts off the dome, and reading
lamps if they are left on for more than 10 minutes
when the ignition is off. This will keep the
battery from running down.
221
Page 225 of 634

The ultrasonic sensors are not kept clean. So,
be sure to keep your vehicle’s rear bumper
free of mud, dirt, snow, ice, and slush.
For cleaning instructions, seeWashing Your
Vehicle on page 557. If the DIC still displays
the PARKING ASSIST OFF message
after cleaning the bumper and driving forward
at a speed of at least 15 mph (25 km/h),
see your dealer.
Other conditions that may affect system
performance include vibrations from a
jackhammer or the compression of air brakes
on a very large truck or other mechanical
devices that interfere with URPA performance.
When URPA is disabled without driver
action and the driver attempts to turn URPA
back on by pressing the rear park aid
button, the indicator light will �ash for
3 seconds and then stay lit to indicate that
URPA is off.
As always, drivers should use care when backing
up a vehicle. Always look behind you, being
sure to check for other vehicles, obstructions and
blind spots.For Driver Information Center messages related to
URPA, seeDIC Warnings and Messages on
page 270.
If the vehicle bumper is damaged, the URPA
system may not work properly. Take the vehicle to
your dealer to repair the system.
Accessory Power Outlet(s)
Accessory power outlets can be used to
connect auxiliary electrical equipment, such as a
cellular telephone or CB radio. The outlet can
accept electrical equipment up to a maximum of
20 amperes.
There are four accessory power outlets. There are
two under the climate controls, one on the back
of the �oor console and a additional accessory
power outlet in the rear cargo area on the
passenger side.
225
Page 226 of 634

To use the power outlet, lift the spring cap and
insert electrical 12V device plug. To close
the power outlet, remove 12V electrical device
plug and the spring cap will close.
The accessory power outlets are powered, even
with the ignition off. Continuing to use power
outlets while the ignition is off may cause
the vehicle’s battery to run down.
Notice:If electrical devices are left plugged
into a power outlet, the battery may drain
causing your vehicle not to start or damage to
the battery. This would not be covered by
the warranty. Always unplug all electrical
devices when turning off your vehicle.
Certain power accessory plugs may not be
compatible to the accessory power outlet and
could result in blown adapter or vehicle fuses.
If you experience a problem, see your dealer for
additional information on the accessory power
plugs.Notice:Adding any electrical equipment to
your vehicle may damage it or keep other
components from working as they should. The
repairs would not be covered by your
warranty. Do not use equipment exceeding
maximum amperage rating of 20 amperes.
Check with your dealer/retailer before adding
electrical equipment.
When adding electrical equipment, be sure to
follow the proper installation instructions included
with the equipment. Do not use equipment
exceeding the maximum amperage rating of
20 amperes.
Notice:Improper use of the power outlet can
cause damage not covered by your warranty.
Do not hang any type of accessory or
accessory bracket from the plug because the
power outlets are designed for accessory
power plugs only.
226
Page 240 of 634

Mode Knob
The right knob on the control panel allows you to
choose the direction of air delivery.
H(Vent):This setting directs the air through the
headliner outlets.
)(Bi-Level):Air is delivered through the �oor
outlets as well as the headliner outlets. The
rear system �oor outlets are located directly behind
the second row seats. The �ow can be divided
between vent and �oor outlets depending
upon where the knob is placed between the
settings.
6(Floor):This setting directs most of the air
through the �oor outlets. The rear system
�oor outlets are located directly behind the second
row seats.
Rear Air Conditioning and Heating
System and Electronic Climate
Controls
If your vehicle has this system, the rear heat and
air conditioning controls are integrated with the
rear seat audio controls located in the center
console. The system can be controlled from the
front controls as well as the rear controls.
To turn the system on, press the AUX button on
the front climate control system, an indicator will be
lit. Pressing the AUX button the �rst time will
turn the rear system on in a mimic mode. In this
mode, the air�ow in the rear will be approximately
the same direction, temperature, and fan speed
as the front. Pressing the AUX button again
will turn the rear system and the indicator off.
If the rear controls are adjusted, the system will
enter a rear independent mode. Air�ow in the rear
will then be directed according to the settings of
rear controls. The rear system can be turned off by
pressing the AUX button on the front climate
control system and the indicator will turn off.
If the indicator in the front AUX button is off, the
rear system is off.
240
Page 492 of 634

Notice:If you leave your radio or other
accessories on during the jump starting
procedure, they could be damaged. The repairs
would not be covered by your warranty. Always
turn off your radio and other accessories when
jump starting your vehicle.
3. Turn off the ignition on both vehicles. Unplug
unnecessary accessories plugged into the
cigarette lighter or the accessory power outlets.
Turn off the radio and all the lamps that are not
needed. This will avoid sparks and help save
both batteries. And it could save the radio!
4. Open the hood on the other vehicle and locate
the positive (+) and negative (−) terminal
locations on that vehicle.
Your vehicle has a remote positive (+) jump
starting terminal and a remote negative (−)
jump starting terminal. You should always use
these remote terminals instead of the
terminals on the battery.
The remote positive (+) terminal, if equipped, is
located under a red plastic cover at the positive
battery post. To uncover the remote positive (+)
terminal, open the red plastic cover.The remote negative (-) terminal is a stud located
on the right front of the engine, where the
negative battery cable attaches.
SeeEngine Compartment Overview on page 458
for more information on the location of the
remote positive (+) and remote negative (-)
terminals.
492
Page 565 of 634

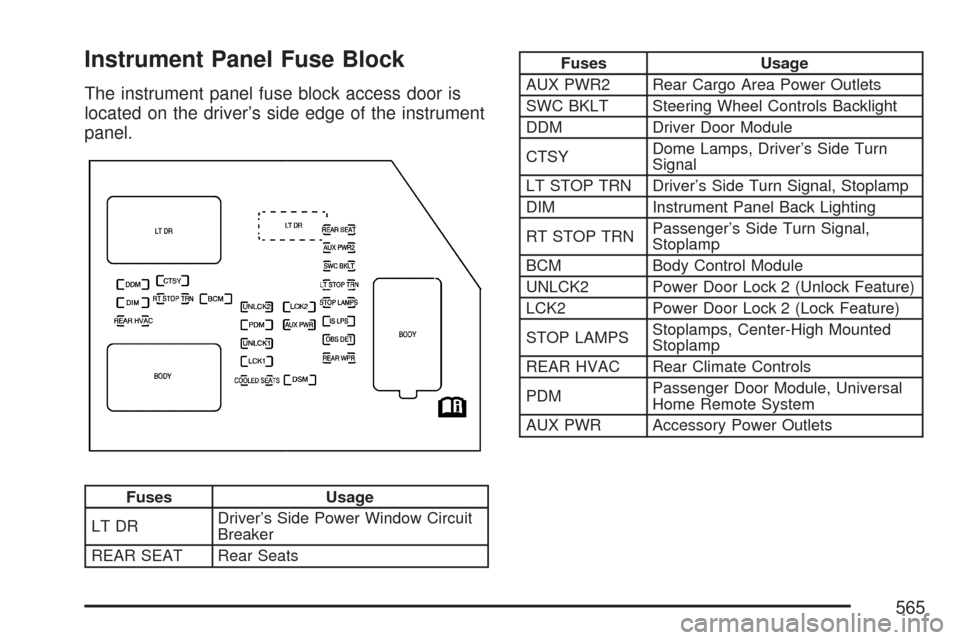
Instrument Panel Fuse Block
The instrument panel fuse block access door is
located on the driver’s side edge of the instrument
panel.
Fuses Usage
LT DRDriver’s Side Power Window Circuit
Breaker
REAR SEAT Rear Seats
Fuses Usage
AUX PWR2 Rear Cargo Area Power Outlets
SWC BKLT Steering Wheel Controls Backlight
DDM Driver Door Module
CTSYDome Lamps, Driver’s Side Turn
Signal
LT STOP TRN Driver’s Side Turn Signal, Stoplamp
DIM Instrument Panel Back Lighting
RT STOP TRNPassenger’s Side Turn Signal,
Stoplamp
BCM Body Control Module
UNLCK2 Power Door Lock 2 (Unlock Feature)
LCK2 Power Door Lock 2 (Lock Feature)
STOP LAMPSStoplamps, Center-High Mounted
Stoplamp
REAR HVAC Rear Climate Controls
PDMPassenger Door Module, Universal
Home Remote System
AUX PWR Accessory Power Outlets
565
Page 628 of 634

N
Navigation/Radio System, see Navigation
Manual..................................................... 337
New Vehicle Break-In.................................. 139
Normal Maintenance Replacement Parts....... 592
O
Odometer.................................................... 244
Odometer, Trip............................................ 244
Off-Road Driving.......................................... 372
Off-Road Recovery...................................... 369
Oil
Engine..................................................... 459
Pressure Gage......................................... 256
Pressure Light.......................................... 257
Oil, Engine Oil Life System......................... 462
Older Children, Restraints............................. 61
Online Owner Center................................... 601
OnStar
®System, see OnStar®Manual........ 173
Operation, Universal Home
Remote System..............................178, 182
Other Warning Devices................................ 204
Outlet Adjustment........................................ 238Outlets
Accessory Power..................................... 225
Outside
Automatic Dimming Mirror........................ 172
Convex Mirror.......................................... 173
Curb View Assist Mirrors.......................... 172
Heated Mirrors......................................... 173
Manual Mirrors......................................... 168
Power Foldaway Mirrors........................... 171
Power Mirrors.......................................... 170
Trailer-Tow Mirrors................................... 169
Overheated Engine Protection
Operating Mode....................................... 476
Owner Checks and Services....................... 586
Owners, Canadian.......................................... 3
P
Paint, Damage............................................ 560
Park Aid...................................................... 222
Park (P)
Shifting Into............................................. 157
Shifting Out of......................................... 159
628