Page 476 of 684

Before you start, check all trailer hitch parts and
attachments, safety chains, electrical connector,
lamps, tires and mirror adjustment. If the trailer has
electric brakes, start your vehicle and trailer
moving and then apply the trailer brake controller
by hand to be sure the brakes are working.
This lets you check your electrical connection at
the same time.
During your trip, check occasionally to be sure
that the load is secure, and that the lamps and any
trailer brakes are still working.
While towing a trailer or when exposed to long
periods of sunshine, the �oor of the truck bed may
become very warm. Avoid putting items in the
truck bed that might be affected by high ambient
temperatures.
Following Distance
Stay at least twice as far behind the vehicle ahead
as you would when driving your vehicle without a
trailer. This can help you avoid situations that
require heavy braking and sudden turns.
Passing
You’ll need more passing distance up ahead when
you’re towing a trailer. And, because you’re a good
deal longer, you’ll need to go much farther beyond
the passed vehicle before you can return to your
lane.
Backing Up
Hold the bottom of the steering wheel with one
hand. Then, to move the trailer to the left, just move
that hand to the left. To move the trailer to the right,
move your hand to the right. Always back up slowly
and, if possible, have someone guide you.
Making Turns
Notice:Making very sharp turns while
trailering could cause the trailer to come in
contact with the vehicle. Your vehicle could be
damaged. Avoid making very sharp turns while
trailering.
When you’re turning with a trailer, make wider
turns than normal. Do this so your trailer
won’t strike soft shoulders, curbs, road signs,
trees or other objects. Avoid jerky or sudden
maneuvers. Signal well in advance.
476
Page 477 of 684

Turn Signals When Towing a Trailer
The arrows on your instrument panel will
�ash whenever you signal a turn or lane change.
Properly hooked up, the trailer lamps will also
�ash, telling other drivers you’re about to
turn, change lanes or stop.
When towing a trailer, the arrows on your
instrument panel will �ash for turns even if the
bulbs on the trailer are burned out. Thus, you may
think drivers behind you are seeing your signal
when they are not. It’s important to check
occasionally to be sure the trailer bulbs are still
working.
Driving On Grades
Reduce speed and shift to a lower gearbefore
you start down a long or steep downgrade. If you
don’t shift down, you might have to use your
brakes so much that they would get hot and no
longer work well.
You can tow in DRIVE (D). You may want to shift
the transmission to lower gear selection if the
transmission shifts too often (e.g., under heavy
loads and/or hilly conditions).You may also want to activate the tow/haul mode
if the transmission shifts too often. SeeTow/Haul
Mode Light on page 268.
When towing at high elevation on steep uphill
grades, consider the following: Engine coolant at
higher elevations will boil at a lower temperature
than at or near sea level. If you turn your
engine off immediately after towing at high
elevation on steep uphill grades, your vehicle may
show signs similar to engine overheating. To
avoid this, let the engine run while parked,
preferably on level ground, with the transmission
in PARK (P) at least �ve minutes before turning the
engine off. If you do get the overheat warning,
seeEngine Overheating on page 517.
477
Page 481 of 684

Heavy-DutyTrailer Wiring Harness
Package
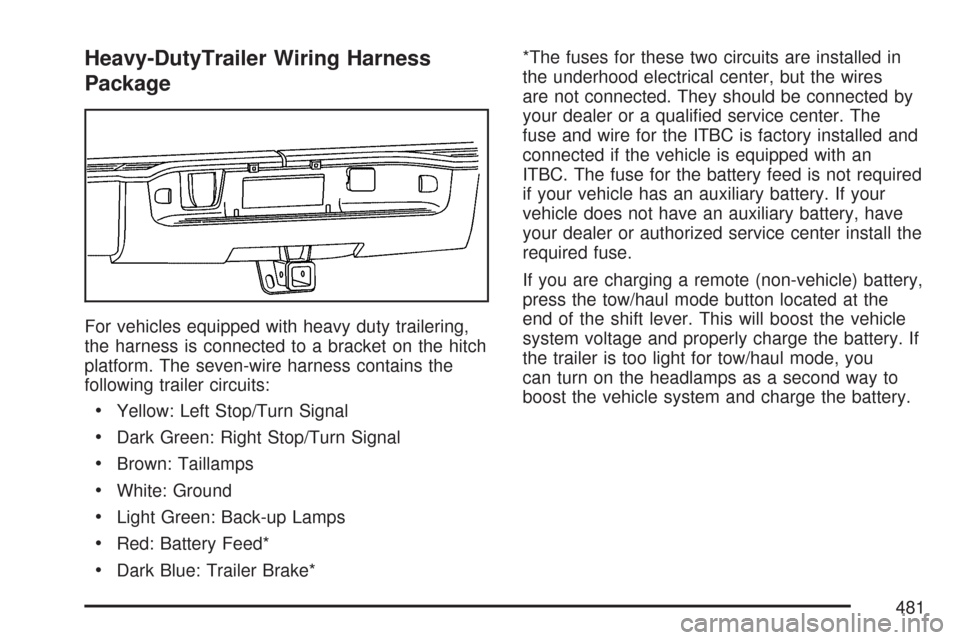
For vehicles equipped with heavy duty trailering,
the harness is connected to a bracket on the hitch
platform. The seven-wire harness contains the
following trailer circuits:
Yellow: Left Stop/Turn Signal
Dark Green: Right Stop/Turn Signal
Brown: Taillamps
White: Ground
Light Green: Back-up Lamps
Red: Battery Feed*
Dark Blue: Trailer Brake**The fuses for these two circuits are installed in
the underhood electrical center, but the wires
are not connected. They should be connected by
your dealer or a quali�ed service center. The
fuse and wire for the ITBC is factory installed and
connected if the vehicle is equipped with an
ITBC. The fuse for the battery feed is not required
if your vehicle has an auxiliary battery. If your
vehicle does not have an auxiliary battery, have
your dealer or authorized service center install the
required fuse.
If you are charging a remote (non-vehicle) battery,
press the tow/haul mode button located at the
end of the shift lever. This will boost the vehicle
system voltage and properly charge the battery. If
the trailer is too light for tow/haul mode, you
can turn on the headlamps as a second way to
boost the vehicle system and charge the battery.
481
Page 482 of 684
Camper/Fifth-Wheel Trailer Wiring Package
The seven-wire camper harness is located
under the front edge of the pickup box on the
driver’s side of the vehicle, attached to the frame
bracket. A connector will have to be added to
the wiring harness which connects to the camper.
The harness contains the following camper/trailer
circuits:
Yellow: Left Stop/Turn Signal
Dark Green: Right Stop/Turn Signal
Brown: Taillamps
White: Ground
Light Green: Back-up Lamps
Red: Battery Feed
Dark Blue: Trailer BrakeIf your vehicle is equipped with the “Heavy-Duty
Trailering” option, please refer to “Heavy-Duty
Trailer Wiring Package” earlier in this section.
When the camper-wiring harness is ordered
without the heavy-duty trailering package, an
eight-wire harness with a seven-pin connector is
located at the rear of the vehicle and is tied to the
vehicle’s frame.
482
Page 486 of 684

Noise Control System................................. 544
Tampering with Noise Control System
Prohibited.............................................. 544
Bulb Replacement....................................... 545
Halogen Bulbs........................................... 545
Headlamps................................................ 546
Center High-Mounted Stoplamp
(CHMSL) and Cargo Lamp.................... 547
Pickup Box Identi�cation and Fender
Marker Lamps........................................ 548
Taillamps, Turn Signal, Stoplamps and
Back-up Lamps...................................... 548
License Plate Lamp................................... 550
Replacement Bulbs................................... 551
Windshield Wiper Blade Replacement....... 551
Tires............................................................ 552
Tire Sidewall Labeling............................... 553
Tire Terminology and De�nitions............... 558In�ation - Tire Pressure............................. 561
Dual Tire Operation................................... 562
Tire Pressure Monitor System................... 563
Tire Inspection and Rotation...................... 568
When It Is Time for New Tires.................. 571
Buying New Tires...................................... 572
Different Size Tires and Wheels................ 574
Uniform Tire Quality Grading..................... 575
Wheel Alignment and Tire Balance............ 576
Wheel Replacement.................................. 576
Tire Chains............................................... 578
If a Tire Goes Flat.................................... 579
Changing a Flat Tire................................. 580
Removing the Spare Tire and Tools.......... 582
Removing the Flat Tire and Installing
the Spare Tire....................................... 586
Secondary Latch System........................... 592
Storing a Flat or Spare Tire and Tools...... 596
Spare Tire................................................. 600
Section 5 Service and Appearance Care
486
Page 548 of 684
Pickup Box Identi�cation and
Fender Marker Lamps
To replace a pickup box identi�cation or fender
marker lamp bulb, do the following:
1. Press the tab from the back to remove
the lamp.
2. Unplug the lamp assembly harness.
3. Gently pry the individual lamp from the lamp
assembly.
4. Unplug the lamp.
5. Plug in a new lamp and snap it into the
assembly.
6. Reinstall the lamp assembly.
Taillamps, Turn Signal, Stoplamps
and Back-up Lamps
To replace one of these bulbs, do the following:
1. Open the tailgate.Tailgate on page 124
for more information.
2. Remove the two
rear lamp assembly
screws near the
tailgate latch
strikerpost and pull
out the lamp
assembly.
548
Page 549 of 684
3. Determine which of the following taillamp
assembly applies to your vehicle.
4. Turn the bulb socket counterclockwise to
remove it from the taillamp assembly.
5. Pull the old bulb straight out from the socket.
6. Press a new bulb into the socket and turn
the socket clockwise into the taillamp
assembly.7. Reinstall the taillamp assembly.
A. Stoplamp/Turn
Signal/Taillamp
B. Back-up Lamp
C. Stoplamp/Turn
Signal/Taillamp
549
Page 550 of 684
Taillamps (Chassis Cab Models)
A. Backup Lamp
B. Stoplamp/Taillamp/Turn Signal Lamp
To replace one of these bulbs, do the following:
1. Remove the four screws.
2. Lift the lens off the lamp assembly.
3. Turn the old bulb counterclockwise and pull
the old bulb straight out from the socket.
4. Install a new bulb into the socket, turn it
clockwise, and press it in until it is tight.
5. Reinstall the lens and the four screws.
License Plate Lamp
To replace one of these bulbs, do the following:
1. Reach under the rear bumper for the bulb
socket.
2. Turn the bulb socket counterclockwise and
pull the bulb socket out of the connector.
3. Pull the old bulb from the bulb socket, keeping
the bulb straight as you pull it out.
4. Install the new bulb.
5. Reverse Steps 1 through 3 to reinstall the
bulb socket.
550