2007 CHEVROLET SILVERADO stop start
[x] Cancel search: stop startPage 158 of 684
Shifting Out of NEUTRAL
To shift out of NEUTRAL do the following:
1. Set the parking brake and apply the regular
brake pedal.
2. Shift the transmission to NEUTRAL (N) and
turn the ignition to RUN with the engine off.
3. Turn the transfer case dial to
Two-Wheel-Drive High.
After the transfer case has shifted out of
NEUTRAL the NEUTRAL light will go out.
4. Release the parking brake prior to moving the
vehicle.
Notice:Shifting the transmission into gear
before the requested mode indicator light has
stopped �ashing could damage the transfer
case. To help avoid damaging your vehicle,
always wait for the mode indicator lights
to stop �ashing before shifting the
transmission into gear.
5. Start the engine and shift the transmission to
the desired position.Excessively shifting the transfer case into or out of
the different modes may cause the transfer
case to enter the shift protection mode. This will
protect the transfer case from possible damage
and will only allow the transfer case to respond to
one shift per 10 seconds. The transfer case
may stay in this mode for up to three minutes.
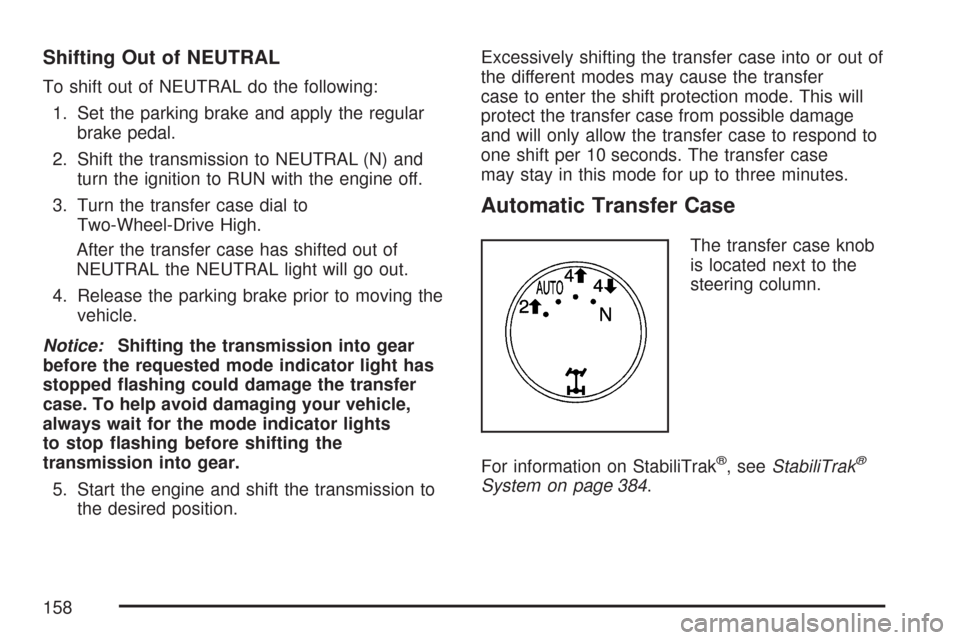
Automatic Transfer Case
The transfer case knob
is located next to the
steering column.
For information on StabiliTrak
®, seeStabiliTrak®
System on page 384.
158
Page 163 of 684
3. Start the vehicle or turn the ignition to RUN.
4. Put the transmission in NEUTRAL (N).
5. Shift the transfer case to
Two-Wheel Drive High.
6. Turn the transfer case dial clockwise to
NEUTRAL till it stops and hold it for
10 seconds. Then slowly release the dial to
the four low position. The NEUTRAL light will
come on when the transfer case shift to
NEUTRAL is complete.
7. If the engine is running, make sure that the
transmission is in NEUTRAL (N) by shifting
the transmission to REVERSE (R) for
one second, then shift the transmission to
DRIVE (D) for one second.
8. Turn the ignition to ACCESSORY, which will
turn the engine off.
9. Place the transmission shift lever in PARK (P).
10. Release the parking brake prior to moving
the vehicle.
11. Turn the ignition to LOCK.Shifting Out of NEUTRAL
To shift out of NEUTRAL do the following:
1. Set the parking brake and apply the regular
brake pedal.
2. Shift the transmission to NEUTRAL (N) and
turn the ignition to RUN with the engine off.
3. Turn the transfer case dial to Two-Wheel-Drive
High, Four-Wheel-Drive High, AUTO.
After the transfer case has shifted out of
NEUTRAL the NEUTRAL light will go out.
4. Release the parking brake prior to moving the
vehicle.
Notice:Shifting the transmission into gear
before the requested mode indicator light has
stopped �ashing could damage the transfer
case. To help avoid damaging your vehicle,
always wait for the mode indicator lights
to stop �ashing before shifting the
transmission into gear.
5. Start the engine and shift the transmission to
the desired position.
163
Page 217 of 684
Windshield Wipers
Be sure to clear ice and snow from the wiper
blades before using them. If they are frozen to the
windshield, gently loosen or thaw them. Damaged
wiper blades may not clear the windshield well,
making it harder to see and drive safely. If
the blades do become damaged, install new
blades or blade inserts. For more information, see
Windshield Wiper Blade Replacement on
page 551.
Heavy snow or ice can overload the wiper motor.
A circuit breaker will stop the motor until it
cools down. Clear away snow or ice to prevent an
overload.
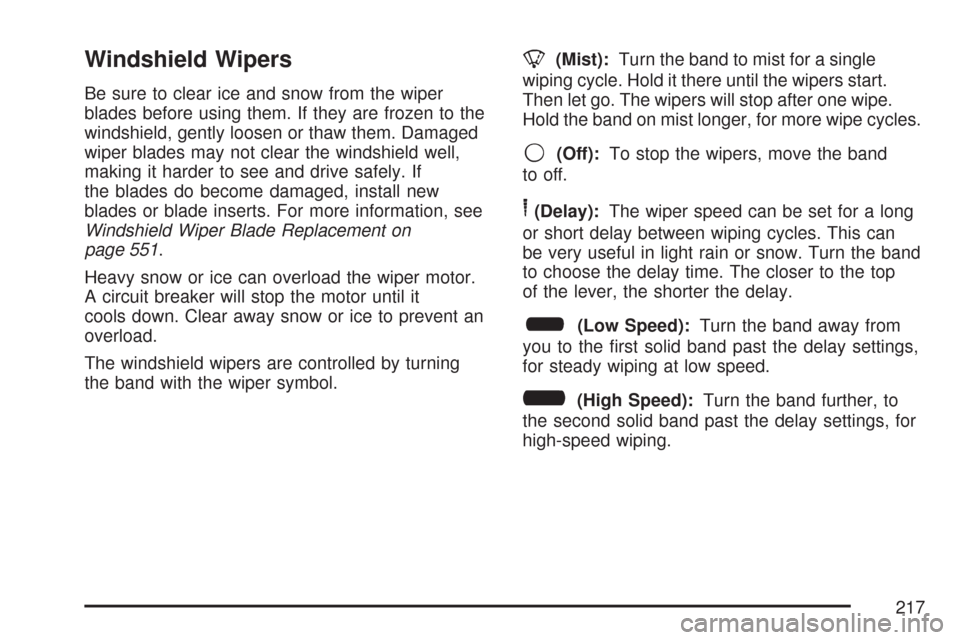
The windshield wipers are controlled by turning
the band with the wiper symbol.
8(Mist):Turn the band to mist for a single
wiping cycle. Hold it there until the wipers start.
Then let go. The wipers will stop after one wipe.
Hold the band on mist longer, for more wipe cycles.
9(Off):To stop the wipers, move the band
to off.
6(Delay):The wiper speed can be set for a long
or short delay between wiping cycles. This can
be very useful in light rain or snow. Turn the band
to choose the delay time. The closer to the top
of the lever, the shorter the delay.
6(Low Speed):Turn the band away from
you to the �rst solid band past the delay settings,
for steady wiping at low speed.
?(High Speed):Turn the band further, to
the second solid band past the delay settings, for
high-speed wiping.
217
Page 263 of 684
This light should come on, as a check to show
you it is working, when the ignition is on and the
engine is not running. If the light does not
come on, have it repaired. This light will also
come on during a malfunction in one of two ways:
Light Flashing— A mis�re condition has
been detected. A mis�re increases vehicle
emissions and may damage the emission
control system on your vehicle. Diagnosis and
service may be required.
Light On Steady— An emission control
system malfunction has been detected on your
vehicle. Diagnosis and service may be
required.
If the Light is Flashing
The following may prevent more serious damage
to your vehicle:
Reducing vehicle speed
Avoiding hard accelerations
Avoiding steep uphill grades
If you are towing a trailer, reduce the amount
of cargo being hauled as soon as it is
possibleIf the light stops �ashing and remains on steady,
see “If the Light Is On Steady” following.
If the light continues to �ash, when it is safe to do
so, stop the vehicle. Find a safe place to park
your vehicle. Turn the key off, wait at least
10 seconds and restart the engine. If the light
remains on steady, see “If the Light Is On Steady”
following. If the light is still �ashing, follow the
previous steps, and see your dealer for service as
soon as possible.
If the Light Is On Steady
You may be able to correct the emission system
malfunction by considering the following:
Did you recently put fuel into your vehicle?
If so, reinstall the fuel cap, making sure to fully
install the cap. SeeFilling the Tank on page 494.
The diagnostic system can determine if the
fuel cap has been left off or improperly installed. A
loose or missing fuel cap will allow fuel to
evaporate into the atmosphere. A few driving trips
with the cap properly installed should turn the
light off.
263
Page 272 of 684
The trip odometer has a feature called the
retro-active reset. This can be used to set the trip
odometer to the number of miles (kilometers)
driven since the ignition was last turned on. This
can be used if the trip odometer is not reset at the
beginning of the trip.
To use the retro-active reset feature, press and
hold the set/reset button for at least four seconds.
The trip odometer will display the number of
miles (mi) or kilometers (km) driven since the
ignition was last turned on and the vehicle
was moving. Once the vehicle begins moving, the
trip odometer will accumulate mileage. For
example, if the vehicle was driven 5 miles (8 km)
before it is started again, and then the retro-active
reset feature is activated, the display will show
5 miles (8 km). As the vehicle begins moving, the
display will then increase to 5.1 miles (8.2 km),
5.2 miles (8.4 km), etc.
If the retro-active reset feature is activated after
the vehicle is started, but before it begins moving,
the display will show the number of miles (mi)
or kilometers (km) that were driven during the last
ignition cycle.Fuel Range
Press the trip/fuel button until FUEL RANGE
displays. This display shows the approximate
number of remaining miles (mi) or kilometers (km)
the vehicle can be driven without refueling. The
display will show LOW if the fuel level is low.
The fuel range estimate is based on an average of
the vehicle’s fuel economy over recent driving
history and the amount of fuel remaining in the fuel
tank. This estimate will change if driving
conditions change. For example, if driving in traffic
and making frequent stops, this display may
read one number, but if the vehicle is driven on a
freeway, the number may change even though
the same amount of fuel is in the fuel tank. This is
because different driving conditions produce
different fuel economies. Generally, freeway
driving produces better fuel economy than city
driving. Fuel range cannot be reset.
272
Page 273 of 684
Average Economy
Press the trip/fuel button until AVG ECONOMY
displays. This display shows the approximate
average miles per gallon (mpg) or liters per
100 kilometers (L/100 km). This number is
calculated based on the number of mpg (L/100 km)
recorded since the last time this menu item was
reset. To reset AVG ECONOMY, press and
hold the set/reset button.
Fuel Used
Press the trip/fuel button until FUEL USED
displays. This display shows the number of
gallons (gal) or liters (L) of fuel used since the last
reset of this menu item. To reset the fuel used
information, press and hold the set/reset button
while FUEL USED is displayed.
Timer
Press the trip/fuel button until TIMER displays.
This display can be used as a timer.To start the timer, press the set/reset button while
TIMER is displayed. The display will show the
amount of time that has passed since the
timer was last reset, not including time the ignition
is off. Time will continue to be counted as long
as the ignition is on, even if another display
is being shown on the DIC. The timer will record
up to 99 hours, 59 minutes and
59 seconds (99:59:59) after which the display will
return to zero.
To stop the timer, press the set/reset button brie�y
while TIMER is displayed.
To reset the timer to zero, press and hold the
set/reset button while TIMER is displayed.
Transmission Temperature
Press the trip/fuel button until TRANS TEMP
displays. This display shows the temperature of
the automatic transmission �uid in either degrees
Fahrenheit (°F) or degrees Celsius (°C).
273
Page 286 of 684
PARK ASSIST OFF
If your vehicle has the Ultrasonic Rear Parking
Assist (URPA) system, after the vehicle has been
started, this message displays to remind the
driver that the URPA system has been turned off.
Press the set/reset button or the trip odometer
reset stem to acknowledge this message and clear
it from the DIC display. To turn the URPA
system back on, seeUltrasonic Rear Parking
Assist (URPA) on page 230.
PASSENGER DOOR OPEN
This message displays and a chime sounds if the
passenger’s door is not fully closed and the
vehicle is in a drive gear. Stop and turn off the
vehicle, check the door for obstructions, and close
the door again. Check to see if the message
still appears on the DIC.
REMOTE KEY LEARNING ACTIVE
This message displays while you are matching a
Remote Keyless Entry (RKE) transmitter to
your vehicle. See “Matching Transmitter(s) to Your
Vehicle” underRemote Keyless Entry (RKE)
System Operation on page 113andDIC Operation
and Displays (With DIC Buttons) on page 270or
DIC Operation and Displays (Without DIC Buttons)
on page 277for more information.
REPLACE BATTERY IN REMOTE KEY
This message displays if a Remote Keyless
Entry (RKE) transmitter battery is low. The battery
needs to be replaced in the transmitter. See
“Battery Replacement” underRemote Keyless
Entry (RKE) System Operation on page 113.
RIGHT REAR DOOR OPEN (Crew Cab)
This message displays and a chime sounds if
the passenger’s side rear door is not fully closed
and the vehicle is in a drive gear. Stop and
turn off the vehicle, check the door for
obstructions, and close the door again. Check to
see if the message still appears on the DIC.
286
Page 287 of 684
SERVICE 4 WHEEL DRIVE
This message displays if a problem occurs with
the four-wheel-drive system. If this message
appears, stop as soon as possible and turn off the
vehicle. Restart the vehicle and check for the
message on the DIC display. If the message is still
displayed or appears again when you begin
driving, the four-wheel-drive system needs service.
See your dealer.
SERVICE AIR BAG
This message displays if there is a problem with
the airbag system. Have your dealer inspect
the system for problems. SeeAirbag Readiness
Light on page 252andAirbag System on page 85
for more information.
SERVICE BATTERY CHARGING
SYSTEM
On some vehicles, this message displays if there
is a problem with the battery charging system.
Under certain conditions, the charging system light
may also turn on in the instrument panel cluster.
SeeCharging System Light on page 256.
Driving with this problem could drain the battery.Turn off all unnecessary accessories. Have the
electrical system checked as soon as possible.
See your dealer.
SERVICE BRAKE SYSTEM
This message displays along with the brake
system warning light if there is a problem with the
brake system. SeeBrake System Warning
Light on page 258. If this message appears, stop
as soon as possible and turn off the vehicle.
Restart the vehicle and check for the message on
the DIC display. If the message is still displayed
or appears again when you begin driving, the
brake system needs service as soon as possible.
See your dealer.
SERVICE BRAKES SOON
This message displays if there is a problem with
the brake system. If this message appears, stop as
soon as possible and turn off the vehicle. Restart
the vehicle and check for the message on the
DIC display. If the message is still displayed
or appears again when you begin driving, the
brake system needs service. See your dealer.
287