Page 145 of 684
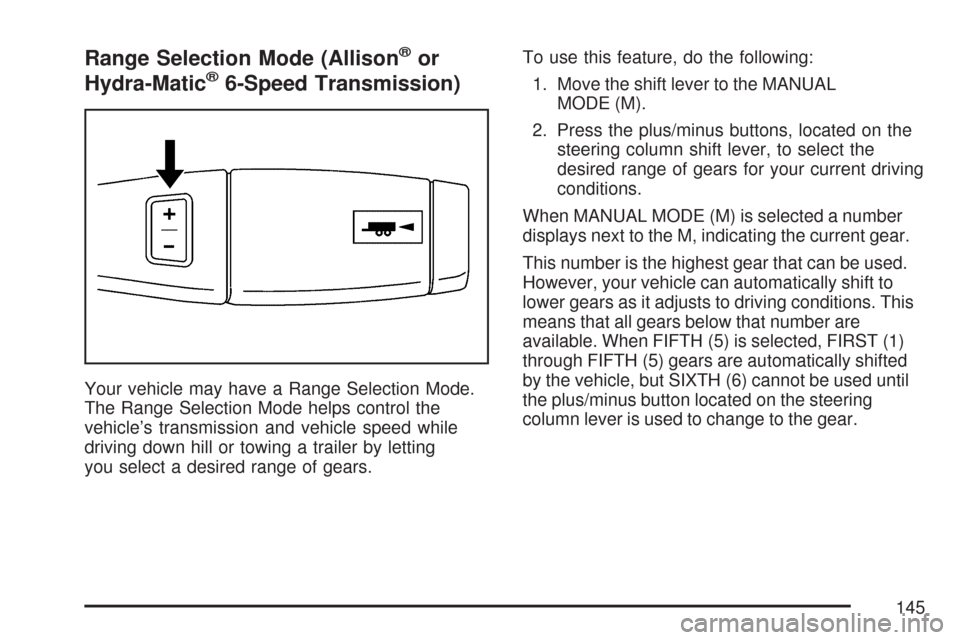
Range Selection Mode (Allison®or
Hydra-Matic®6-Speed Transmission)
Your vehicle may have a Range Selection Mode.
The Range Selection Mode helps control the
vehicle’s transmission and vehicle speed while
driving down hill or towing a trailer by letting
you select a desired range of gears.To use this feature, do the following:
1. Move the shift lever to the MANUAL
MODE (M).
2. Press the plus/minus buttons, located on the
steering column shift lever, to select the
desired range of gears for your current driving
conditions.
When MANUAL MODE (M) is selected a number
displays next to the M, indicating the current gear.
This number is the highest gear that can be used.
However, your vehicle can automatically shift to
lower gears as it adjusts to driving conditions. This
means that all gears below that number are
available. When FIFTH (5) is selected, FIRST (1)
through FIFTH (5) gears are automatically shifted
by the vehicle, but SIXTH (6) cannot be used until
the plus/minus button located on the steering
column lever is used to change to the gear.
145
Page 149 of 684
Four-Wheel Drive
If your vehicle has Four-Wheel Drive, you can
send the engine’s driving power to all four wheels
for extra traction. To get the most satisfaction
out of Four-Wheel Drive, you must be familiar with
its operation. Read the part that follows before
using Four-Wheel Drive. See the appropriate text
for the transfer case in your vehicle.
Notice:Driving on clean, dry pavement in
Four-Wheel-Drive High or Four-Wheel-Drive
Low for an extended period of time may cause
premature wear on your vehicle’s powertrain.
Do not drive on clean, dry pavement in
Four-Wheel-Drive High or Four-Wheel-Drive
Low for extended periods of time.
While driving on clean dry pavement and during
tight turns, you may experience vibration in
the steering system.
Front Axle Locking Feature
The front axle locks and unlocks automatically
when you shift the transfer case. Some delay for
the axle to lock or unlock is normal.
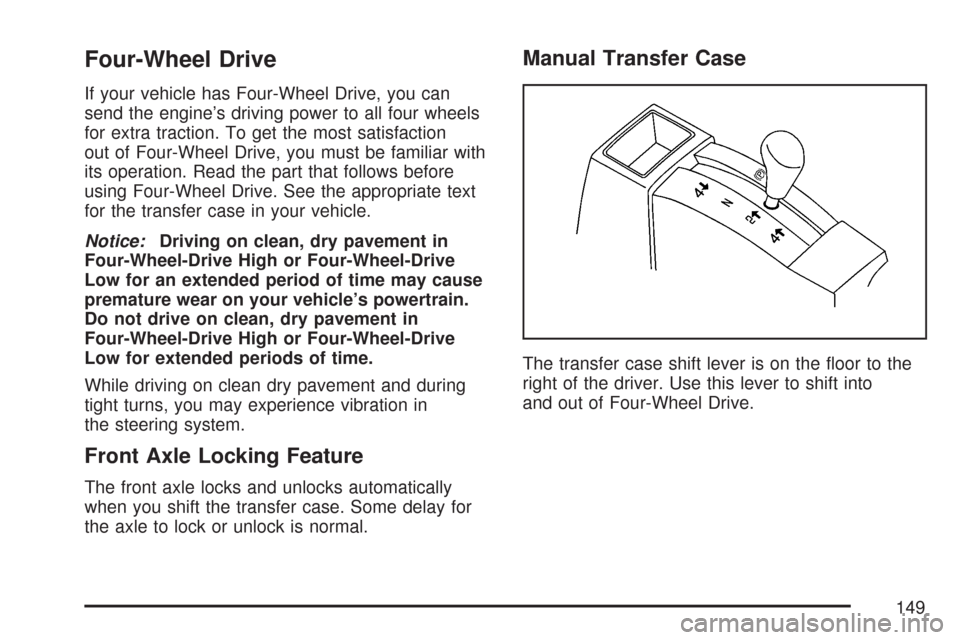
Manual Transfer Case
The transfer case shift lever is on the �oor to the
right of the driver. Use this lever to shift into
and out of Four-Wheel Drive.
149
Page 154 of 684
Electronic Transfer Case
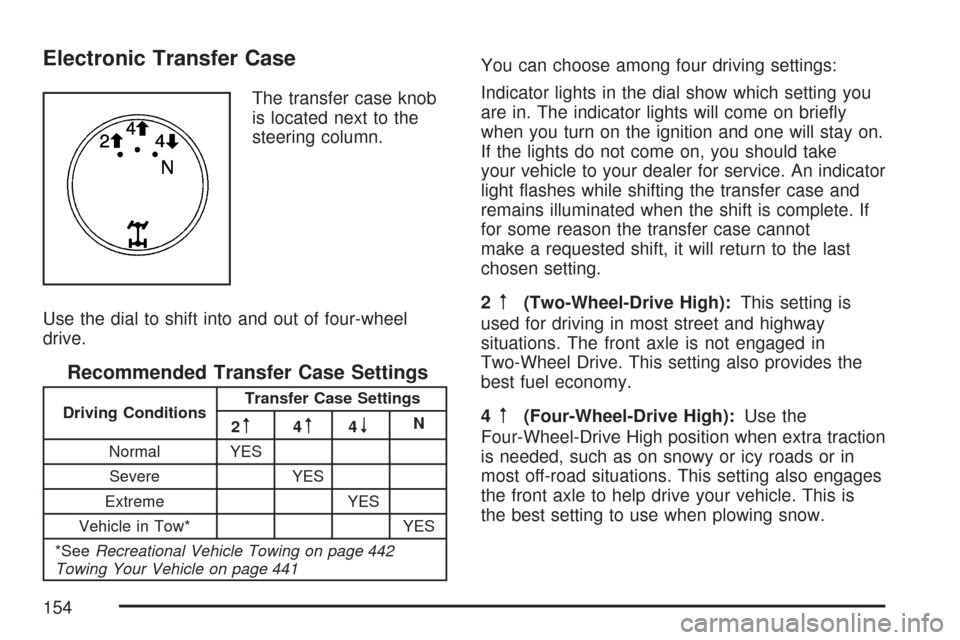
The transfer case knob
is located next to the
steering column.
Use the dial to shift into and out of four-wheel
drive.
Recommended Transfer Case Settings
Driving ConditionsTransfer Case Settings
2m4m4nN
Normal YES
Severe YES
Extreme YES
Vehicle in Tow* YES
*SeeRecreational Vehicle Towing on page 442
Towing Your Vehicle on page 441
You can choose among four driving settings:
Indicator lights in the dial show which setting you
are in. The indicator lights will come on brie�y
when you turn on the ignition and one will stay on.
If the lights do not come on, you should take
your vehicle to your dealer for service. An indicator
light �ashes while shifting the transfer case and
remains illuminated when the shift is complete. If
for some reason the transfer case cannot
make a requested shift, it will return to the last
chosen setting.
2
m(Two-Wheel-Drive High):This setting is
used for driving in most street and highway
situations. The front axle is not engaged in
Two-Wheel Drive. This setting also provides the
best fuel economy.
4
m(Four-Wheel-Drive High):Use the
Four-Wheel-Drive High position when extra traction
is needed, such as on snowy or icy roads or in
most off-road situations. This setting also engages
the front axle to help drive your vehicle. This is
the best setting to use when plowing snow.
154
Page 158 of 684
Shifting Out of NEUTRAL
To shift out of NEUTRAL do the following:
1. Set the parking brake and apply the regular
brake pedal.
2. Shift the transmission to NEUTRAL (N) and
turn the ignition to RUN with the engine off.
3. Turn the transfer case dial to
Two-Wheel-Drive High.
After the transfer case has shifted out of
NEUTRAL the NEUTRAL light will go out.
4. Release the parking brake prior to moving the
vehicle.
Notice:Shifting the transmission into gear
before the requested mode indicator light has
stopped �ashing could damage the transfer
case. To help avoid damaging your vehicle,
always wait for the mode indicator lights
to stop �ashing before shifting the
transmission into gear.
5. Start the engine and shift the transmission to
the desired position.Excessively shifting the transfer case into or out of
the different modes may cause the transfer
case to enter the shift protection mode. This will
protect the transfer case from possible damage
and will only allow the transfer case to respond to
one shift per 10 seconds. The transfer case
may stay in this mode for up to three minutes.
Automatic Transfer Case
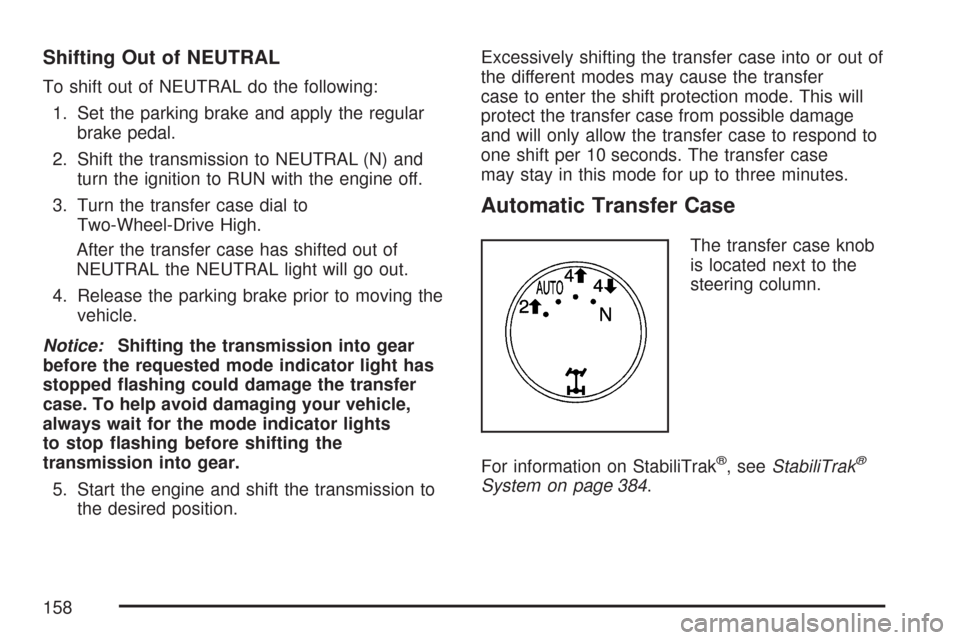
The transfer case knob
is located next to the
steering column.
For information on StabiliTrak
®, seeStabiliTrak®
System on page 384.
158
Page 184 of 684
OnStar®Virtual Advisor
OnStar®Virtual Advisor is a feature of OnStar®
Hands-Free Calling that uses your minutes to
access location-based weather, local traffic reports,
and stock quotes. By pressing the phone button
and giving a few simple voice commands, you can
browse through the various topics. See the OnStar
®
Owners Guide for more information (Only available
in the continental U.S.).
OnStar®Steering Wheel Controls
Your vehicle may have a Talk/Mute button that
can be used to interact with OnStar®Hands-Free
Calling. SeeAudio Steering Wheel Controls on
page 370for more information.
On some vehicles, you may have to hold the
button for a few seconds and give the command
“ONSTAR” in order to activate the OnStar
®
Hands-Free Calling feature.
On some vehicles, the mute button can be used to
dial numbers into voicemail systems, or to dial
phone extensions. See the OnStar
®Owner’s
Guide for more information.
How OnStar®Service Works
In order to provide you with OnStar®services,
your vehicle’s OnStar®system has the capability
of recording and transmitting vehicle information.
This information is automatically sent to an
OnStar
®Call Center at the time of an OnStar®
button press, Emergency button press or if
your airbags or AACN system deploys. The vehicle
information usually includes your GPS location
and, in the event of a crash, additional information
regarding the accident that your vehicle has
been involved in (e.g. the direction from which
your vehicle was hit). When you use the Virtual
Advisor feature of OnStar
®Hands-Free Calling,
your vehicle also sends OnStar®your GPS
location so that we can provide you with
location-based services.
184
Page 207 of 684
Audio System(s)......................................... 302
Setting the Time........................................ 303
AM-FM Radio............................................ 306
Radio with CD (Base)............................... 308
Radio with CD (MP3)................................ 314
Radio with CD and DVD (MP3)................. 324
Using an MP3 (Radio with CD or
Six-Disc CD Player)............................... 341
Using an MP3 (Radio with CD and
DVD Player)........................................... 347
XM Radio Messages................................. 355Navigation/Radio System........................... 357
Rear Seat Entertainment System............... 357
Rear Seat Audio (RSA)............................. 368
Theft-Deterrent Feature............................. 370
Audio Steering Wheel Controls.................. 370
Radio Reception........................................ 371
Care of Your CDs and DVDs.................... 372
Care of the CD and DVD Player............... 373
Fixed Mast Antenna.................................. 373
XM™ Satellite Radio Antenna System....... 373
Section 3 Instrument Panel
207
Page 212 of 684

E. Shift Lever. SeeAutomatic Transmission
Operation on page 140.
F. Tow/Haul Selector Button (If Equipped). See
Tow/Haul Mode on page 146.
G. Driver Information Center (DIC) Controls. See
Driver Information Center (DIC) on page 269.
H. Audio System. SeeAudio System(s) on
page 302.
I. Exterior Lamps Control. SeeExterior Lamps on
page 223.
J. Integrated Trailer Brake Controller (If
Equipped). SeeTowing a Trailer on page 447.
K. Dome Lamp Override Button. SeeDome
Lamp Override on page 228. Dome Lamp
Knob. SeeDome Lamps on page 228.
L. Automatic Transfer Case Control. (If Equipped).
SeeFour-Wheel Drive on page 149.
M. Hood Release. SeeHood Release on
page 498.
N. Parking Brake. SeeParking Brake on
page 164.
O. Cruise Control Buttons. SeeCruise Control on
page 220.
P. Tilt Wheel Lever. SeeTilt Wheel on page 214.Q. Horn. SeeHorn on page 213.
R. Audio Steering Wheel Controls. SeeAudio
Steering Wheel Controls on page 370.
S. Climate Controls. SeeClimate Control System
(With Air Conditioning ) on page 236or
Climate Control System (Heater Only) on
page 239or Dual Automatic Climate Controls
(If Equipped). SeeDual Automatic Climate
Control System on page 240.
T. Accessory Power Outlets. SeeAccessory
Power Outlet(s) on page 234. Cigarette Lighter
(If Equipped). SeeAshtray(s) and Cigarette
Lighter on page 235.
U. StabiliTrak
®Button (If Equipped). See
StabiliTrak®System on page 384. Pedal Adjust
Button (If Equipped). SeeAdjustable Throttle
and Brake Pedal on page 138. Rear Park Assist
Disable Button (If Equipped). SeeUltrasonic
Rear Parking Assist (URPA) on page 230.
Heated Windshield Washer Fluid Button
(If Equipped). SeeWindshield Washer on
page 219.
V. Passenger Airbag Off Control (If Equipped).
SeeAirbag Off Switch on page 95.
W. Glove Box. SeeGlove Box on page 198.
212
Page 213 of 684
Hazard Warning Flashers
The hazard warning �ashers warn others. They
also let police know you have a problem.
Your front and rear turn signal lamps will �ash on
and off.
The hazard warning
�asher button is located
on top of the steering
column.
The hazard warning �ashers work no matter what
ignition position the key is in, and even if the
key is not in the ignition.
Press the button to make the front and rear turn
signal lamps �ash on and off. Press the button
again to turn the �ashers off.
When the hazard warning �ashers are on, your
turn signals will not work.
Other Warning Devices
If you carry re�ective triangles, you can set them
up at the side of the road about 300 feet
(100 m) behind your vehicle.
Horn
To sound the horn, press the horn symbols
located on the steering wheel.
213