2007 CHEVROLET SILVERADO service
[x] Cancel search: servicePage 506 of 684
How to Reset the Engine Oil Life
System
The Engine Oil Life System calculates when to
change your engine oil and �lter based on vehicle
use. Anytime your oil is changed, reset the
system so it can calculate when the next oil
change is required. If a situation occurs where you
change your oil prior to a CHANGE ENGINE
OIL SOON message coming on, reset the system.
Always reset the engine oil life to 100% after
every oil change. It will not reset itself. To reset
the Engine Oil Life System, do the following:
1. Display the OIL LIFE REMAINING on the DIC.
If your vehicle does not have DIC buttons, the
vehicle must be in PARK (P) to access this
display. SeeDIC Operation and Displays (With
DIC Buttons) on page 270orDIC Operation
and Displays (Without DIC Buttons) on
page 277.
2. Press and hold the SET/RESET button on the
DIC, or the trip odometer reset stem if your
vehicle does not have DIC buttons, for more
than �ve seconds. The oil life will change
to 100%.If the CHANGE ENGINE OIL SOON message
comes back on when you start your vehicle, the
Engine Oil Life System has not reset. Repeat
the procedure.
What to Do with Used Oil
Used engine oil contains certain elements that
may be unhealthy for your skin and could
even cause cancer. Do not let used oil stay on
your skin for very long. Clean your skin and nails
with soap and water, or a good hand cleaner.
Wash or properly dispose of clothing or rags
containing used engine oil. See the manufacturer’s
warnings about the use and disposal of oil
products.
Used oil can be a threat to the environment. If you
change your own oil, be sure to drain all the oil from
the �lter before disposal. Never dispose of oil by
putting it in the trash, pouring it on the ground, into
sewers, or into streams or bodies of water. Instead,
recycle it by taking it to a place that collects used
oil. If you have a problem properly disposing of
used oil, ask your dealer, a service station, or a
local recycling center for help.
506
Page 510 of 684

Automatic Transmission Fluid
When to Check and Change Automatic
Transmission Fluid
It is usually not necessary to check the
transmission �uid level. The only reason for �uid
loss is a transmission leak or overheating the
transmission. If you suspect a small leak, then use
the following checking procedures to check the
�uid level. However, if there is a large leak, then it
may be necessary to have the vehicle towed to
a dealership service department and have it
repaired before driving the vehicle further.
Notice:Use of the incorrect automatic
transmission �uid may damage your vehicle,
and the damages may not be covered by
your warranty. Always use the automatic
transmission �uid listed inRecommended
Fluids and Lubricants on page 639.
Change the �uid and �lter at the intervals listed in
the Maintenance Schedule. SeeScheduled
Maintenance (Gasoline Engine) on page 627.Be
sure to use the transmission �uid listed in
Recommended Fluids and Lubricants on page 639.
How to Check Automatic Transmission
Fluid
Notice:Too much or too little �uid can
damage your transmission. Too much can
mean that some of the �uid could come out
and fall on hot engine parts or exhaust system
parts, starting a �re. Too little �uid could
cause the transmission to overheat. Be sure to
get an accurate reading if you check your
transmission �uid.
Before checking the �uid level, prepare your
vehicle as follows:
1. Start the engine and park your vehicle on a
level surface. Keep the engine running.
2. Apply the parking brake and place the shift
lever in PARK (P).
510
Page 514 of 684
Consistency of Readings
Always check the �uid level at least twice using
the procedures described. Consistency (repeatable
readings) is important to maintaining proper �uid
level. If �uid is added, it may take 15 minutes
or longer to obtain an accurate reading because of
residual �uid draining down the dipstick tube. If
inconsistent readings persist, check the
transmission breather to be sure it is clean and
not clogged. If readings are still inconsistent,
contact your dealer.
Engine Coolant
If your vehicle has the DURAMAX®Diesel engine,
see the DURAMAX®Diesel manual for more
information.
The cooling system in your vehicle is �lled with
DEX-COOL
®engine coolant. This coolant is
designed to remain in your vehicle for �ve years or
150,000 miles (240 000 km), whichever occurs
�rst, if you add only DEX-COOL
®extended
life coolant.The following explains your cooling system and
how to add coolant when it is low. If you have
a problem with engine overheating, seeEngine
Overheating on page 517.
A 50/50 mixture of clean, drinkable water and
DEX-COOL
®coolant will:
Give freezing protection down to
−34°F (−37°C).
Give boiling protection up to 265°F (129°C).
Protect against rust and corrosion.
Help keep the proper engine temperature.
Let the warning lights and gages work as they
should.
Notice:Using coolant other than DEX-COOL
®
may cause premature engine, heater core, or
radiator corrosion. In addition, the engine
coolant may require changing sooner, at the
�rst maintenance service after each
30,000 miles (50 000 km) or 24 months,
whichever occurs �rst. Any repairs would not
be covered by your warranty. Always use
DEX-COOL
®(silicate-free) coolant in your
vehicle.
514
Page 520 of 684
If the warning continues, pull over, stop, and park
your vehicle immediately.
If there is still no sign of steam and your vehicle
has an engine-driven cooling fan, push down
the accelerator until the engine speed is about
twice as fast as normal idle speed for at least
�ve minutes while you are parked.
If there is still no sign of steam and your vehicle
has an electric cooling fan, idle the engine for
�ve minutes while you are parked.
If you still have the warning, turn off the engine
and get everyone out of the vehicle until it
cools down. Also, see “Overheated Engine
Protection Operating Mode” later in this section.
You may decide not to lift the hood but to get
service help right away.Overheated Engine Protection
Operating Mode (V8 Engines Only)
If an overheated engine condition exists and
the REDUCED ENGINE POWER message
is displayed, an overheat protection mode which
alternates �ring groups of cylinders helps
prevent engine damage. In this mode, you will
notice a loss in power and engine performance.
This operating mode allows your vehicle to
be driven to a safe place in an emergency. Driving
extended miles (km) and/or towing a trailer in
the overheat protection mode should be avoided.
Notice:After driving in the overheated
engine protection operating mode, to avoid
engine damage, allow the engine to cool before
attempting any repair. The engine oil will be
severely degraded. Repair the cause of coolant
loss, change the oil and reset the oil life
system. SeeEngine Oil (Gasoline Engine) on
page 502.
520
Page 531 of 684
Notice:
Using the wrong �uid can badly damage
brake system parts. For example, just a
few drops of mineral-based oil, such
as engine oil, in the brake system can
damage brake system parts so badly that
they will have to be replaced. Do not
let someone put in the wrong kind of �uid.
If you spill brake �uid on your vehicle’s
painted surfaces, the paint �nish can
be damaged. Be careful not to spill brake
�uid on your vehicle. If you do, wash it
off immediately. SeeWashing Your Vehicle
on page 605.
Brake Wear
Your vehicle has front disc brakes and could have
rear drum brakes or rear disc brakes.
Disc brake pads have built-in wear indicators that
make a high-pitched warning sound when the
brake pads are worn and new pads are needed.
The sound can come and go or be heard all
the time your vehicle is moving, except when you
are pushing on the brake pedal �rmly.
{CAUTION:
The brake wear warning sound means that
soon the brakes will not work well. That
could lead to an accident. When you hear
the brake wear warning sound, have your
vehicle serviced.
Notice:Continuing to drive with worn-out
brake pads could result in costly brake repair.
Some driving conditions or climates can cause
a brake squeal when the brakes are �rst applied or
lightly applied. This does not mean something is
wrong with the brakes.
Properly torqued wheel nuts are necessary to help
prevent brake pulsation. When tires are rotated,
inspect brake pads for wear and evenly tighten
wheel nuts in the proper sequence to torque
speci�cations inCapacities and Speci�cations on
page 620.
531
Page 532 of 684
If you have rear drum brakes, they do not have
wear indicators, but if you ever hear a rear brake
rubbing noise, have the rear brake linings
inspected immediately. Rear brake drums should
be removed and inspected each time the tires
are removed for rotation or changing. Drum brakes
have an inspection hole to inspect lining wear
during scheduled maintenance. When you have
the front brake pads replaced, have the rear
brakes inspected, too.
Brake linings should always be replaced as
complete axle sets.
Brake Pedal Travel
See your dealer/retailer if the brake pedal does
not return to normal height, or if there is a
rapid increase in pedal travel. This could be a sign
that brake service might be required.
Brake Adjustment
Every time you make a brake stop, the brakes
adjust for wear.
Replacing Brake System Parts
The braking system on a vehicle is complex. Its
many parts have to be of top quality and work well
together if the vehicle is to have really good
braking. Your vehicle was designed and tested
with top-quality brake parts. When you replace
parts of the braking system — for example, when
the brake linings wear down and you need
new ones put in — be sure you get new approved
replacement parts. If you do not, the brakes
might not work properly. For example, if someone
puts in brake linings that are wrong for your
vehicle, the balance between the front and rear
brakes can change — for the worse. The braking
performance you have come to expect can
change in many other ways if someone puts in the
wrong replacement brake parts.
532
Page 538 of 684
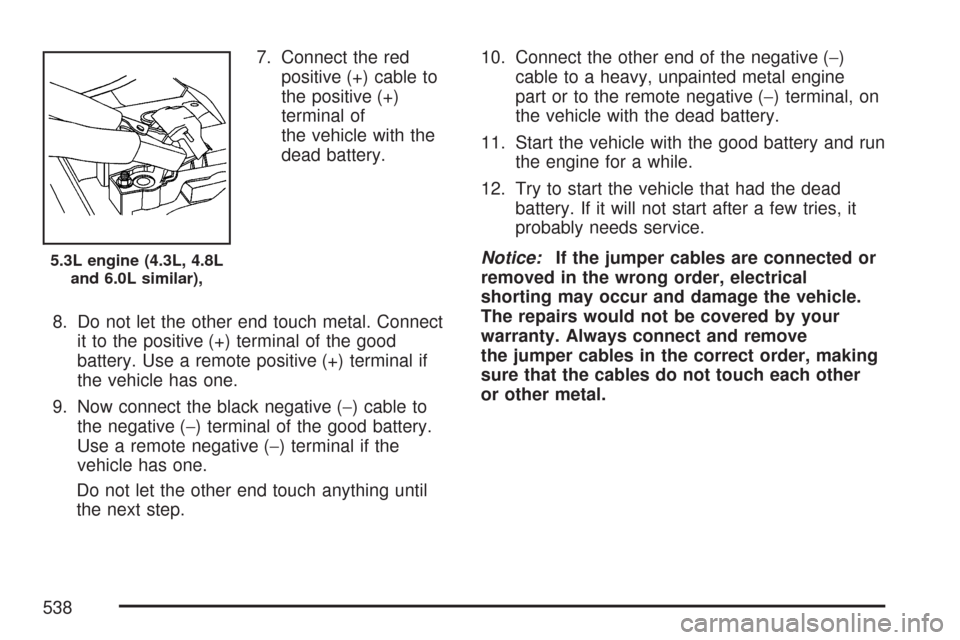
7. Connect the red
positive (+) cable to
the positive (+)
terminal of
the vehicle with the
dead battery.
8. Do not let the other end touch metal. Connect
it to the positive (+) terminal of the good
battery. Use a remote positive (+) terminal if
the vehicle has one.
9. Now connect the black negative (−) cable to
the negative (−) terminal of the good battery.
Use a remote negative (−) terminal if the
vehicle has one.
Do not let the other end touch anything until
the next step.10. Connect the other end of the negative (−)
cable to a heavy, unpainted metal engine
part or to the remote negative (−) terminal, on
the vehicle with the dead battery.
11. Start the vehicle with the good battery and run
the engine for a while.
12. Try to start the vehicle that had the dead
battery. If it will not start after a few tries, it
probably needs service.
Notice:If the jumper cables are connected or
removed in the wrong order, electrical
shorting may occur and damage the vehicle.
The repairs would not be covered by your
warranty. Always connect and remove
the jumper cables in the correct order, making
sure that the cables do not touch each other
or other metal.
5.3L engine (4.3L, 4.8L
and 6.0L similar),
538
Page 552 of 684
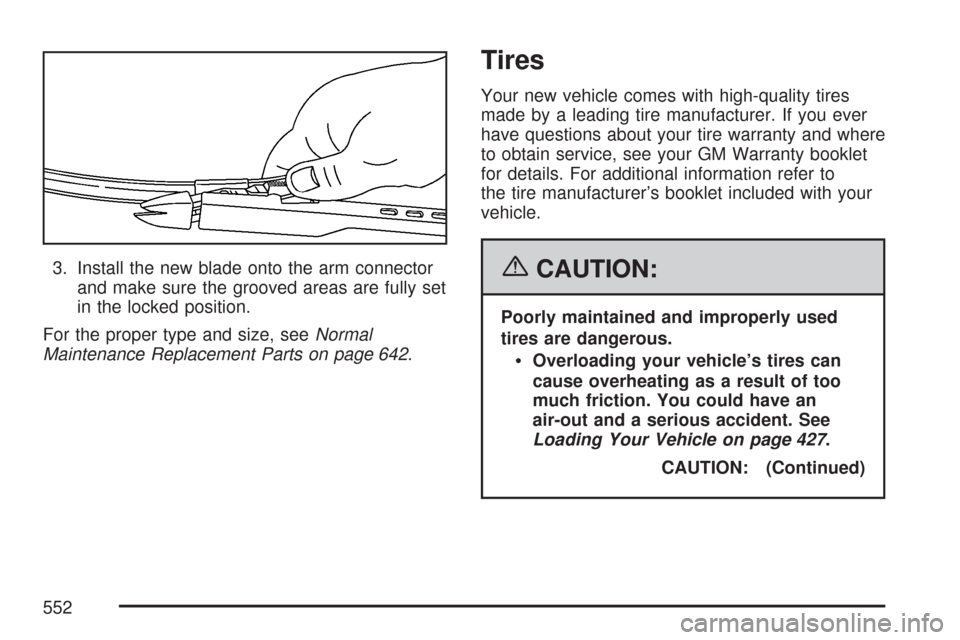
3. Install the new blade onto the arm connector
and make sure the grooved areas are fully set
in the locked position.
For the proper type and size, seeNormal
Maintenance Replacement Parts on page 642.
Tires
Your new vehicle comes with high-quality tires
made by a leading tire manufacturer. If you ever
have questions about your tire warranty and where
to obtain service, see your GM Warranty booklet
for details. For additional information refer to
the tire manufacturer’s booklet included with your
vehicle.
{CAUTION:
Poorly maintained and improperly used
tires are dangerous.
Overloading your vehicle’s tires can
cause overheating as a result of too
much friction. You could have an
air-out and a serious accident. See
Loading Your Vehicle on page 427.
CAUTION: (Continued)
552