2007 CHEVROLET MALIBU MAXX change wheel
[x] Cancel search: change wheelPage 89 of 510
Adding Equipment to Your
Airbag-Equipped Vehicle
Q:Is there anything I might add to the front
or sides of the vehicle that could keep the
airbags from working properly?
A:Yes. If you add things that change your
vehicle’s frame, bumper system, height,
front end or side sheet metal, they may keep
the airbag system from working properly.
Also, the airbag system may not work properly
if you relocate any of the airbag sensors.
If you have any questions about this,
you should contact Customer Assistance
before you modify your vehicle. The phone
numbers and addresses for Customer
Assistance are in Step Two of the Customer
Satisfaction Procedure in this manual.
SeeCustomer Satisfaction Procedure
on page 476.
Q:Because I have a disability, I have to get
my vehicle modi�ed. How can I �nd out
whether this will affect my airbag system?
A:Changing or moving any parts of the
front seats, safety belts, the airbag sensing
and diagnostic module, steering wheel,
instrument panel, ceiling headliner, ceiling
and pillar garnish trim, roof-mounted airbag
modules, or airbag wiring can affect the
operation of the airbag system. If you have
questions, call Customer Assistance. The
phone numbers and addresses for Customer
Assistance are in Step Two of the Customer
Satisfaction Procedure in this manual.
SeeCustomer Satisfaction Procedure
on page 476.
89
Page 165 of 510
Instrument Panel Overview........................ 168
Hazard Warning Flashers.......................... 170
Other Warning Devices............................. 170
Horn.......................................................... 170
Tilt and Telescopic Steering Wheel............ 170
Turn Signal/Multifunction Lever.................. 171
Turn and Lane-Change Signals................. 172
Headlamp High/Low-Beam Changer.......... 172
Flash-to-Pass............................................ 173
Windshield Wipers..................................... 173
Windshield Washer.................................... 174
Rear Window Wiper/Washer
(MAXX Model)....................................... 175
Cruise Control........................................... 176
Exterior Lamps.......................................... 179
Headlamps on Reminder........................... 181
Headlamps Off in PARK (P)...................... 181
Delayed Headlamps.................................. 182
Daytime Running Lamps (DRL)................. 182
Automatic Headlamp System..................... 183
Fog Lamps................................................ 184
Instrument Panel Brightness...................... 184
Dome Lamp.............................................. 184
Entry/Exit Lighting...................................... 185Parade Dimming........................................ 185
Front Reading Lamps................................ 185
Rear Reading Lamps................................ 185
Trunk Lamp............................................... 185
Cargo Lamp.............................................. 186
Battery Run-Down Protection..................... 186
Accessory Power Outlet(s)........................ 186
Cigarette Lighter........................................ 187
Climate Controls......................................... 188
Climate Control System............................. 188
Automatic Climate Control System............. 192
Outlet Adjustment...................................... 197
Warning Lights, Gages, and Indicators..... 198
Instrument Panel Cluster........................... 198
Speedometer and Odometer...................... 200
Trip Odometer........................................... 200
Tachometer............................................... 201
Safety Belt Reminder Light........................ 201
Passenger Safety Belt Reminder Light....... 202
Airbag Readiness Light............................. 202
Passenger Airbag Status Indicator............. 203
Charging System Light.............................. 206
Brake System Warning Light..................... 206
Anti-Lock Brake System Warning Light...... 208
Section 3 Instrument Panel
165
Page 171 of 510
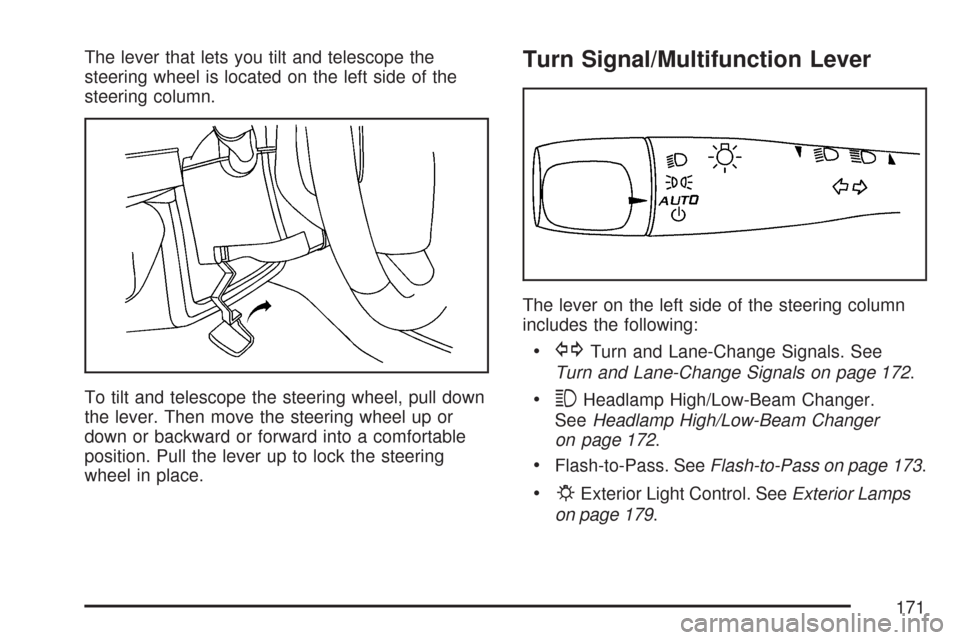
The lever that lets you tilt and telescope the
steering wheel is located on the left side of the
steering column.
To tilt and telescope the steering wheel, pull down
the lever. Then move the steering wheel up or
down or backward or forward into a comfortable
position. Pull the lever up to lock the steering
wheel in place.Turn Signal/Multifunction Lever
The lever on the left side of the steering column
includes the following:
GTurn and Lane-Change Signals. See
Turn and Lane-Change Signals on page 172.
3Headlamp High/Low-Beam Changer.
SeeHeadlamp High/Low-Beam Changer
on page 172.
Flash-to-Pass. SeeFlash-to-Pass on page 173.
PExterior Light Control. SeeExterior Lamps
on page 179.
171
Page 176 of 510
Cruise Control
With cruise control, you can maintain a speed
of about 25 mph (40 km/h) or more without
keeping your foot on the accelerator. This can
really help on long trips. Cruise control does not
work at speeds below about 25 mph (40 km/h).
{CAUTION:
Cruise control can be dangerous where
you cannot drive safely at a steady speed.
So, do not use your cruise control on
winding roads or in heavy traffic.
Cruise control can be dangerous on
slippery roads. On such roads, fast
changes in tire traction can cause
excessive wheel slip, and you could
lose control. Do not use cruise control
on slippery roads.
Setting Cruise Control
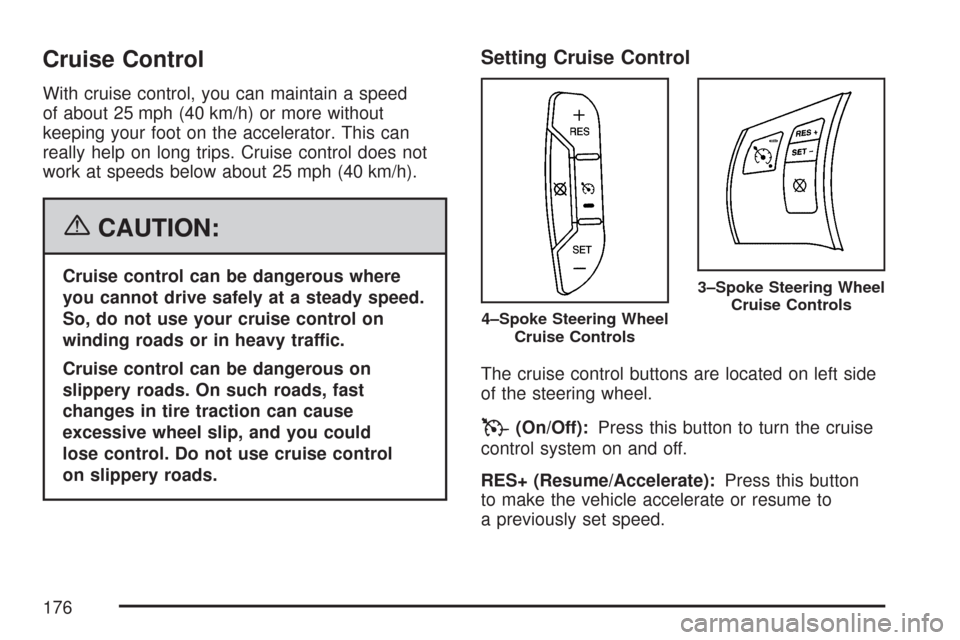
The cruise control buttons are located on left side
of the steering wheel.
T(On/Off):Press this button to turn the cruise
control system on and off.
RES+ (Resume/Accelerate):Press this button
to make the vehicle accelerate or resume to
a previously set speed.
4–Spoke Steering Wheel
Cruise Controls
3–Spoke Steering Wheel
Cruise Controls
176
Page 197 of 510
Notice:Do not use a razor blade or sharp
object to clear the inside rear window. Do not
adhere anything to the defogger grid lines
in the rear glass. These actions may damage
the rear defogger. Repairs would not be
covered by your warranty.
Outlet Adjustment
Use the thumbwheels on the air outlets, located
on the center and on the sides of the instrument
panel, to change the horizontal direction of
the air�ow. Use the tabs on the outlet vanes
to change the vertical direction of the air�ow.
Use the tabs on the outlet vanes to shut off
air�ow to the outlets.
The two upper outlets in the center of the
instrument panel are dedicated to the rear seats.
These outlets are �xed to aim air�ow into the
rear seats to help cool the rear occupants in
hot weather. Air�ow can be shut off at the
upper outlets by turning the vertical thumbwheel.
The louvers are �xed, do not attempt to move
them or they may break.
Operation Tips
Clear away any ice, snow or leaves from the
air inlets at the base of the windshield that
may block the �ow of air into your vehicle.
Use of non-GM approved hood de�ectors may
adversely affect performance of the system.
Keep the path under the front seats clear
of objects to help circulate the air inside
of your vehicle more effectively.
When an objectionable odor outside the
vehicle is encountered, use the recirculation
mode, with the temperature knob at a
comfortable setting to prevent the odor from
entering the vehicle through the ventilation
system. This can be helpful when driving
through a long tunnel with poor ventilation.
However, extended usage of this mode in cold
or cool weather can cause window fogging.
197
Page 282 of 510
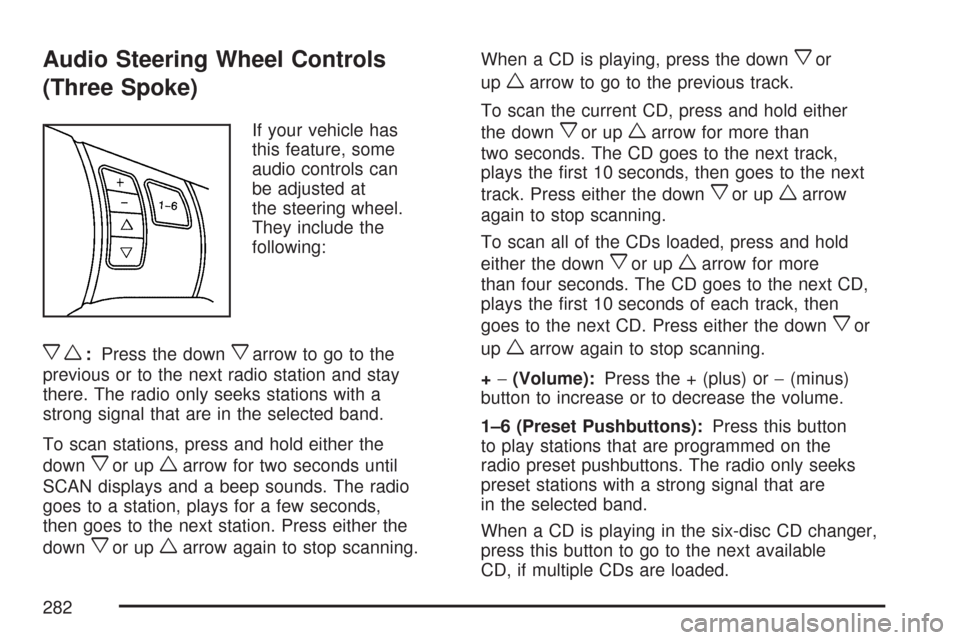
Audio Steering Wheel Controls
(Three Spoke)
If your vehicle has
this feature, some
audio controls can
be adjusted at
the steering wheel.
They include the
following:
xw:Press the downxarrow to go to the
previous or to the next radio station and stay
there. The radio only seeks stations with a
strong signal that are in the selected band.
To scan stations, press and hold either the
down
xor upwarrow for two seconds until
SCAN displays and a beep sounds. The radio
goes to a station, plays for a few seconds,
then goes to the next station. Press either the
down
xor upwarrow again to stop scanning.When a CD is playing, press the down
xor
up
warrow to go to the previous track.
To scan the current CD, press and hold either
the down
xor upwarrow for more than
two seconds. The CD goes to the next track,
plays the �rst 10 seconds, then goes to the next
track. Press either the down
xor upwarrow
again to stop scanning.
To scan all of the CDs loaded, press and hold
either the down
xor upwarrow for more
than four seconds. The CD goes to the next CD,
plays the �rst 10 seconds of each track, then
goes to the next CD. Press either the down
xor
up
warrow again to stop scanning.
+−(Volume):Press the + (plus) or−(minus)
button to increase or to decrease the volume.
1–6 (Preset Pushbuttons):Press this button
to play stations that are programmed on the
radio preset pushbuttons. The radio only seeks
preset stations with a strong signal that are
in the selected band.
When a CD is playing in the six-disc CD changer,
press this button to go to the next available
CD, if multiple CDs are loaded.
282
Page 283 of 510
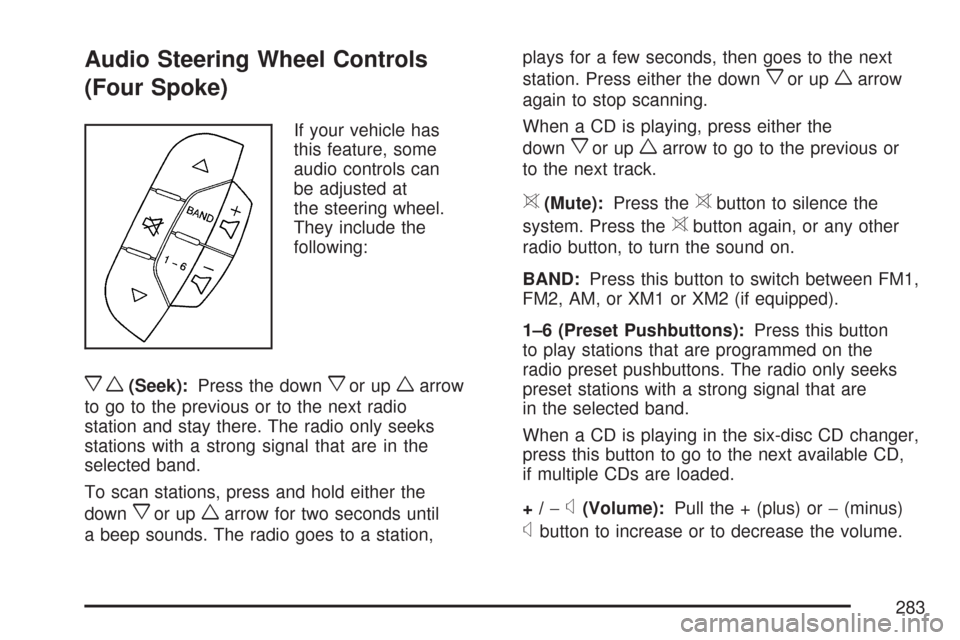
Audio Steering Wheel Controls
(Four Spoke)
If your vehicle has
this feature, some
audio controls can
be adjusted at
the steering wheel.
They include the
following:
xw(Seek):Press the downxor upwarrow
to go to the previous or to the next radio
station and stay there. The radio only seeks
stations with a strong signal that are in the
selected band.
To scan stations, press and hold either the
down
xor upwarrow for two seconds until
a beep sounds. The radio goes to a station,plays for a few seconds, then goes to the next
station. Press either the down
xor upwarrow
again to stop scanning.
When a CD is playing, press either the
down
xor upwarrow to go to the previous or
to the next track.
>(Mute):Press the>button to silence the
system. Press the
>button again, or any other
radio button, to turn the sound on.
BAND:Press this button to switch between FM1,
FM2, AM, or XM1 or XM2 (if equipped).
1–6 (Preset Pushbuttons):Press this button
to play stations that are programmed on the
radio preset pushbuttons. The radio only seeks
preset stations with a strong signal that are
in the selected band.
When a CD is playing in the six-disc CD changer,
press this button to go to the next available CD,
if multiple CDs are loaded.
+/−
x(Volume):Pull the + (plus) or−(minus)
xbutton to increase or to decrease the volume.
283
Page 294 of 510
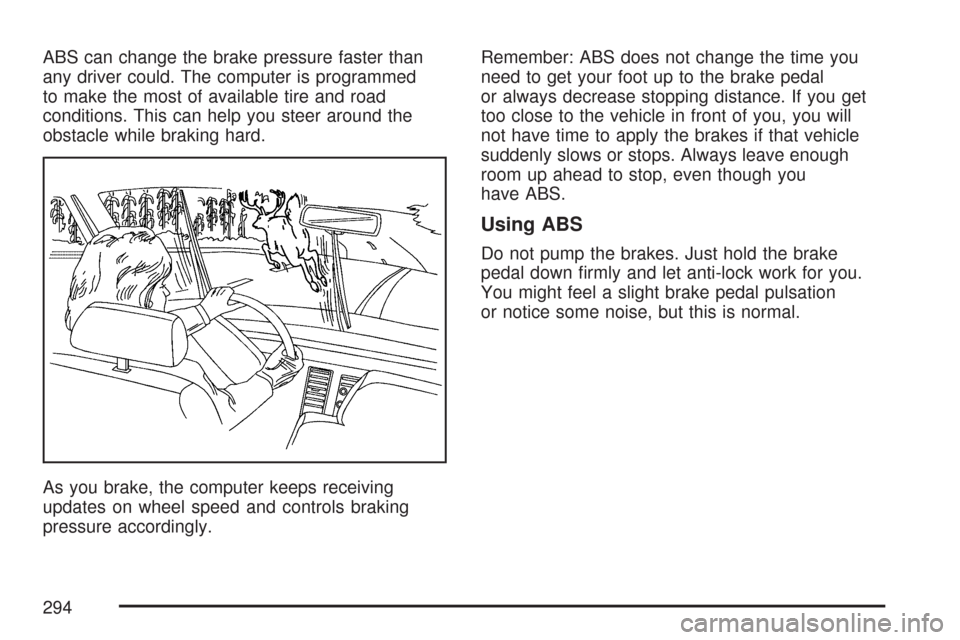
ABS can change the brake pressure faster than
any driver could. The computer is programmed
to make the most of available tire and road
conditions. This can help you steer around the
obstacle while braking hard.
As you brake, the computer keeps receiving
updates on wheel speed and controls braking
pressure accordingly.Remember: ABS does not change the time you
need to get your foot up to the brake pedal
or always decrease stopping distance. If you get
too close to the vehicle in front of you, you will
not have time to apply the brakes if that vehicle
suddenly slows or stops. Always leave enough
room up ahead to stop, even though you
have ABS.
Using ABS
Do not pump the brakes. Just hold the brake
pedal down �rmly and let anti-lock work for you.
You might feel a slight brake pedal pulsation
or notice some noise, but this is normal.
294