Page 274 of 510
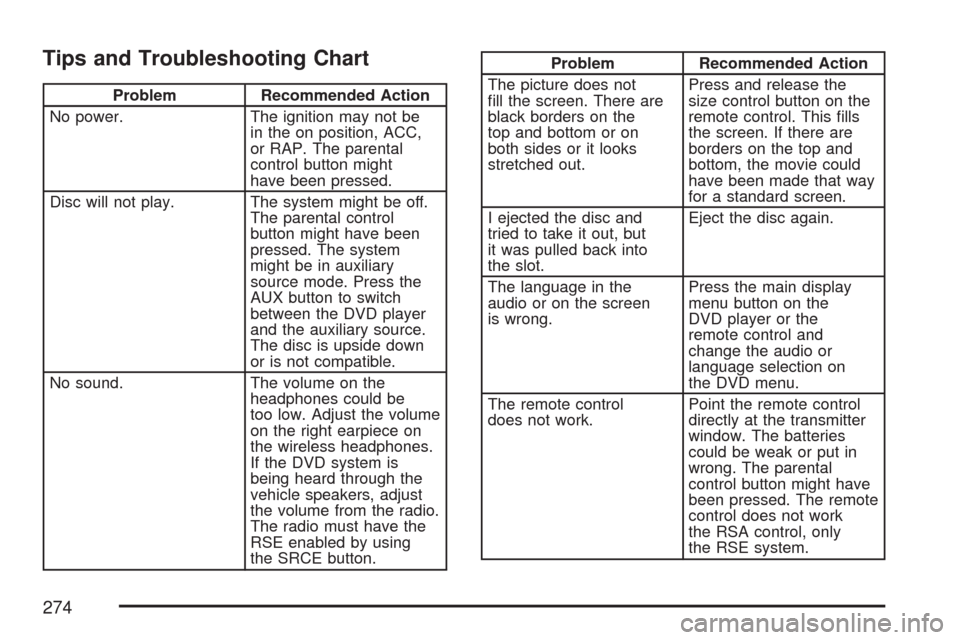
Tips and Troubleshooting Chart
Problem Recommended Action
No power. The ignition may not be
in the on position, ACC,
or RAP. The parental
control button might
have been pressed.
Disc will not play. The system might be off.
The parental control
button might have been
pressed. The system
might be in auxiliary
source mode. Press the
AUX button to switch
between the DVD player
and the auxiliary source.
The disc is upside down
or is not compatible.
No sound. The volume on the
headphones could be
too low. Adjust the volume
on the right earpiece on
the wireless headphones.
If the DVD system is
being heard through the
vehicle speakers, adjust
the volume from the radio.
The radio must have the
RSE enabled by using
the SRCE button.
Problem Recommended Action
The picture does not
�ll the screen. There are
black borders on the
top and bottom or on
both sides or it looks
stretched out.Press and release the
size control button on the
remote control. This �lls
the screen. If there are
borders on the top and
bottom, the movie could
have been made that way
for a standard screen.
I ejected the disc and
tried to take it out, but
it was pulled back into
the slot.Eject the disc again.
The language in the
audio or on the screen
is wrong.Press the main display
menu button on the
DVD player or the
remote control and
change the audio or
language selection on
the DVD menu.
The remote control
does not work.Point the remote control
directly at the transmitter
window. The batteries
could be weak or put in
wrong. The parental
control button might have
been pressed. The remote
control does not work
the RSA control, only
the RSE system.
274
Page 286 of 510
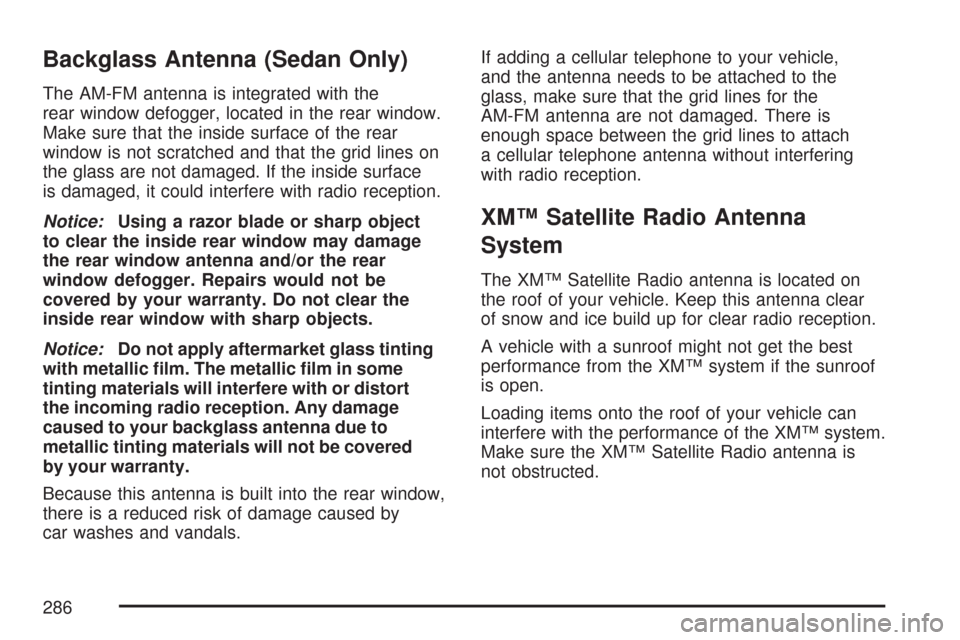
Backglass Antenna (Sedan Only)
The AM-FM antenna is integrated with the
rear window defogger, located in the rear window.
Make sure that the inside surface of the rear
window is not scratched and that the grid lines on
the glass are not damaged. If the inside surface
is damaged, it could interfere with radio reception.
Notice:Using a razor blade or sharp object
to clear the inside rear window may damage
the rear window antenna and/or the rear
window defogger. Repairs would not be
covered by your warranty. Do not clear the
inside rear window with sharp objects.
Notice:Do not apply aftermarket glass tinting
with metallic �lm. The metallic �lm in some
tinting materials will interfere with or distort
the incoming radio reception. Any damage
caused to your backglass antenna due to
metallic tinting materials will not be covered
by your warranty.
Because this antenna is built into the rear window,
there is a reduced risk of damage caused by
car washes and vandals.If adding a cellular telephone to your vehicle,
and the antenna needs to be attached to the
glass, make sure that the grid lines for the
AM-FM antenna are not damaged. There is
enough space between the grid lines to attach
a cellular telephone antenna without interfering
with radio reception.
XM™ Satellite Radio Antenna
System
The XM™ Satellite Radio antenna is located on
the roof of your vehicle. Keep this antenna clear
of snow and ice build up for clear radio reception.
A vehicle with a sunroof might not get the best
performance from the XM™ system if the sunroof
is open.
Loading items onto the roof of your vehicle can
interfere with the performance of the XM™ system.
Make sure the XM™ Satellite Radio antenna is
not obstructed.
286
Page 314 of 510
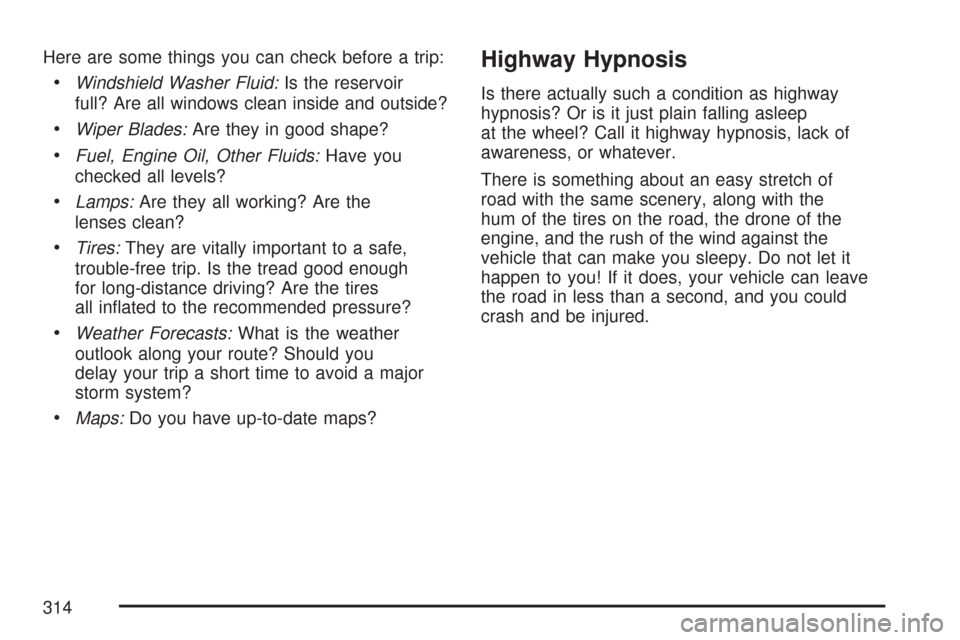
Here are some things you can check before a trip:
Windshield Washer Fluid:Is the reservoir
full? Are all windows clean inside and outside?
Wiper Blades:Are they in good shape?
Fuel, Engine Oil, Other Fluids:Have you
checked all levels?
Lamps:Are they all working? Are the
lenses clean?
Tires:They are vitally important to a safe,
trouble-free trip. Is the tread good enough
for long-distance driving? Are the tires
all in�ated to the recommended pressure?
Weather Forecasts:What is the weather
outlook along your route? Should you
delay your trip a short time to avoid a major
storm system?
Maps:Do you have up-to-date maps?
Highway Hypnosis
Is there actually such a condition as highway
hypnosis? Or is it just plain falling asleep
at the wheel? Call it highway hypnosis, lack of
awareness, or whatever.
There is something about an easy stretch of
road with the same scenery, along with the
hum of the tires on the road, the drone of the
engine, and the rush of the wind against the
vehicle that can make you sleepy. Do not let it
happen to you! If it does, your vehicle can leave
the road in less than a second, and you could
crash and be injured.
314
Page 321 of 510
You can run the engine to keep warm,
but be careful.
{CAUTION:
Snow can trap exhaust gases under
your vehicle. This can cause deadly
CO (carbon monoxide) gas to get inside.
CO could overcome you and kill you.
You cannot see it or smell it, so you
might not know it is in your vehicle.
Clear away snow from around the base
of your vehicle, especially any that is
blocking the exhaust pipe. And check
around again from time to time to be
sure snow does not collect there.
Open a window just a little on the side
of the vehicle that is away from the wind.
This will help keep CO out.
321
Page 322 of 510
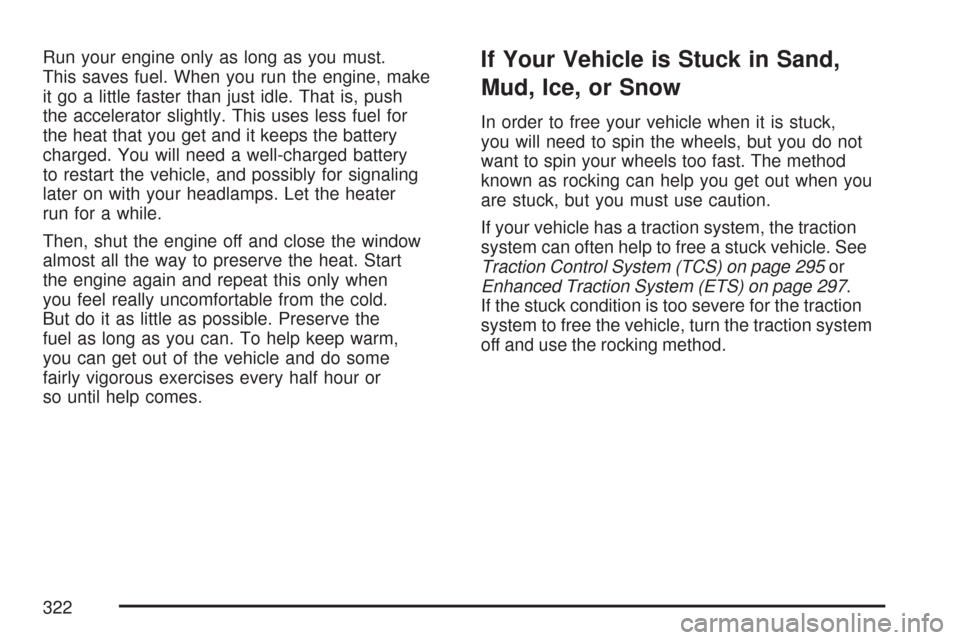
Run your engine only as long as you must.
This saves fuel. When you run the engine, make
it go a little faster than just idle. That is, push
the accelerator slightly. This uses less fuel for
the heat that you get and it keeps the battery
charged. You will need a well-charged battery
to restart the vehicle, and possibly for signaling
later on with your headlamps. Let the heater
run for a while.
Then, shut the engine off and close the window
almost all the way to preserve the heat. Start
the engine again and repeat this only when
you feel really uncomfortable from the cold.
But do it as little as possible. Preserve the
fuel as long as you can. To help keep warm,
you can get out of the vehicle and do some
fairly vigorous exercises every half hour or
so until help comes.If Your Vehicle is Stuck in Sand,
Mud, Ice, or Snow
In order to free your vehicle when it is stuck,
you will need to spin the wheels, but you do not
want to spin your wheels too fast. The method
known as rocking can help you get out when you
are stuck, but you must use caution.
If your vehicle has a traction system, the traction
system can often help to free a stuck vehicle. See
Traction Control System (TCS) on page 295or
Enhanced Traction System (ETS) on page 297.
If the stuck condition is too severe for the traction
system to free the vehicle, turn the traction system
off and use the rocking method.
322
Page 343 of 510
Vehicle Identi�cation.................................. 444
Vehicle Identi�cation Number (VIN)........... 444
Service Parts Identi�cation Label............... 444
Electrical System........................................ 445
Add-On Electrical Equipment..................... 445
Headlamp Wiring....................................... 445
Windshield Wiper Fuses............................ 445Power Windows and Other Power
Options.................................................. 446
Fuses........................................................ 446
Instrument Panel Fuse Block..................... 447
Engine Compartment Fuse Block............... 449
Rear Compartment Fuse Block.................. 451
Capacities and Speci�cations.................... 454
Section 5 Service and Appearance Care
343
Page 373 of 510
If you get the overheat warning with no sign of
steam, try this for a minute or so:
1. In heavy traffic, let the engine idle in
NEUTRAL (N) while stopped. If it is safe to do
so, pull off the road, shift to PARK (P) or
NEUTRAL (N) and let the engine idle.
2. Turn on your heater to full hot at the highest
fan speed and open the windows as
necessary.
If you no longer have the overheat warning, you
can drive. Just to be safe, drive slower for
about 10 minutes. If the warning does not come
back on, you can drive normally.
If the warning continues, pull over, stop, and park
your vehicle right away.
If there is still no sign of steam, idle the engine for
three minutes while you are parked. If you still
have the warning, turn off the engine and
get everyone out of the vehicle until it cools down.
You may decide not to lift the hood but to get
service help right away.Overheated Engine Protection
Operating Mode (3.5L V6 and
3.9L V6 Engines)
This emergency operating mode allows your
vehicle to be driven to a safe place in an
emergency situation. If an overheated engine
condition exists, an overheat protection mode
which alternates �ring groups of cylinders helps
prevent engine damage. In this mode, you
will notice a signi�cant loss in power and engine
performance. The temperature gage will
indicate an overheat condition exists. Driving
extended miles (km) and/or towing a trailer in the
overheat protection mode should be avoided.
Notice:After driving in the overheated engine
protection operating mode, to avoid engine
damage, allow the engine to cool before
attempting any repair. The engine oil will be
severely degraded. Repair the cause of coolant
loss, change the oil and reset the oil life system.
SeeEngine Oil on page 359.
373
Page 395 of 510
3. Pull the assembly down to release it from the
U-hooked end of the wiper arm and slide the
assembly away from the arm.
4. Slide in the new wiper blade assembly and
snap it into place.
5. Repeat Steps 1 through 4 for the other wiper,
if necessary.
Rear Wiper Blade Replacement – MAXX
To replace the rear wiper blade, do the following:
1. Pull the wiper blade assembly away from
the window.
2. Pull the wiper blade out of the wiper blade
assembly, as shown.
395