Page 112 of 488
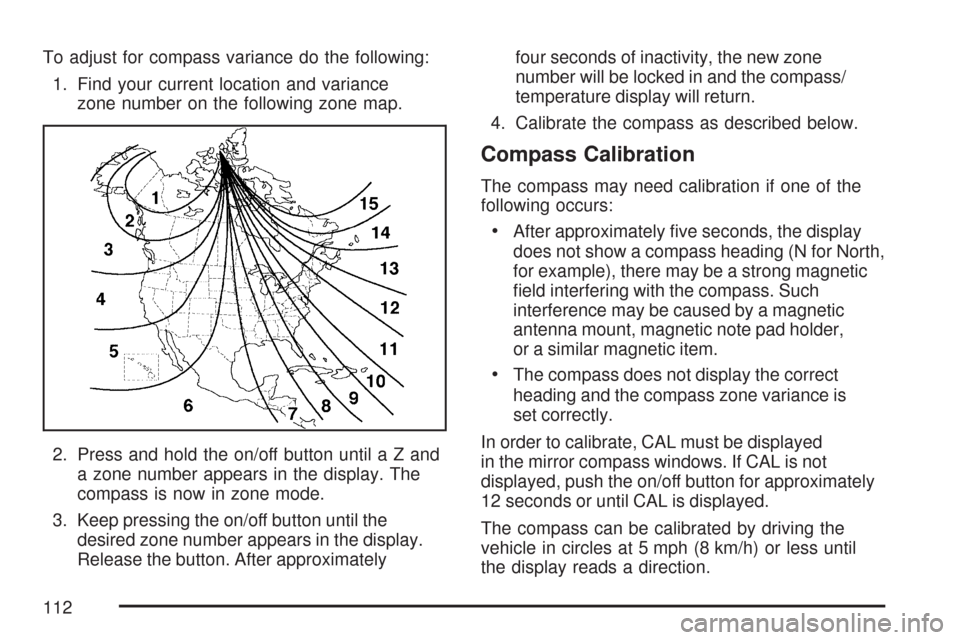
To adjust for compass variance do the following:
1. Find your current location and variance
zone number on the following zone map.
2. Press and hold the on/off button untilaZand
a zone number appears in the display. The
compass is now in zone mode.
3. Keep pressing the on/off button until the
desired zone number appears in the display.
Release the button. After approximatelyfour seconds of inactivity, the new zone
number will be locked in and the compass/
temperature display will return.
4. Calibrate the compass as described below.
Compass Calibration
The compass may need calibration if one of the
following occurs:
After approximately �ve seconds, the display
does not show a compass heading (N for North,
for example), there may be a strong magnetic
�eld interfering with the compass. Such
interference may be caused by a magnetic
antenna mount, magnetic note pad holder,
or a similar magnetic item.
The compass does not display the correct
heading and the compass zone variance is
set correctly.
In order to calibrate, CAL must be displayed
in the mirror compass windows. If CAL is not
displayed, push the on/off button for approximately
12 seconds or until CAL is displayed.
The compass can be calibrated by driving the
vehicle in circles at 5 mph (8 km/h) or less until
the display reads a direction.
112
Page 113 of 488
Cleaning the Mirror
When cleaning the mirror, use a paper towel or
similar material dampened with glass cleaner.
Do not spray glass cleaner directly on the mirror
as that may cause the liquid cleaner to enter
the mirror housing.
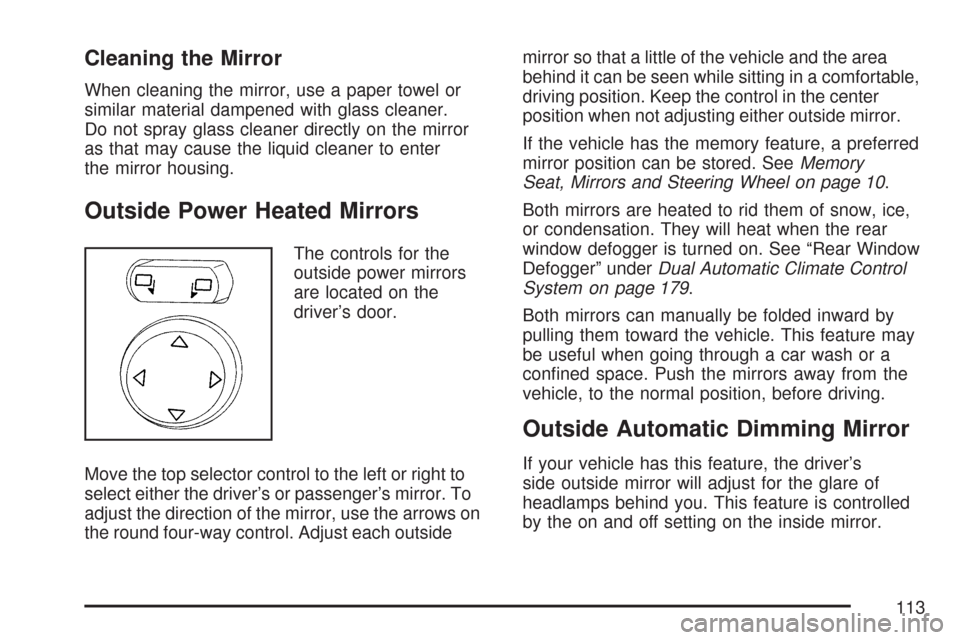
Outside Power Heated Mirrors
The controls for the
outside power mirrors
are located on the
driver’s door.
Move the top selector control to the left or right to
select either the driver’s or passenger’s mirror. To
adjust the direction of the mirror, use the arrows on
the round four-way control. Adjust each outsidemirror so that a little of the vehicle and the area
behind it can be seen while sitting in a comfortable,
driving position. Keep the control in the center
position when not adjusting either outside mirror.
If the vehicle has the memory feature, a preferred
mirror position can be stored. SeeMemory
Seat, Mirrors and Steering Wheel on page 10.
Both mirrors are heated to rid them of snow, ice,
or condensation. They will heat when the rear
window defogger is turned on. See “Rear Window
Defogger” underDual Automatic Climate Control
System on page 179.
Both mirrors can manually be folded inward by
pulling them toward the vehicle. This feature may
be useful when going through a car wash or a
con�ned space. Push the mirrors away from the
vehicle, to the normal position, before driving.
Outside Automatic Dimming Mirror
If your vehicle has this feature, the driver’s
side outside mirror will adjust for the glare of
headlamps behind you. This feature is controlled
by the on and off setting on the inside mirror.
113
Page 134 of 488
Roof Panel
The vehicle may have a removable roof panel.
Follow the procedures listed when removing
or installing it.
Removing the Roof Panel
{CAUTION:
Do not try to remove a roof panel while
the vehicle is moving. Trying to remove
the roof panel while the vehicle is moving
could cause an accident. The panel could
fall into the vehicle and cause you to lose
control, or it could �y off and strike
another vehicle. You or others could be
injured. Remove the roof panel only when
the vehicle is parked.
Until you are sure you can remove the panel
alone, have someone help you.Notice:If you drop or rest a roof panel
on its edges, the roof panel, paint and/or
weatherstripping may be damaged. Always
place the roof panel in the stowage receivers
after removing it from the vehicle.
1. Park on a level surface and set the parking
brake. Shift an automatic transmission into
PARK (P). Shift a manual transmission
into NEUTRAL.
2. Make sure the ignition is off.
3. Lower both sun visors.
4. Open the rear hatch and remove any items
that may interfere with proper storage of the
roof panel.
5. Lower the windows.
There are two release latches on the front of
the roof panel and one rear release latch
on the back of the roof panel.
134
Page 140 of 488
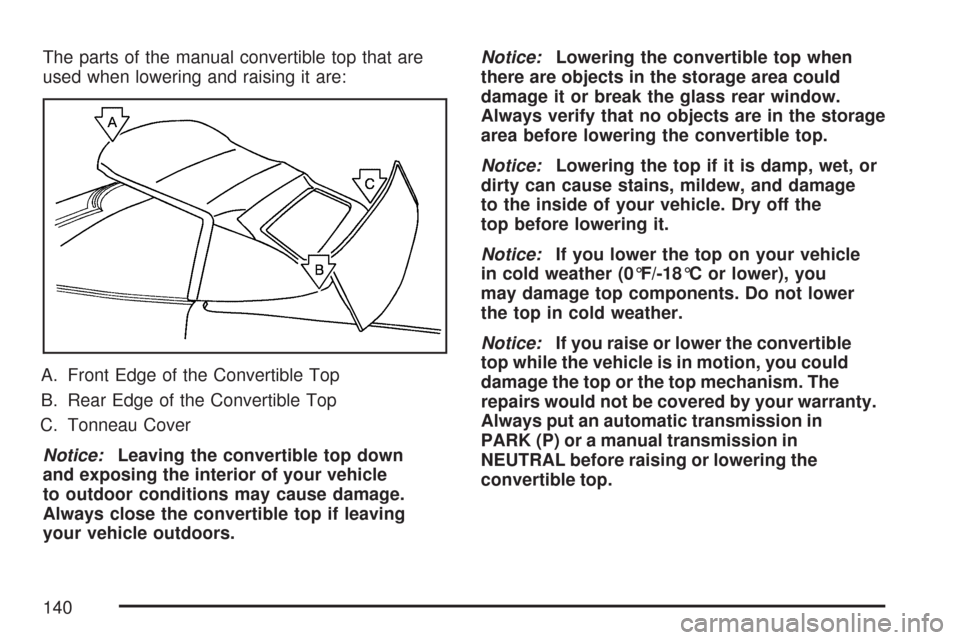
The parts of the manual convertible top that are
used when lowering and raising it are:
A. Front Edge of the Convertible Top
B. Rear Edge of the Convertible Top
C. Tonneau Cover
Notice:Leaving the convertible top down
and exposing the interior of your vehicle
to outdoor conditions may cause damage.
Always close the convertible top if leaving
your vehicle outdoors.Notice:Lowering the convertible top when
there are objects in the storage area could
damage it or break the glass rear window.
Always verify that no objects are in the storage
area before lowering the convertible top.
Notice:Lowering the top if it is damp, wet, or
dirty can cause stains, mildew, and damage
to the inside of your vehicle. Dry off the
top before lowering it.
Notice:If you lower the top on your vehicle
in cold weather (0°F/-18°C or lower), you
may damage top components. Do not lower
the top in cold weather.
Notice:If you raise or lower the convertible
top while the vehicle is in motion, you could
damage the top or the top mechanism. The
repairs would not be covered by your warranty.
Always put an automatic transmission in
PARK (P) or a manual transmission in
NEUTRAL before raising or lowering the
convertible top.
140
Page 144 of 488
9. Then move the top rearward to its fully-stored
position.
10. After the top is stored, apply one even push
on the center of the front edge (A) of the
convertible top to assure that the top is fully
retracted.
11. Close the tonneau cover (B) by pressing down
on it with a swift, �rm motion.
Raising the Manual Convertible Top
1. Park on a level surface. Shift an automatic
transmission into PARK (P) and set the
parking brake. Shift a manual transmission
into NEUTRAL and set the parking brake.
2. Lower both windows.
3. Make sure the ignition is off.
4. Tilt the driver’s seat forward and press the
tonneau cover release button, or use the
manual release cable if battery power has been
lost. See Step 6 under “Lowering the Manual
Convertible Top” earlier in this section.
After pressing the release button, the driver’s
and passenger’s door glass should retract
to the full-down position, if they have not
already been lowered.
5. Lift the tonneau cover.
144
Page 146 of 488
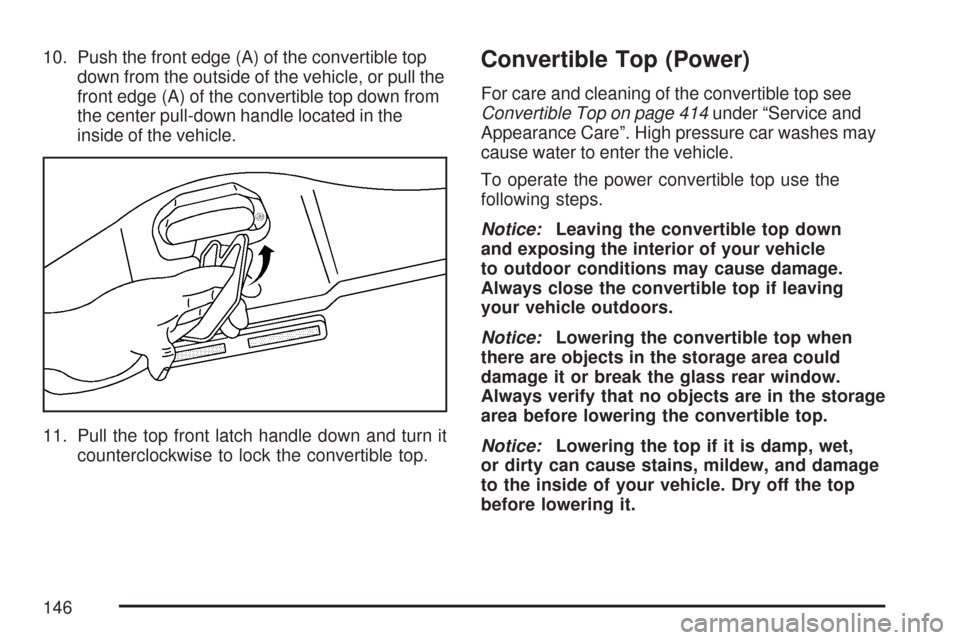
10. Push the front edge (A) of the convertible top
down from the outside of the vehicle, or pull the
front edge (A) of the convertible top down from
the center pull-down handle located in the
inside of the vehicle.
11. Pull the top front latch handle down and turn it
counterclockwise to lock the convertible top.Convertible Top (Power)
For care and cleaning of the convertible top see
Convertible Top on page 414under “Service and
Appearance Care”. High pressure car washes may
cause water to enter the vehicle.
To operate the power convertible top use the
following steps.
Notice:Leaving the convertible top down
and exposing the interior of your vehicle
to outdoor conditions may cause damage.
Always close the convertible top if leaving
your vehicle outdoors.
Notice:Lowering the convertible top when
there are objects in the storage area could
damage it or break the glass rear window.
Always verify that no objects are in the storage
area before lowering the convertible top.
Notice:Lowering the top if it is damp, wet,
or dirty can cause stains, mildew, and damage
to the inside of your vehicle. Dry off the top
before lowering it.
146
Page 147 of 488

Notice:If you lower the top on your vehicle
in cold weather (0°F/-18°C or lower), you
may damage top components. Do not lower
the top in cold weather.
Notice:If you raise or lower the convertible
top while the vehicle is in motion, you could
damage the top or the top mechanism. The
repairs would not be covered by your warranty.
Always put an automatic transmission in
PARK (P) or a manual transmission in
NEUTRAL before raising or lowering the
convertible top.
Lowering the Power Convertible Top
1. Park on a level surface. The vehicle must
be running or in Acc. Shift an automatic
transmission into PARK (P) and set the
parking brake. Shift a manual transmission
into NEUTRAL, and set the parking brake.
2. Make sure the trunk is closed and the rear
trunk partition in the rear storage area is
in the fastened upright position, and that
no objects are forward of the divider.
See “Rear Trunk Partition” underRear
Storage Area on page 131.3. Release the convertible top front latch,
located above the inside rearview mirror,
by pulling and turning it clockwise toward
the driver’s door. Push upward on the front
edge. The windows will automatically lower.
147
Page 148 of 488
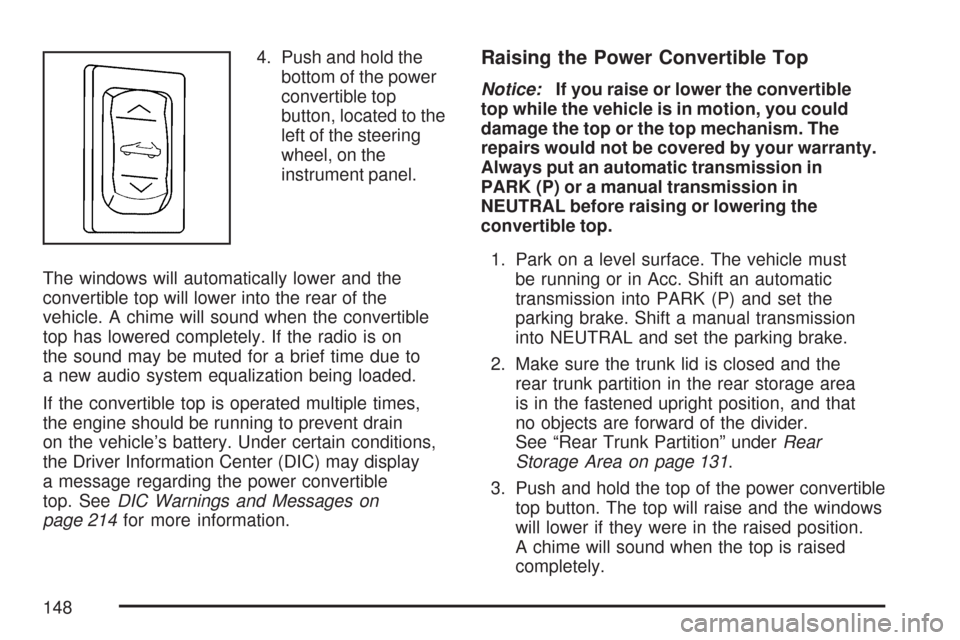
4. Push and hold the
bottom of the power
convertible top
button, located to the
left of the steering
wheel, on the
instrument panel.
The windows will automatically lower and the
convertible top will lower into the rear of the
vehicle. A chime will sound when the convertible
top has lowered completely. If the radio is on
the sound may be muted for a brief time due to
a new audio system equalization being loaded.
If the convertible top is operated multiple times,
the engine should be running to prevent drain
on the vehicle’s battery. Under certain conditions,
the Driver Information Center (DIC) may display
a message regarding the power convertible
top. SeeDIC Warnings and Messages on
page 214for more information.Raising the Power Convertible Top
Notice:If you raise or lower the convertible
top while the vehicle is in motion, you could
damage the top or the top mechanism. The
repairs would not be covered by your warranty.
Always put an automatic transmission in
PARK (P) or a manual transmission in
NEUTRAL before raising or lowering the
convertible top.
1. Park on a level surface. The vehicle must
be running or in Acc. Shift an automatic
transmission into PARK (P) and set the
parking brake. Shift a manual transmission
into NEUTRAL and set the parking brake.
2. Make sure the trunk lid is closed and the
rear trunk partition in the rear storage area
is in the fastened upright position, and that
no objects are forward of the divider.
See “Rear Trunk Partition” underRear
Storage Area on page 131.
3. Push and hold the top of the power convertible
top button. The top will raise and the windows
will lower if they were in the raised position.
A chime will sound when the top is raised
completely.
148