2007 CHEVROLET CORVETTE trunk
[x] Cancel search: trunkPage 148 of 488
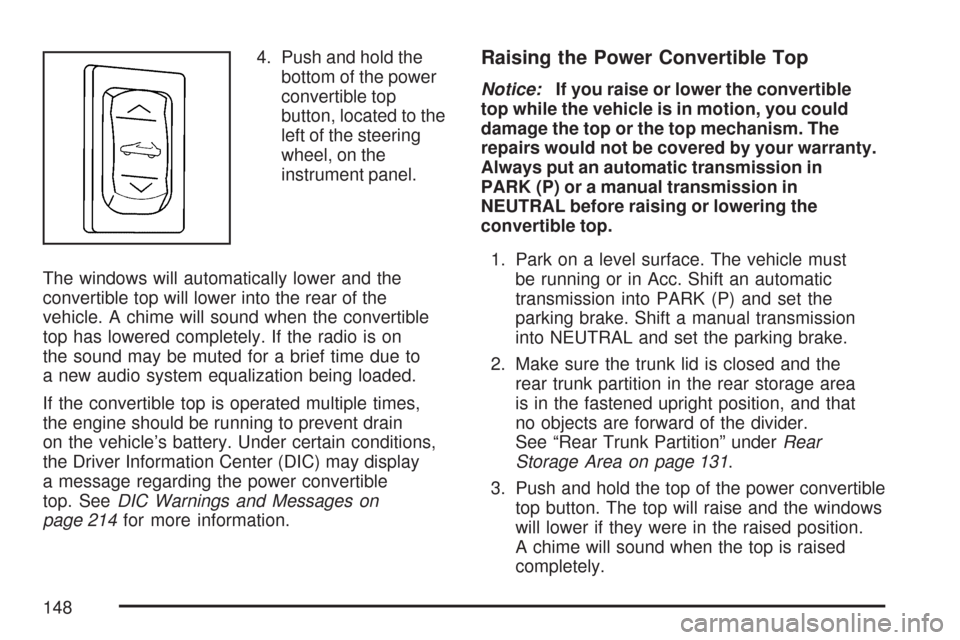
4. Push and hold the
bottom of the power
convertible top
button, located to the
left of the steering
wheel, on the
instrument panel.
The windows will automatically lower and the
convertible top will lower into the rear of the
vehicle. A chime will sound when the convertible
top has lowered completely. If the radio is on
the sound may be muted for a brief time due to
a new audio system equalization being loaded.
If the convertible top is operated multiple times,
the engine should be running to prevent drain
on the vehicle’s battery. Under certain conditions,
the Driver Information Center (DIC) may display
a message regarding the power convertible
top. SeeDIC Warnings and Messages on
page 214for more information.Raising the Power Convertible Top
Notice:If you raise or lower the convertible
top while the vehicle is in motion, you could
damage the top or the top mechanism. The
repairs would not be covered by your warranty.
Always put an automatic transmission in
PARK (P) or a manual transmission in
NEUTRAL before raising or lowering the
convertible top.
1. Park on a level surface. The vehicle must
be running or in Acc. Shift an automatic
transmission into PARK (P) and set the
parking brake. Shift a manual transmission
into NEUTRAL and set the parking brake.
2. Make sure the trunk lid is closed and the
rear trunk partition in the rear storage area
is in the fastened upright position, and that
no objects are forward of the divider.
See “Rear Trunk Partition” underRear
Storage Area on page 131.
3. Push and hold the top of the power convertible
top button. The top will raise and the windows
will lower if they were in the raised position.
A chime will sound when the top is raised
completely.
148
Page 150 of 488
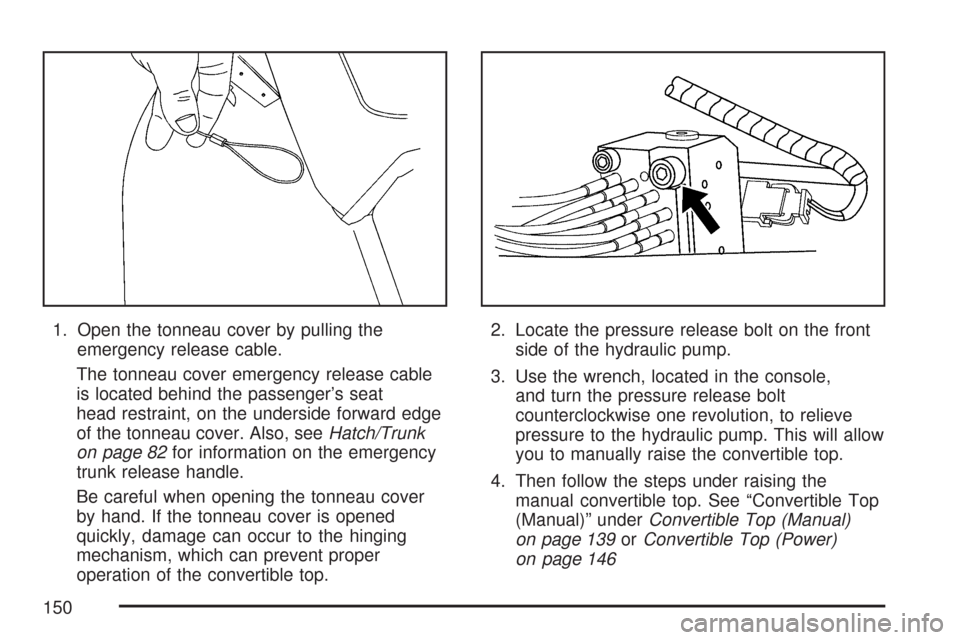
1. Open the tonneau cover by pulling the
emergency release cable.
The tonneau cover emergency release cable
is located behind the passenger’s seat
head restraint, on the underside forward edge
of the tonneau cover. Also, seeHatch/Trunk
on page 82for information on the emergency
trunk release handle.
Be careful when opening the tonneau cover
by hand. If the tonneau cover is opened
quickly, damage can occur to the hinging
mechanism, which can prevent proper
operation of the convertible top.2. Locate the pressure release bolt on the front
side of the hydraulic pump.
3. Use the wrench, located in the console,
and turn the pressure release bolt
counterclockwise one revolution, to relieve
pressure to the hydraulic pump. This will allow
you to manually raise the convertible top.
4. Then follow the steps under raising the
manual convertible top. See “Convertible Top
(Manual)” underConvertible Top (Manual)
on page 139orConvertible Top (Power)
on page 146
150
Page 157 of 488

The main components of your instrument panel are the following:
A. Air Outlet. SeeOutlet Adjustment on page 186.
B. Head-Up Display Controls (If Equipped).
SeeHead-Up Display (HUD) on page 174.
C. Turn Signal/Multifunction Lever. SeeTurn
Signal/Multifunction Lever on page 160. Cruise
Control. SeeCruise Control on page 164.
Fog Lamps. SeeFog Lamps on page 171.
Headlamp Controls. SeeExterior Lamps
on page 168.
D. Manual Shift Paddles (If Equipped). See
Automatic Transmission Operation on page 95.
E. Driver Information Center (DIC). SeeDriver
Information Center (DIC) on page 207.
F. Instrument Panel Cluster. SeeInstrument
Panel Cluster on page 189.
G. Audio Steering Wheel Controls (If Equipped).
SeeAudio Steering Wheel Controls on
page 269.
H. Windshield Wiper/Washer Lever. See
Windshield Wipers on page 162and
Windshield Washer on page 163.
I. Driver Information Center (DIC) Controls.
SeeDIC Controls and Displays on page 208.J. Center Air Outlets. SeeOutlet Adjustment
on page 186.
K. Hazard Warning Flasher Button. SeeHazard
Warning Flashers on page 158.
L. Audio System. SeeAudio System(s) on
page 244.
M. Climate Controls. SeeDual Automatic Climate
Control System on page 179.
N. Fuel Door Release Button. SeeFilling the Tank
on page 324. Hatch/Trunk Release Button.
See “Hatch/Trunk Lid Release” under
Hatch/Trunk on page 82.
O. Instrument Panel Brightness Control. See
Instrument Panel Brightness on page 172.
P. Power Folding Top Switch (If Equipped).
SeeConvertible Top (Manual) on page 139
orConvertible Top (Power) on page 146.
Q. Tilt Wheel Lever. SeeTilt Wheel on page 159.
R. Telescopic Wheel Button (If Equipped).
SeeTilt Wheel on page 159.
S. Ignition Switch. SeeIgnition Positions
on page 90.
157
Page 173 of 488

Turn and hold the knob clockwise to brighten the
lights or counterclockwise to dim them. During
the day, this knob will adjust the instrument panel
brightness and at night will adjust all interior
lighting.
Be sure not to have this knob turned all the way
down with the lamps on during the day. Your
Driver Information Center (DIC) may not be visible.
Courtesy Lamps
When any door or the hatch/trunk lid is opened,
the interior lamps will go on unless it is bright
outside.
You can also turn the courtesy lamps on and off
by pressing the instrument panel brightness knob.
Entry/Exit Lighting
With entry lighting, the interior lamps will come on
when entering the vehicle. The interior lamps
will come on for about 20 seconds when the
engine is off.
You can turn exit and entry lighting off by quickly
turning the courtesy lamps on and off.
Reading Lamps
The inside rearview mirror includes two reading
lamps. The lamps will go on when a door is
opened. When the doors are closed, each lamp
can be turned on individually by pressing the
switch for that lamp.
An ambient light is located in the passenger sun
visor clip. This light stays on while driving to
keep the cabin from being too dark.
Battery Run-Down Protection
This vehicle has a feature to help prevent the
battery from being drained in case any of
the following lamps are left on; the underhood
lamp, if your vehicle has this feature, vanity mirror
lamps, cargo lamps, reading lamps, console or
glove box lamps. If any of these lamps are left on,
they will automatically time-out after about
10 minutes. To reset it, all of the above lamps
must be turned off or the ignition key on.
173
Page 215 of 488
ACTIVE HANDLING CALIBRATING
This message displays and the active handling
system light on the instrument panel cluster turns
on while the system is calibrating after exceeding
19 mph (30 km/h) for 10 seconds. SeeActive
Handling System Light on page 198. The Active
Handling System is not functional yet. The
Active Handling System performance is affected
until the next message ACTIVE HANDLING
READY is displayed. The Active Handling System
is off until the ACTIVE HANDLING READY
message is displayed. SeeActive Handling
System on page 283for more information.
ACTIVE HANDLING READY
This message displays when the functional check
of the Active Handling System has been
completed. SeeActive Handling System on
page 283for more information.
ACTIVE HANDLING WARMING UP
This message may display when you �rst start
your vehicle during cold winter weather, and begin
to drive away, up to 6 mph (10 km/h). This is
normal. The Active Handling System performance
is affected until the next message ACTIVE
HANDLING READY is displayed in the DIC. See
Active Handling System on page 283for more
information.
To acknowledge the message, press the RESET
button.
ATTACH TRUNK PARTITION
If your vehicle has a power convertible top, this
message displays and a chime sounds if the trunk
partition is not in place. Open the hatch/trunk
and make sure the trunk partition is secure and no
objects are on the trunk partition. SeeRear
Storage Area on page 131for more information.
215
Page 218 of 488
CLOSE TRUNK TO MOVE TOP
This message displays and a chime sounds if the
trunk is open while you are trying to operate
the convertible top. Make sure the trunk is closed
before operating the convertible top. See
Convertible Top (Manual) on page 139or
Convertible Top (Power) on page 146.
COMPETITIVE DRIVING MODE
This message displays and a short chime sounds
when the Competitive Driving mode is selected.
The instrument panel cluster light will not be
on when the Competitive Driving mode is selected.
The Traction Control System (TCS) will not be
operating while in the Competitive Driving mode.
Adjust your driving accordingly. SeeRacing or
Other Competitive Driving on page 292for more
information.
COOLANT OVER TEMPERATURE
This message displays and a chime sounds if the
engine coolant exceeds 255°F (124°C). If you have
been operating your vehicle under normal driving
conditions, pull off the road, stop your vehicle, and
turn off the engine as soon as possible.
You can monitor the coolant temperature with the
gages button on the DIC or the engine coolant
temperature gage on the instrument panel cluster.
SeeEngine Overheating on page 350,DIC
Controls and Displays on page 208, andEngine
Coolant Temperature Gage on page 199.
To acknowledge the message, press the RESET
button. The message reappears and a chime
sounds every minute until this condition changes.
If you do not press the RESET button, the
message remains on until the condition changes.
CRUISE DISENGAGED
This message displays brie�y when you disengage
the cruise control system by stepping on the brake
on an automatic transmission vehicle or the clutch
on a manual transmission vehicle, or by turning off
the cruise control switch. SeeCruise Control on
page 164for more information.
218
Page 233 of 488
DRIVER DOOR AJAR
FOB AUTOLEARN WAIT XX MINUTES
See “Matching Transmitter(s) to Your Vehicle”
underKeyless Access System Operation
on page 73.
FOB BATTERY LOW
See “Battery Replacement” underKeyless
Access System Operation on page 73.
HATCH AJAR (Coupe)
INTRUSION SENSOR OFF, if your vehicle
has this feature.
INTRUSION SENSOR ON, if your vehicle
has this feature.
KNOWN FOB
See “Matching Transmitter(s) to Your Vehicle”
underKeyless Access System Operation
on page 73.
MAXIMUM NUMBER OF FOBS LEARNED
See “Matching Transmitter(s) to Your
Vehicle” underKeyless Access System
Operation on page 73.
OFF–ACCESSORY TO LEARN
See “Matching Transmitter(s) to Your Vehicle”
underKeyless Access System Operation
on page 73.
PASSENGER DOOR AJAR
READY FOR FOB #X
See “Matching Transmitter(s) to Your Vehicle”
underKeyless Access System Operation
on page 73.
TONNEAU AJAR (Convertible)
TRUNK AJAR (Convertible)
UPSHIFT NOW
SeeManual Transmission Operation
on page 100.
233
Page 238 of 488
Twilight Delay:This option allows you to set the
amount of time you want the parking lamps
and front fog lamps to remain on after you exit the
vehicle. This will occur when the vehicle is off
or in RAP and the headlamps are on due to the
automatic headlamp system. The parking
lamps and front fog lamps will remain on until the
driver selected time expires, the exterior lamp
control is activated or the vehicle is no longer off
or in RAP.
Press the OPTION button until TWILIGHT DELAY
appears on the display, then press the RESET
button to scroll through the following modes:
OFF
15 S
30 S (default)
90 S
If you choose OFF, this option will turn off.
If you choose 15 S, the twilight delay time will be
set to 15 seconds.
If you choose 30 S, the twilight delay time will be
set to 30 seconds.
If you choose 90 S, the twilight delay time will be
set to 90 seconds.When the mode you want is selected, press the
OPTION button to set your choice and advance to
the next personal option.
Flash at Unlock:This option activates the front
and rear turn signals for two short �ashes
when the unlock or hatch/trunk button on the
keyless access transmitter is pressed. This will
only occur when the vehicle is off.
Press the OPTION button until FLASH AT
UNLOCK appears on the display, then press the
RESET button to scroll through the following
modes:
YES (default)
NO
If you choose YES, the front and rear turn signals
will �ash twice when you press the unlock button or
the hatch/trunk button on the keyless access
transmitter.
If you choose NO, this option will turn off.
When the mode you want is selected, press the
OPTION button to set your choice and advance to
the next personal option.
238