2007 BUICK TERRAZA remote start
[x] Cancel search: remote startPage 305 of 562

Playing a Disc
To play a disc, gently insert the disc, with the label
side up, into the loading slot. The DVD player
will continue loading the disc and the player will
automatically start if the vehicle is in
ACCESSORY, RUN, or RAP.
If a disc is already in the player, make sure that
the DVD player is on, then press the play/pause
button on the player faceplate or on the remote
control. You can also press the DVD AUX button
on the player faceplate, or the CD AUX button
on the radio faceplate until RSE appears on
the display, to start playing a disc.
Some DVDs will not allow fast forwarding or
skipping of the copyright information or previews.
Some DVDs will begin playing after the previews
have �nished. If the DVD does not begin
playing at the main title, refer to the on-screen
instructions.
Stopping and Resuming Playback
To stop playing a disc, press and release the
stop button on the DVD player faceplate or
the remote control.
To resume playback, press the play/pause button
on the DVD player faceplate or the remote control.
The movie should resume play from where it was
last stopped if the disc has not been ejected.
If the disc has been ejected, the disc will resume
play at the beginning of the disc.
Ejecting a Disc
Press the eject button on the DVD player faceplate,
when the disc is stopped, to eject the disc. There is
no eject button on the remote control.
If a disc is ejected from the player, but not removed,
the DVD player will reload the disc after a short
period of time.
305
Page 322 of 562

Selecting Your Mobile Digital Media as the
Active Source
Your radio and rear seat entertainment system
communicate with the GM Mobile Digital Media
system, as one compact unit that can be accessed
by everyone seated inside the vehicle. The GM
Mobile Digital Media system can hold thousands of
songs, hours of videos, and hundreds of games.
To help use this system, see the following
“Quick Start” information:
Front seat driver and passenger, use the radio
and steering wheel controls to access the music
collection with PhatNoise Voice Index™
technology. The preset buttons can be used to
select the browsing category. The Next,
Previous, and Seek buttons can be used to
browse within a browsing category. Browse the
music collection by artist, album, genre, or
custom playlist as the system uses the voice
mode to announce these selections. See “Using
the GM Mobile Digital Media System for Front
Seat Audio Entertainment” later in this manual.
Rear seat passengers, use the wireless DVD
remote control to navigate the menu displayed
on the overhead DVD video screen, then selectto play music, videos, or games. A dedicated
game controller is included with the Mobile
Digital Media package. See “Using the GM
Mobile Digital Media System for Rear Seat
Entertainment” later in this manual.
Your vehicle may have audio steering wheel
controls. Some audio controls can be adjusted at
the steering wheel. SeeAudio Steering Wheel
Controls on page 341in your owner manual.
If your vehicle has the OnStar
®/Mute audio
steering wheel control, read the following
instructions.
For vehicles with OnStar
®:
Press and hold the mute button to activate
OnStar®.
Press and release this button once again
to deactivate OnStar®mode and go to
mute mode.
Press this button twice to return to sound from
the GM Mobile Digital Media system.
For vehicles without OnStar
®:
Press the mute button to silence the system,
press and release this button once again to
turn the sound back on.
322
Page 327 of 562

Using the Fast Forward and Fast
Reverse Buttons
{|(Fast Forward/Fast Reverse):Press and
hold the fast forward or fast reverse arrow to
fast forward or reverse within the current track.
Using the GM Mobile Digital Media
System for Rear Seat Entertainment
Rear seat passengers
can enjoy audio, video
and games over the
wireless headphones.Access to the Audio, Video, and Games on the
menu system is displayed on the video screen.
The DVD remote control and the controls on the
DVD player itself can be used to make the
selections.
Starting the System for Rear Seat
Entertainment
The GM Mobile Digital Media system is available
through the auxiliary mode of the DVD player.
To begin using the system, follow the instruction
list below:
1. Insert the DMS cartridge into the GM Mobile
Digital Media player.
2. Turn on your video screen by pressing the
power button.
3. Switch to the DMS mode by pressing the
AUX button.
Overhead Video Screen
327
Page 328 of 562

Navigating the On-Screen Menus Using
the DVD Remote Control
The on-screen menus provide access to the
Audio, Video, and Game content on your digital
media storage (DMS) cartridge. Use the DVD
remote control to navigate the on-screen menus.
A. Up List
B. Top Menu
C. Left
D. Down List
E. SelectF. Options
G. Right
H. Return to
Current Selection
n,q,p,o(Up List, Down List, Right, and
Left Directional Arrows):For the GM Mobile
Digital Media system, press the up list or down list
directional arrows (A, D) to move the highlight
area up or down the list of items.
Press the right directional arrow (G) to go further
into the selected item, or press the left directional
arrow (C) to go back one menu level.
r(Enter/Select):For the GM Mobile Digital
Media system, press the enter/select button (E)
to go into any selected menu item.
v(Title/Top Menu):For the GM Mobile
Digital Media system, press the title/top menu
button (B) to jump to the start screen.
q(Return/Current Selection):For the GM
Mobile Digital Media system, if audio is playing or
in the pause mode, press the return/current
selection button (H) to go back to the current
selection.
328
Page 329 of 562

y(Menu/Options):For the GM Mobile Digital
Media system, press the menu/options button (F)
to display the options list.
c(Stop):For the GM Mobile Digital Media
system, press this button to stop playback of the
selected option.
r/j(Play/Pause):For the GM Mobile Digital
Media system, press this button to start playback
of a selected option. Press this button while
an option is in the play mode to pause it.
Press it again to continue playback of the
current option.
DVD Remote Control Batteries
If the remote control does not seem to be
working, the batteries may need to be replaced.
See Remote Control, “Battery Replacement”
in your vehicle’s owner manual.
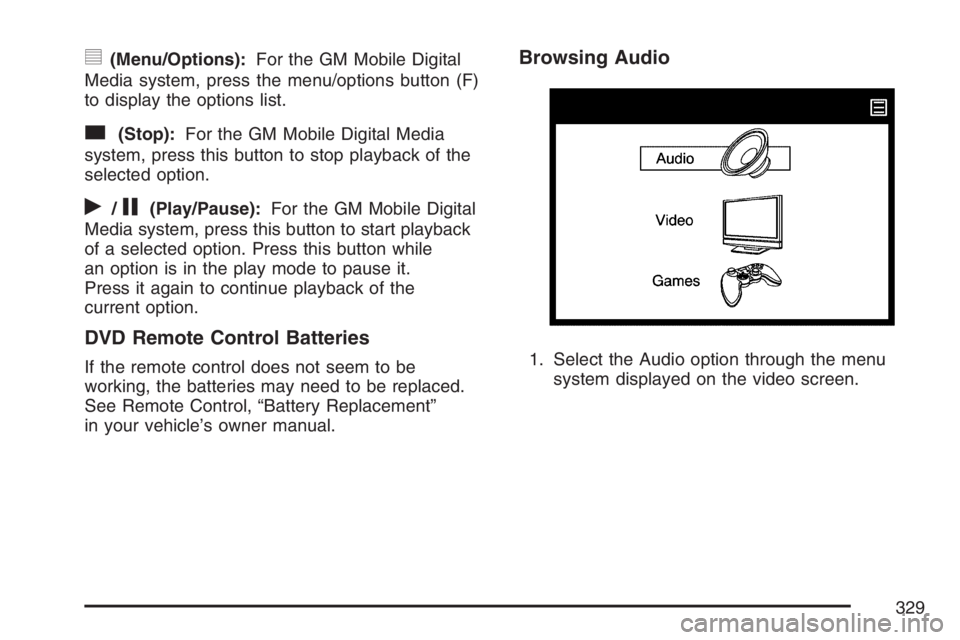
Browsing Audio
1. Select the Audio option through the menu
system displayed on the video screen.
329
Page 411 of 562

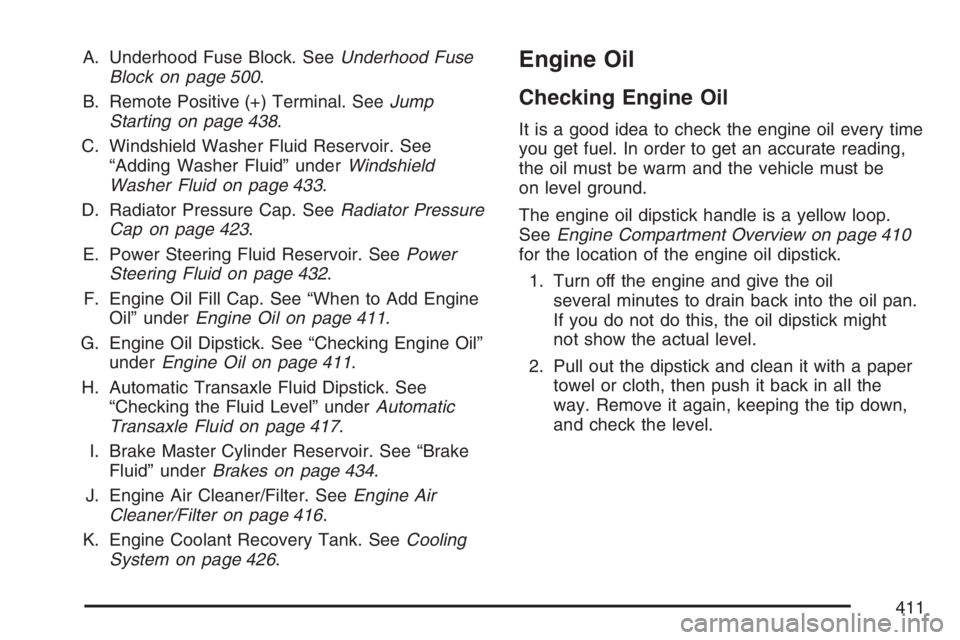
A. Underhood Fuse Block. SeeUnderhood Fuse
Block on page 500.
B. Remote Positive (+) Terminal. SeeJump
Starting on page 438.
C. Windshield Washer Fluid Reservoir. See
“Adding Washer Fluid” underWindshield
Washer Fluid on page 433.
D. Radiator Pressure Cap. SeeRadiator Pressure
Cap on page 423.
E. Power Steering Fluid Reservoir. SeePower
Steering Fluid on page 432.
F. Engine Oil Fill Cap. See “When to Add Engine
Oil” underEngine Oil on page 411.
G. Engine Oil Dipstick. See “Checking Engine Oil”
underEngine Oil on page 411.
H. Automatic Transaxle Fluid Dipstick. See
“Checking the Fluid Level” underAutomatic
Transaxle Fluid on page 417.
I. Brake Master Cylinder Reservoir. See “Brake
Fluid” underBrakes on page 434.
J. Engine Air Cleaner/Filter. SeeEngine Air
Cleaner/Filter on page 416.
K. Engine Coolant Recovery Tank. SeeCooling
System on page 426.Engine Oil
Checking Engine Oil
It is a good idea to check the engine oil every time
you get fuel. In order to get an accurate reading,
the oil must be warm and the vehicle must be
on level ground.
The engine oil dipstick handle is a yellow loop.
SeeEngine Compartment Overview on page 410
for the location of the engine oil dipstick.
1. Turn off the engine and give the oil
several minutes to drain back into the oil pan.
If you do not do this, the oil dipstick might
not show the actual level.
2. Pull out the dipstick and clean it with a paper
towel or cloth, then push it back in all the
way. Remove it again, keeping the tip down,
and check the level.
411
Page 439 of 562

To avoid the possibility of the vehicles rolling,
set the parking brake �rmly on both vehicles
involved in the jump start procedure. Put
an automatic transaxle in PARK (P) or
a manual transaxle in NEUTRAL before setting
the parking brake.
Notice:If you leave your radio or other
accessories on during the jump starting
procedure, they could be damaged. The repairs
would not be covered by your warranty.
Always turn off your radio and other
accessories when jump starting your vehicle.
3. Turn off the ignition on both vehicles.
Unplug unnecessary accessories plugged into
the cigarette lighter or the accessory power
outlet. Turn off the radio and all lamps that are
not needed. This will avoid sparks and help
save both batteries. And it could save
the radio!
4. Open the hoods and locate the batteries. Find
the positive (+) and negative (−) terminal
locations on each vehicle.
You will not need to access your battery for
jump starting. Your vehicle has a remote
positive (+) jump starting terminal for
that purpose.The terminal is located
under the fuse block
cover. Remove
the cover to access the
remote positive (+)
terminal.
SeeEngine Compartment Overview on
page 410for more information on the location
of the remote positive (+) terminal. You
should always use the remote positive (+)
terminal instead of the positive (+) terminal on
your battery.
{CAUTION:
An electric fan can start up even when the
engine is not running and can injure you.
Keep hands, clothing and tools away from
any underhood electric fan.
439
Page 441 of 562

6. Connect the red positive (+) cable to the
positive (+) terminal of the dead battery.
Use a remote positive (+) terminal if
the vehicle has one.
7. Do not let the other end touch metal. Connect
it to the positive (+) terminal of the good
battery. Use a remote positive (+) terminal if
the vehicle has one.
8. Now connect the black negative (−) cable to
the negative (−) terminal of the good battery.
Use a remote negative (−) terminal if the
vehicle has one.
Do not let the other end touch anything until
the next step. The other end of the negative (−)
cable does not go to the dead battery. It
goes to a heavy, unpainted metal engine part,
or to a remote negative (−) terminal on the
vehicle with the dead battery.9. Connect the other end of the negative (−) cable
at least 18 inches (45 cm) away from the dead
battery, but not near engine parts that move.
The electrical connection is just as good there,
and the chance of sparks getting back to the
battery is much less.
10. Now start the vehicle with the good battery
and run the engine for a while.
11. Try to start the vehicle that had the dead
battery. If it will not start after a few tries, it
probably needs service.
441