Page 19 of 166
Instrument cluster1Rev. counter
2 Speedometer
3 Telltale lights ( 20)
4 Multifunction display
( 20)
5 Telltale light, anti-theft alarm
(OE) and sensor for instru-
ment lighting
6 Select readings ( 45)
Reset the tripmeter ( 46)
Set the clock ( 44)
The instrument-cluster
lighting has automatic day
and night switchover.
217zGeneral views
Page 24 of 166
Status indicators
with tyre-pressure
monitoring (RDC)
OE
1 Tyre pressures alternate
with the clock; if the motor-
cycle is fitted with an on-
board computer tyre pres-
sures displayed as an ad-
ditional set of readings by
the on-board computer.
OE
( 51)
Standard warningsMode of presentation
Warnings are indicated by the
'General' warning light 1show-
ing in combination with a warning
word, for example 2or in com-
bination with one of the warning
symbols 3. The 'General' warn-
ing light shows red or yellow, de-
pending on the urgency of the
warning. If two or more warn-
ings occur at the same time, all
the appropriate warning lights
and warning symbols appear, al-
ternating with warning words as
applicable. The possible warnings are listed
on the next page.
322zStatus indicators
Page 46 of 166

Replacement and extra
keysYou can obtain replacement/extra
keys only through an authorised
BMW Motorrad dealer. The keys
are part of an integrated secur-
ity system, so the dealer is un-
der an obligation to check the
legitimacy of all applications for
replacement/extra keys. If you
want to have a lost key barred,
you have to bring with you all
the other keys that belong to
the motorcycle. A key that has
been barred can subsequently be
cleared and reactivated for use.ClockSetting clock
Attempting to set the clock
while riding the motorcycle
can lead to accidents.
Set the clock only when the mo-
torcycle is stationary. Switch on the ignition.
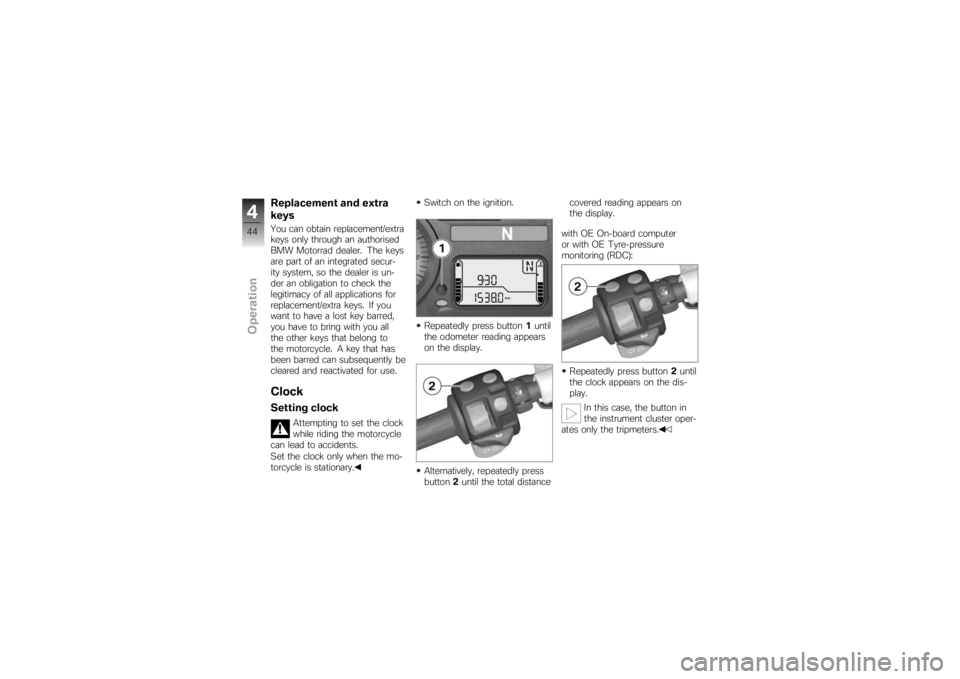
Repeatedly press button
1until
the odometer reading appears
on the display.
Alternatively, repeatedly press
button 2until the total distance covered reading appears on
the display.
with OE On-board computer
or with OE Tyre-pressure
monitoring (RDC):
Repeatedly press button 2until
the clock appears on the dis-
play.
In this case, the button in
the instrument cluster oper-
ates only the tripmeters.
444zOperation
Page 47 of 166
Hold down the button.
Hours reading3flashes.
Press the button.
The hours reading increments
by one each time you press
the button.
Hold down the button.
Minutes reading 4flashes.
Press the button.
The minutes reading incre-
ments by one each time you
press the button.
Either press and hold down the
button or wait without pressing
a button. The clock is now set and the
time appears on the display.
Odometer and
tripmetersSelecting readingsSwitch on the ignition.
Press button
1. If you prefer, you can use but-
ton
2for this purpose.
The display starts with the cur-
rent value and each time the but-
ton is pressed it moves one step
through the following sequence:
445zOperation
Page 118 of 166

indicators in the display tell you
that a bulb defect has occurred.A defective bulb places
your safety at risk because
it is easier for other users to
oversee the motorcycle.
Replace defective bulbs as
soon as possible; always carry a
complete set of spare bulbs if
possible.
The bulb is pressurised and
can cause injury if dam-
aged.
Wear protective goggles and
gloves when changing bulbs.
The types of bulb fitted to
your motorcycle are listed
in the section entitled "Technical
data".
Do not touch the glass of
new bulbs with your fingers.
Use a clean, dry cloth to hold
the bulbs when handling them.
Dirt deposits, in particular oil and
grease, interfere with heat radi- ation from the bulb. This leads
to overheating and shortens the
bulb's operating life.
Replacing low-beam
headlight bulb
If it is not standing firmly,
the motorcycle could topple
in the course of the operations
described below.
Always make sure that the
motorcycle is stable and firmly
supported.
Make sure the ground is level
and firm and place the motor-
cycle on its stand.
Switch off the ignition. Turn the handlebars to the
left to facilitate access. Turn cover
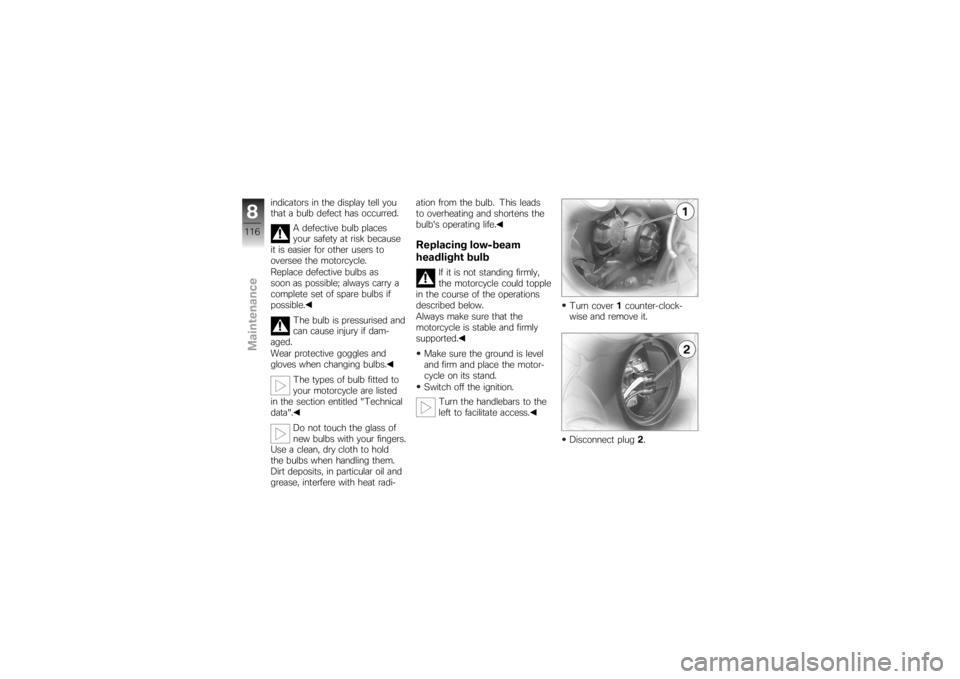
1counter-clock-
wise and remove it.
Disconnect plug 2.
8116zMaintenance
Page 131 of 166
Install the batteryPlace the battery in the battery
compartment, positive termin-
al on the right in the forward
direction of travel.
Slip the battery retainer
over the battery and install
screws3.
Installation in the wrong
sequence increases the risk
of short-circuits.
Always proceed in the correct
sequence.
Connect battery positive lead 2
first. The connect battery negative
lead
1.
Install the battery-compartment
cover ( 128)
Switch on the ignition.
If the battery was discon-
nected from the motorcycle
for a prolonged period of time
it will be necessary to enter the
current date in the instrument
cluster, in order to ensure that
the service-due indicator func-
tions correctly.
If you want to have the date set
consult a specialist workshop,
preferably an authorised BMW
Motorrad dealer.
Fully open the throttle once or
twice.
The engine management sys-
tem registers the throttle-valve
position.
Set the clock ( 44)
8129zMaintenance