Page 17 of 166
Handlebar fitting, left1Operating the odometer
( 45), Operating the on-
board computer
OE
( 47)
2 Operating ASC
OE
( 55)
3 Operating the ESAOE
( 59)
4 Horn
5 Flashing turn indicators,
left ( 53), Hazard warn-
ing flashers ( 53)
6 High-beam headlight and
headlight flasher ( 52)
215zGeneral views
Page 20 of 166
Headlight1High-beam headlight
2 Low-beam headlight
3 Side light
218zGeneral views
Page 22 of 166
Standard status
indicatorsMultifunction display1Clock ( 44)
2 Gear ( 20)
3 Coolant temperature
( 20)
4 Odometer and tripmeters
( 45)
5 Fuel capacity ( 20)
Telltale lights1Flashing turn indicators, left
2 High-beam headlight
3 Idle
4 Flashing turn indicators,
rightFuel capacity
The horizontal bars below
the fuel-pump symbol in-
dicate the remaining quantity of
fuel.
When the fuel in the tank is
topped up the gauge briefly
shows the original level, before
the reading is updated.
Gear
The gear engaged or
N
for neutral appears on the
display.
If no gear is engaged, the
'neutral' telltale light also
lights up.
Coolant temperature
The horizontal bars below
the temperature symbol
indicate the coolant temperature.
Service-due indicatorIf the next service is due in less
than one month, the date for the
320zStatus indicators
Page 28 of 166

If the battery is not char-
ging, continuing to ride can
cause it to discharge completely,
in which case it will suffer irrepar-
able damage.
If possible, do not continue your
journey.
Battery is not being charged.
You can continue to ride until
the battery is discharged. Bear
in mind, however, that the en-
gine could cut out suddenly
and that the battery could dis-
charge until completely flat,
in which case it might have
suffered irreparable damage.
Have the fault rectified as
quickly as possible by a
specialist workshop, preferably
an authorised BMW Motorrad
dealer.
Rear light bulb defective General warning light shows
yellow.
LAMPR !
appears on the dis-
play.
A defective bulb places
your safety at risk because
it is easier for other users to
oversee the motorcycle.
Replace defective bulbs as
soon as possible; always carry a
complete set of spare bulbs if
possible.
Rear light or brake light bulb de-
fective.
Replacing brake light and rear
light bulb ( 120)
Front light bulb defective
LAMPF !
appears on the dis-
play.
A defective bulb places
your safety at risk because
it is easier for other users to
oversee the motorcycle.
Replace defective bulbs as
soon as possible; always carry a complete set of spare bulbs if
possible.
Low-beam headlight, high-beam
headlight, side-light or turn-indic-
ator bulb defective.
Replacing low-beam headlight
bulb ( 116)
Replacing high-beam headlight
bulb ( 118)
Replacing parking-light bulb
( 119)
Replacing front turn indicator
bulbs ( 122)
Replacing rear turn indicator
bulbs ( 123)
Bulbs defective General warning light shows
yellow.
LAMPS !
appears on the dis-
play.
A defective bulb places
your safety at risk because
it is easier for other users to
oversee the motorcycle.
326zStatus indicators
Page 54 of 166

LightsSide lightThe side lights switch on auto-
matically when the ignition is
switched on.The side lights place
a strain on the battery.
Do not switch the ignition
on for longer than absolutely
necessary.Low-beam headlightThe low-beam headlight switches
on automatically when you start
the engine.
When the engine is not
running you can switch on
the lights by switching on the ig-
nition and either switching on the
high-beam headlight or operating
the headlight flasher.
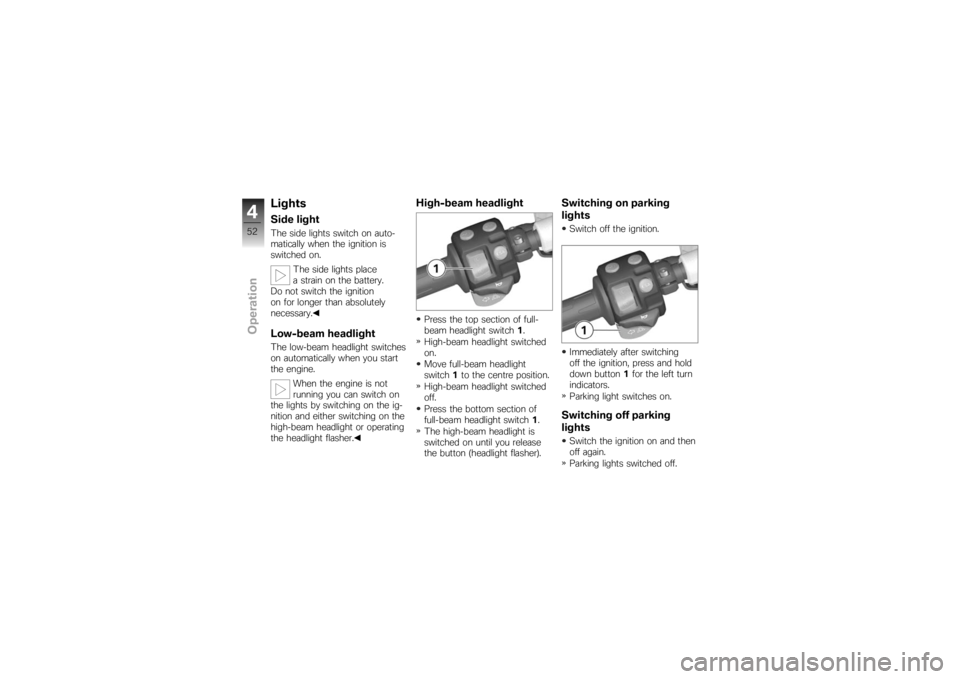
High-beam headlightPress the top section of full-
beam headlight switch 1.
High-beam headlight switched
on.
Move full-beam headlight
switch 1to the centre position.
High-beam headlight switched
off.
Press the bottom section of
full-beam headlight switch 1.
The high-beam headlight is
switched on until you release
the button (headlight flasher).
Switching on parking
lightsSwitch off the ignition.
Immediately after switching
off the ignition, press and hold
down button 1for the left turn
indicators.
Parking light switches on.Switching off parking
lightsSwitch the ignition on and then
off again.
Parking lights switched off.
452zOperation
Page 64 of 166

The settings shown on the
display are automatically ac-
cepted as the spring preload
and, if applicable, the damp-
ing characteristic if you allow a
certain length of time to pass
without pressing making further
changes. The reading flashes
while spring preload adjustment
is in progress.
Wait until adjustment com-
pletes (reading stops flashing)
before pulling away.TyresChecking tyre pressureMake sure the ground is level
and firm and place the motor-
cycle on its stand.Incorrect tyre pressures im-
pair the motorcycle's hand-
ling characteristics and increase
the rate of tyre wear.
Always check that the tyre pres-
sures are correct. At high road speeds, tyre
valves have a tendency to
open as a result of centrifugal
force.
Fit metal valve caps with rubber
seals and screw them on firmly
to prevent sudden deflation.
Check that tyre pressures are
correct as per the data below.
Tyre pressure, front
2.5 bar (one-up, tyre cold)
2.5 bar (two-up and/or with
luggage, tyre cold) Tyre pressure, rear
2.9 bar (one-up, tyre cold)
2.9 bar (two-up and/or with
luggage, tyre cold) If tyre pressure is too low:
Correct tyre pressure.
HeadlightAdjusting headlight for
driving on left/driving on
rightIf the motorcycle is ridden in a
country where the opposite rule
of the road applies, its asymmet-
ric low-beam headlight will tend
to dazzle oncoming traffic.
Have the headlight set accord-
ingly by a specialist workshop,
preferably an authorised BMW
Motorrad dealer.
Commercially available ad-
hesive tape will damage the
plastic lens of the light.
Consult a specialist workshop,
preferably an authorised BMW
Motorrad dealer, in order to avoid
damaging the plastic lens of the
light.
462zOperation
Page 120 of 166
Turn cover1clockwise to in-
stall.Replacing high-beam
headlight bulb
If it is not standing firmly,
the motorcycle could topple
in the course of the operations
described below.
Always make sure that the
motorcycle is stable and firmly
supported.
Make sure the ground is level
and firm and place the motor-
cycle on its stand.
Switch off the ignition. Turn the handlebars to the
left to facilitate access.
Turn cover 1counter-clock-
wise and remove it.
Disconnect plug 2. Release spring clip
3at left
and right and swing it up.
Remove bulb 4.
Replace the defective bulb.
8118zMaintenance
Page 121 of 166
Bulb for high-beam
headlight
H7/12V/55W
Install bulb 4; make sure that
tab 5is pointing up. Engage spring retainer
3on
left and right.
Close plug 2. Turn cover
1clockwise to in-
stall.
Replacing parking-light
bulb
If it is not standing firmly,
the motorcycle could topple
in the course of the operations
described below.
Always make sure that the
motorcycle is stable and firmly
supported.
Make sure the ground is level
and firm and place the motor-
cycle on its stand.
8119zMaintenance