Page 99 of 166

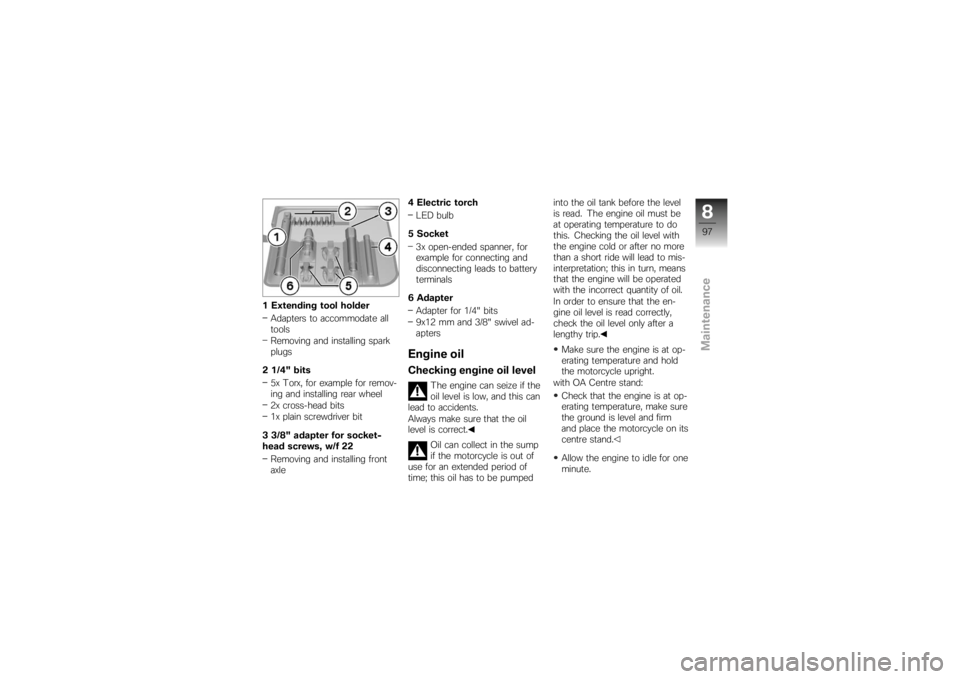
1 Extending tool holderAdapters to accommodate all
tools
Removing and installing spark
plugs
2 1/4" bits 5x Torx, for example for remov-
ing and installing rear wheel
2x cross-head bits
1x plain screwdriver bit
3 3/8" adapter for socket-
head screws, w/f 22 Removing and installing front
axle 4 Electric torch
LED bulb
5 Socket 3x open-ended spanner, for
example for connecting and
disconnecting leads to battery
terminals
6 Adapter Adapter for 1/4" bits
9x12 mm and 3/8" swivel ad-
apters
Engine oilChecking engine oil level
The engine can seize if the
oil level is low, and this can
lead to accidents.
Always make sure that the oil
level is correct.
Oil can collect in the sump
if the motorcycle is out of
use for an extended period of
time; this oil has to be pumped into the oil tank before the level
is read. The engine oil must be
at operating temperature to do
this. Checking the oil level with
the engine cold or after no more
than a short ride will lead to mis-
interpretation; this in turn, means
that the engine will be operated
with the incorrect quantity of oil.
In order to ensure that the en-
gine oil level is read correctly,
check the oil level only after a
lengthy trip.
Make sure the engine is at op-
erating temperature and hold
the motorcycle upright.
with OA Centre stand:
Check that the engine is at op-
erating temperature, make sure
the ground is level and firm
and place the motorcycle on its
centre stand.
Allow the engine to idle for one
minute.
897zMaintenance
Page 100 of 166
Switch off the ignition.
Check the oil level in oil-level
indicator1. Engine oil, specified level
Between MIN and MAX
marks
If the oil level is below the MIN
mark: Top up the engine oil ( 98)
If the oil level is above the MAX
mark: Drain the engine oil ( 99)
Topping up engine oilRemove the seat ( 63) Damage to the engine
can result if it is operated
without enough oil, but the same
also applies if the oil level is too
high.
Always make sure that the oil
level is correct.
Wipe the area around the filler
neck clean.
Remove cap of oil filler neck 1
by turning it counter-clockwise.
Top up the engine oil to the
specified level.
Check the engine oil level
( 97)
898zMaintenance
Page 101 of 166

Install cap of oil filler neck1
and turn it clockwise to close.
Install the seat ( 64)Draining engine oilRemove the seat ( 63)
Damage to the engine
can result if it is operated
without enough oil, but the same
also applies if the oil level is too
high.
Always make sure that the oil
level is correct.
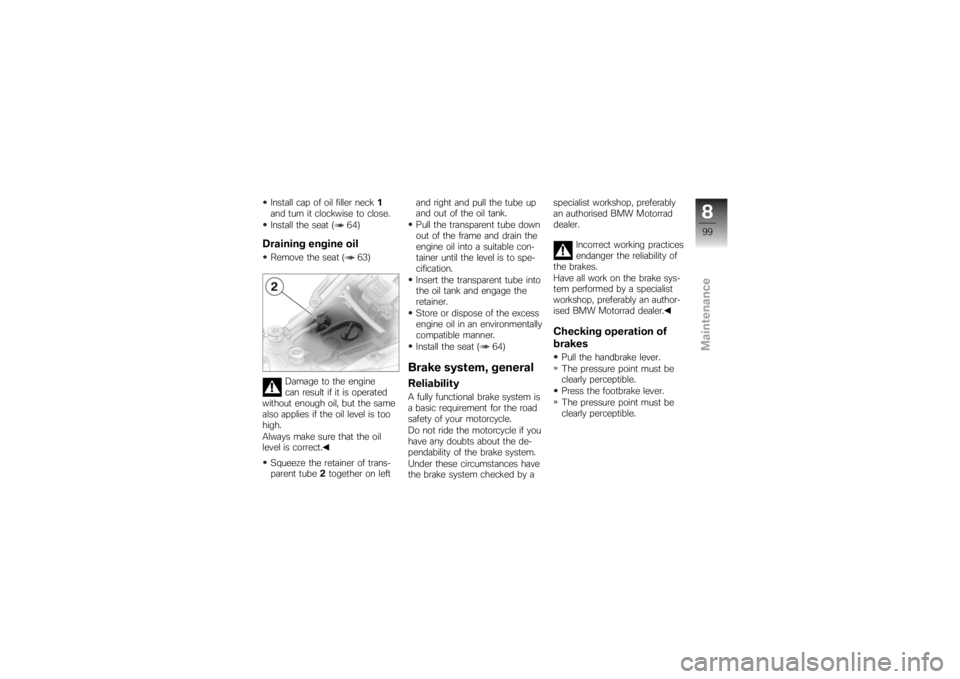
Squeeze the retainer of trans-
parent tube 2together on left and right and pull the tube up
and out of the oil tank.
Pull the transparent tube down
out of the frame and drain the
engine oil into a suitable con-
tainer until the level is to spe-
cification.
Insert the transparent tube into
the oil tank and engage the
retainer.
Store or dispose of the excess
engine oil in an environmentally
compatible manner.
Install the seat ( 64)
Brake system, generalReliabilityA fully functional brake system is
a basic requirement for the road
safety of your motorcycle.
Do not ride the motorcycle if you
have any doubts about the de-
pendability of the brake system.
Under these circumstances have
the brake system checked by a specialist workshop, preferably
an authorised BMW Motorrad
dealer.
Incorrect working practices
endanger the reliability of
the brakes.
Have all work on the brake sys-
tem performed by a specialist
workshop, preferably an author-
ised BMW Motorrad dealer.
Checking operation of
brakesPull the handbrake lever.
The pressure point must be
clearly perceptible.
Press the footbrake lever.
The pressure point must be
clearly perceptible.
899zMaintenance
Page 136 of 166

Remove stains of this kind im-
mediately, using cleaning-grade
benzene or petroleum spirit on a
clean cloth or ball of cotton wool.
BMW Motorrad recommends
BMW tar remover for removing
specks of tar. Remember to wax
the parts treated in this way.Protective wax coatingBMW Motorrad recommends
applying only BMW car wax or
products containing carnauba
wax or synthetic wax.
It is time to rewax the paint-
work when water "puddles" on
the surface, instead of forming
beads.Laying up motorcycleClean the motorcycle.
Remove the battery.
Spray the brake and clutch
lever pivots and the main andside stand pivots with a suit-
able lubricant.
Coat bright metal and chrome-
plated parts with an acid-free
grease (e.g. Vaseline).
Stand the motorcycle in a dry
room in such a way that there
is no load on either wheel.
Before laying the vehicle
up out of use, have the en-
gine oil and the oil filter element
changed by a specialist work-
shop, preferably an authorised
BMW Motorrad dealer. Com-
bine work for laying up/restoring
to use with a BMW service or
inspection.
Restoring motorcycle
to useRemove the protective wax
coating.
Clean the motorcycle.
Install a charged battery. Before starting: work through
the checklist.
9134zCare
Page 162 of 166

CoolantTemperature gauge, 20
Warning, 24
Currency, 7
D
Damping Adjusting, 11, 59
E
Electrics Technical data, 144
Emergency off switch (kill switch), 16, 54
Engine Technical data, 138
Warning for engine
electronics, 24
Engine oil Checking level, 13, 97
Draining, 99
Technical data, 139
Topping up, 14, 98
Warning for engine oil level, 29
Warning for engine oil
pressure, 25 Equipment, 7
ESA, 15, 59
EWS, 43
Warning, 24
F
Frame Technical data, 145
Front-wheel stand, 113
Fuel Quantity reading, 20
Refuelling, 13, 77
Technical data, 139
Warning for fuel down to
reserve, 24
Fuses, 144
G
Gear indicator, 20
Grip heating, 16, 55
H
Handlebar fittings General view, left side, 15
General view, right side, 16 Hazard warning flashers, 15, 16
Switching off, 54
Switching on, 53
Headlight Adjustment for driving on left/
driving on right, 62
Beam throw, 63
High-beam headlight, 18
Low-beam headlight, 18
Side light, 18
Helmet holder, 14, 65
Horn, 15
I
Ignition Switching off, 42
Switching on, 42
Immobiliser, 43 Warning, 24
Instrument cluster Overview, 17
Sensor for instrument-cluster
lighting, 17
J
Jump starting, 125
12160zIndex
Page 163 of 166

K
Keys, 42
L
Laying up, 134
LightsHeadlight flasher, 15, 52
High-beam headlight, 15, 52
Low-beam headlight, 52
Parking light, 52
Side light, 52
Luggage Correct loading, 89
Luggage loops, 66
M
Maintenance General instructions, 96
Mirrors Adjusting, 58
Motorcycle General view, left side, 11
General view, right side, 13
Laying up, 134
Restoring to use, 134 Multifunction display, 17
Overview, 20
O
Odometer and tripmeters Resetting, 46
Selecting readings, 45
On-board computer Ambient temperature, 48
Average consumption, 49
Average speed, 48
Oil level, 50
Range, 50
Selecting readings, 47
P
Power socket, 11
Pre-ride check, 71
R
Rear-wheel drive Technical data, 141
Rear-wheel stand, 114
Refuelling, 77 Reserve
Warning, 24
Residual range, 47
Restoring to use, 134
Rev. counter, 17
Rims Test, 105
Running gear Technical data, 141
Running in, 73
S
Seat Installation, 64
Lock, 11
Removal, 63
Service, 150 Status indicators on the
display, 20
Service Card, 150
Side stand For starting, 70
Spark plugs, 144
Speedometer, 17
12161zIndex
Page 164 of 166

Spring preloadAdjusting, 11, 58
Starter, 16
Steering lock Locking, 43
T
Technical data Battery, 144
Brakes, 142
Bulbs, 145
Clutch, 140
Electrics, 144
Engine, 138
Engine oil, 139
Frame, 145
Fuel, 139
Rear-wheel drive, 141
Running gear, 141
Spark plugs, 144
Standards, 7
Transmission, 140
Wheels and tyres, 142
Telltale lights, 17 Toolkit, 14
Service kit, 96
Standard kit, 96
Torques, 135
Transmission For starting, 70
Technical data, 140
Troubleshooting chart, 136
Turn indicators Left, 15, 53
Right, 16, 53
Switching off, 16, 53
Tyre pressure monitoring RDC Label on wheel rim, 105
Operation, 51
Status indicators, 51
Warning, 33
Tyres Checking inflation pressure, 62
Measuring tread depth, 104
Recommended tyres, 105
Running in, 73
Technical data, 142 V
Vehicle identification number, 13
W
Warning lights, 17
Warnings
Mode of presentation, 22
Warnings, overview, 23, 28, 30, 32, 35, 39
Wheels Installing front wheel, 107
Installing rear wheel, 111
Remove the front wheel, 106
Removing rear wheel, 109
Technical data, 142
12162zIndex