Page 65 of 132

If the oil level is above the MAX
mark:Have the oil level corrected by
a specialist workshop, prefer-
ably an authorised BMW Mo-
torrad dealer.Topping up engine oil
Damage to the engine
can result if it is operated
without enough oil, but the same
also applies if the oil level is too
high.
Always make sure that the oil
level is correct.
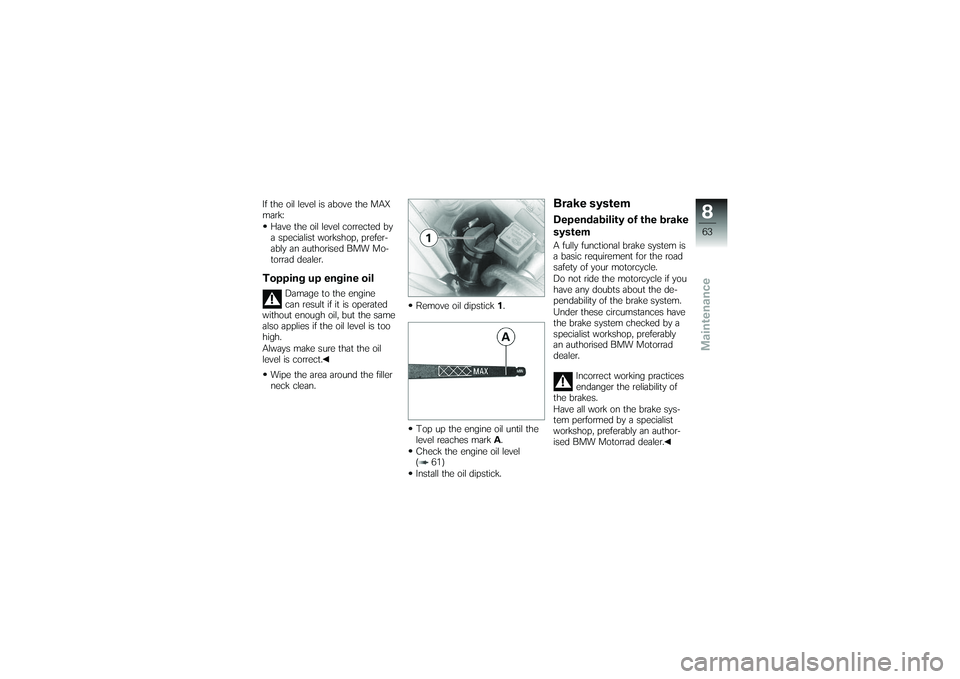
Wipe the area around the filler
neck clean. Remove oil dipstick
1.
Top up the engine oil until the
level reaches mark A.
Check the engine oil level
( 61)
Install the oil dipstick.
Brake systemDependability of the brake
systemA fully functional brake system is
a basic requirement for the road
safety of your motorcycle.
Do not ride the motorcycle if you
have any doubts about the de-
pendability of the brake system.
Under these circumstances have
the brake system checked by a
specialist workshop, preferably
an authorised BMW Motorrad
dealer.
Incorrect working practices
endanger the reliability of
the brakes.
Have all work on the brake sys-
tem performed by a specialist
workshop, preferably an author-
ised BMW Motorrad dealer.
863zMaintenance
Page 70 of 132
Topping up coolantPull cover of radiator cap1for-
ward to remove.
Open cap of the expansion
tank for coolant 2. Top up the coolant to the spe-
cified level.
Close the cap of the expansion
tank for coolant.
Seat the cover of the radiator
cap in holders
3. In this pro-
cess, guide the top edge of the
cover behind the bottom edge
of centre trim panel 4.
ClutchChecking clutch-lever
playPull the clutch lever until resist-
ance is perceptible.
Measure clutch-lever play A.
Clutch-lever play
2...3 mm (Engine cold)
Clutch-lever play is out of toler-
ance: Adjust clutch-lever play ( 69)
868zMaintenance
Page 83 of 132

FusesRemoving fuse
Risk of fire if an attempt is
made to jumper defective
fuse.
Always replace defective fuses
with new fuses of the correct
amperage rating.
Switch off the ignition.
Remove the seat ( 38)
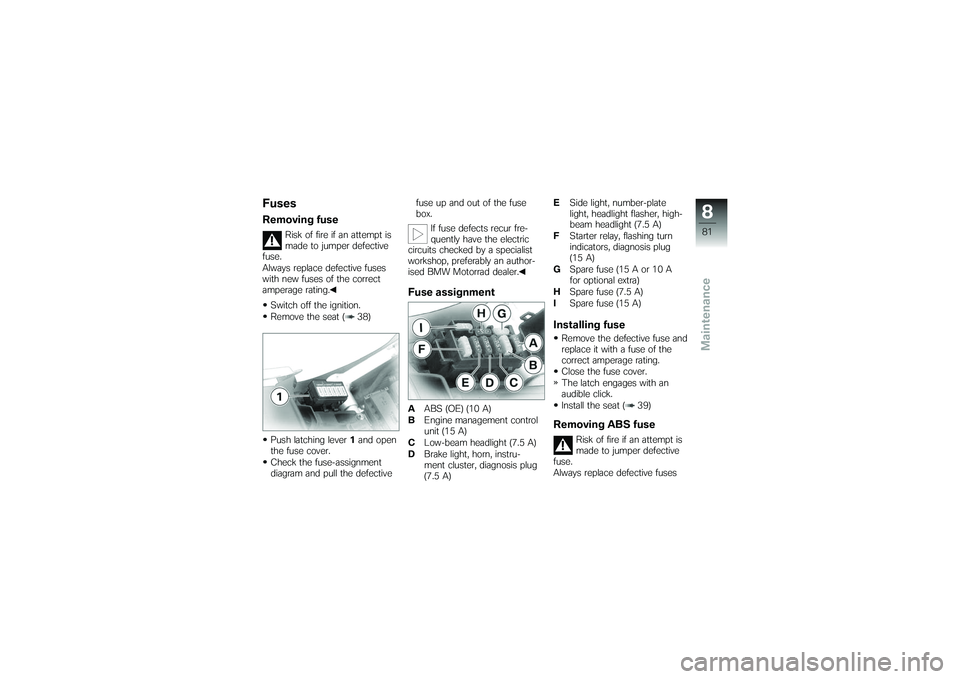
Push latching lever 1and open
the fuse cover.
Check the fuse-assignment
diagram and pull the defective fuse up and out of the fuse
box.
If fuse defects recur fre-
quently have the electric
circuits checked by a specialist
workshop, preferably an author-
ised BMW Motorrad dealer.
Fuse assignmentA ABS (OE) (10 A)
B Engine management control
unit (15 A)
C Low-beam headlight (7.5 A)
D Brake light, horn, instru-
ment cluster, diagnosis plug
(7.5 A) E
Side light, number-plate
light, headlight flasher, high-
beam headlight (7.5 A)
F Starter relay, flashing turn
indicators, diagnosis plug
(15 A)
G Spare fuse (15 A or 10 A
for optional extra)
H Spare fuse (7.5 A)
I Spare fuse (15 A)
Installing fuseRemove the defective fuse and
replace it with a fuse of the
correct amperage rating.
Close the fuse cover.
The latch engages with an
audible click.
Install the seat ( 39)Removing ABS fuse
Risk of fire if an attempt is
made to jumper defective
fuse.
Always replace defective fuses
881zMaintenance
Page 92 of 132

Seat bulb holder1in the light
carrier.Jump starting
The wires leading to the
power socket do not have
a load-capacity rating adequate
for jump-starting the engine. Ex-
cessively high current can lead
to a cable fire or damage to the
vehicle electronics.
Do not use the on-board socket
to jump-start the engine of the
motorcycle. Touching live parts of the
ignition system with the
engine running can cause electric
shock.
Do not touch parts of the igni-
tion system when the engine is
running.
A short-circuit can res-
ult if the crocodile clips
of the jump leads are accident-
ally brought into contact with the
motorcycle.
Use only jump leads fitted with
fully insulated crocodile clips at
both ends.
Jump-starting with a donor-
battery voltage higher than
12 V can damage the vehicle
electronics.
Make sure that the battery of the
donor vehicle has a voltage rating
of 12 V.
Remove the right side panel
( 93) When jump-starting the engine,
do not disconnect the battery
from the on-board electrical
system.
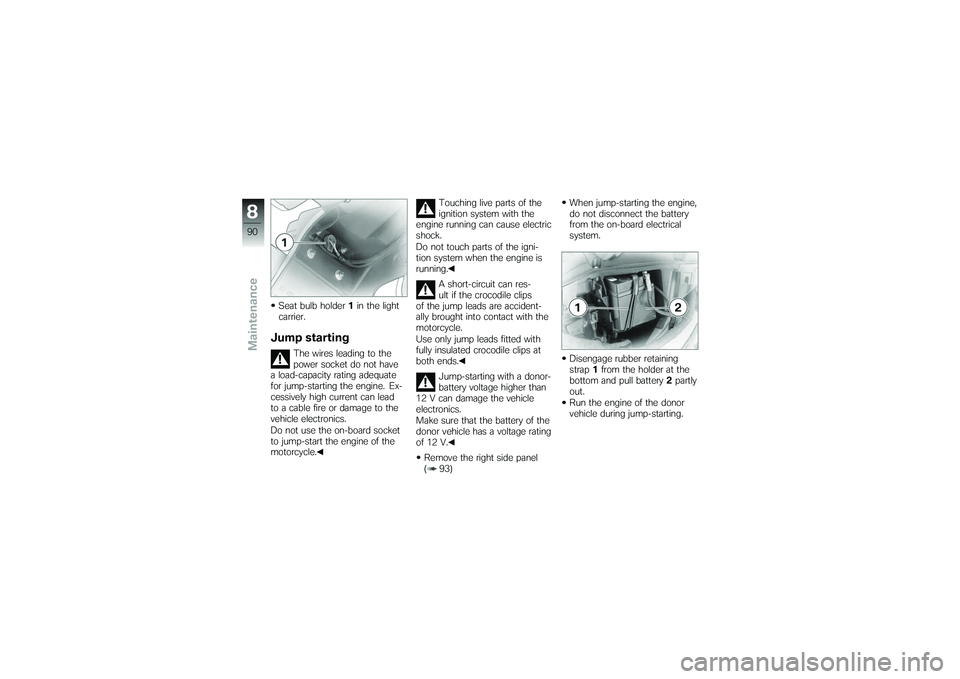
Disengage rubber retaining
strap
1from the holder at the
bottom and pull battery 2partly
out.
Run the engine of the donor
vehicle during jump-starting.
890zMaintenance
Page 93 of 132

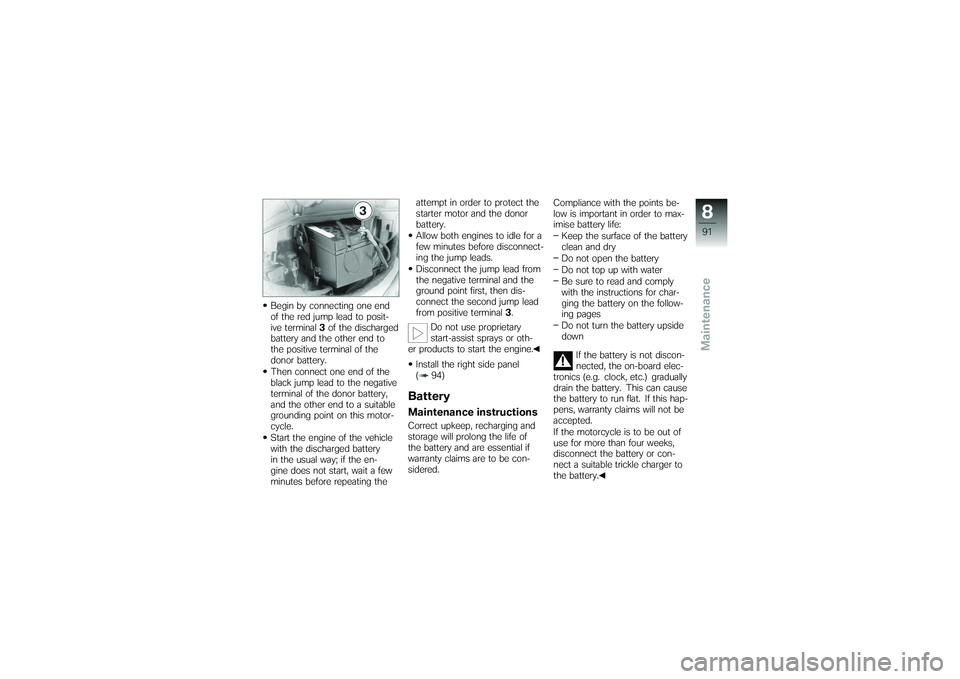
Begin by connecting one end
of the red jump lead to posit-
ive terminal3of the discharged
battery and the other end to
the positive terminal of the
donor battery.
Then connect one end of the
black jump lead to the negative
terminal of the donor battery,
and the other end to a suitable
grounding point on this motor-
cycle.
Start the engine of the vehicle
with the discharged battery
in the usual way; if the en-
gine does not start, wait a few
minutes before repeating the attempt in order to protect the
starter motor and the donor
battery.
Allow both engines to idle for a
few minutes before disconnect-
ing the jump leads.
Disconnect the jump lead from
the negative terminal and the
ground point first, then dis-
connect the second jump lead
from positive terminal
3.
Do not use proprietary
start-assist sprays or oth-
er products to start the engine.
Install the right side panel
( 94)
BatteryMaintenance instructionsCorrect upkeep, recharging and
storage will prolong the life of
the battery and are essential if
warranty claims are to be con-
sidered. Compliance with the points be-
low is important in order to max-
imise battery life:
Keep the surface of the battery
clean and dry
Do not open the battery
Do not top up with water
Be sure to read and comply
with the instructions for char-
ging the battery on the follow-
ing pages
Do not turn the battery upside
down
If the battery is not discon-
nected, the on-board elec-
tronics (e.g. clock, etc.) gradually
drain the battery. This can cause
the battery to run flat. If this hap-
pens, warranty claims will not be
accepted.
If the motorcycle is to be out of
use for more than four weeks,
disconnect the battery or con-
nect a suitable trickle charger to
the battery.
891zMaintenance
Page 103 of 132
Technical data
Technical data
Troubleshooting chart . . ........... 102
Threaded fasteners . ............... 103
Engine . . . .......................... 105
Fuel . ............................... 106
Engine oil .......................... 106
Clutch . . . .......................... 107
Transmission . ..................... 107
Rear-wheel drive ................... 108
Running gear . ..................... 108
Brakes . . . .......................... 109
Wheels and tyres . . . ............... 109
Electrics . .......................... 110
Frame . . . .......................... 112
Dimensions . . . ..................... 112
Weights . . .......................... 113 Riding specifications
............... 113
10101zTechnical data
Page 104 of 132
Troubleshooting chartEngine does not start at all or is difficult to start.Possible causeRemedyKill switch activated. Kill switch in operating position (run).
Side stand extended and gear engaged. Retract the side stand ( 44).
Gear engaged and clutch not disengaged. Select neutral or pull clutch lever ( 44).
No fuel in tank. Refuelling ( 50)
Battery not adequately charged. Charge the battery when connected ( 92)
10102zTechnical data
Page 107 of 132
EngineEngine designSingle-cylinder four-stroke, double overhead cam-
shafts driven by roller chain, 4 valves operated by
bucket tappets, balancing shaft, liquid-cooled cyl-
inder and cylinder head, integral water pump, 5-
speed gearbox and dry sump lubrication.
Displacement 652 cm
3
Cylinder bore100 mm
Piston stroke 83 mm
Compression ratio 11.5:1
Nominal output 39 kW, - at engine speed: 7000 min
-1
Torque60 Nm, - at engine speed: 5250 min
-1
Maximum engine speed max 7500 min
-1
Idle speed1480 min
-1
10105zTechnical data