Page 17 of 126
Handlebar fitting, left1Headlight flasher
2 Operating the ABS
OE
( 33)
3 Switch for flashing turn in-
dicators ( 32)
4 Horn
5 High-beam headlight
( 31)
215zGeneral views
Page 22 of 126
Status indicatorsMultifunction display1Speedometer
2 Odometer, clock or battery
voltage ( 28)
Telltale lights1Flashing turn indicators, left
2 Flashing turn indicators,
right
3 Idle
4 High-beam headlight
Standard warningsMode of presentation
Warnings are indicated by warn-
ing lights 1.
The possible warnings are listed
on the next page.
320zStatus indicators
Page 33 of 126
Residual range on reserve
quantity of fuelReading1is the distance
covered since the fuel in the tank
dropped to the reserve level.LightsSide lightThe side lights switch on auto-
matically when the ignition is
switched on.
The side lights place
a strain on the battery.
Do not switch the ignition on for longer than absolutely
necessary.
Low-beam headlightThe low-beam headlight switches
on automatically when the igni-
tion is switched on.
The low-beam headlight
places a strain on the bat-
tery. Do not switch the ignition
on for longer than absolutely
necessary.High-beam headlightPush full-beam headlight
switch 1up. High-beam headlight switched
on.
Push full-beam headlight
switch
1down.
High-beam headlight switched
off.
Headlight flasherPress headlight flasher but-
ton 1.
The high-beam headlight is
switched on until you release
the button.
431zOperation
Page 38 of 126

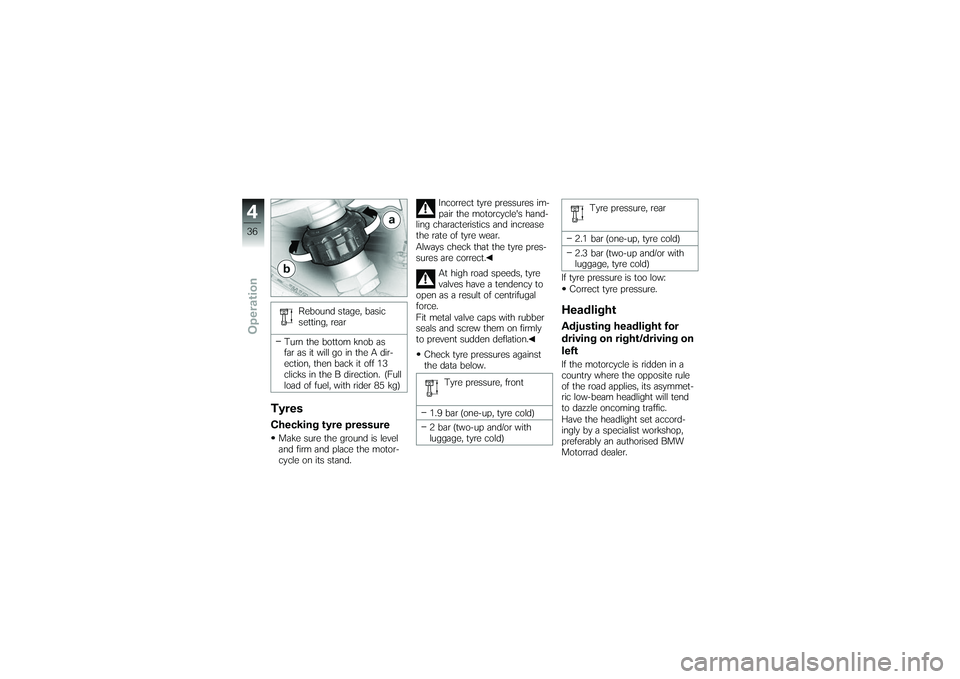
Rebound stage, basic
setting, rear
Turn the bottom knob as
far as it will go in the A dir-
ection, then back it off 13
clicks in the B direction. (Full
load of fuel, with rider 85 kg)
TyresChecking tyre pressureMake sure the ground is level
and firm and place the motor-
cycle on its stand. Incorrect tyre pressures im-
pair the motorcycle's hand-
ling characteristics and increase
the rate of tyre wear.
Always check that the tyre pres-
sures are correct.
At high road speeds, tyre
valves have a tendency to
open as a result of centrifugal
force.
Fit metal valve caps with rubber
seals and screw them on firmly
to prevent sudden deflation.
Check tyre pressures against
the data below.
Tyre pressure, front
1.9 bar (one-up, tyre cold)
2 bar (two-up and/or with
luggage, tyre cold) Tyre pressure, rear
2.1 bar (one-up, tyre cold)
2.3 bar (two-up and/or with
luggage, tyre cold)
If tyre pressure is too low: Correct tyre pressure.
HeadlightAdjusting headlight for
driving on right/driving on
leftIf the motorcycle is ridden in a
country where the opposite rule
of the road applies, its asymmet-
ric low-beam headlight will tend
to dazzle oncoming traffic.
Have the headlight set accord-
ingly by a specialist workshop,
preferably an authorised BMW
Motorrad dealer.
436zOperation
Page 81 of 126

FusesRemoving fuse
Risk of fire if an attempt is
made to jumper defective
fuse.
Always replace defective fuses
with new fuses of the correct
amperage rating.
Switch off the ignition.
Remove the seat ( 37)
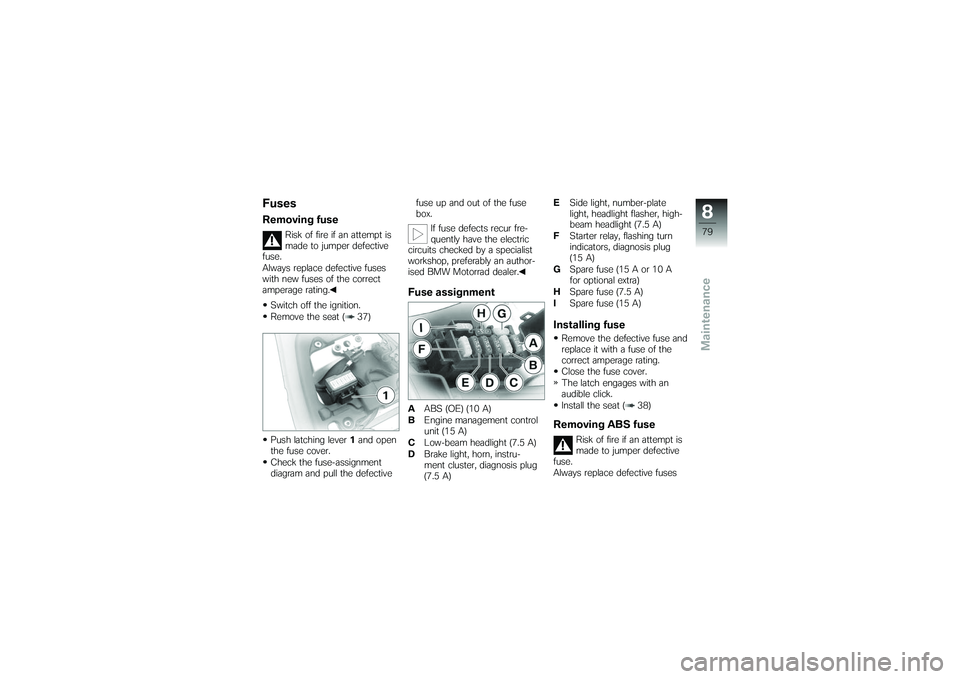
Push latching lever 1and open
the fuse cover.
Check the fuse-assignment
diagram and pull the defective fuse up and out of the fuse
box.
If fuse defects recur fre-
quently have the electric
circuits checked by a specialist
workshop, preferably an author-
ised BMW Motorrad dealer.
Fuse assignmentA ABS (OE) (10 A)
B Engine management control
unit (15 A)
C Low-beam headlight (7.5 A)
D Brake light, horn, instru-
ment cluster, diagnosis plug
(7.5 A) E
Side light, number-plate
light, headlight flasher, high-
beam headlight (7.5 A)
F Starter relay, flashing turn
indicators, diagnosis plug
(15 A)
G Spare fuse (15 A or 10 A
for optional extra)
H Spare fuse (7.5 A)
I Spare fuse (15 A)
Installing fuseRemove the defective fuse and
replace it with a fuse of the
correct amperage rating.
Close the fuse cover.
The latch engages with an
audible click.
Install the seat ( 38)Removing ABS fuse
Risk of fire if an attempt is
made to jumper defective
fuse.
Always replace defective fuses
879zMaintenance
Page 83 of 126
grease, interfere with heat radi-
ation from the bulb. This leads
to overheating and shortens the
bulb's operating life.Removing headlight
If it is not standing firmly,
the motorcycle could topple
in the course of the operations
described below.
Always make sure that the
motorcycle is stable and firmly
supported.
Make sure the ground is level
and firm and place the motor-
cycle on its stand.
Switch off the ignition. While holding the headlight,
remove three screws
1.
Remove cover 2and lift the
headlight out of the housing.
Disconnect plugs 3,4 and 5.
Replacing low-beam and
high-beam headlight bulbRemove the headlight ( 81)
Remove rubber cap 1.
881zMaintenance
Page 84 of 126
Disengage spring clips2from
the fastenings and swing them
aside.
Pull high-beam/low-beam
bulb 3out of the headlight
housing.
Replace the defective bulb.
Bulb for low-beam and
high-beam headlight
H4 / 12 V / 55...60 W Insert bulb
3into the headlight
housing.
Close and lock spring clips 2.
Position the rubber cap 1on
the headlight housing and push
it into place. Install the headlight ( 82)
Installing headlightConnect plugs
3,4 and 5.
Seat the headlight with cover 2
in the headlight housing.
882zMaintenance
Page 108 of 126
Battery
Battery, manufacturer and designationETZ 10 S
Battery type AGM (Absorptive Glass Mat) battery
Battery rated voltage 12 V
Battery rated capacity 10 Ah
Spark plugs
Spark plugs, manufacturer and designation NGK DR8 EB
Electrode gap of spark plug 0.6...0.7 mm, When new
max 0.9 mm, Wear limit
Lighting
Bulb for low-beam and high-beam headlight H4 / 12 V / 55...60 W
Bulb for parking light W5W / 12 V / 5 W
Bulbs for flashing turn indicators, front RY10W / 12 V / 10 W
Bulbs for flashing turn indicators, rear RY10W / 12 V / 10 W
Bulb for number-plate light W5W / 12 V / 5 W
10106zTechnical data