2007 BMW M5 rear entertainment
[x] Cancel search: rear entertainmentPage 81 of 253

Controls
79Reference
At a glance
Driving tips
Communications
Navigation
Entertainment
Mobility
PDC with visual warning*
You can also have the system show distances
to objects on the Control Display. Objects that
are farther away are already shown there before
a signal tone sounds. The setting is stored for
the remote control currently in use.
iDrive, for explanation of principle, refer to
page16.
1.Press the button.
This opens the start menu.
2.Press the controller to open the menu.
3.Turn the controller until "Settings" is
selected and press the controller.
4.Turn the controller until "Vehicle / Tires" is
selected and press the controller.
5.Change to upper field if necessary. Turn the
controller until "PDC" is selected and press
the controller.
6.Select "PDC display on" and press the con-
troller.
The PDC screen is activated.
The display appears on the Control Display as
soon as PDC is activated.
System limits
Even with PDC, final responsibility for
estimating the distance between the
vehicle and any obstructions always remains
with the driver. Even when sensors are pro-
vided, there is a blind spot in which objects can
no longer be detected. The system is also sub-
ject to the physical limits that apply to all forms
of ultrasonic measurement, such as those
encountered with tow bars and trailer cou-
plings, or thin and wedge-shaped objects etc.
Low objects already displayed, e. g. curbs, can
also disappear from the detection area of the
sensors again before or after a continuous tone
already sounds. Higher, protruding objects, e.g.
ledges, cannot be detected.
Loud sources of sound, inside and outside the
vehicle, could drown out the PDC signal tone.<
Driving stability control
systems
Your BMW is equipped with an extended array
of systems designed to enhance and maintain
vehicle stability under extreme conditions.
ABS Antilock Brake System
ABS prevents locking of the wheels during
braking. Safe steering response is maintained
even during full braking. Active safety is thus
increased.
The ABS is operational every time you start the
engine. Braking safely refer to page113.
CBC Cornering Brake Control
When braking during curves or when braking
during a lane change, driving stability and steer-
ing response are improved further.
Electronic brake-force distribution
The system controls the brake pressure in the
rear wheels to ensure stable braking behavior.
Page 89 of 253

Controls
87Reference
At a glance
Driving tips
Communications
Navigation
Entertainment
Mobility
Airbags
The following airbags are located under the
marked covers:
1Front airbags
2Head airbags
3Side airbags in front and rear
Protective action
To ensure that the safety systems con-
tinue to provide optimized protection,
please observe the adjustment instructions on
page41.<
The front airbags help protect the driver and
front passenger by responding to frontal
impacts in which safety belts alone cannot pro-
vide adequate restraint. When needed, the
head and side airbags help provide protection in
the event of side impact. The relevant side air-
bag supports the side upper body area. The
head air bag supports the head.
The airbags are deliberately not triggered in
every impact situation, e. g. less severe acci-
dents or rear-end collisions.
Do not apply adhesive materials to the
cover panels of the airbags, cover them or
modify them in any other way. Do not attempt to
remove the airbag restraint system from the
vehicle. Do not modify or tamper with either the
wiring or the individual components in the air-
bag system. This category includes the uphol-
stery in the center of the steering wheel, on the
instrument panel, the doors and the roof pillars
along with the sides of the headliner. Do not
attempt to remove or dismantle the steering
wheel. Do not touch the individual components
immediately after the system has been trig-gered, because there is a danger of burns.
In the event of malfunctions, deactivation, or
triggering of the airbag restraint system, have
the testing, repair, removal, and disposal of air-
bag generators executed only by a BMW center
or a workshop that works according to BMW
repair procedures with correspondingly trained
personnel and has the required explosives
licenses. Unprofessional attempts to service
the system could lead to failure in an emer-
gency or undesired airbag activation, either of
which could result in personal injury.<
Warnings and information on the airbags is also
provided on the sun visors.
Automatic deactivation of front
passenger airbags
The occupation of the seat is detected by eval-
uating the impression on the occupied seat sur-
face of the front passenger seat. The front and
side airbags on the front passenger side are
activated or deactivated accordingly by the sys-
tem.
The current status of the front passenger
airbag, i.e. deactivated or activated, is
indicated by the indicator lamp over the interior
rearview mirror, refer to Operating state of front
passenger airbags in the following.<
Before transporting a child on the front
passenger seat, observe the safety infor-
mation and handling instructions under Trans-
porting children safely refer to page52.
The front and side airbags on the front passen-
ger side can be deactivated for teenagers and
adults in certain seat positions; then the indica-
tor lamp for the front passenger airbags lights
Page 97 of 253
Controls
95Reference
At a glance
Driving tips
Communications
Navigation
Entertainment
Mobility
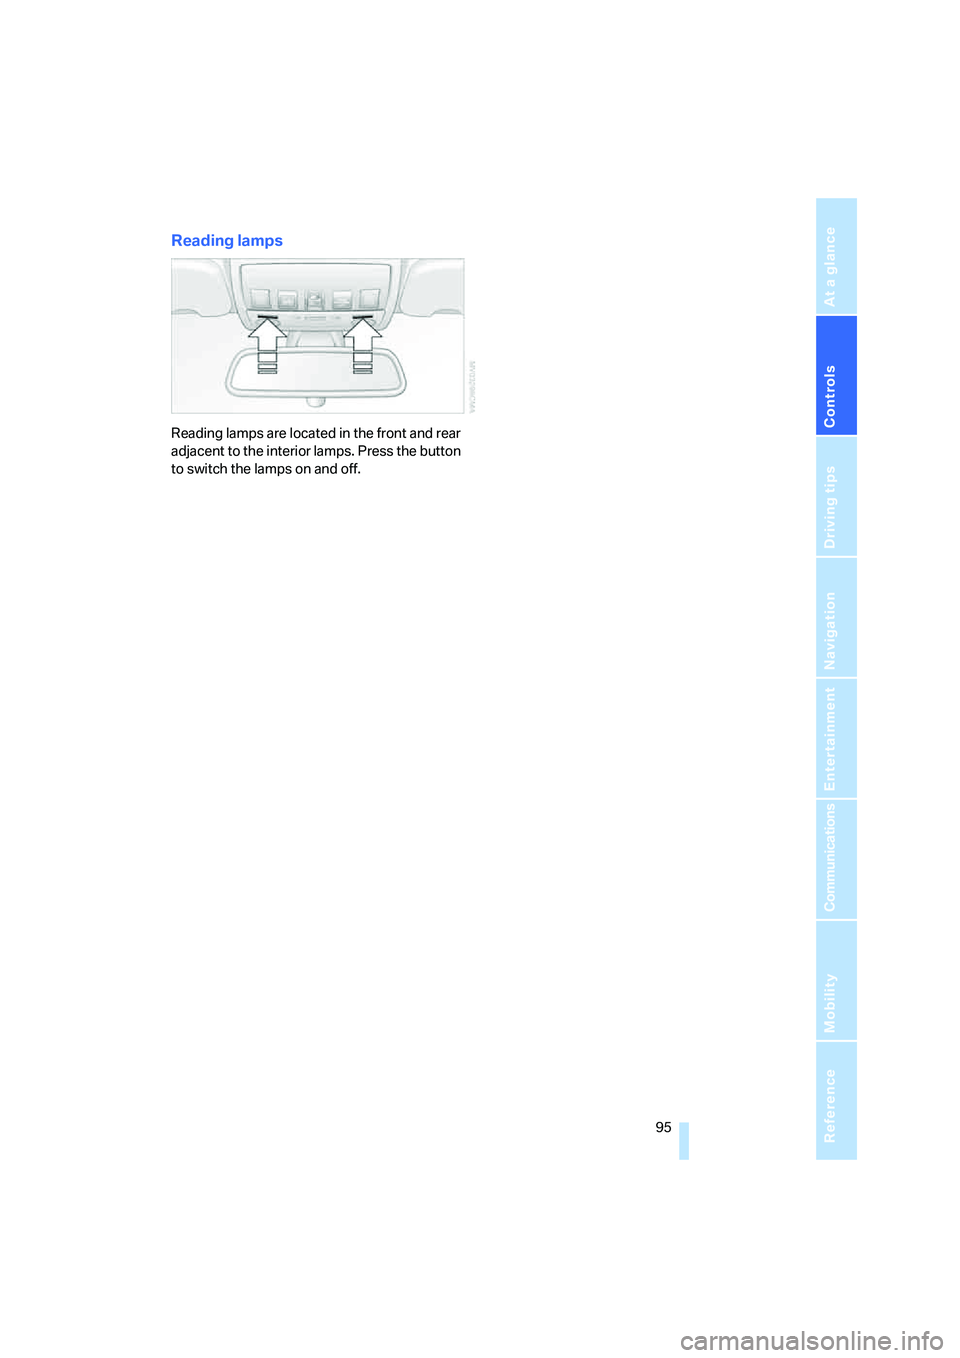
Reading lamps
Reading lamps are located in the front and rear
adjacent to the interior lamps. Press the button
to switch the lamps on and off.
Page 105 of 253

Controls
103Reference
At a glance
Driving tips
Communications
Navigation
Entertainment
Mobility
If the device fails to function even after
repeated programming, check whether
the original hand-held transmitter uses an alter-
nating-code system. To do so, either read the
instructions for the original hand-held transmit-
ter or hold down the programmed memory
button1 of the integrated universal remote
control. If the LED2 on the integrated universal
remote control flashes rapidly for a short time
and then remains lit for approx. 2 seconds, this
indicates that the original hand-held transmitter
uses an alternating-code system. In the case of
an alternating-code system, program the mem-
ory buttons1 as described at Alternating-code
hand-held transmitters.<
Alternating-code hand-held
transmitters
To program the integrated universal remote
control, consult the operating instructions for
the equipment to be set. You will find informa-
tion there on the possibilities for synchroniza-
tion.
When programming hand-held transmitters
that employ an alternating code, please observe
the following supplementary instructions:
P r o g ra m m in g w i ll b e ea s i er w it h t h e a i d o f
a second person.<
1.Park your vehicle within the range of the
remote-controlled device.
2.Program the integrated universal remote
control as described above in the section
Fixed-code hand-held transmitters.
3.Locate the button on the receiver of the
device to be set, e. g. on the drive unit.
4.Press the button on the receiver of the
device to be set. After step 4, you have
approx. 30 seconds for step 5.
5.Press the programmed memory button1
of the integrated universal remote control
three times.
The corresponding memory button 1 is now
programmed with the signal of the original
hand-held transmitter.
If you have any additional questions,
please contact your BMW center.<
Deleting stored programs
Press both outer memory buttons1 for approx.
20 seconds until the LED2 flashes:
All stored programs are deleted.
Individual programs cannot be deleted.
Sun blinds*
Sun blind for rear window
Press the button on the driver's door.
Sun blinds for rear side windows
Pull the loop of the roller sun blind and hook
onto bracket.
Glove compartment
Opening
Pull the handle. The light in the glove compart-
ment switches on.
To prevent injury in the event of an acci-
dent while the vehicle is being driven,
close the glove compartment immediately after
use.<
Page 107 of 253

Controls
105Reference
At a glance
Driving tips
Communications
Navigation
Entertainment
Mobility
Ventilating lower compartment
Push the slide in the lower compartment
upward.
Depending on the automatic climate con-
trol setting, the temperature inside the
ventilated compartment may be higher than in
the rest of the interior. Should this be the case,
push the slide downward to close off the venti-
lation.<
Adjusting
Push the illustrated section of the center arm-
rest into the desired position.
Connection for external audio device
You can connect an external audio device, e.g. a
CD or an MP3 player, and play the sound via the
vehicle loudspeakers, refer to page165.
Storage compartments
Storage compartments are located in the cen-
ter console and in the rear.
Storage nets are located on the backrests of the
front seats, and a net
* is provided in the front
passenger footwell.
Do not stow hard or sharp-edged objects
in the storage nets or the net, otherwise
there is an increased risk of injury in an acci-
dent.<
In front of gearshift lever*
Do not use the storage compartment as
an ashtray, otherwise damage could
result.<
Clothes hooks
Clothes hooks are located near the grab han-
dles in the rear.
When hanging clothing on the hooks,
ensure that it will not obstruct the driver's
vision. Do not hang heavy objects on the hooks.
If you do so, they could cause personal injury to
occupants during braking or evasive maneu-
vers.<
Cup holders
Do not place containers made of glass in
the cup holders. This would lead to an
increased risk of injury in the event of an acci-
dent. Do not force containers that are too large
into the cup holders, otherwise damage could
result.<
Opening
Briefly press the button.
Page 109 of 253
Controls
107Reference
At a glance
Driving tips
Communications
Navigation
Entertainment
Mobility
On vehicles with a manual transmission, the
sockets are not equipped with cigarette light-
ers, but are instead covered with removable
caps.
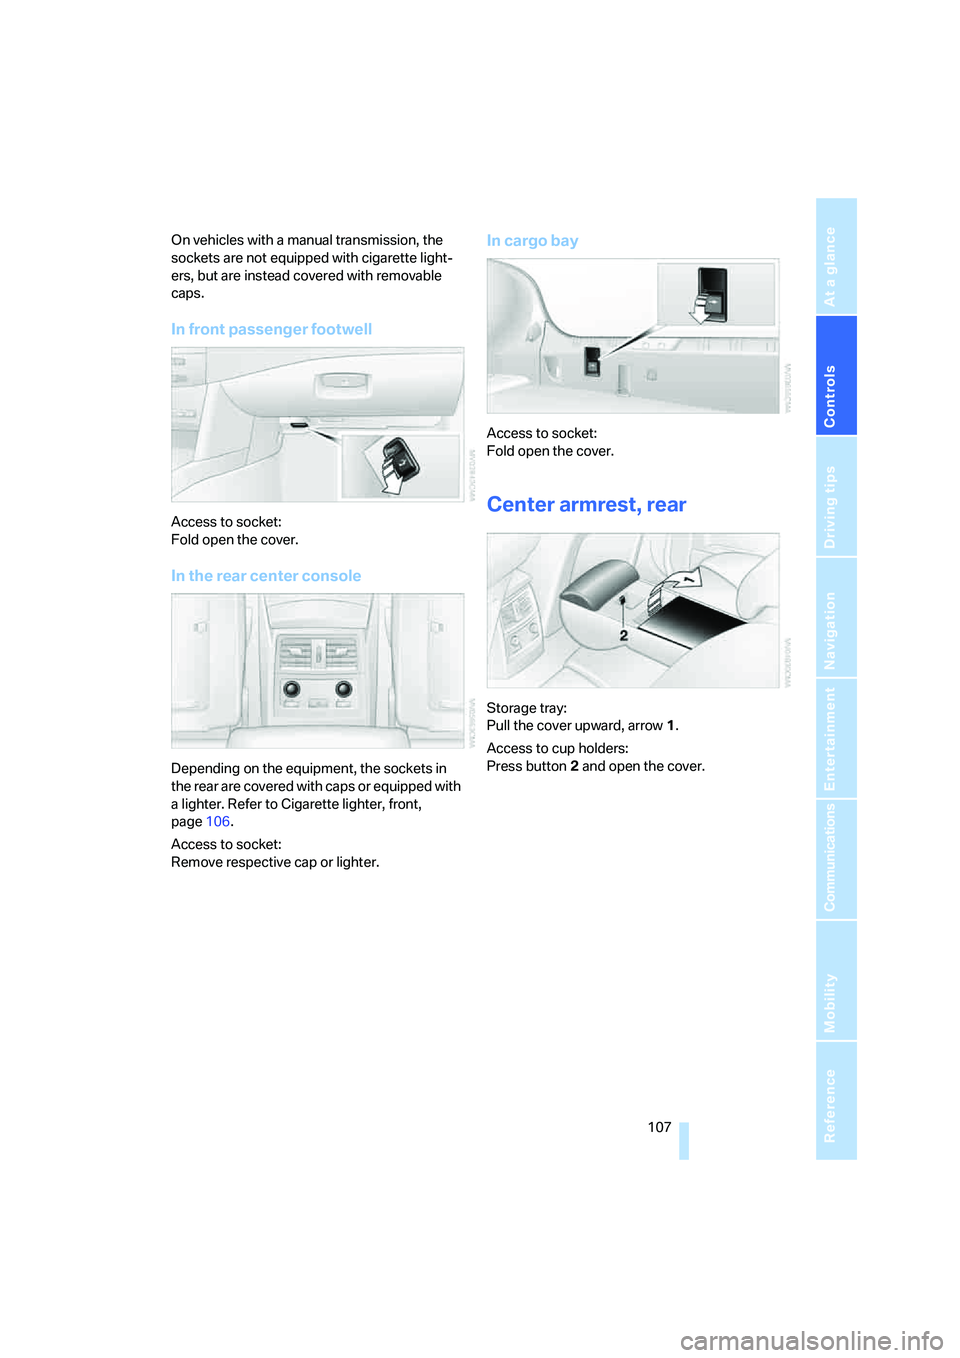
In front passenger footwell
Access to socket:
Fold open the cover.
In the rear center console
Depending on the equipment, the sockets in
the rear are covered with caps or equipped with
a lighter. Refer to Cigarette lighter, front,
page106.
Access to socket:
Remove respective cap or lighter.
In cargo bay
Access to socket:
Fold open the cover.
Center armrest, rear
Storage tray:
Pull the cover upward, arrow1.
Access to cup holders:
Press button2 and open the cover.
Page 117 of 253

Driving tips
115Reference
At a glance
Controls
Communications
Navigation
Entertainment
Mobility
Determining loading limit
1.Locate the following statement on your
vehicle's placard
*:
The combined weight of occupants
and cargo should never exceed
YYY lbs. or XXX kg, as otherwise the vehicle
may be damaged and unstable driving con-
ditions may result.<
2.Determine the combined weight of the
driver and passengers that will be riding in
your vehicle.
3.Subtract the combined weight of the driver
and passengers from YYY lbs. or XXX kg.
4.The resulting figure equals the available
amount of cargo and luggage load capacity.
For example, if the XXX amount equals
1,400 lbs. and there will be five 150-lb. pas-
sengers in your vehicle, the amount of avail-
able cargo and luggage load capacity is
650 lbs.:
1,400 lbs. minus 750 lbs. = 650 lbs.
5.Determine the combined weight of luggage
and cargo being loaded on the vehicle. That
weight may not safely exceed the available
cargo and luggage load capacity calculated
in step 4.
6.If your vehicle will be towing a trailer, part of
the load from your trailer will be transferred
to your vehicle. Consult the manual for
transporting a trailer to determine how this
may reduce the available cargo and luggage
load capacity of your vehicle.
Load
The permissible load is the total of the weight of
occupants and cargo/luggage. The greater the
weight of occupants, the less cargo/luggage
can be transported.
Stowing cargo
>Load heavy cargo as far forward and as low
as possible, placing it directly behind the
rear backrest.
>Cover sharp edges and corners.
>For very heavy cargo when the rear seat is
not occupied, secure each safety belt in the
opposite buckle.
>Do not pile objects higher than the top edge
of the backrest.
Page 209 of 253

Mobility
207Reference
At a glance
Controls
Driving tips
Communications
Navigation
Entertainment
procedures with correspondingly trained per-
sonnel. Due to the high voltage present in the
system, there is a danger of fatal injuries when
work is carried out improperly.<
Parking and roadside parking lamps
In the event of a malfunction, please go to your
BMW center or a workshop that works accord-
ing to BMW repair procedures with correspond-
ingly trained personnel.
Turn signals, front
21-watt bulb, PY21W
1.Turn the bulb holder to the left and remove.
2.Apply gentle pressure to the bulb while
turning it to the left for removal and replace-
ment.
Side-mounted turn signals
5-watt bulb, W5W
1.Press back against the front edge of the
lamp with the tip of your finger, then pivot it
out.
2.Turn the bulb holder to the left and remove.
3.Remove the bulb for replacement.
Side marker lamps, front and rear
To replace, please go to your BMW center or a
workshop that works according to BMW repair
procedures with correspondingly trained per-
sonnel.
Tail lamps
>Turn signals: 21-watt bulb, PY21W
>Backup lamps: 16-watt bulb, W16W
>Other lamps: 21-watt bulb, P21W
1Turn signal
2Rear lamp and brake lamp
3Rear lamp and brake lamp
4Backup lamp
5Reflector
6Roadside parking lamp, rear lamp and
brake lamp
Center brake lamp
This lamp uses LED technology for operation.
In the event of a malfunction, please go to your
BMW center or a workshop that works accord-
ing to BMW repair procedures with correspond-
ingly trained personnel.
Fender-mounted lamps
The illustration shows the left-hand side of the
cargo bay.
All the bulbs are integrated into a central bulb
fitting.
1.Lift up floor mat.
2.Undo the quick-release fasteners of the
side panel and pull out the panel.