2007 BMW 760LI SEDAN window
[x] Cancel search: windowPage 41 of 253
Controls
39Reference
At a glance
Driving tips
Communications
Navigation
Entertainment
Mobility
Unlocking the luggage compartment
lid separately
Press the button on the outside of the luggage
compartment lid, refer to page35. This corre-
sponds to pressing the button.
If a remote control accidentally left in the
luggage compartment is detected in the
locked vehicle, then the luggage compartment
lid opens again.<
Radio ready state
By briefly pressing the Start/Stop button, you
switch on the radio ready state, refer to
page57.
When doing so, do not depress the brake
pedal; otherwise, the engine will start.<
Starting the engine
You can start the engine or switch on the igni-
tion, as long as a remote control is in the pas-
senger compartment. The remote does not
have to be inserted into the ignition lock, refer to
page57.
Before driving into a car wash
1.Insert remote control into ignition lock.
2.Shift transmission into position N.
3.Switch engine off.
4.Leave the remote control in the ignition
lock.
The vehicle can roll.
Malfunction
Local radio waves can disrupt the function of
Comfort Access. Should the remote control fail
to operate due to interference of this kind, you
can respond by using the buttons on the remote
control or by using a key to unlock or lock your
vehicle at one of the doors. To start the engine
after this, insert the remote control into the igni-
tion lock.
Changing battery
The remote control for Comfort Access con-
tains a battery that must be replaced when it
becomes discharged.
1.Remove the integrated key from the remote
control, refer to page30.
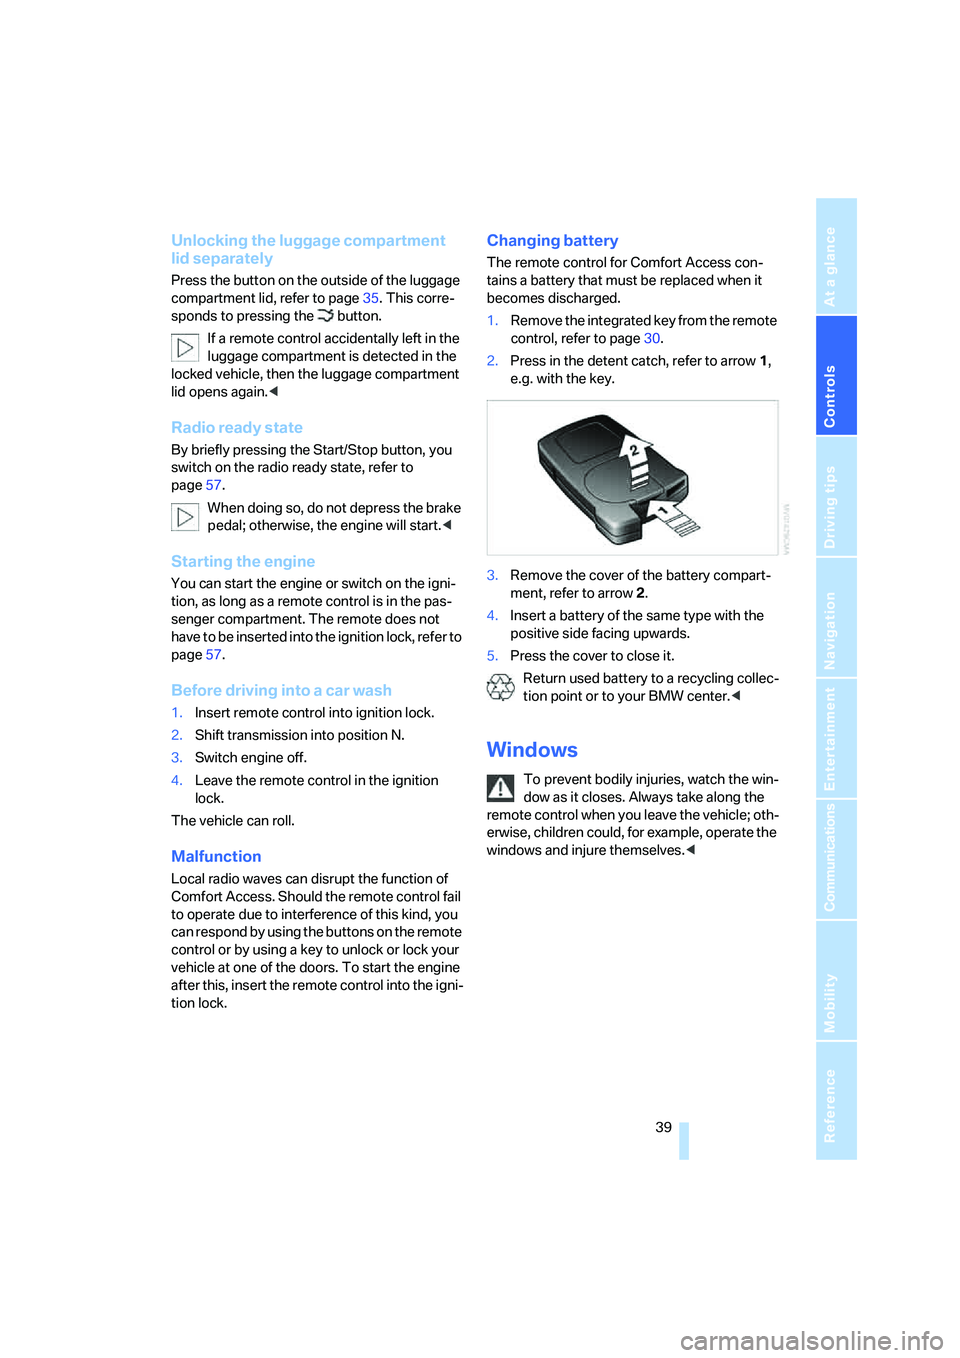
2.Press in the detent catch, refer to arrow1,
e.g. with the key.
3.Remove the cover of the battery compart-
ment, refer to arrow2.
4.Insert a battery of the same type with the
positive side facing upwards.
5.Press the cover to close it.
Return used battery to a recycling collec-
tion point or to your BMW center.<
Windows
To prevent bodily injuries, watch the win-
dow as it closes. Always take along the
remote control when you leave the vehicle; oth-
erwise, children could, for example, operate the
windows and injure themselves.<
Page 42 of 253
Opening and closing
40
Opening, closing
>Press the switch down to the resistance
point:
The window continues to open as long as
you continue to hold the switch.
>Press the switch beyond the resistance
point:
The window opens automatically. Press the
switch again to stop the opening move-
ment.
You can close the windows in the same manner
by pulling the switch.
After switching off ignition
You can still operate the power windows:
>For an extended period in radio ready state.
>For approx. 1 minute when the ignition is
switched off or with the remote control dis-
engaged.
To open, press the switch beyond the resis-
tance point.
Pinch protection system
If the closing force exceeds a specific value as a
window closes, the closing action is interrupted
and the window reopens slightly.
Despite the presence of the pinch protec-
tion system, make sure to inspect the
window's travel path prior to closing it, as the
safety system might fail to detect certain kinds
of obstructions, such as very thin objects, and
the window would continue closing.
Do not install any accessories in the range of
movement of the windows; otherwise, the pinch
protection system will be impaired.
their travel; this is to allow the pinch protection
system to respond more precisely to any
obstructions encountered in this critical
range.<
Closing without the pinch protection
system
If danger outside the vehicle or a frozen window
prevents you from closing the windows nor-
mally, proceed as follows:
1.Pull the switch past the resistance point and
hold it there. The pinch protection system is
restricted and the window opens slightly
once the closing force exceeds a certain
value.
2.Pull the switch again beyond the resistance
point within approx. 4 seconds and hold it
there. The window closes without the pinch
protection system.
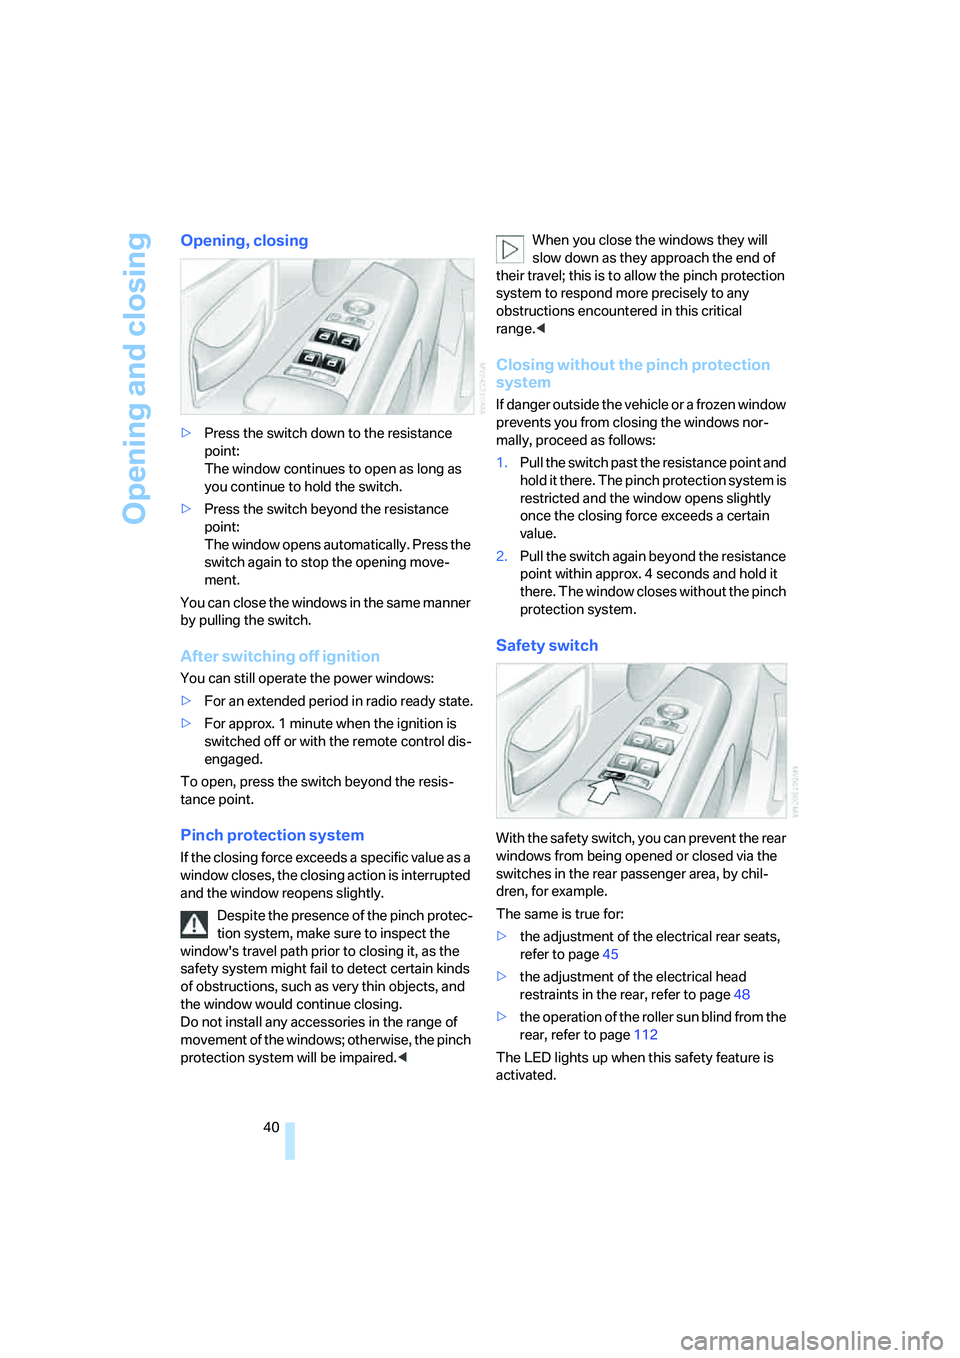
Safety switch
With the safety switch, you can prevent the rear
windows from being opened or closed via the
switches in the rear passenger area, by chil-
dren, for example.
The same is true for:
>the adjustment of the electrical rear seats,
refer to page45
>the adjustment of the electrical head
restraints in the rear, refer to page48
>the operation of the roller sun blind from the
rear, refer to page112
The LED lights up when this safety feature is
activated.
Page 43 of 253
Controls
41Reference
At a glance
Driving tips
Communications
Navigation
Entertainment
Mobility
Press the safety switch when children
ride in the rear; otherwise, unsupervised
closing of the windows could lead to injuries.<
In order to deactivate the function again,
you must insert the remote control into
the ignition lock or, with Comfort Access, you
must switch into radio ready state.<
Glass sunroof, electric*
To prevent bodily injuries, watch the
glass sunroof as it closes.
Always take along the remote control when you
leave the vehicle; otherwise, children could, for
example, operate the roof and injure them-
selves.<
Raising
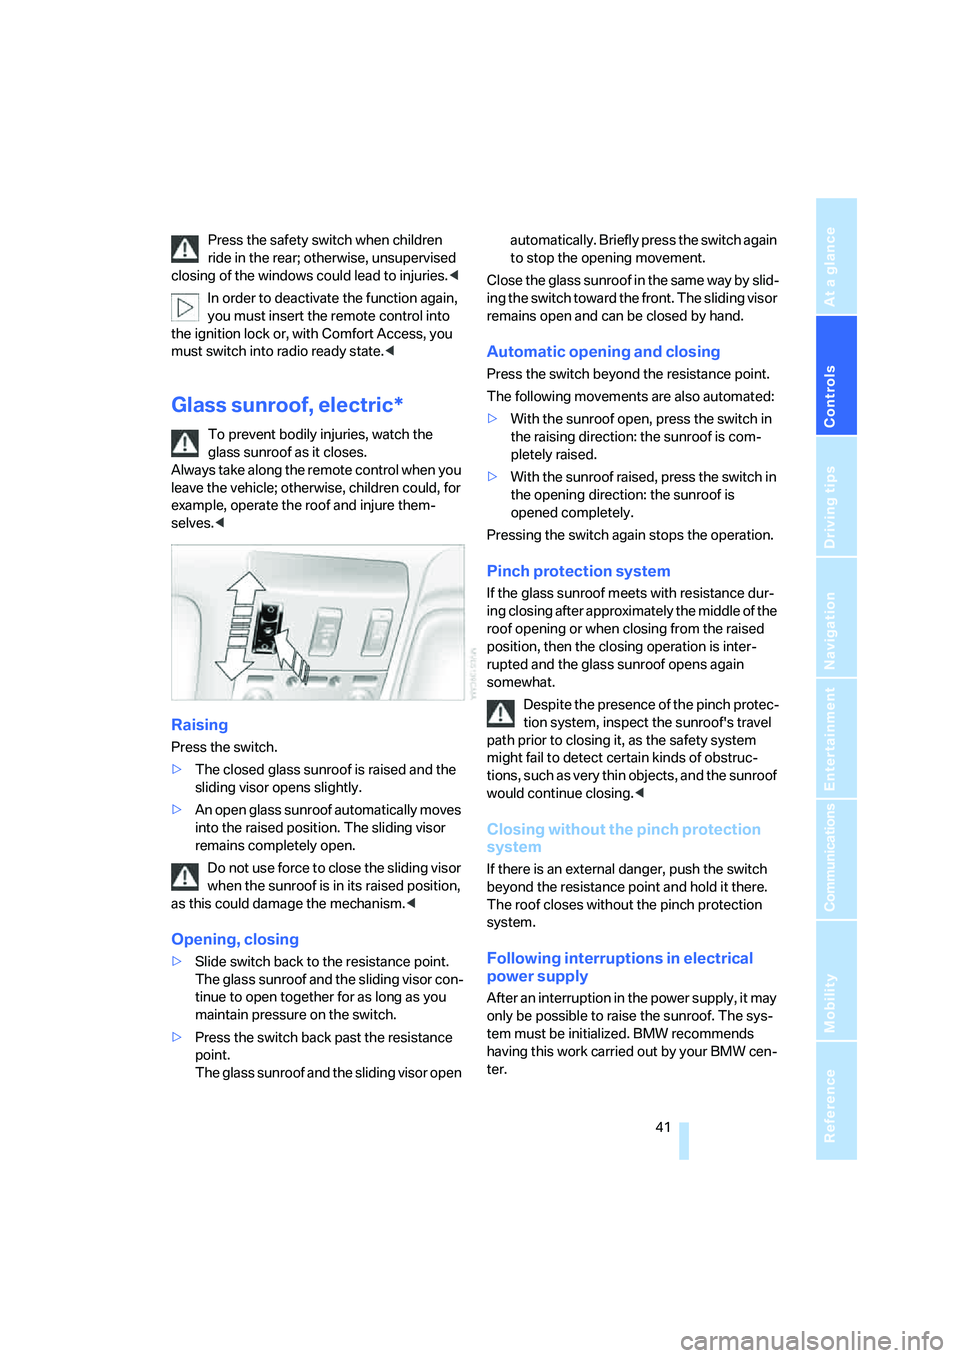
Press the switch.
>The closed glass sunroof is raised and the
sliding visor opens slightly.
>An open glass sunroof automatically moves
into the raised position. The sliding visor
remains completely open.
Do not use force to close the sliding visor
when the sunroof is in its raised position,
as this could damage the mechanism.<
Opening, closing
>Slide switch back to the resistance point.
The glass sunroof and the sliding visor con-
tinue to open together for as long as you
maintain pressure on the switch.
>Press the switch back past the resistance
point.
The glass sunroof and the sliding visor open automatically. Briefly press the switch again
to stop the opening movement.
Close the glass sunroof in the same way by slid-
ing the switch toward the front. The sliding visor
remains open and can be closed by hand.
Automatic opening and closing
Press the switch beyond the resistance point.
The following movements are also automated:
>With the sunroof open, press the switch in
the raising direction: the sunroof is com-
pletely raised.
>With the sunroof raised, press the switch in
the opening direction: the sunroof is
opened completely.
Pressing the switch again stops the operation.
Pinch protection system
If the glass sunroof meets with resistance dur-
ing closing after approximately the middle of the
roof opening or when closing from the raised
position, then the closing operation is inter-
rupted and the glass sunroof opens again
somewhat.
Despite the presence of the pinch protec-
tion system, inspect the sunroof's travel
path prior to closing it, as the safety system
might fail to detect certain kinds of obstruc-
tions, such as very thin objects, and the sunroof
would continue closing.<
Closing without the pinch protection
system
If there is an external danger, push the switch
beyond the resistance point and hold it there.
The roof closes without the pinch protection
system.
Following interruptions in electrical
power supply
After an interruption in the power supply, it may
only be possible to raise the sunroof. The sys-
tem must be initialized. BMW recommends
having this work carried out by your BMW cen-
ter.
Page 47 of 253
Controls
45Reference
At a glance
Driving tips
Communications
Navigation
Entertainment
Mobility
front passenger's seat, by the safety belt
buckle.
Lumbar support adjustment
5Lumbar support
You can also adjust the contour of the backrest
to obtain additional support in the lumbar
region.
The upper hips and spinal column receive sup-
plementary support to help you maintain a
relaxed, upright sitting position.
>Increase or decrease curvature
>Shift curvature up or down
Shoulder support adjustment
6Adjustment of the tilt angle of the shoulder
support:
The shoulder support provides support to your
back in the shoulder region as well. This pro-
vides a relaxed driving position and helps
relieve stress on the shoulder muscles.
Rear comfort seat* adjustment
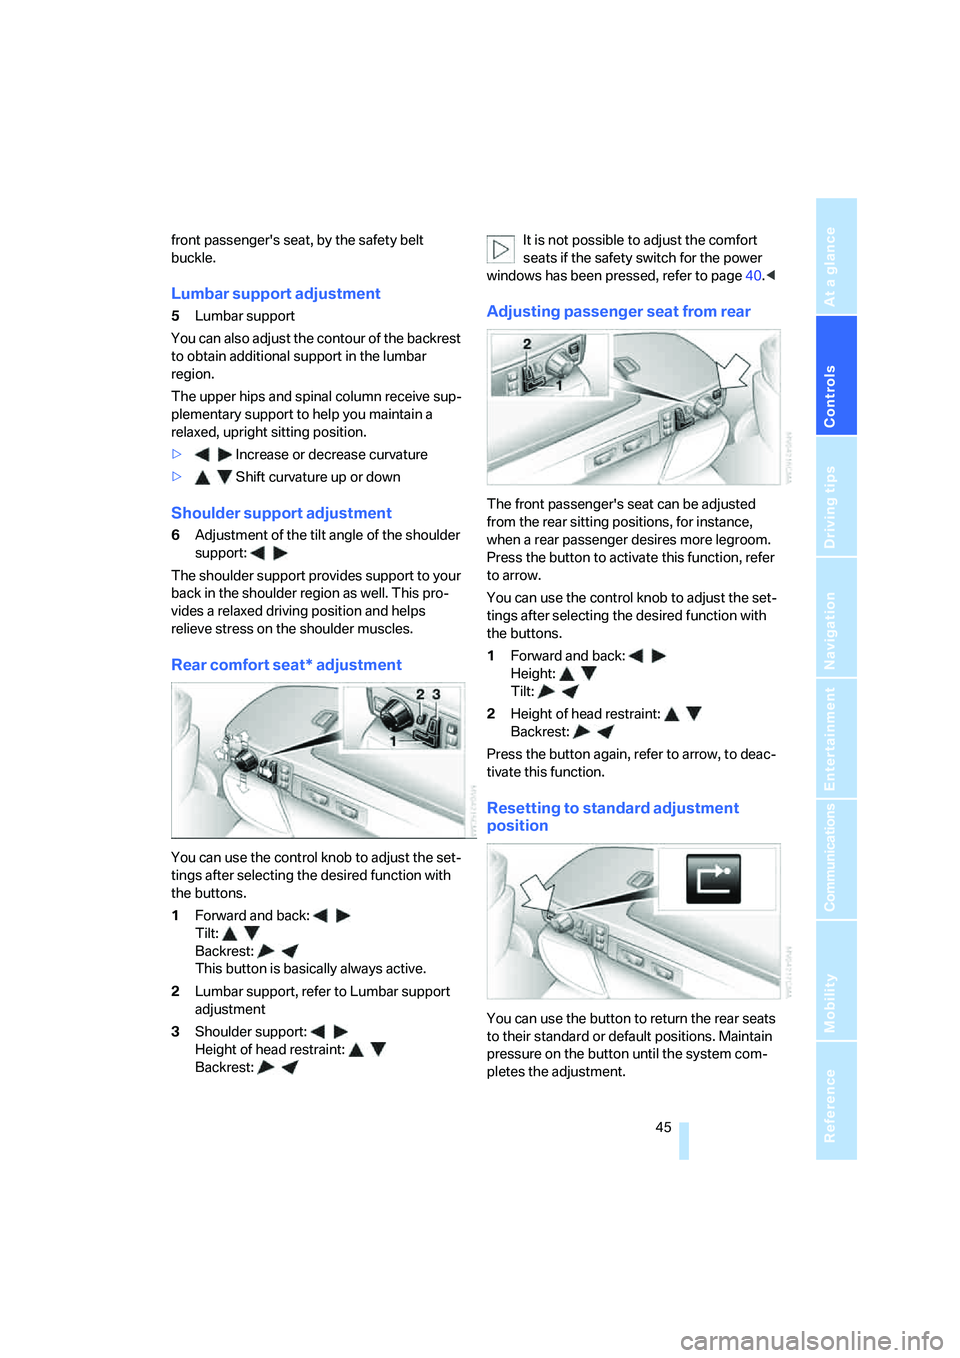
You can use the control knob to adjust the set-
tings after selecting the desired function with
the buttons.
1Forward and back:
Tilt:
Backrest:
This button is basically always active.
2Lumbar support, refer to Lumbar support
adjustment
3Shoulder support:
Height of head restraint:
Backrest:It is not possible to adjust the comfort
seats if the safety switch for the power
windows has been pressed, refer to page40.<
Adjusting passenger seat from rear
The front passenger's seat can be adjusted
from the rear sitting positions, for instance,
when a rear passenger desires more legroom.
Press the button to activate this function, refer
to arrow.
You can use the control knob to adjust the set-
tings after selecting the desired function with
the buttons.
1Forward and back:
Height:
Tilt:
2Height of head restraint:
Backrest:
Press the button again, refer to arrow, to deac-
tivate this function.
Resetting to standard adjustment
position
You can use the button to return the rear seats
to their standard or default positions. Maintain
pressure on the button until the system com-
pletes the adjustment.
Page 58 of 253
Transporting children safely
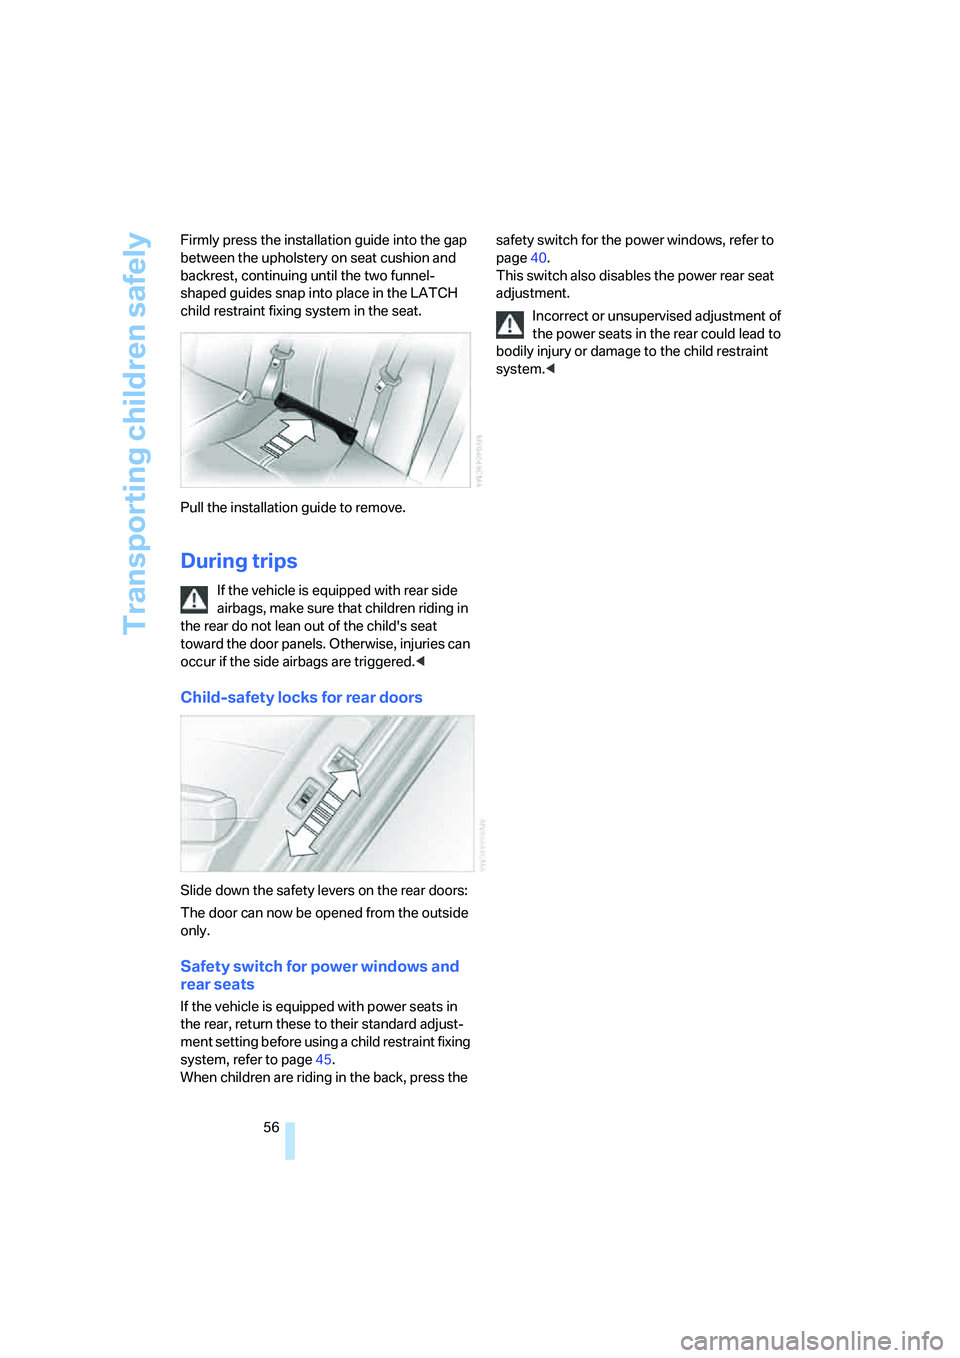
56 Firmly press the installation guide into the gap
between the upholstery on seat cushion and
backrest, continuing until the two funnel-
shaped guides snap into place in the LATCH
child restraint fixing system in the seat.
Pull the installation guide to remove.
During trips
If the vehicle is equipped with rear side
airbags, make sure that children riding in
the rear do not lean out of the child's seat
toward the door panels. Otherwise, injuries can
occur if the side airbags are triggered.<
Child-safety locks for rear doors
Slide down the safety levers on the rear doors:
The door can now be opened from the outside
only.
Safety switch for power windows and
rear seats
If the vehicle is equipped with power seats in
the rear, return these to their standard adjust-
ment setting before using a child restraint fixing
system, refer to page45.
When children are riding in the back, press the safety switch for the power windows, refer to
page40.
This switch also disables the power rear seat
adjustment.
Incorrect or unsupervised adjustment of
the power seats in the rear could lead to
bodily injury or damage to the child restraint
system.<
Page 85 of 253
Controls
83Reference
At a glance
Driving tips
Communications
Navigation
Entertainment
Mobility
Limit on Info Display
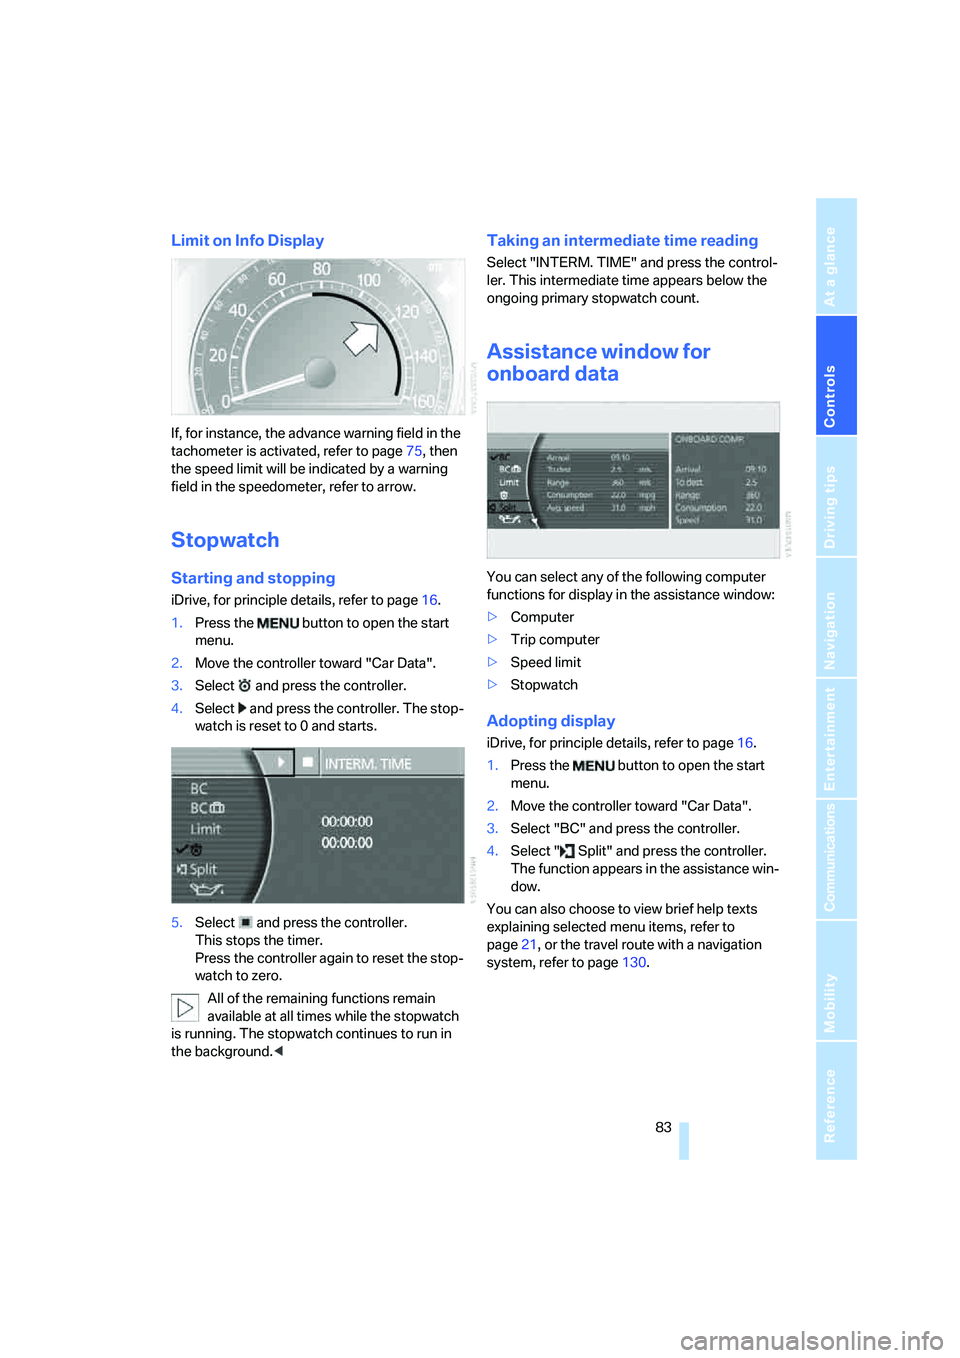
If, for instance, the advance warning field in the
tachometer is activated, refer to page75, then
the speed limit will be indicated by a warning
field in the speedometer, refer to arrow.
Stopwatch
Starting and stopping
iDrive, for principle details, refer to page16.
1.Press the button to open the start
menu.
2.Move the controller toward "Car Data".
3.Select and press the controller.
4.Select and press the controller. The stop-
watch is reset to 0 and starts.
5.Select and press the controller.
This stops the timer.
Press the controller again to reset the stop-
watch to zero.
All of the remaining functions remain
available at all times while the stopwatch
is running. The stopwatch continues to run in
the background.<
Taking an intermediate time reading
Select "INTERM. TIME" and press the control-
ler. This intermediate time appears below the
ongoing primary stopwatch count.
Assistance window for
onboard data
You can select any of the following computer
functions for display in the assistance window:
>Computer
>Trip computer
>Speed limit
>Stopwatch
Adopting display
iDrive, for principle details, refer to page16.
1.Press the button to open the start
menu.
2.Move the controller toward "Car Data".
3.Select "BC" and press the controller.
4.Select " Split" and press the controller.
The function appears in the assistance win-
dow.
You can also choose to view brief help texts
explaining selected menu items, refer to
page21, or the travel route with a navigation
system, refer to page130.
Page 99 of 253
Controls
97Reference
At a glance
Driving tips
Communications
Navigation
Entertainment
Mobility
driver can decide which actions are appropriate
and then react accordingly.
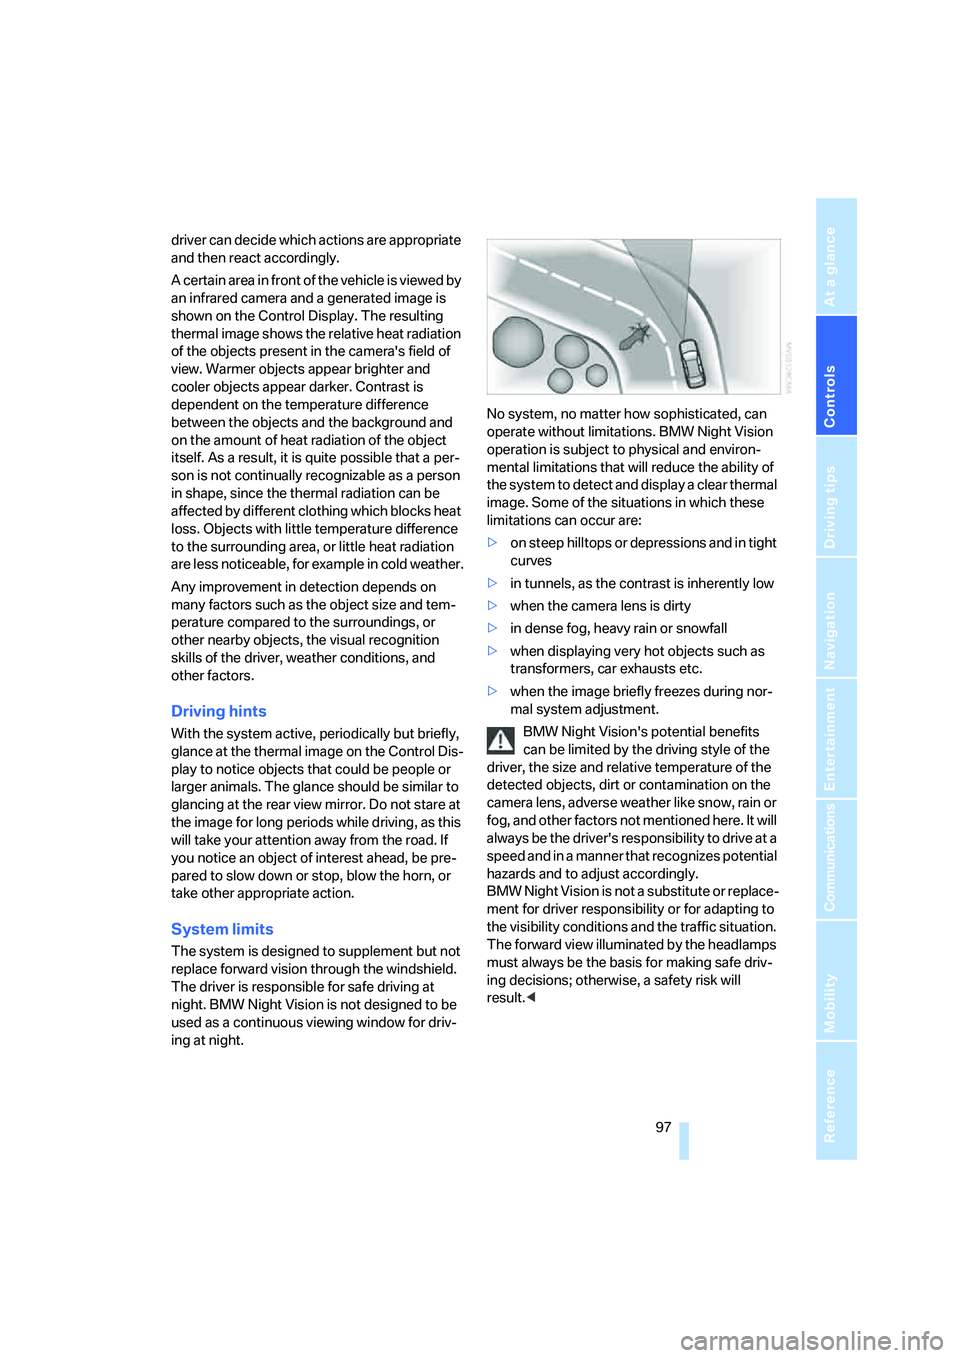
A certain area in front of the vehicle is viewed by
an infrared camera and a generated image is
shown on the Control Display. The resulting
thermal image shows the relative heat radiation
of the objects present in the camera's field of
view. Warmer objects appear brighter and
cooler objects appear darker. Contrast is
dependent on the temperature difference
between the objects and the background and
on the amount of heat radiation of the object
itself. As a result, it is quite possible that a per-
son is not continually recognizable as a person
in shape, since the thermal radiation can be
affected by different clothing which blocks heat
loss. Objects with little temperature difference
to the surrounding area, or little heat radiation
are less noticeable, for example in cold weather.
Any improvement in detection depends on
many factors such as the object size and tem-
perature compared to the surroundings, or
other nearby objects, the visual recognition
skills of the driver, weather conditions, and
other factors.
Driving hints
With the system active, periodically but briefly,
glance at the thermal image on the Control Dis-
play to notice objects that could be people or
larger animals. The glance should be similar to
glancing at the rear view mirror. Do not stare at
the image for long periods while driving, as this
will take your attention away from the road. If
you notice an object of interest ahead, be pre-
pared to slow down or stop, blow the horn, or
take other appropriate action.
System limits
The system is designed to supplement but not
replace forward vision through the windshield.
The driver is responsible for safe driving at
night. BMW Night Vision is not designed to be
used as a continuous viewing window for driv-
ing at night.No system, no matter how sophisticated, can
operate without limitations. BMW Night Vision
operation is subject to physical and environ-
mental limitations that will reduce the ability of
the system to detect and display a clear thermal
image. Some of the situations in which these
limitations can occur are:
>on steep hilltops or depressions and in tight
curves
>in tunnels, as the contrast is inherently low
>when the camera lens is dirty
>in dense fog, heavy rain or snowfall
>when displaying very hot objects such as
transformers, car exhausts etc.
>when the image briefly freezes during nor-
mal system adjustment.
BMW Night Vision's potential benefits
can be limited by the driving style of the
driver, the size and relative temperature of the
detected objects, dirt or contamination on the
camera lens, adverse weather like snow, rain or
fog, and other factors not mentioned here. It will
always be the driver's responsibility to drive at a
speed and in a manner that recognizes potential
hazards and to adjust accordingly.
BMW Night Vision is not a substitute or replace-
ment for driver responsibility or for adapting to
the visibility conditions and the traffic situation.
The forward view illuminated by the headlamps
must always be the basis for making safe driv-
ing decisions; otherwise, a safety risk will
result.<
Page 105 of 253
Controls
103Reference
At a glance
Driving tips
Communications
Navigation
Entertainment
Mobility
Climate
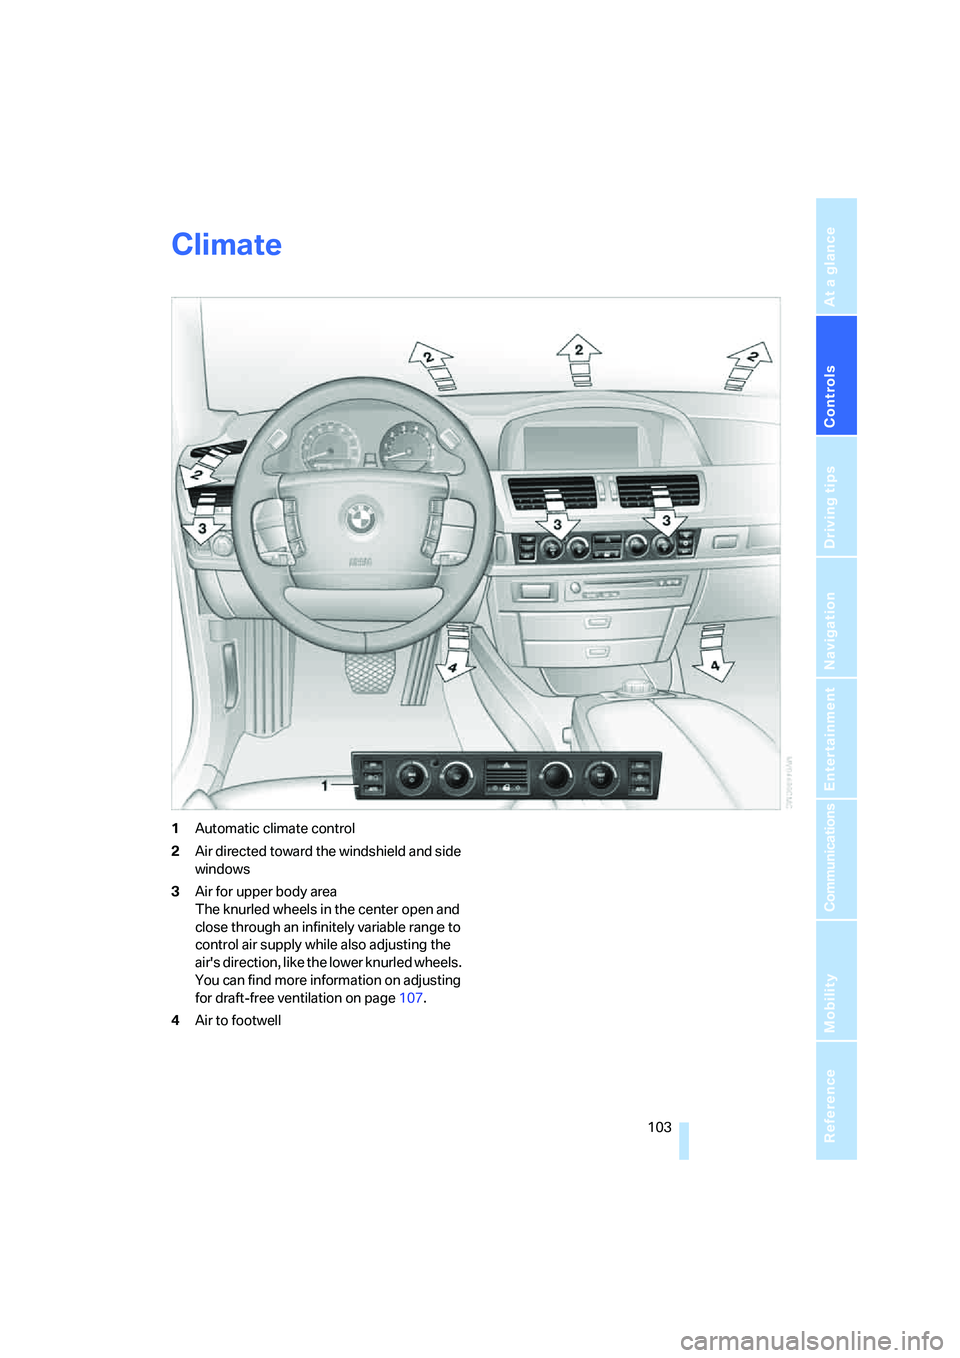
1Automatic climate control
2Air directed toward the windshield and side
windows
3Air for upper body area
The knurled wheels in the center open and
close through an infinitely variable range to
control air supply while also adjusting the
air's direction, like the lower knurled wheels.
You can find more information on adjusting
for draft-free ventilation on page107.
4Air to footwell