Page 48 of 254

Adjusting
46
Seat, mirror and steering
wheel memory
You can store and select two different adjust-
ment settings for the driver's seat, exterior mir-
rors and steering wheel.
With comfort seats, you can also use the mem-
ory to store and recall two seat positions for
each additional seat.
The adjustment of the lumbar support is not
stored in the memory.
Storing
1.Switch on radio ready state or ignition, refer
to page57.
2.Set desired seat position; for driver's seat
also set the exterior mirror and steering
wheel position.
3.Press
MEMORY button:
The LED in the button lights up.
4.Press the desired memory button1 or2:
The LED goes out.
Requesting
Do not request a position from the mem-
ory while the vehicle is moving. There is a
risk of accident from unexpected movement of
the seat or steering wheel.<
Comfort mode
1.With driver's door open after unlocking or
with radio ready state switched on.
2.Briefly press the desired memory button 1
or2.The adjusting procedure is immediately inter-
rupted when you touch a seat adjustment
switch or one of the memory buttons.
Safety mode
1.With driver's door closed and ignition
switched either on or off.
2.Press the desired memory button 1or2
and maintain pressure until the adjustment
process has been completed.
If you press the
MEMORY button accidentally:
Press the button again; the LED goes out.
Head restraints
A correctly adjusted head restraint reduces the
risk of injury to cervical vertebrae in the event of
an accident.
Adjust the head restraint so that its center
is approx. at ear level. Otherwise, there is
increased danger of injury in the event of an
accident. Only remove the head restraint if no
one will be sitting on the seat in question. Rein-
stall the head restraint before transporting any-
one in the seat. Otherwise, the protective func-
tion of the head restraint is unavailable.<
Front: height adjustment
1.Select head restraint, button1.
2.Adjust height, arrow2.
Removing
1.Raise head restraint all the way.
2.Pull out the head restraint all the way out
with a firm tug.
Page 57 of 254

Controls
55Reference
At a glance
Driving tips
Communications
Navigation
Entertainment
Mobility
Unlocking safety belt
1.Open the belt buckle.
2.Remove the child restraint system.
3.Allow the belt webbing to be pulled in com-
pletely.
LATCH child restraint fixing
system*
LATCH: Lower Anchor and Tethers for CHil-
dren.
For installation and use of LATCH child
restraint systems, follow the operating
and safety instructions of the system manufac-
turer.<
If the vehicle is equipped with power seats in
the rear, return these to their standard positions
before using LATCH child restraint systems,
refer to page45.
Before installing the LATCH child's seat, pull
the belt away from the region of the child
restraint fixing system.
Make sure that the LATCH anchors have
properly engaged and that the child
restraint system is resting snugly against the
backrest.<
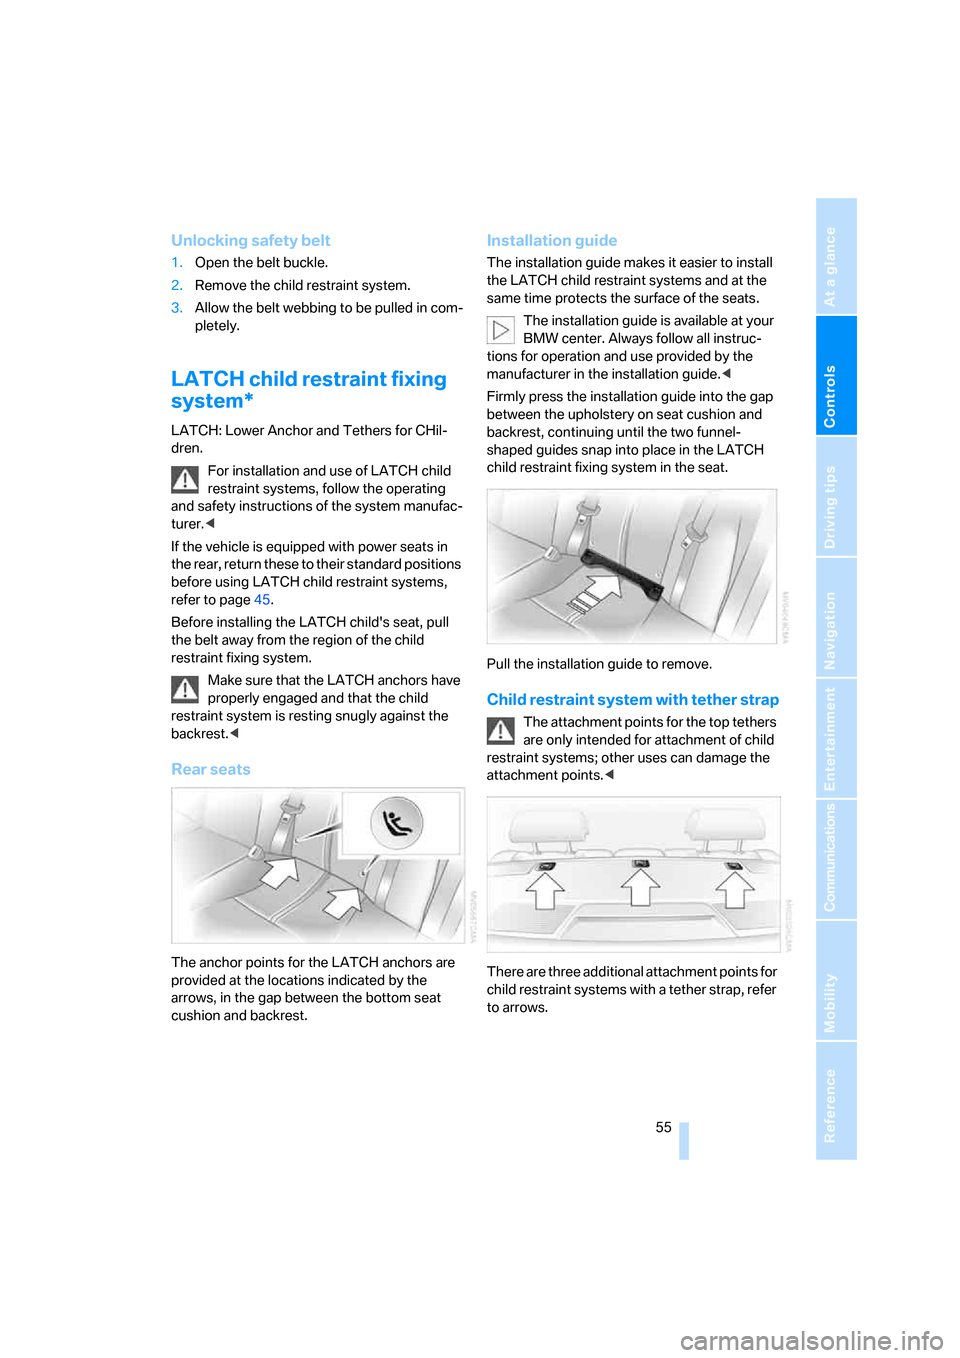
Rear seats
The anchor points for the LATCH anchors are
provided at the locations indicated by the
arrows, in the gap between the bottom seat
cushion and backrest.
Installation guide
The installation guide makes it easier to install
the LATCH child restraint systems and at the
same time protects the surface of the seats.
The installation guide is available at your
BMW center. Always follow all instruc-
tions for operation and use provided by the
manufacturer in the installation guide.<
Firmly press the installation guide into the gap
between the upholstery on seat cushion and
backrest, continuing until the two funnel-
shaped guides snap into place in the LATCH
child restraint fixing system in the seat.
Pull the installation guide to remove.
Child restraint system with tether strap
The attachment points for the top tethers
are only intended for attachment of child
restraint systems; other uses can damage the
attachment points.<
There are three additional attachment points for
child restraint systems with a tether strap, refer
to arrows.
Page 115 of 254

Controls
113Reference
At a glance
Driving tips
Communications
Navigation
Entertainment
Mobility
4Switching to the other side
Briefly press the corresponding button with the
ignition in radio ready state or higher.
The side window blind can not be
extended unless the side window is
closed. If the side window is open, the blind will
rise slightly prior to immediately retracting to its
original position.<
To avoid injuries, make sure that the clos-
ing region of the roller blind is clear.
Press the safety switch on the driver's door,
refer to page40. The LED must light up. This
precaution prevents children from operating
the sun blinds using the rear switches, etc.
When leaving the vehicle parked, remove the
remote control from the ignition lock and close
the doors; this precaution prevents children
from operating the roller sun blinds and injuring
themselves.<
Automatically extending and retracting
sun blinds
You can run the sun blinds up and down
together when you press and hold the button3
longer.
Glove compartment
Releasing
Press button. The glove compartment opens
automatically and the light comes on.
Closing
Fold the cover up.
To prevent injury in the event of an acci-
dent while the vehicle is being driven,
close the glove compartment immediately after
use.<
Rechargeable flashlight
The flashlight is located on the left side of the
glove compartment.
The flashlight can remain plugged in continu-
ously. Remove the flashlight from the socket
when needed.
Be sure that the flashlight is switched off
when it is inserted into its holder. Failure
to comply with this precaution could lead to
overcharging and damage.<
Front center armrest
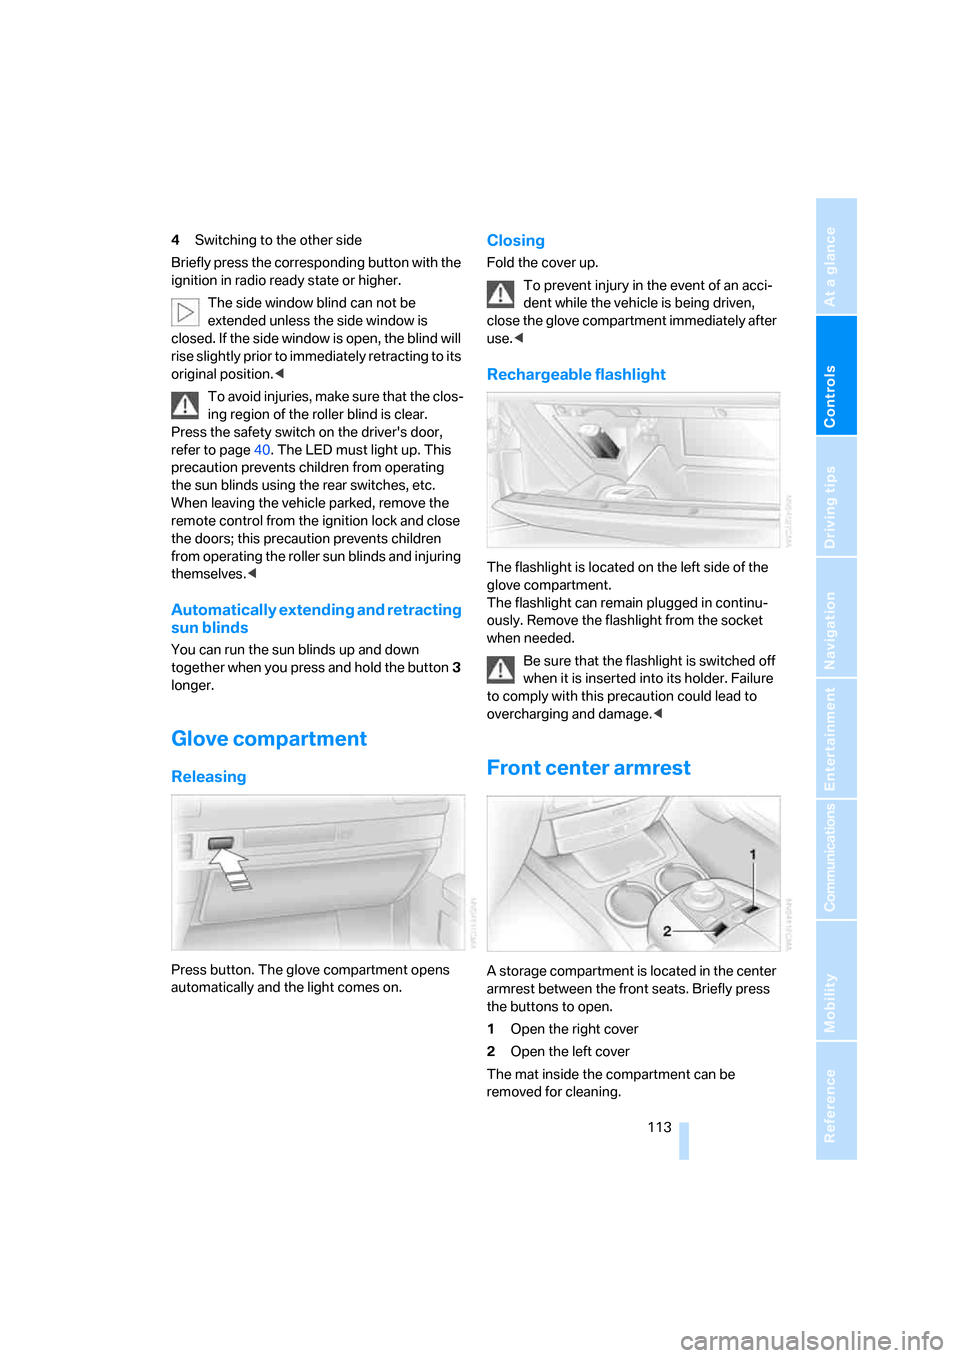
A storage compartment is located in the center
armrest between the front seats. Briefly press
the buttons to open.
1Open the right cover
2Open the left cover
The mat inside the compartment can be
removed for cleaning.
Page 120 of 254

Practical interior accessories
118
Loading
1.Fold down the center armrest in the rear
backrest.
2.Pull on the handle and open the cover panel.
3.Remove the cover panel
* and place it on
the controller in the rear.
4.To open the cover panel in the luggage
compartment:
Press the handle and slide it to the right.
5.Place the ski bag between the front seats
and load it. The zipper gives you easy
access to the stowed items and facilitates
drying of the ski bag.
Only place clean skis in the ski bag. Wrap sharp
edges so that no damage occurs.
Securing cargo
After loading, secure the ski bag and its con-
tents. Tighten the retaining strap on the ten-
sioning buckle for this purpose.
Failure to secure the ski bag with the
retaining strap could endanger occupants
during braking or evasive maneuvers.<
Stowing ski bag
1.To close the cover panel in the luggage
compartment:
Press the handle and slide it to the left.
2.Fold the ski bag and store it in the compart-
ment.
3.Snap the cover into place as shown.
4.Close the cover panel.