2007 BMW 760I radio
[x] Cancel search: radioPage 109 of 254

Controls
107Reference
At a glance
Driving tips
Communications
Navigation
Entertainment
Mobility
The interior temperature, air volume, and air
distribution can be set starting from the radio
ready state.
Switching cooling function on and off
manually
When activated, the air conditioner
mode cools and dehumidifies the
incoming air, reheating it as
required, depending on the temperature set-
ting. Depending on the weather, the windshield
may fog over briefly when the engine is started.
The cooling function is switched on automati-
cally with the AUTO program. The passenger
compartment can only be cooled with the
engine running.
Rear window defroster
The rear window defroster
switches off automatically after a
while. Depending on your equip-
ment package, the upper wires are used as an
antenna and are not part of the rear window
defroster.
Front ventilation
1Knurled wheels for smoothly opening and
closing the air vents
2Knurled wheels for changing airflow direc-
tion
Ventilation for cooling
Adjust the vents to direct the flow of cool air in
your direction, for instance, if the interior has
become too warm, etc.
Draft-free ventilation
Set the vent outlets so that the air flows past
you and is not directed straight at you.
Ventilation in rear
1Knurled wheel for smoothly opening and
closing the air vents
1Knurled wheels for smoothly opening and
closing the air vents
2Levers for changing airflow direction
3Knurled wheels
* for setting temperature:
>Turn toward blue: colder
>Turn toward red: warmer
Microfilter/activated-charcoal filter
The microfilter removes dust and pollen from
the incoming air. The activated-charcoal filter
provides additional protection by filtering gas-
eous pollutants from the outside air. Your BMW
center replaces this combined filter as a stan-
dard part of your scheduled maintenance.
You can select a display of more detailed infor-
mation in the service required display, refer to
page78.
Page 113 of 254
Controls
111Reference
At a glance
Driving tips
Communications
Navigation
Entertainment
Mobility
Practical interior accessories
Integrated universal remote
control*
The concept
The integrated universal remote control can
replace as many as three hand-held transmit-
ters for various radio-controlled accessories,
such as garage doors, entrance gates, or light-
ing systems. The integrated universal remote
control registers and stores signals from the
original hand-held transmitters.
The signal of an original hand-held transmitter
can be programmed into one of the three mem-
ory buttons1. After this, the programmed
memory button1 will operate the system in
question. The LED2 flashes to confirm trans-
mission of the signal.
Should you sell your vehicle one day, be sure to
delete the stored programs beforehand for your
security, refer to page112.
To prevent possible damage or injury,
during programming or before each use
of the programmed device by the integrated
universal remote control, always inspect the
immediate area to make certain that no people,
animals or objects are within the swiveling and
movement range of the device. Also, comply
with the safety precautions of the original hand-
held transmitter.<
Checking compatibility
If you see this symbol on the packaging
or in the manual supplied with the orig-
inal hand-held transmitter, then it is
safe to assume that it is compatible with the
integrated universal remote control.
If you have additional questions, please
contact your BMW center or call:
1-800-355-3515.
Information is also provided on the Internet at:
www.bmwusa.com or
www.homelink.com. HomeLink is a registered trademark of
Johnson Controls, Inc.<
Programming
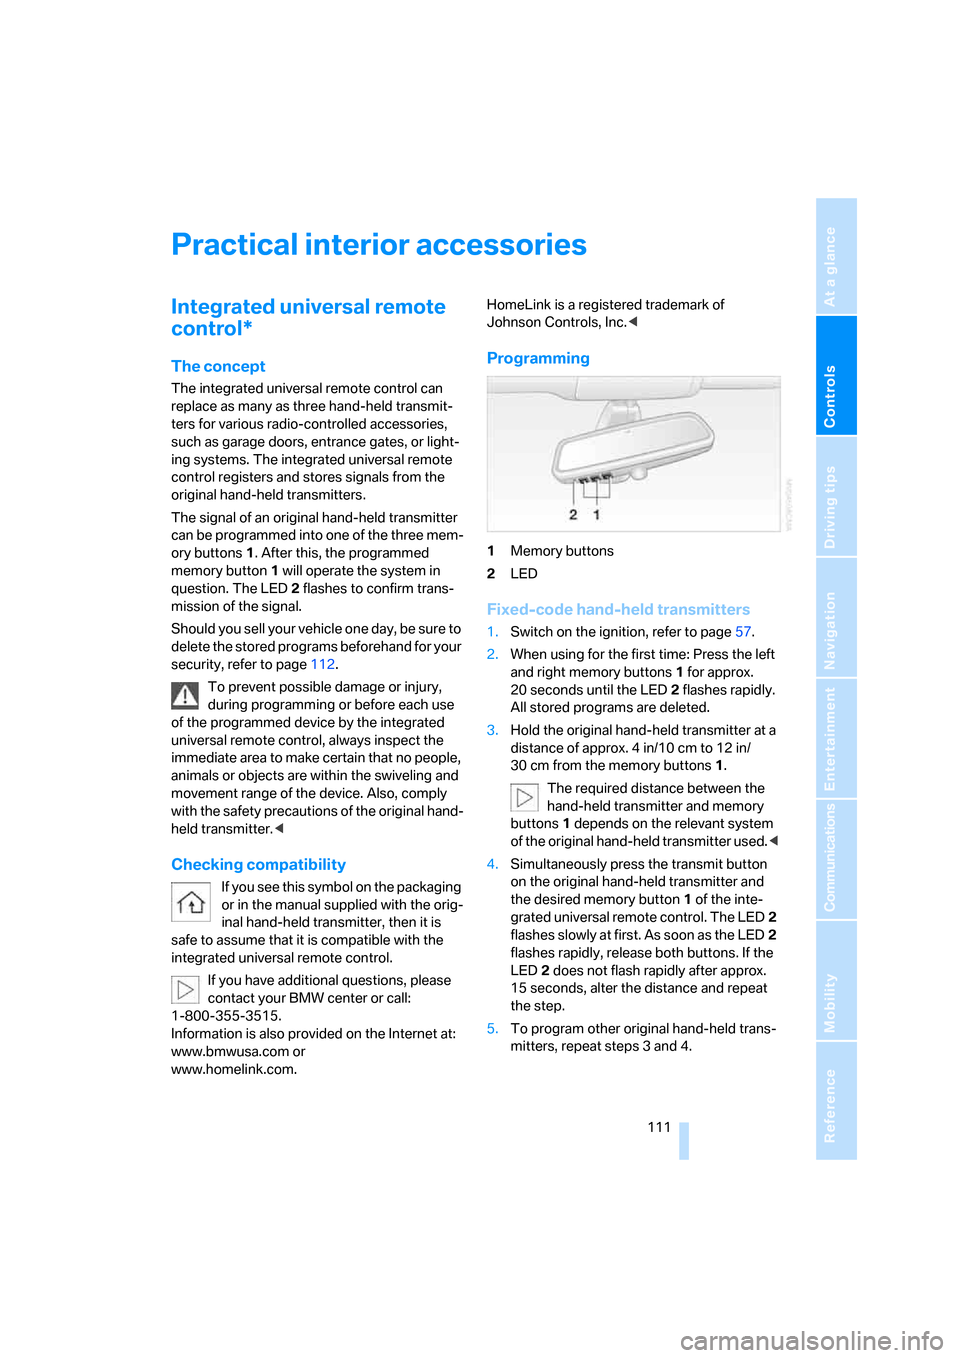
1Memory buttons
2LED
Fixed-code hand-held transmitters
1.Switch on the ignition, refer to page57.
2.When using for the first time: Press the left
and right memory buttons1 for approx.
20 seconds until the LED2 flashes rapidly.
All stored programs are deleted.
3.Hold the original hand-held transmitter at a
distance of approx. 4 in/10 cm to 12 in/
30 cm from the memory buttons1.
The required distance between the
hand-held transmitter and memory
buttons1 depends on the relevant system
of the original hand-held transmitter used.<
4.Simultaneously press the transmit button
on the original hand-held transmitter and
the desired memory button1 of the inte-
grated universal remote control. The LED2
flashes slowly at first. As soon as the LED2
flashes rapidly, release both buttons. If the
LED2 does not flash rapidly after approx.
15 seconds, alter the distance and repeat
the step.
5.To program other original hand-held trans-
mitters, repeat steps 3 and 4.
Page 114 of 254
Practical interior accessories
112 The corresponding memory button1 is now
programmed with the signal of the original
hand-held transmitter.
You can operate the system when the engine is
running or when the ignition is switched on.
If the device cannot be used after
repeated programming, check whether
the original hand-held transmitter uses an alter-
nating-code system. To do so, either read the
instructions of the original hand-held transmit-
ter or press and hold down the programmed
memory button1 of the integrated universal
remote control. If the LED2 on the integrated
universal remote control flashes rapidly for a
short time and then remains lit for approx.
2 seconds, then this indicates that the original
hand-held transmitter is equipped with an alter-
nating-code system. In the case of an alternat-
ing-code system, program the memory but-
tons 1 as described in the Alternating-code
hand-held transmitters section below.<
Alternating-code hand-held
transmitters
Consult the operating instructions of the unit
you wish to set when programming the univer-
sal remote control. You will find information
there on the possibilities for synchronization.
When programming hand-held transmitters
that employ an alternating code, please follow
the supplementary instructions below:
Programming will be easier with the aid of
a second person.<
1.Park your vehicle within the range of the
remote-controlled device.
2.Program the integrated universal remote
control as described above in the Fixed-
code hand-held transmitters section.
3.Locate the button on the receiver of the
device you want to set up, e.g. on the upper
section of its drive unit.
4.Press the button on the receiver of the
device you want to set up. After step 4, you
have approx. 30 seconds for step 5.5.Press the programmable memory button1
on the integrated universal remote control
three times.
The corresponding memory button1 is now
programmed with the signal of the original
hand-held transmitter.
If you have any additional questions,
please contact your BMW center.<
Deleting stored programs
Press the left and right memory buttons1 for
approx. 20 seconds until the LED2 flashes rap-
idly:
All stored programs are deleted.
It is not possible to delete individual programs.
Roller sun blinds*
Rear window blind
Briefly press the button on the driver's door with
the ignition in radio ready state or higher.
Roller sun blinds for rear side windows
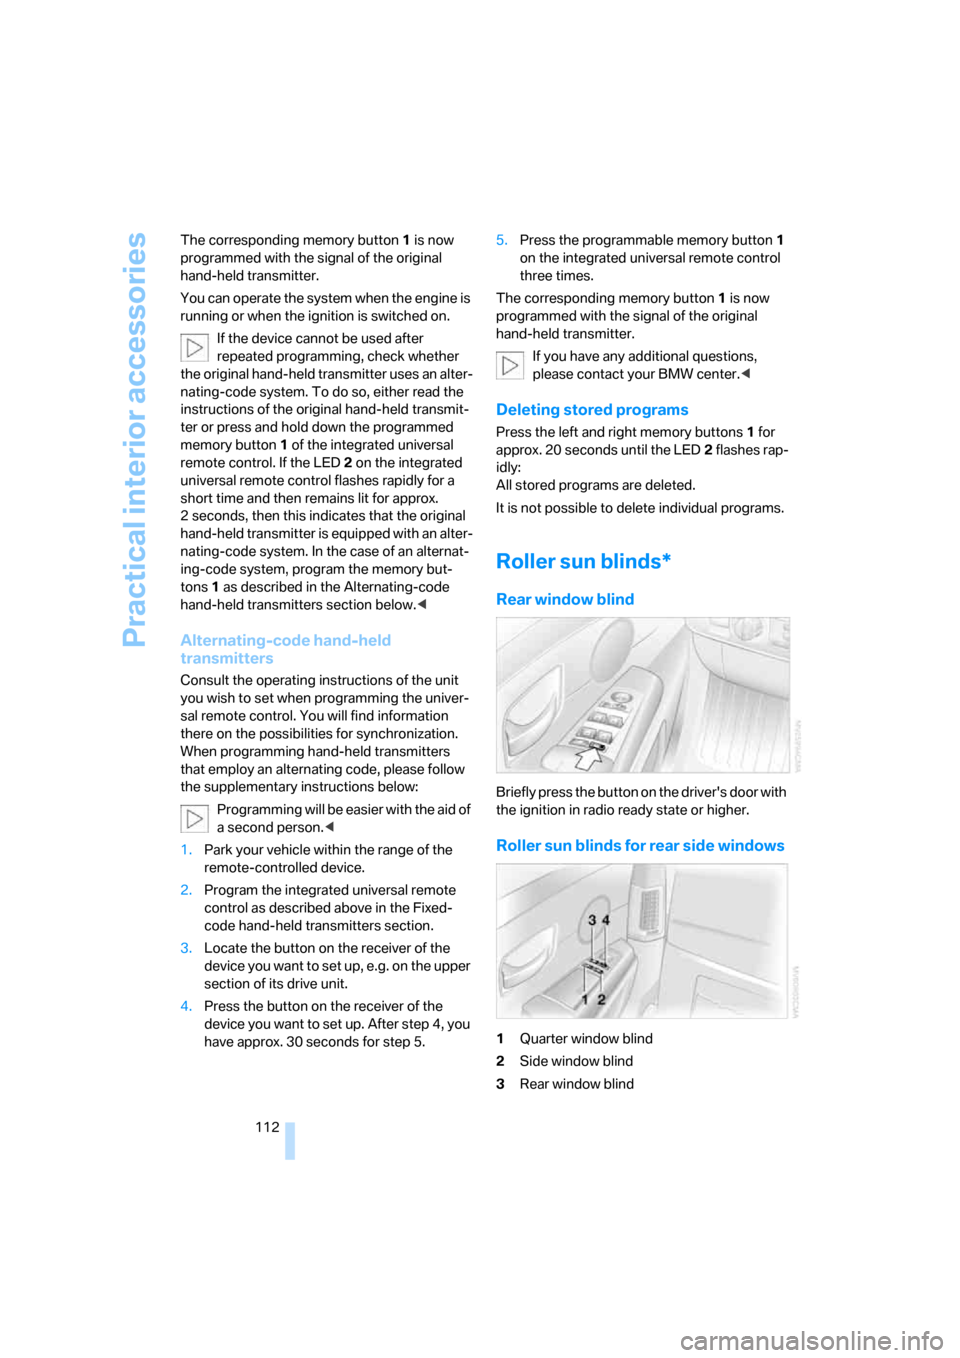
1Quarter window blind
2Side window blind
3Rear window blind
Page 115 of 254
Controls
113Reference
At a glance
Driving tips
Communications
Navigation
Entertainment
Mobility
4Switching to the other side
Briefly press the corresponding button with the
ignition in radio ready state or higher.
The side window blind can not be
extended unless the side window is
closed. If the side window is open, the blind will
rise slightly prior to immediately retracting to its
original position.<
To avoid injuries, make sure that the clos-
ing region of the roller blind is clear.
Press the safety switch on the driver's door,
refer to page40. The LED must light up. This
precaution prevents children from operating
the sun blinds using the rear switches, etc.
When leaving the vehicle parked, remove the
remote control from the ignition lock and close
the doors; this precaution prevents children
from operating the roller sun blinds and injuring
themselves.<
Automatically extending and retracting
sun blinds
You can run the sun blinds up and down
together when you press and hold the button3
longer.
Glove compartment
Releasing
Press button. The glove compartment opens
automatically and the light comes on.
Closing
Fold the cover up.
To prevent injury in the event of an acci-
dent while the vehicle is being driven,
close the glove compartment immediately after
use.<
Rechargeable flashlight
The flashlight is located on the left side of the
glove compartment.
The flashlight can remain plugged in continu-
ously. Remove the flashlight from the socket
when needed.
Be sure that the flashlight is switched off
when it is inserted into its holder. Failure
to comply with this precaution could lead to
overcharging and damage.<
Front center armrest
A storage compartment is located in the center
armrest between the front seats. Briefly press
the buttons to open.
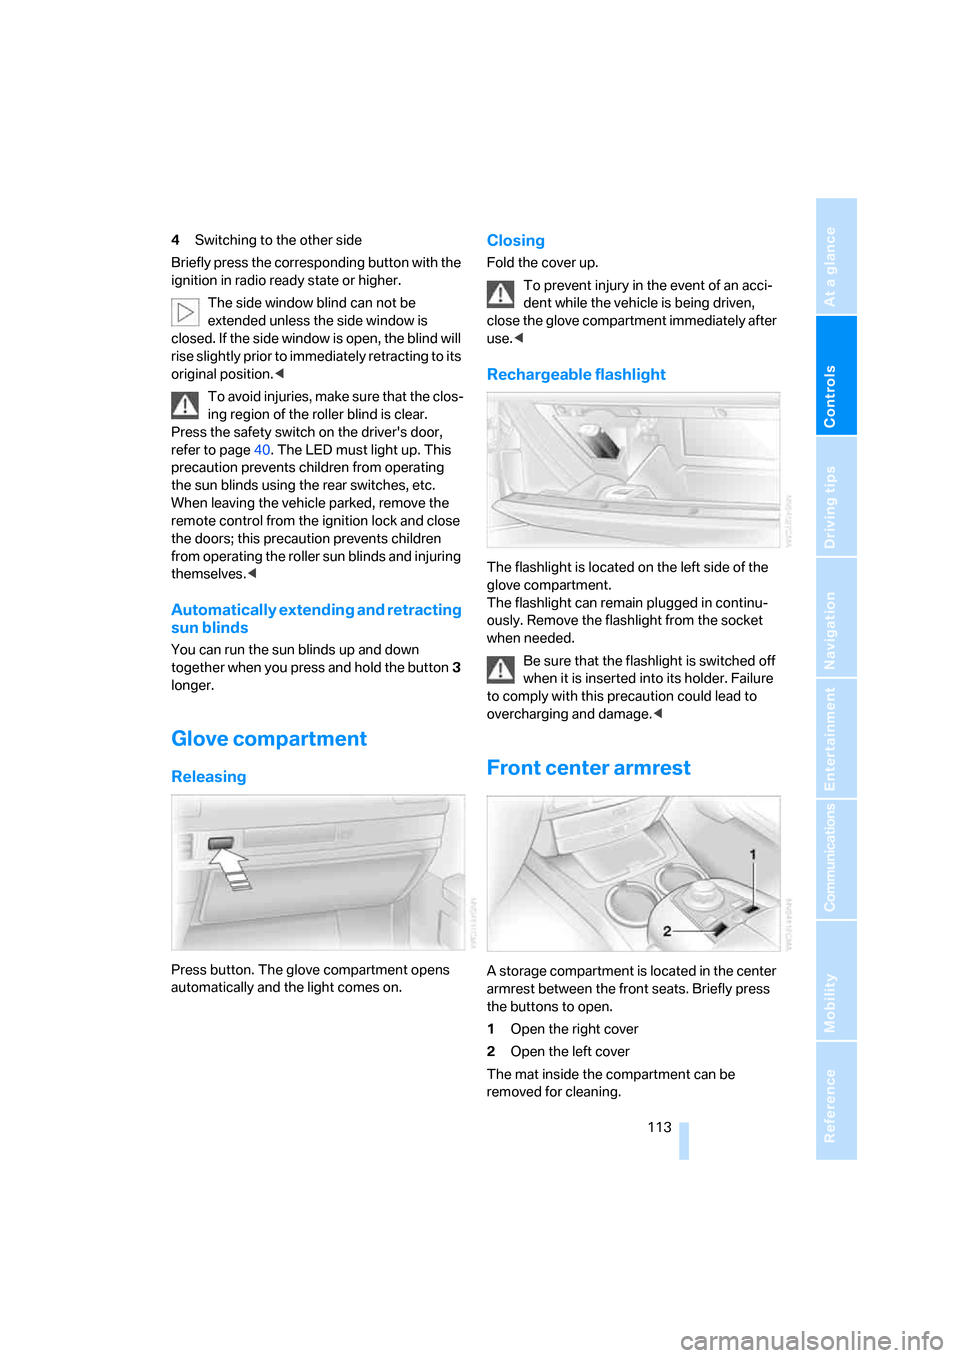
1Open the right cover
2Open the left cover
The mat inside the compartment can be
removed for cleaning.
Page 153 of 254
Entertainment
The chapter ensures your enjoyment when
receiving radio stations or playing CDs or DVDs.
Entertainment
Page 154 of 254

On/off and settings
152
On/off and settings
The following audio and video sources share
the same controls and adjustment options.
>Radio
>CD player
*
>CD changer*
>DVD changer*
The CD changer can play CDs with com-
pressed audio files, such as MP3s.<
Controls
The audio and video sources can be operated
using:
>Buttons on the CD player
>iDrive
>Buttons on steering wheel, refer to page11
Buttons on the CD player
1Entertainment sound output on/off, volume
>Press: switching on/off
When switching on, the most recently
selected radio station or CD track is
selected.
>Turn: adjusting volume
2 button
Selecting radio, CD player, and CD changer
3 button
>Press briefly: selecting AM or FM wave-
band
>Press and hold: Autostore, updating
selection of stations in range4CD slot
5 button
Eject CD
6 button
Station scan/track search
>Select radio station
>Fast forward/reverse
>Change track for CD player,
change chapter for DVD changer
Operating via iDrive
iDrive, for principle details, refer to page16.
1.Press the button to open the start
menu.
2.Move the controller toward "Entertain-
ment".
3.You have the choice of:
>"FM" and "AM": select radio reception.
>"WB": select Weather Band.
>"SAT": select satellite radio.
>"CD" and "CDC": select CD player or
CD changer.
>"AUX": select external audio device
>"DVD": select DVD changer
*.
>"Picture": adjust picture
*.
>"Tone": tone control, e.g. treble and
bass.
You can also control the radio, CD player, CD
changer, external audio devices, and the DVD
changer using the buttons on the steering
Page 155 of 254
Navigation
Entertainment
Driving tips
153Reference
At a glance
Controls
Communications
Mobility
wheel, refer to page11, and via the voice com-
mand system
*, refer to page23.
Switching on/off
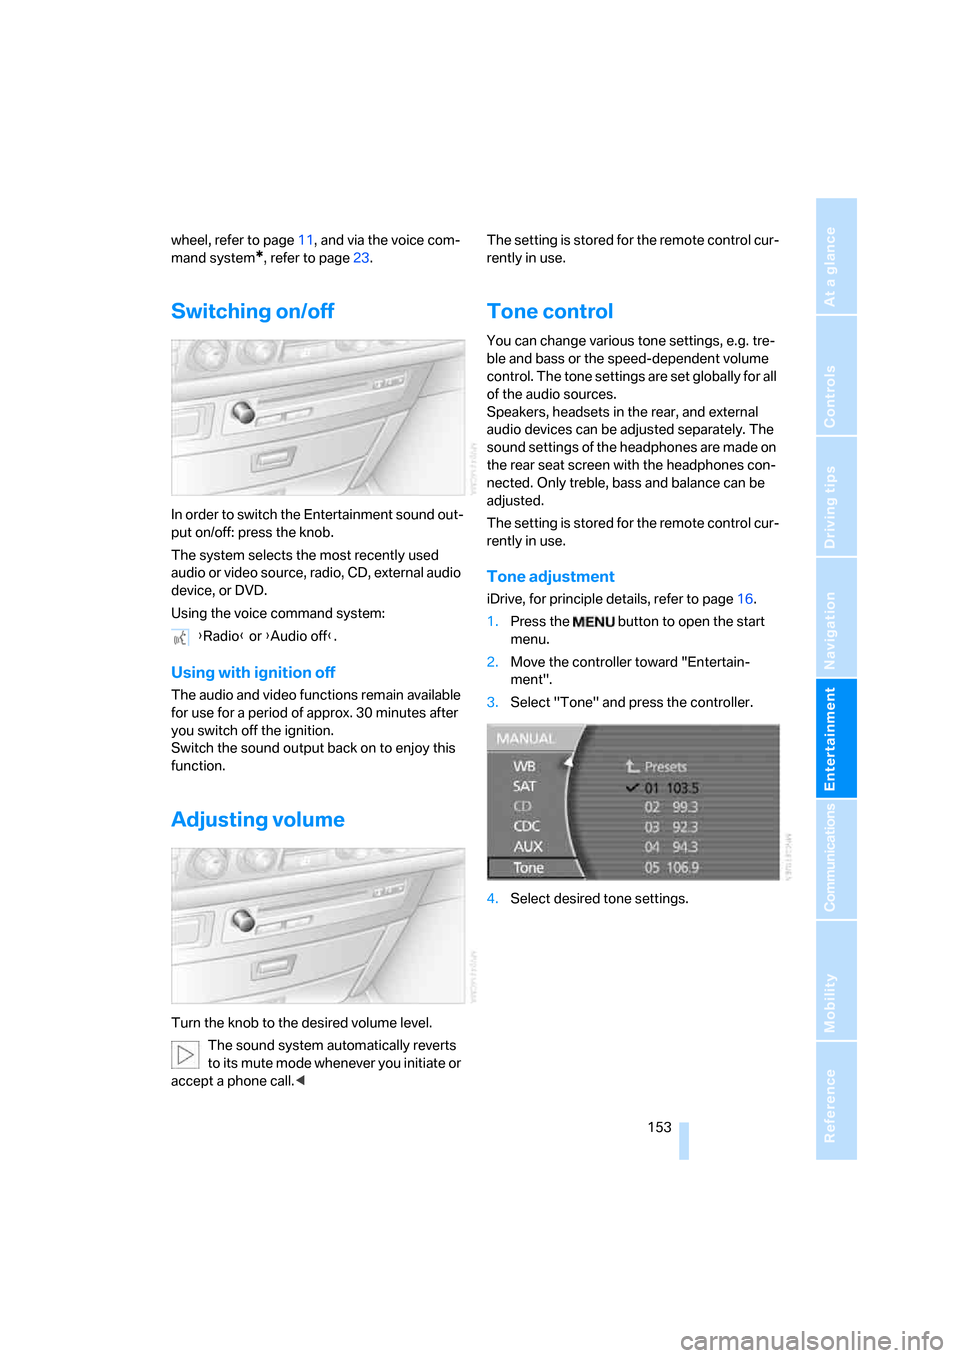
In order to switch the Entertainment sound out-
put on/off: press the knob.
The system selects the most recently used
audio or video source, radio, CD, external audio
device, or DVD.
Using the voice command system:
Using with ignition off
The audio and video functions remain available
for use for a period of approx. 30 minutes after
you switch off the ignition.
Switch the sound output back on to enjoy this
function.
Adjusting volume
Turn the knob to the desired volume level.
The sound system automatically reverts
to its mute mode whenever you initiate or
accept a phone call.
Tone control
You can change various tone settings, e.g. tre-
ble and bass or the speed-dependent volume
control. The tone settings are set globally for all
of the audio sources.
Speakers, headsets in the rear, and external
audio devices can be adjusted separately. The
sound settings of the headphones are made on
the rear seat screen with the headphones con-
nected. Only treble, bass and balance can be
adjusted.
The setting is stored for the remote control cur-
rently in use.
Tone adjustment
iDrive, for principle details, refer to page16.
1.Press the button to open the start
menu.
2.Move the controller toward "Entertain-
ment".
3.Select "Tone" and press the controller.
4.Select desired tone settings. {Radio} or {Audio off}.
Page 156 of 254
On/off and settings
154
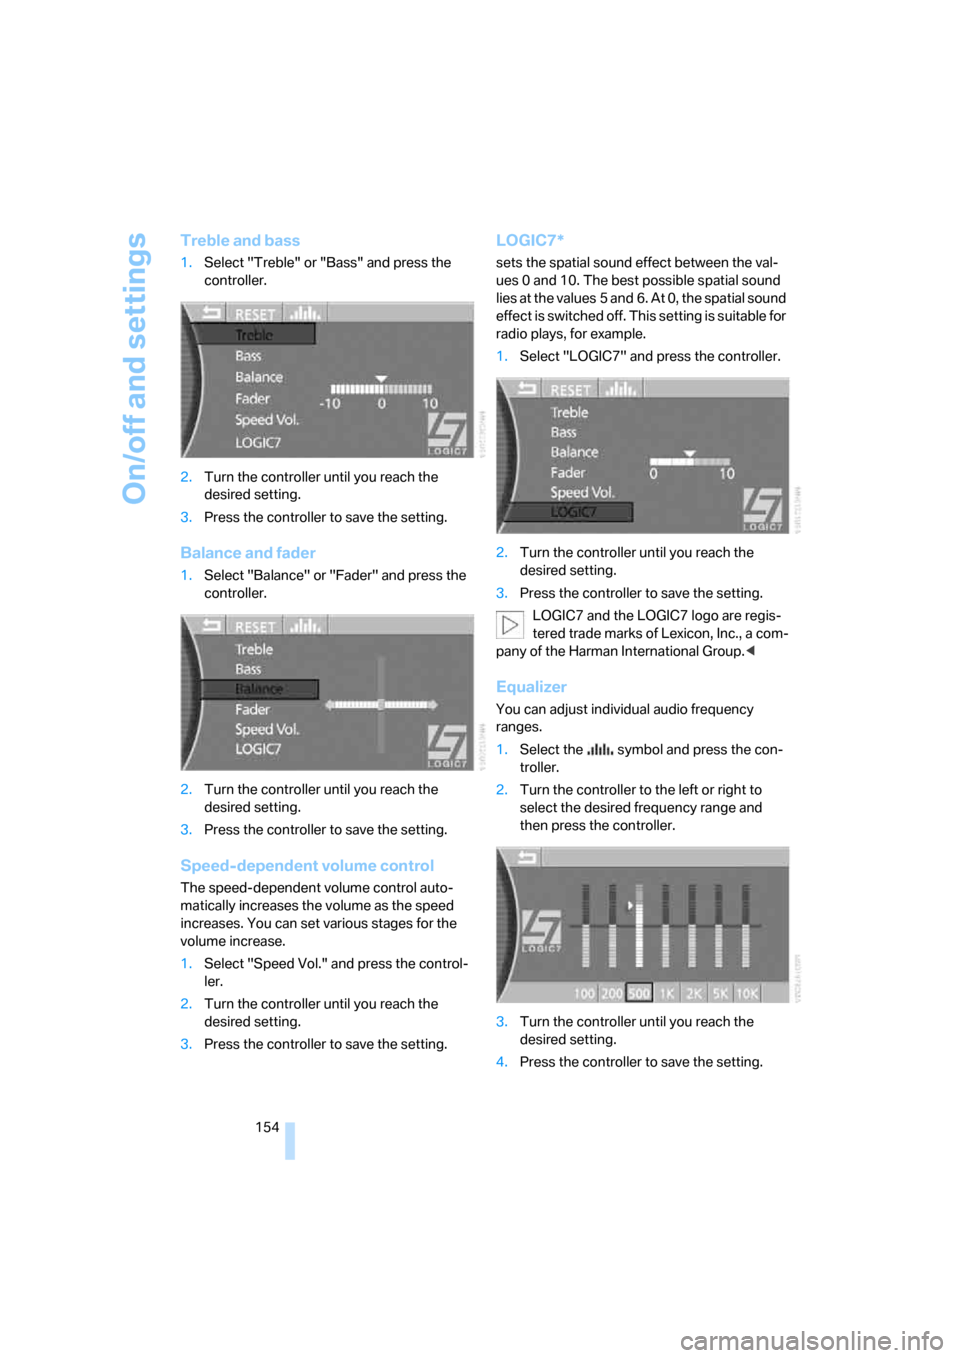
Treble and bass
1.Select "Treble" or "Bass" and press the
controller.
2.Turn the controller until you reach the
desired setting.
3.Press the controller to save the setting.
Balance and fader
1.Select "Balance" or "Fader" and press the
controller.
2.Turn the controller until you reach the
desired setting.
3.Press the controller to save the setting.
Speed-dependent volume control
The speed-dependent volume control auto-
matically increases the volume as the speed
increases. You can set various stages for the
volume increase.
1.Select "Speed Vol." and press the control-
ler.
2.Turn the controller until you reach the
desired setting.
3.Press the controller to save the setting.
LOGIC7*
sets the spatial sound effect between the val-
ues 0 and 10. The best possible spatial sound
lies at the values 5 and 6. At 0, the spatial sound
effect is switched off. This setting is suitable for
radio plays, for example.
1.Select "LOGIC7" and press the controller.
2.Turn the controller until you reach the
desired setting.
3.Press the controller to save the setting.
LOGIC7 and the LOGIC7 logo are regis-
tered trade marks of Lexicon, Inc., a com-
pany of the Harman International Group.<
Equalizer
You can adjust individual audio frequency
ranges.
1.Select the symbol and press the con-
troller.
2.Turn the controller to the left or right to
select the desired frequency range and
then press the controller.
3.Turn the controller until you reach the
desired setting.
4.Press the controller to save the setting.