2007 BMW 750LI navigation
[x] Cancel search: navigationPage 109 of 254

Controls
107Reference
At a glance
Driving tips
Communications
Navigation
Entertainment
Mobility
The interior temperature, air volume, and air
distribution can be set starting from the radio
ready state.
Switching cooling function on and off
manually
When activated, the air conditioner
mode cools and dehumidifies the
incoming air, reheating it as
required, depending on the temperature set-
ting. Depending on the weather, the windshield
may fog over briefly when the engine is started.
The cooling function is switched on automati-
cally with the AUTO program. The passenger
compartment can only be cooled with the
engine running.
Rear window defroster
The rear window defroster
switches off automatically after a
while. Depending on your equip-
ment package, the upper wires are used as an
antenna and are not part of the rear window
defroster.
Front ventilation
1Knurled wheels for smoothly opening and
closing the air vents
2Knurled wheels for changing airflow direc-
tion
Ventilation for cooling
Adjust the vents to direct the flow of cool air in
your direction, for instance, if the interior has
become too warm, etc.
Draft-free ventilation
Set the vent outlets so that the air flows past
you and is not directed straight at you.
Ventilation in rear
1Knurled wheel for smoothly opening and
closing the air vents
1Knurled wheels for smoothly opening and
closing the air vents
2Levers for changing airflow direction
3Knurled wheels
* for setting temperature:
>Turn toward blue: colder
>Turn toward red: warmer
Microfilter/activated-charcoal filter
The microfilter removes dust and pollen from
the incoming air. The activated-charcoal filter
provides additional protection by filtering gas-
eous pollutants from the outside air. Your BMW
center replaces this combined filter as a stan-
dard part of your scheduled maintenance.
You can select a display of more detailed infor-
mation in the service required display, refer to
page78.
Page 111 of 254

Controls
109Reference
At a glance
Driving tips
Communications
Navigation
Entertainment
Mobility
Ventilation in rear
Use the lever1 to vary the airflow direction.
For additional information on rear ventilation
options, refer to page107.
Parked car ventilation
The parked car ventilation blows air into the
passenger compartment to reduce interior tem-
peratures.
You can set two different times for the system
to start. The system is operated via iDrive.
It remains switched on for 30 minutes.
Since the system uses a substantial amount of
electrical current, you should refrain from acti-
vating it twice in succession without allowing
the battery to be recharged in normal operation
between uses.
With a preselected switch-on time, the parked
car ventilation is switched on at an outside tem-
perature of 597/156 or greater. When oper-
ated manually, it is ready for use at any outside
temperature, but not during driving.
The air enters the passenger compartment
through the air vents for the upper body in the
dashboard, which can be adjusted for both
direction and airflow. These vents must be
open for the system to operate.
Switching on and off directly
iDrive, for principle details, refer to page16.
1.Press the button to open the start
menu.
2.Move the controller toward "Climate".
3.If need be, select the symbol and press
the controller to switch to the other side of
the menu.
4.Select "Parked car " and press the control-
ler.
5.Select "Indep. ventil. " and press the con-
troller.
The parked car ventilation is switched
on.
LED on the automatic climate control
flashes.
6.Select "Indep. ventil." again and press the
controller to switch off.
Preselecting activation time
iDrive, for principle details, refer to page16.
1.Press the button to open the start
menu.
2.Move the controller toward "Climate".
3.If need be, select the symbol and press
the controller to switch to the other side of
the menu.
4.Select "Parked car" and press the control-
ler.
5.Select "Set time 1" or "Set time 2" and
press the controller.
Page 113 of 254
Controls
111Reference
At a glance
Driving tips
Communications
Navigation
Entertainment
Mobility
Practical interior accessories
Integrated universal remote
control*
The concept
The integrated universal remote control can
replace as many as three hand-held transmit-
ters for various radio-controlled accessories,
such as garage doors, entrance gates, or light-
ing systems. The integrated universal remote
control registers and stores signals from the
original hand-held transmitters.
The signal of an original hand-held transmitter
can be programmed into one of the three mem-
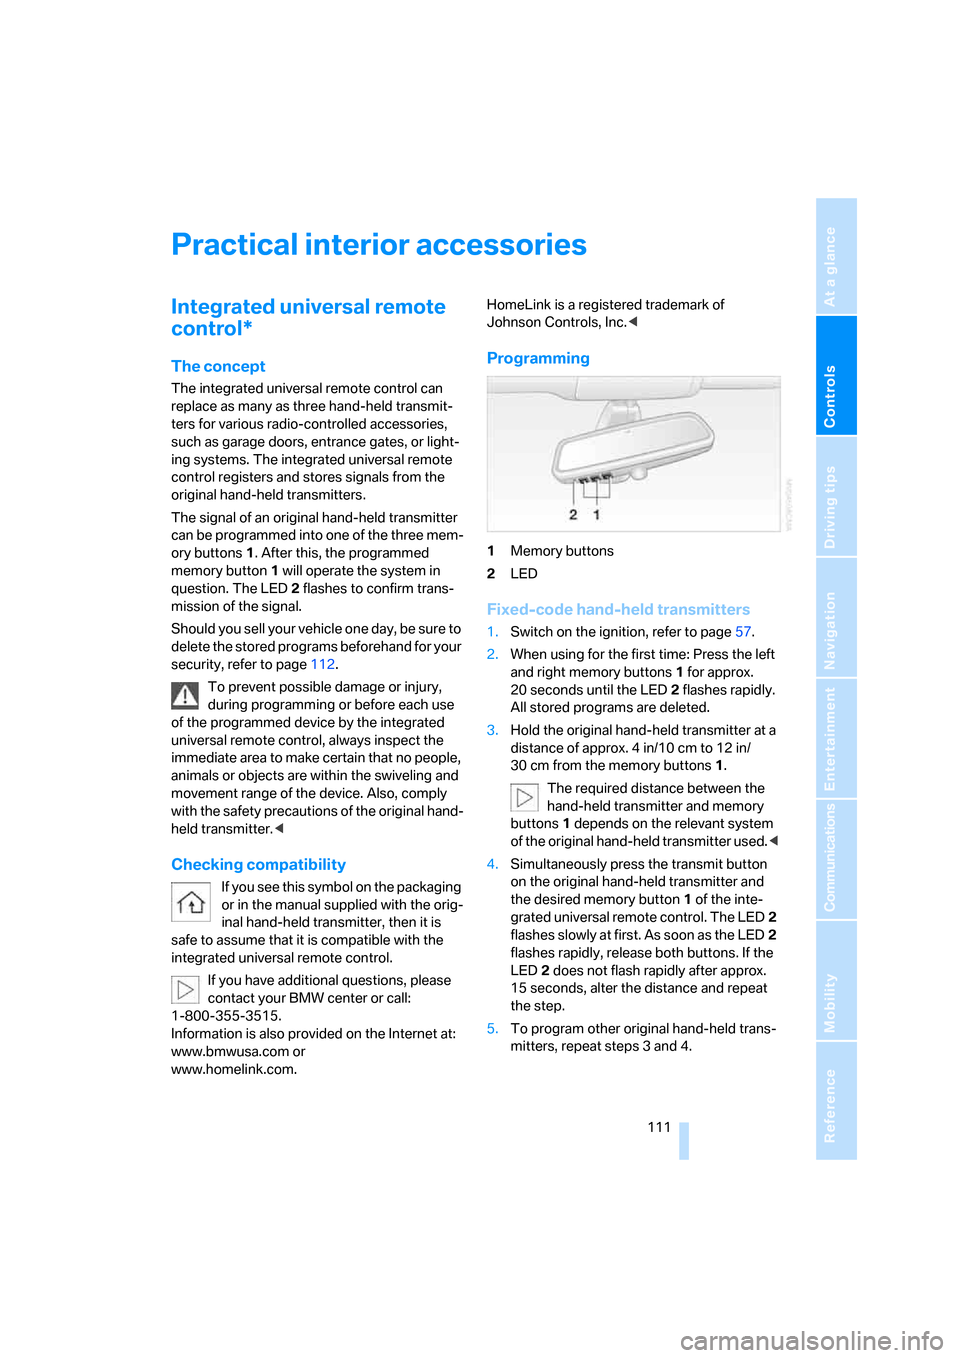
ory buttons1. After this, the programmed
memory button1 will operate the system in
question. The LED2 flashes to confirm trans-
mission of the signal.
Should you sell your vehicle one day, be sure to
delete the stored programs beforehand for your
security, refer to page112.
To prevent possible damage or injury,
during programming or before each use
of the programmed device by the integrated
universal remote control, always inspect the
immediate area to make certain that no people,
animals or objects are within the swiveling and
movement range of the device. Also, comply
with the safety precautions of the original hand-
held transmitter.<
Checking compatibility
If you see this symbol on the packaging
or in the manual supplied with the orig-
inal hand-held transmitter, then it is
safe to assume that it is compatible with the
integrated universal remote control.
If you have additional questions, please
contact your BMW center or call:
1-800-355-3515.
Information is also provided on the Internet at:
www.bmwusa.com or
www.homelink.com. HomeLink is a registered trademark of
Johnson Controls, Inc.<
Programming
1Memory buttons
2LED
Fixed-code hand-held transmitters
1.Switch on the ignition, refer to page57.
2.When using for the first time: Press the left
and right memory buttons1 for approx.
20 seconds until the LED2 flashes rapidly.
All stored programs are deleted.
3.Hold the original hand-held transmitter at a
distance of approx. 4 in/10 cm to 12 in/
30 cm from the memory buttons1.
The required distance between the
hand-held transmitter and memory
buttons1 depends on the relevant system
of the original hand-held transmitter used.<
4.Simultaneously press the transmit button
on the original hand-held transmitter and
the desired memory button1 of the inte-
grated universal remote control. The LED2
flashes slowly at first. As soon as the LED2
flashes rapidly, release both buttons. If the
LED2 does not flash rapidly after approx.
15 seconds, alter the distance and repeat
the step.
5.To program other original hand-held trans-
mitters, repeat steps 3 and 4.
Page 115 of 254
Controls
113Reference
At a glance
Driving tips
Communications
Navigation
Entertainment
Mobility
4Switching to the other side
Briefly press the corresponding button with the
ignition in radio ready state or higher.
The side window blind can not be
extended unless the side window is
closed. If the side window is open, the blind will
rise slightly prior to immediately retracting to its
original position.<
To avoid injuries, make sure that the clos-
ing region of the roller blind is clear.
Press the safety switch on the driver's door,
refer to page40. The LED must light up. This
precaution prevents children from operating
the sun blinds using the rear switches, etc.
When leaving the vehicle parked, remove the
remote control from the ignition lock and close
the doors; this precaution prevents children
from operating the roller sun blinds and injuring
themselves.<
Automatically extending and retracting
sun blinds
You can run the sun blinds up and down
together when you press and hold the button3
longer.
Glove compartment
Releasing
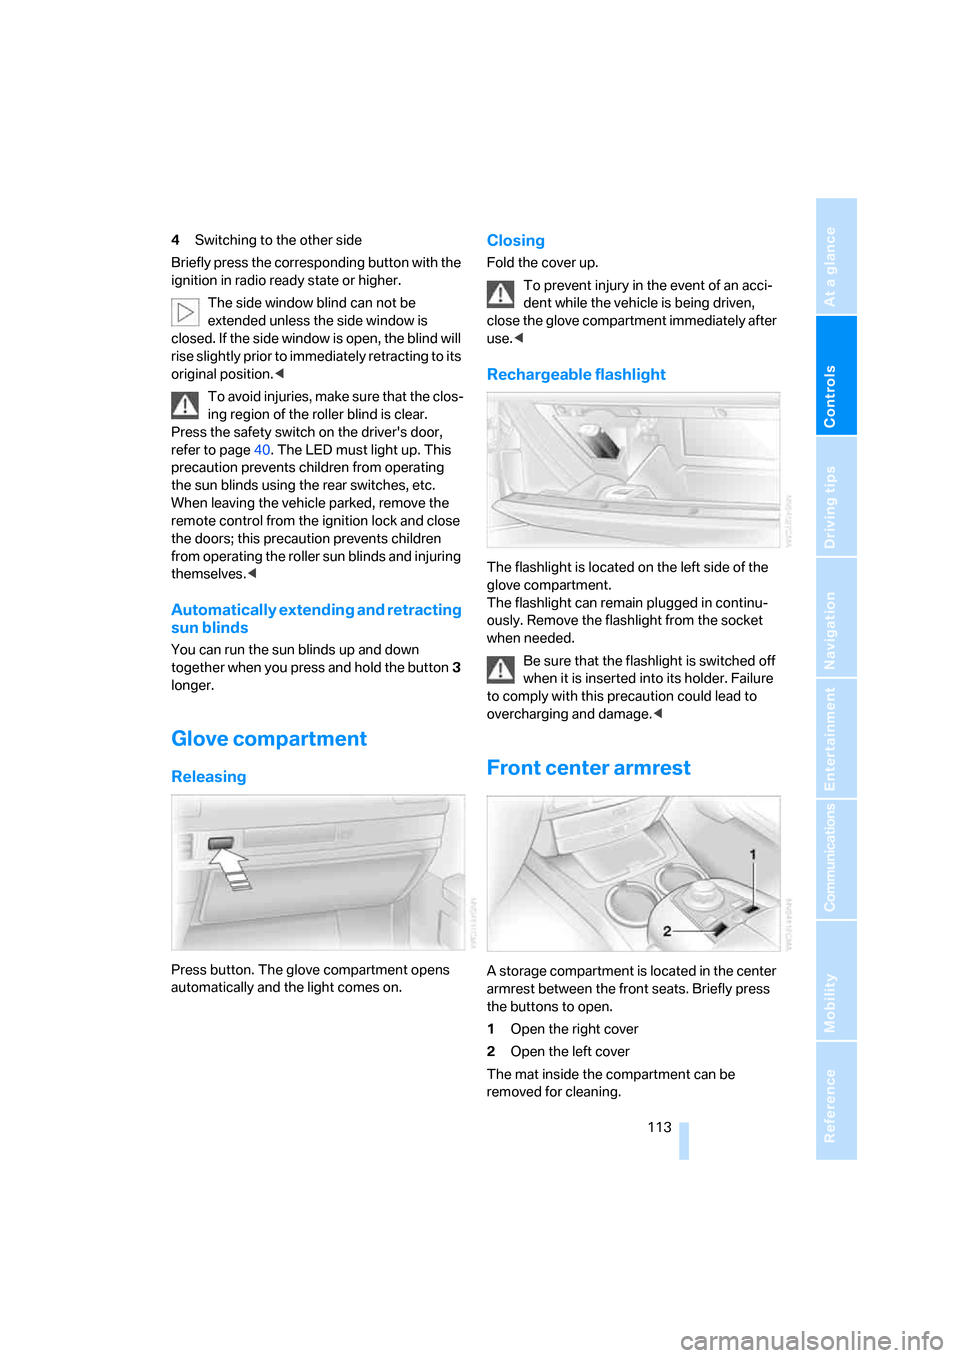
Press button. The glove compartment opens
automatically and the light comes on.
Closing
Fold the cover up.
To prevent injury in the event of an acci-
dent while the vehicle is being driven,
close the glove compartment immediately after
use.<
Rechargeable flashlight
The flashlight is located on the left side of the
glove compartment.
The flashlight can remain plugged in continu-
ously. Remove the flashlight from the socket
when needed.
Be sure that the flashlight is switched off
when it is inserted into its holder. Failure
to comply with this precaution could lead to
overcharging and damage.<
Front center armrest
A storage compartment is located in the center
armrest between the front seats. Briefly press
the buttons to open.
1Open the right cover
2Open the left cover
The mat inside the compartment can be
removed for cleaning.
Page 117 of 254
Controls
115Reference
At a glance
Driving tips
Communications
Navigation
Entertainment
Mobility
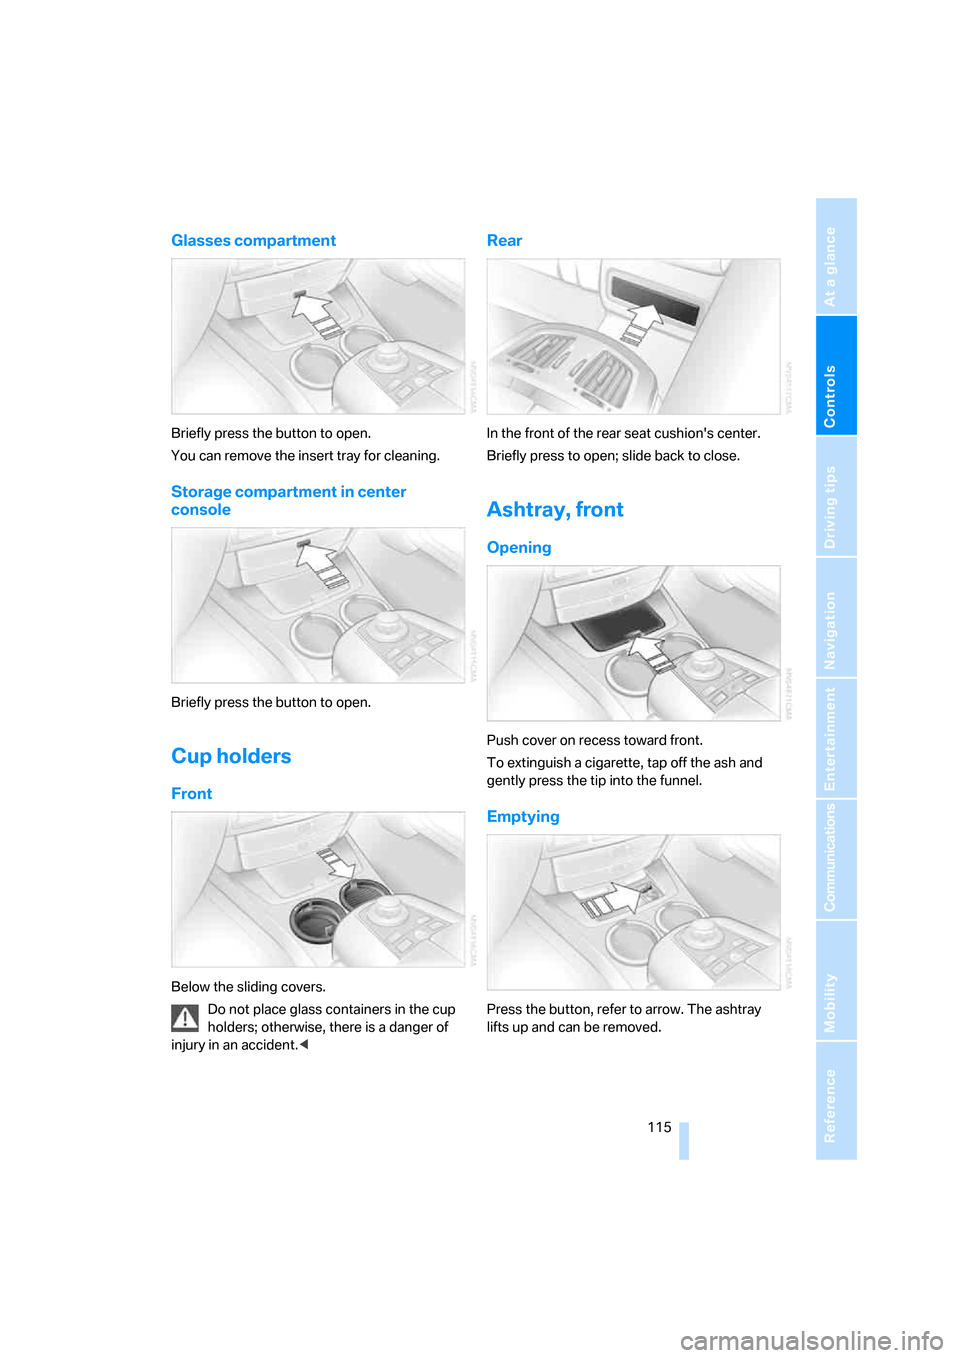
Glasses compartment
Briefly press the button to open.
You can remove the insert tray for cleaning.
Storage compartment in center
console
Briefly press the button to open.
Cup holders
Front
Below the sliding covers.
Do not place glass containers in the cup
holders; otherwise, there is a danger of
injury in an accident.<
Rear
In the front of the rear seat cushion's center.
Briefly press to open; slide back to close.
Ashtray, front
Opening
Push cover on recess toward front.
To extinguish a cigarette, tap off the ash and
gently press the tip into the funnel.
Emptying
Press the button, refer to arrow. The ashtray
lifts up and can be removed.
Page 119 of 254
Controls
117Reference
At a glance
Driving tips
Communications
Navigation
Entertainment
Mobility
Rear refrigerator*
The rear refrigerator is located behind the rear
seats' center armrest.
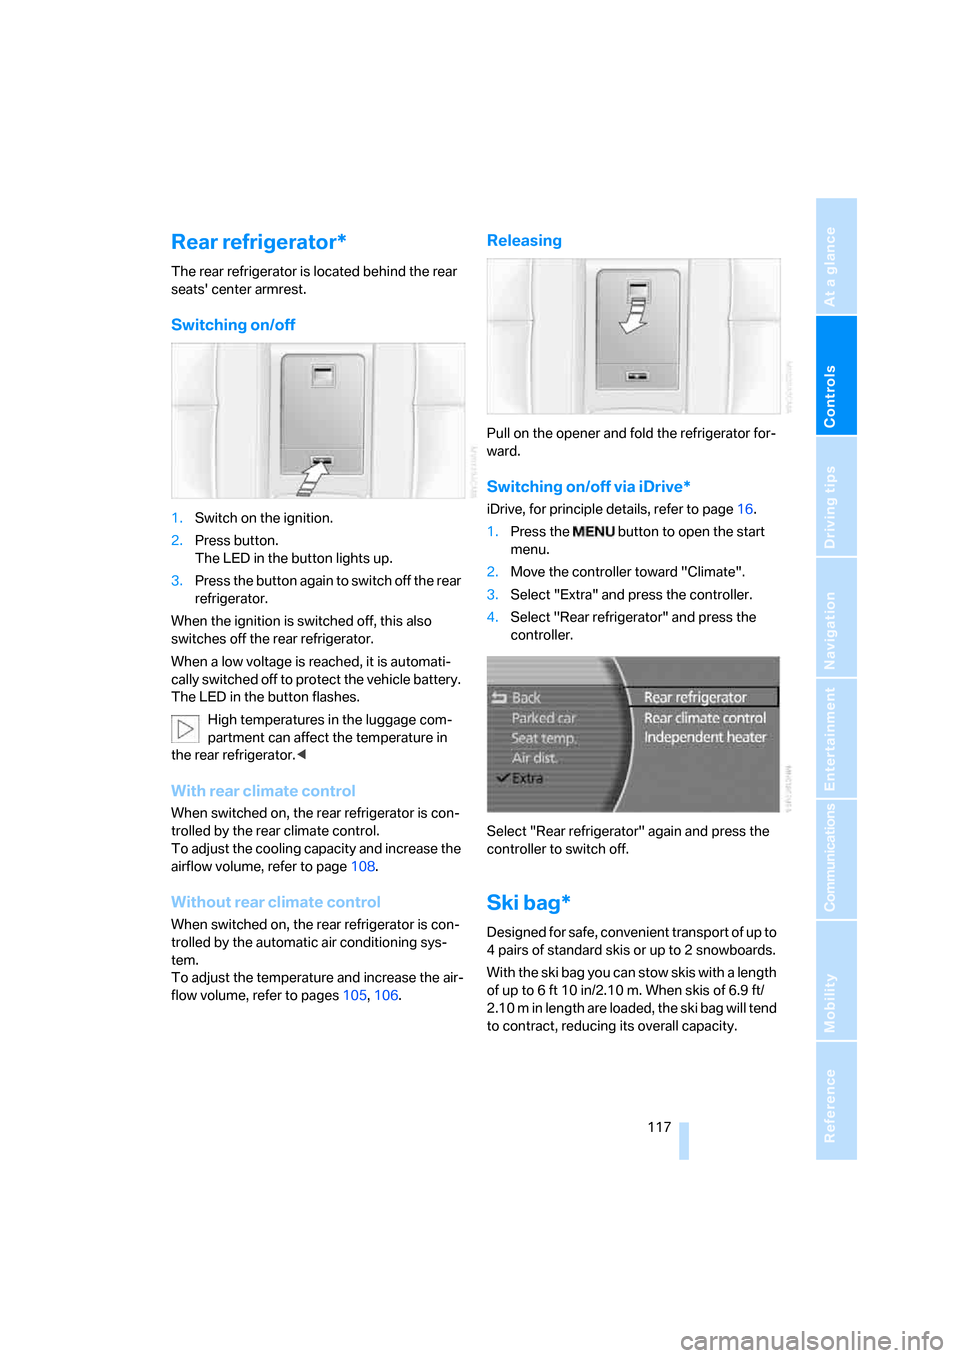
Switching on/off
1.Switch on the ignition.
2.Press button.
The LED in the button lights up.
3.Press the button again to switch off the rear
refrigerator.
When the ignition is switched off, this also
switches off the rear refrigerator.
When a low voltage is reached, it is automati-
cally switched off to protect the vehicle battery.
The LED in the button flashes.
High temperatures in the luggage com-
partment can affect the temperature in
the rear refrigerator.<
With rear climate control
When switched on, the rear refrigerator is con-
trolled by the rear climate control.
To adjust the cooling capacity and increase the
airflow volume, refer to page108.
Without rear climate control
When switched on, the rear refrigerator is con-
trolled by the automatic air conditioning sys-
tem.
To adjust the temperature and increase the air-
flow volume, refer to pages105, 106.
Releasing
Pull on the opener and fold the refrigerator for-
ward.
Switching on/off via iDrive*
iDrive, for principle details, refer to page16.
1.Press the button to open the start
menu.
2.Move the controller toward "Climate".
3.Select "Extra" and press the controller.
4.Select "Rear refrigerator" and press the
controller.
Select "Rear refrigerator" again and press the
controller to switch off.
Ski bag*
Designed for safe, convenient transport of up to
4 pairs of standard skis or up to 2 snowboards.
With the ski bag you can stow skis with a length
of up to 6ft 10in/2.10m. When skis of 6.9ft/
2.10 m in length are loaded, the ski bag will tend
to contract, reducing its overall capacity.
Page 121 of 254
Controls
119Reference
At a glance
Driving tips
Communications
Navigation
Entertainment
Mobility
Luggage compartment
Net*
You can use the net to stow smaller objects
against the bulkhead separating the luggage
compartment from the rear seats.
Do not stow objects behind the side trim
panels on the left and right in the luggage
compartment; otherwise, this could cause over-
heating and damage to the electrical parts
inside.<
Page 125 of 254

Driving tips
123Reference
At a glance
Controls
Communications
Navigation
Entertainment
Mobility
Hydroplaning
When driving on wet or slushy roads,
reduce road speed. If you do not, a wedge
of water can form between tires and road sur-
face. This phenomenon is referred to as hydro-
planing, and is characterized by a partial or
complete loss of contact between tires and
road surface, ultimately undermining your abil-
ity to steer and brake the vehicle.<
Driving through water
Only drive through water with a maximum
depth of 1 ft/30 cm and then, at no more
than walking speed. Otherwise, you run the risk
of damaging the vehicle's engine, electrical sys-
tems, and transmission.<
Safe braking
Your BMW is equipped with ABS as standard
equipment. In situations that require it, it is best
to apply the brakes fully. Since the vehicle
maintains steering responsiveness, you can
nevertheless avoid possible obstacles with a
minimum of steering effort.
Pulsation at the brake pedal combines with
sounds from the hydraulic circuits to indicate to
the driver that ABS is in its active mode.
Driving in wet conditions
When driving in wet conditions and in heavy
rain, it is a good idea to apply light pressure to
the brake pedal every few miles. Monitor traffic
conditions to ensure that this maneuver does
not endanger other road users. The heat gener-
ated helps dry the pads and rotors to ensure
that full braking efficiency will then be available
when you need it.
Hills
To prevent overheating and reduced effi-
ciency of the brake system, drive long or
steep downhill grades in the gear that requires
the least amount of braking. Otherwise, even
light but consistent pedal pressure can lead to
high temperatures, brake wear, and possibly
even failure of the brake system.
transmission's manual mode, downshifting as
far as first gear on extremely steep stretches,
refer to page63. This strategy helps you avoid
placing excessive loads on the brake system.
Do not drive in idle or with the engine
switched off; otherwise, there will be no
engine braking action or power-assist for the
brakes and steering.
Never allow floor mats, carpets or any other
objects to protrude into the area of movement
of the pedals and impair their operation.<
Corrosion on brake rotors
When the vehicle is driven only occasionally,
during extended periods when the vehicle is not
used at all, and in operating conditions where
brake applications are less frequent, there is an
increased tendency for corrosion to form on
rotors, while contaminants accumulate on the
brake pads. This occurs because the minimal
pressure that must be exerted by the pads dur-
ing brake applications to clean the rotors is not
reached.
Should corrosion form on the brake rotors, the
brakes will tend to respond with a pulsating
effect that even extended application will fail to
cure.
When vehicle is parked
Condensation forms in the automatic climate
control during operation, and then exits under
the vehicle. Traces of condensed water under
the vehicle are therefore normal.
Before driving into a car wash
1.Fold in the exterior mirrors, refer to page50;
otherwise, they could be damaged due to
the width of the vehicle.
To permit the vehicle to roll, follow the
instructions on page58.
2.Release the parking brake, especially when
you have activated Automatic Hold. Refer to
page59.