2007 BMW 750I display
[x] Cancel search: displayPage 106 of 254

Climate
104
Automatic climate control
1AUTO program, left side of passenger
compartment, refer to section below
2Outside air/AUC Automatic recirculated-air
control/recirculated air105
3Switching off automatic climate
control105
4Temperature, left side of passenger
compartment105
5Maximum cooling106
6Air volume, left side of passenger
compartment106
7Defrosting windows and removing
condensation106
8Air volume, right side of passenger
compartment1069Temperature, right side of passenger
compartment105
10Residual heat mode106
11Rear window defroster107
12Switching cooling function on and off
manually107
13AUTO program, right side of passenger
compartment, refer to section below
14Air grille for interior temperature sensor –
please keep clear and unobstructed
15Parked car ventilation109
> lights up: activation time activated
> flashes: parked car ventilation
switched on
The current setting for air distribution appears
on the Control Display, refer to page106.
A congenial climate
For almost all conditions, the AUTO program1
offers the optimal air distribution and air vol-
ume. Select an interior temperature that you
find pleasant.
The following section contains more detailed
information on the available setting options.
The settings are stored for the remote key cur-
rently in use.
AUTO program
The AUTO program handles the
adjustment of air distribution to the
windshield and side windows, in
the direction of the upper body, and in the foot-
well, as well as the adjustment of the air volume. It also adapts your instructions for the tempera-
ture to outside influences throughout the year.
The cooling is switched on automatically with
the AUTO program. At the same time, a con-
densation sensor controls the program so as to
prevent window condensation as much as pos-
sible.
Intensity of AUTO program
You can adjust the intensity of the AUTO pro-
gram by repeatedly pressing the AUTO button.
Press the button to have the current setting
briefly displayed on the lower status line of the
Control Display.
You can also adjust the intensity of the AUTO
program via iDrive.
Page 107 of 254

Controls
105Reference
At a glance
Driving tips
Communications
Navigation
Entertainment
Mobility
iDrive, for principle details, refer to page16.
1.Press the button to open the start
menu.
2.Move the controller toward "Climate".
3.Turn the controller to select driver's side or
passenger side.
4.Turn the controller to select the field.
5.Press the controller repeatedly until the
desired program is displayed:
>"low"
>"medium"
>"high"
Automatic recirculated air control/
recirculated air mode
You can respond to unpleasant
odors or pollutants in the immedi-
ate environment by temporarily
suspending the supply of outside air. The sys-
tem then recirculates the air currently within the
vehicle. In AUC mode, a sensor detects pollut-
ants in the outside air and controls the shut-off
automatically.
Press the button repeatedly to run through the
following control sequence:
>LEDs off: outside air flows into the vehicle
continuously.
>Left LED on, AUC mode: the system
detects pollutants in the outside air and
responds by blocking the supply of outside
air when required.
>Right LED on, recirculated-air mode: the
supply of outside air into the vehicle is con-
tinuously blocked.If the windows fog over in recirculated-air
mode, then press the AUTO button or
switch off the recirculated-air mode and
increase the air quantity as needed.
The recirculated-air mode should not be used
over a longer period of time, as the air quality
inside the vehicle deteriorates continuously.<
Automatic climate control, switching
on and off
The air volume, the heater, and the
air conditioner mode are all
switched off.
You can restart the automatic climate control by
pressing any of its buttons except the REST
button.
Temperature adjustment
Adjust the desired temperature
individually on the driver's side and
passenger side. Your settings
appear on the status line of the
Control Display.
The automatic climate control achieves this
temperature as quickly as possible at any time
of year, if necessary with the maximum cooling
or heating capacity, and then keeps it constant.
When switching between different tem-
perature settings in rapid succession, the
automatic climate control does not have suffi-
cient time to achieve the set temperature.<
The highest setting switches on the maximum
heat output regardless of the outside tempera-
ture. The lowest setting activates maximum air
conditioning.
Using iDrive
1.Open the start menu.
2.Open "Climate".
3.Turn the controller to select driver's side or
passenger side.
4.Turn the controller to select the field and
press the controller.
Page 109 of 254

Controls
107Reference
At a glance
Driving tips
Communications
Navigation
Entertainment
Mobility
The interior temperature, air volume, and air
distribution can be set starting from the radio
ready state.
Switching cooling function on and off
manually
When activated, the air conditioner
mode cools and dehumidifies the
incoming air, reheating it as
required, depending on the temperature set-
ting. Depending on the weather, the windshield
may fog over briefly when the engine is started.
The cooling function is switched on automati-
cally with the AUTO program. The passenger
compartment can only be cooled with the
engine running.
Rear window defroster
The rear window defroster
switches off automatically after a
while. Depending on your equip-
ment package, the upper wires are used as an
antenna and are not part of the rear window
defroster.
Front ventilation
1Knurled wheels for smoothly opening and
closing the air vents
2Knurled wheels for changing airflow direc-
tion
Ventilation for cooling
Adjust the vents to direct the flow of cool air in
your direction, for instance, if the interior has
become too warm, etc.
Draft-free ventilation
Set the vent outlets so that the air flows past
you and is not directed straight at you.
Ventilation in rear
1Knurled wheel for smoothly opening and
closing the air vents
1Knurled wheels for smoothly opening and
closing the air vents
2Levers for changing airflow direction
3Knurled wheels
* for setting temperature:
>Turn toward blue: colder
>Turn toward red: warmer
Microfilter/activated-charcoal filter
The microfilter removes dust and pollen from
the incoming air. The activated-charcoal filter
provides additional protection by filtering gas-
eous pollutants from the outside air. Your BMW
center replaces this combined filter as a stan-
dard part of your scheduled maintenance.
You can select a display of more detailed infor-
mation in the service required display, refer to
page78.
Page 132 of 254

Starting navigation system
130
Starting navigation system
Your navigation system can use satellites to
ascertain the precise position of your vehicle
and guide you reliably to any destination you
enter.
Navigation CD/DVD
Installation location navigation drive
Behind the left side panel in the luggage com-
partment.
You can use navigation CDs, versions 2001-1
and later, and navigation DVDs in your naviga-
tion computer.
To ensure that your vehicle's navigation system
has access to the latest highway system infor-
mation, always load the most recent CD/DVD
version of the digital road map.
As is the case with conventional road maps, the
navigation CDs/DVDs are subject to periodic
updates to ensure that they reflect the latest
information and surveys.
Navigation CDs/DVDs are available at
your BMW center.<
Inserting navigation CDs/DVDs
Navigation CDs/DVDs are to be inserted into
the navigation player.
1.Insert the navigation CD/DVD with the
labeled side up.
2.Wait a few seconds until the CD/DVD con-
tents are read.
Removing navigation CD/DVD
1.Press the button.
2.Remove navigation CD/DVD.
Display in assistance
window*
You can also view the route guidance in the
assistance window; it then remains visible when
you select a new menu.
iDrive, for principle details, refer to page16.
1.Press the button to open the start
menu.
2.Move the controller toward "Navigation".
3.Press the controller as needed.
4.Select "Split" and press the controller.
The route is shown in various views in the
assistance window during route guidance,
refer to Displaying route, page145:
>North orientation
>Direction of travel
>Perspective
>Arrow display
*
Page 134 of 254

Destination input
132 >You can skip the entry of country and city if
the existing entries should be retained for
your new destination.
Using the voice command system:
Entering name
You do not absolutely have to enter a name to
use route guidance or to store an address in the
list, but assigning each address a name can
make it easier for you to recognize the
addresses in a list.
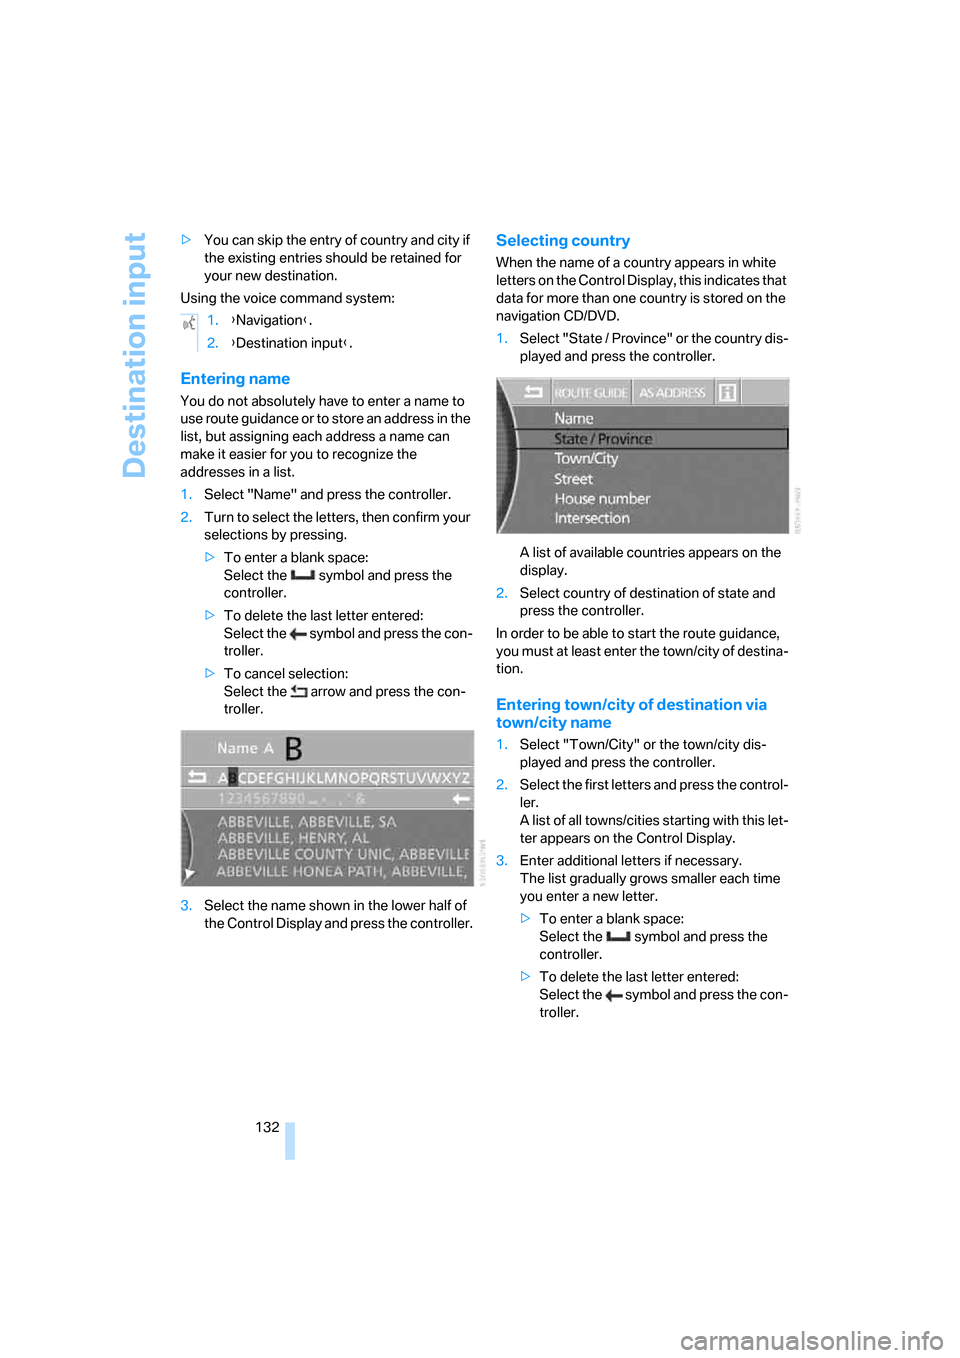
1.Select "Name" and press the controller.
2.Turn to select the letters, then confirm your
selections by pressing.
>To enter a blank space:
Select the symbol and press the
controller.
>To delete the last letter entered:
Select the symbol and press the con-
troller.
>To cancel selection:
Select the arrow and press the con-
troller.
3.Select the name shown in the lower half of
the Control Display and press the controller.
Selecting country
When the name of a country appears in white
letters on the Control Display, this indicates that
data for more than one country is stored on the
navigation CD/DVD.
1.Select "State / Province" or the country dis-
played and press the controller.
A list of available countries appears on the
display.
2.Select country of destination of state and
press the controller.
In order to be able to start the route guidance,
you must at least enter the town/city of destina-
tion.
Entering town/city of destination via
town/city name
1.Select "Town/City" or the town/city dis-
played and press the controller.
2.Select the first letters and press the control-
ler.
A list of all towns/cities starting with this let-
ter appears on the Control Display.
3.Enter additional letters if necessary.
The list gradually grows smaller each time
you enter a new letter.
>To enter a blank space:
Select the symbol and press the
controller.
>To delete the last letter entered:
Select the symbol and press the con-
troller. 1.{Navigation}.
2.{Destination input}.
Page 135 of 254

Navigation
Driving tips
133Reference
At a glance
Controls
Communications
Entertainment
Mobility
>To cancel selection:
Select the arrow and press the con-
troller.
4.Turn the controller to select place names in
the list and press the controller.
Entering town/city of destination with
zip code*
You can enter the zip code if the navigation CD/
DVD supports this function.
1.Select "City / Postal Code" and press the
controller.
2.Enter the zip code:
Select numbers individually and press the
controller each time.
>To enter a blank space:
Select the symbol and press the
controller.
>To delete last digit or letter:
Select the symbol and press the con-
troller.
>To cancel selection:
Select the arrow and press the con-
troller.
3.Select the zip code and press the controller.
The corresponding town/city of destination
is displayed.
4.Turn the controller to select place names in
the list and press the controller.
Entering street, house number, and
intersection
Entering street
1.Select "Street" or the street displayed and
press the controller.
2.Enter in the same way as described under
Entering town/city of destination via town/
city name.
Entering a street without entering
town/city of destination
You can also enter a street without entering a
town/city of destination if the navigation CD/
DVD supports this function. In this case, all
streets of the entered country are offered for
selection. The related town/city is displayed
after the street name.
If a town/city has already been entered, you can
cancel this entry. This may be practical if the
desired street does not exist in the entered
town/city of destination, because, for example,
it belongs to another part of the town/city.
1.Turn the controller until the top field is
selected.
2.Press the controller.
Page 136 of 254

Destination input
134 3.Enter the street.
You can change to the entered town or city
in the same way again to enter a street.
Entering intersection
The intersection is entered in the same way as
the street.
Entering house number
You can enter the house number if the naviga-
tion CD/DVD supports this function.
1.Select "House number" and press the con-
troller.
2.Enter the house number:
Select numbers individually and press the
controller each time.
>To delete last digit or letter:
Select the symbol and press the con-
troller.
>To cancel selection:
Select the arrow and press the con-
troller.
If the house number entered is not stored
on the navigation CD/DVD, then the system
displays the closest possible number.
3.Select "Enter" and press the controller.
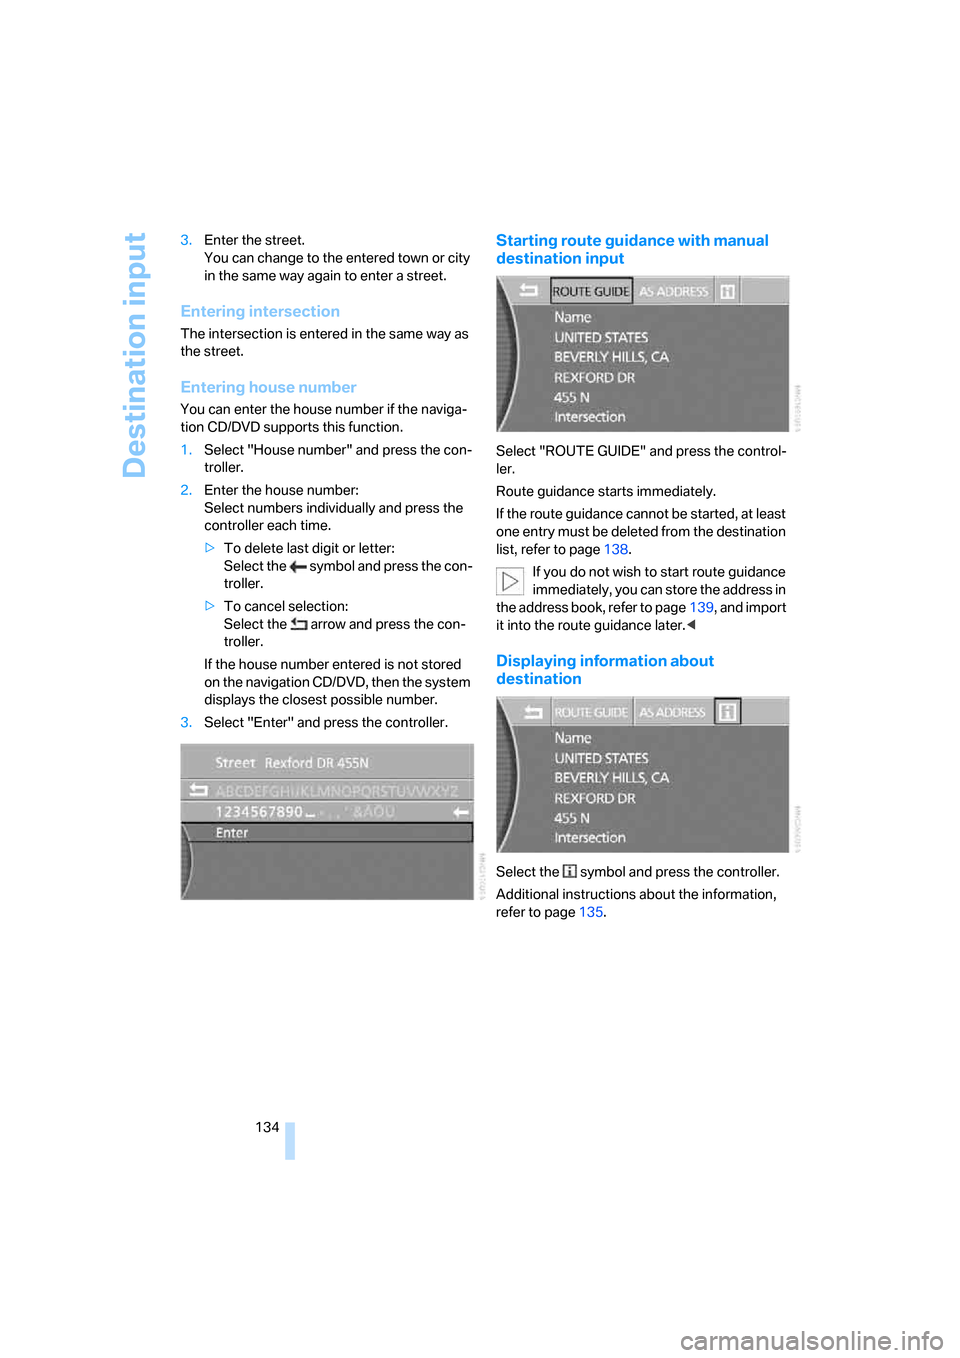
Starting route guidance with manual
destination input
Select "ROUTE GUIDE" and press the control-
ler.
Route guidance starts immediately.
If the route guidance cannot be started, at least
one entry must be deleted from the destination
list, refer to page138.
If you do not wish to start route guidance
immediately, you can store the address in
the address book, refer to page139, and import
it into the route guidance later.<
Displaying information about
destination
Select the symbol and press the controller.
Additional instructions about the information,
refer to page135.
Page 137 of 254

Navigation
Driving tips
135Reference
At a glance
Controls
Communications
Entertainment
Mobility
Map-guided destination
selection
If you only know the street or location of the
town/city of destination, then you can enter the
destination using a map. You can select the
destination on the map using crosshairs and
then adopt it into the route guidance:
1.Select "Dest. input" and press the control-
ler.
2.Select "New dest." and press the controller.
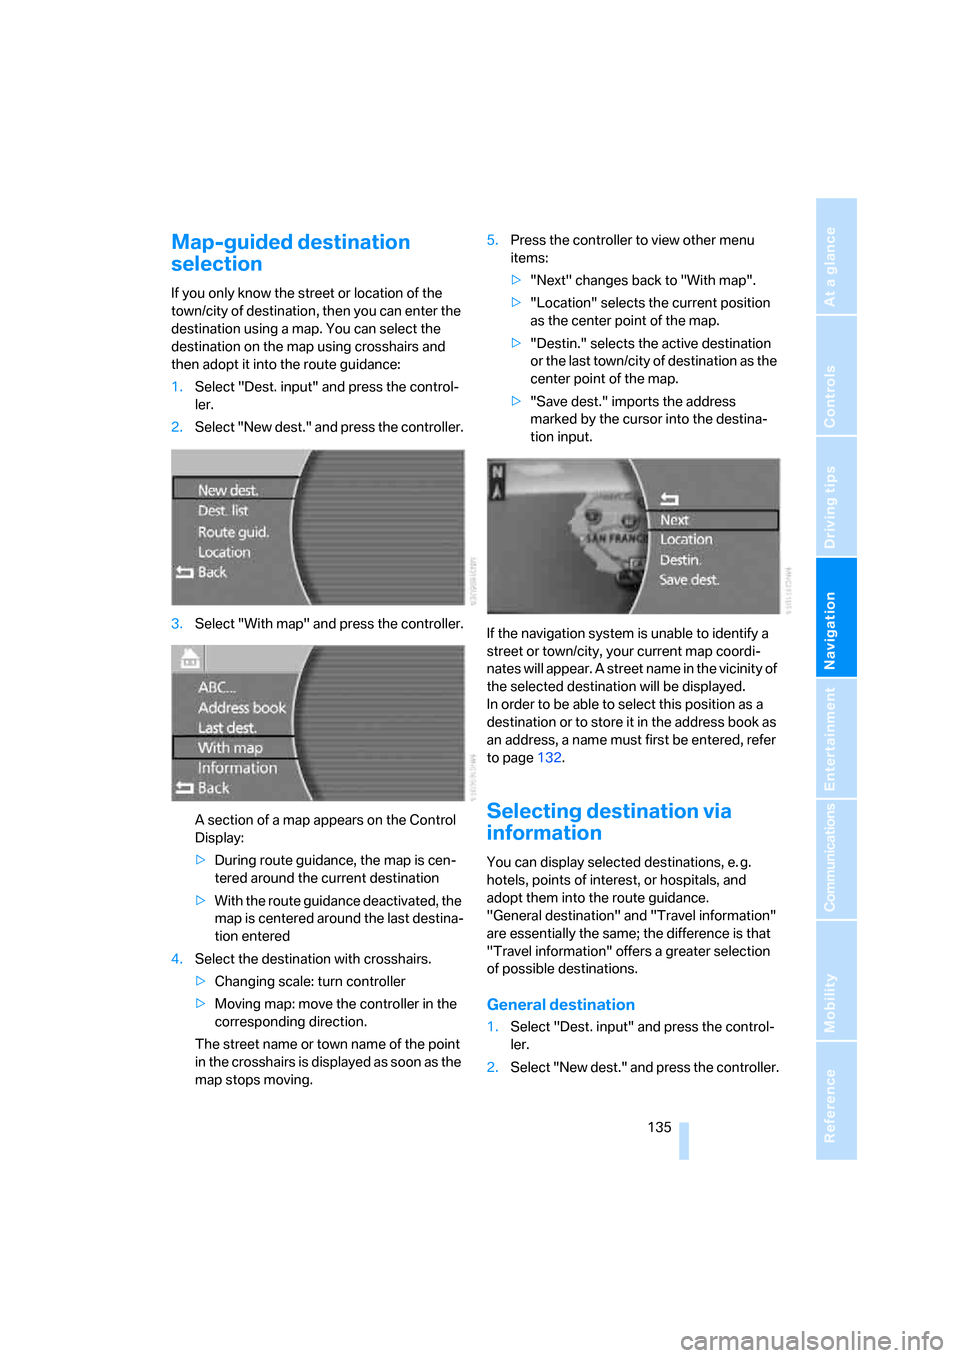
3.Select "With map" and press the controller.
A section of a map appears on the Control
Display:
>During route guidance, the map is cen-
tered around the current destination
>With the route guidance deactivated, the
map is centered around the last destina-
tion entered
4.Select the destination with crosshairs.
>Changing scale: turn controller
>Moving map: move the controller in the
corresponding direction.
The street name or town name of the point
in the crosshairs is displayed as soon as the
map stops moving.5.Press the controller to view other menu
items:
>"Next" changes back to "With map".
>"Location" selects the current position
as the center point of the map.
>"Destin." selects the active destination
or the last town/city of destination as the
center point of the map.
>"Save dest." imports the address
marked by the cursor into the destina-
tion input.
If the navigation system is unable to identify a
street or town/city, your current map coordi-
nates will appear. A street name in the vicinity of
the selected destination will be displayed.
In order to be able to select this position as a
destination or to store it in the address book as
an address, a name must first be entered, refer
to page132.
Selecting destination via
information
You can display selected destinations, e. g.
hotels, points of interest, or hospitals, and
adopt them into the route guidance.
"General destination" and "Travel information"
are essentially the same; the difference is that
"Travel information" offers a greater selection
of possible destinations.
General destination
1.Select "Dest. input" and press the control-
ler.
2.Select "New dest." and press the controller.