2007 BMW 650I COUPE turn signal
[x] Cancel search: turn signalPage 158 of 254
Radio
156
Radio
Your radio provides reception of the FM and AM
wavebands.
Listening to radio
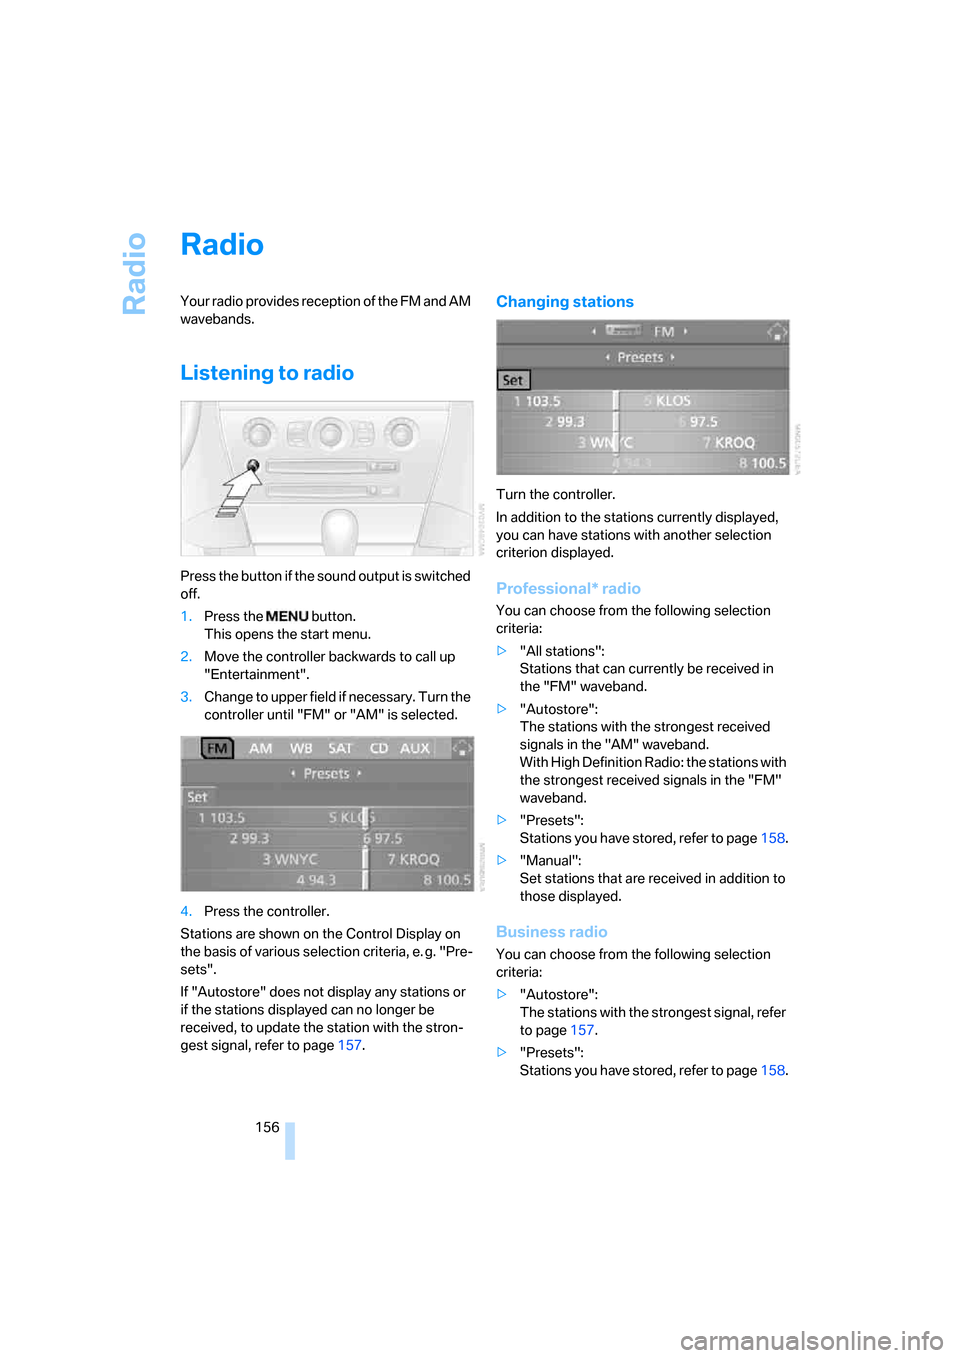
Press the button if the sound output is switched
off.
1.Press the button.
This opens the start menu.
2.Move the controller backwards to call up
"Entertainment".
3.Change to upper field if necessary. Turn the
controller until "FM" or "AM" is selected.
4.Press the controller.
Stations are shown on the Control Display on
the basis of various selection criteria, e. g. "Pre-
sets".
If "Autostore" does not display any stations or
if the stations displayed can no longer be
received, to update the station with the stron-
gest signal, refer to page157.
Changing stations
Turn the controller.
In addition to the stations currently displayed,
you can have stations with another selection
criterion displayed.
Professional* radio
You can choose from the following selection
criteria:
>"All stations":
Stations that can currently be received in
the "FM" waveband.
>"Autostore":
The stations with the strongest received
signals in the "AM" waveband.
With High Definition Radio: the stations with
the strongest received signals in the "FM"
waveband.
>"Presets":
Stations you have stored, refer to page158.
>"Manual":
Set stations that are received in addition to
those displayed.
Business radio
You can choose from the following selection
criteria:
>"Autostore":
The stations with the strongest signal, refer
to page157.
>"Presets":
Stations you have stored, refer to page158.
Page 159 of 254
Navigation
Entertainment
Driving tips
157Reference
At a glance
Controls
Communications
Mobility
>"Manual":
Set stations that are received in addition to
those displayed.
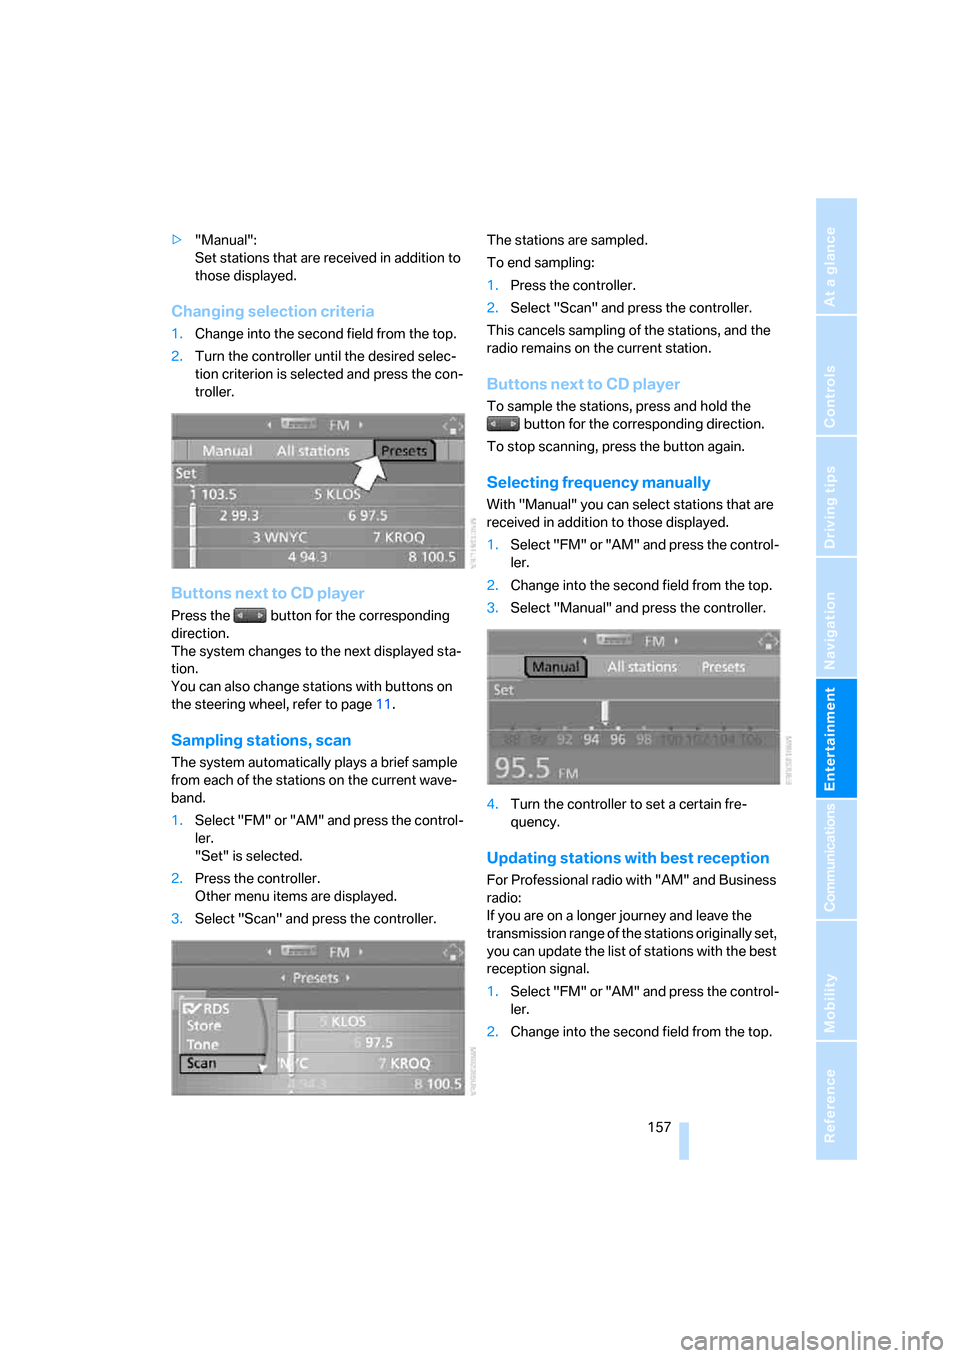
Changing selection criteria
1.Change into the second field from the top.
2.Turn the controller until the desired selec-
tion criterion is selected and press the con-
troller.
Buttons next to CD player
Press the button for the corresponding
direction.
The system changes to the next displayed sta-
tion.
You can also change stations with buttons on
the steering wheel, refer to page11.
Sampling stations, scan
The system automatically plays a brief sample
from each of the stations on the current wave-
band.
1.Select "FM" or "AM" and press the control-
ler.
"Set" is selected.
2.Press the controller.
Other menu items are displayed.
3.Select "Scan" and press the controller.The stations are sampled.
To end sampling:
1.Press the controller.
2.Select "Scan" and press the controller.
This cancels sampling of the stations, and the
radio remains on the current station.
Buttons next to CD player
To sample the stations, press and hold the
button for the corresponding direction.
To stop scanning, press the button again.
Selecting frequency manually
With "Manual" you can select stations that are
received in addition to those displayed.
1.Select "FM" or "AM" and press the control-
ler.
2.Change into the second field from the top.
3.Select "Manual" and press the controller.
4.Turn the controller to set a certain fre-
quency.
Updating stations with best reception
For Professional radio with "AM" and Business
radio:
If you are on a longer journey and leave the
transmission range of the stations originally set,
you can update the list of stations with the best
reception signal.
1.Select "FM" or "AM" and press the control-
ler.
2.Change into the second field from the top.
Page 162 of 254
Radio
160
Weather news flashes*
Weather Radio is a service of the National Oce-
anic and Atmospheric Administration (NOAA)
of the US Department of Trade. Weather news
flashes are repeated every 4 to 6 minutes and
are routinely updated at intervals of 1 to
3 hours, and more often when necessary. Most
stations operate 24 hours a day. In case of a
storm, the National Weather Service interrupts
the routine weather news and transmits special
warning messages instead. If you have a ques-
tion about NOAA Weather Radio, please con-
tact the nearest office of the National Weather
Service. Details are also provided on the Inter-
net at www.nws.noaa.gov.
Calling up weather news flashes
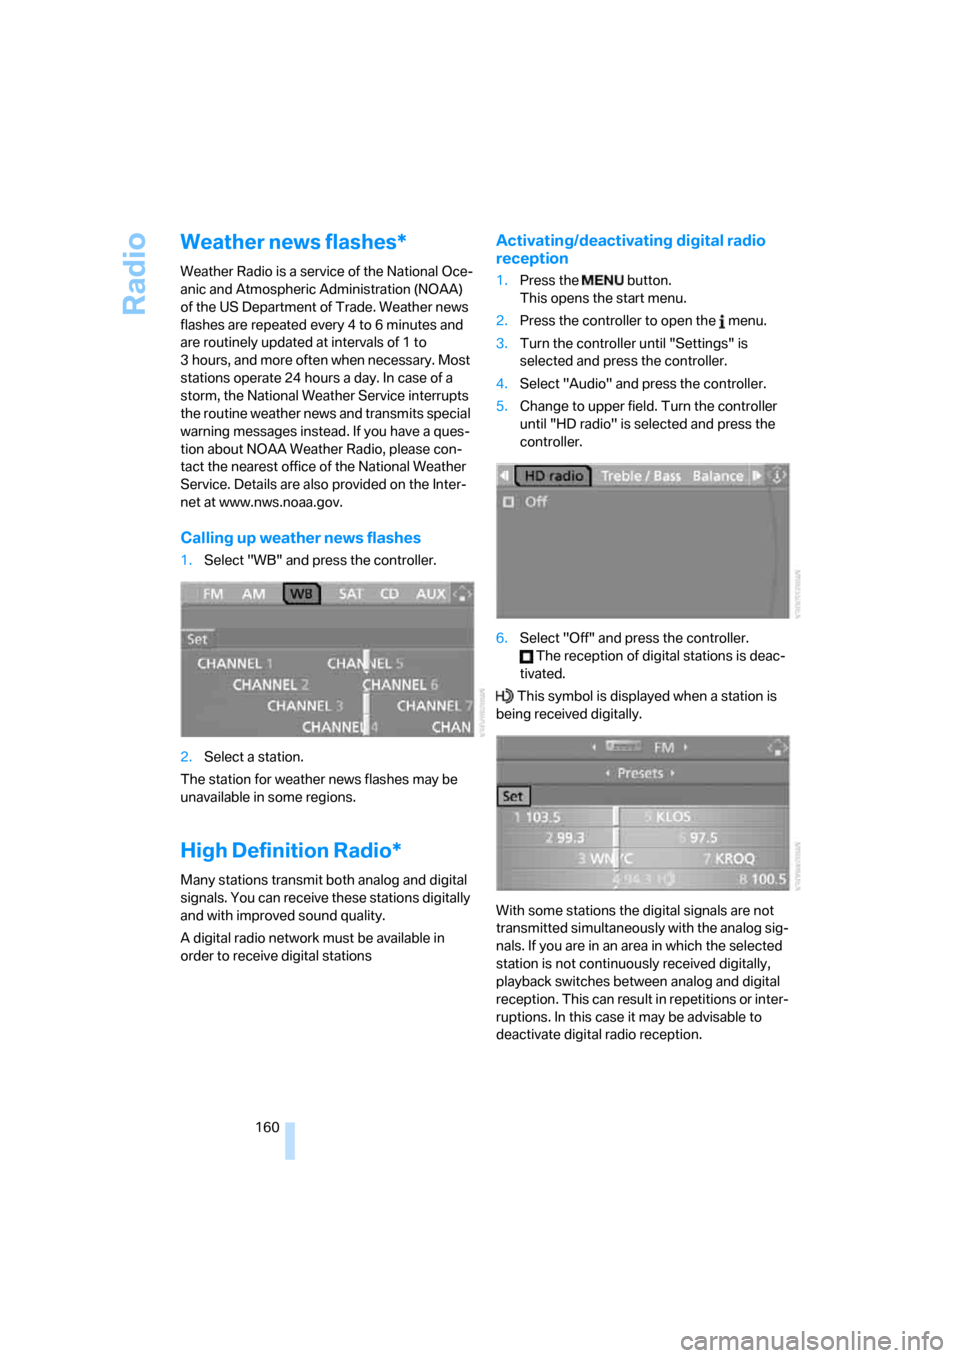
1.Select "WB" and press the controller.
2.Select a station.
The station for weather news flashes may be
unavailable in some regions.
High Definition Radio*
Many stations transmit both analog and digital
signals. You can receive these stations digitally
and with improved sound quality.
A digital radio network must be available in
order to receive digital stations
Activating/deactivating digital radio
reception
1.Press the button.
This opens the start menu.
2.Press the controller to open the menu.
3.Turn the controller until "Settings" is
selected and press the controller.
4.Select "Audio" and press the controller.
5.Change to upper field. Turn the controller
until "HD radio" is selected and press the
controller.
6.Select "Off" and press the controller.
The reception of digital stations is deac-
tivated.
This symbol is displayed when a station is
being received digitally.
With some stations the digital signals are not
transmitted simultaneously with the analog sig-
nals. If you are in an area in which the selected
station is not continuously received digitally,
playback switches between analog and digital
reception. This can result in repetitions or inter-
ruptions. In this case it may be advisable to
deactivate digital radio reception.
Page 166 of 254
Radio
164
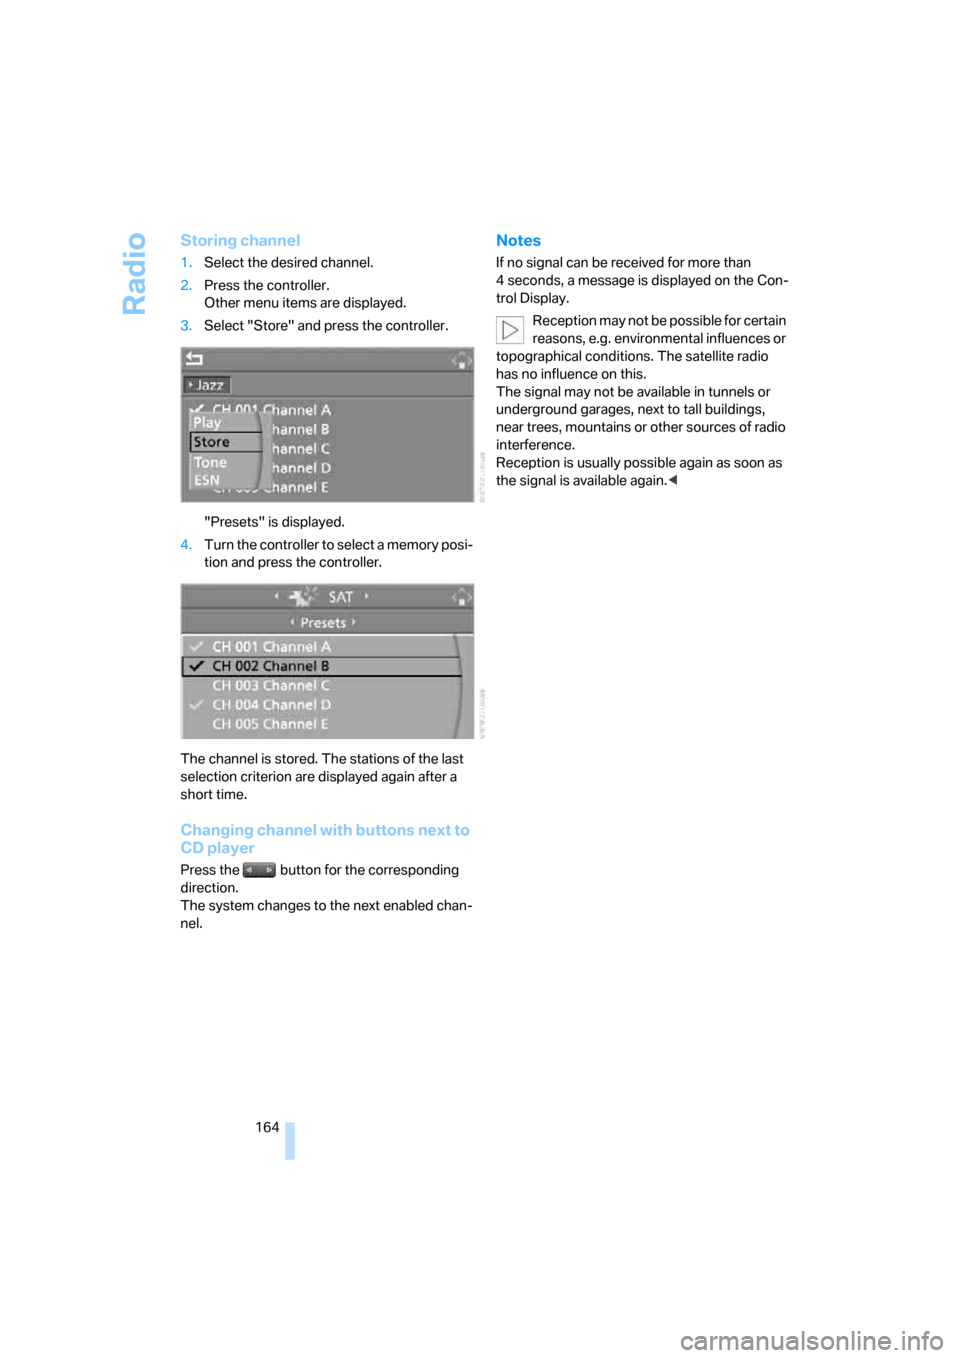
Storing channel
1.Select the desired channel.
2.Press the controller.
Other menu items are displayed.
3.Select "Store" and press the controller.
"Presets" is displayed.
4.Turn the controller to select a memory posi-
tion and press the controller.
The channel is stored. The stations of the last
selection criterion are displayed again after a
short time.
Changing channel with buttons next to
CD player
Press the button for the corresponding
direction.
The system changes to the next enabled chan-
nel.
Notes
If no signal can be received for more than
4 seconds, a message is displayed on the Con-
trol Display.
Reception may not be possible for certain
reasons, e.g. environmental influences or
topographical conditions. The satellite radio
has no influence on this.
The signal may not be available in tunnels or
underground garages, next to tall buildings,
near trees, mountains or other sources of radio
interference.
Reception is usually possible again as soon as
the signal is available again.<
Page 215 of 254
Mobility
213Reference
At a glance
Controls
Driving tips
Communications
Navigation
Entertainment
Have work on the xenon lighting system
performed only by your BMW center or a
workshop that works according to BMW repair
procedures with correspondingly trained per-
sonnel. Due to the high voltage involved, there
is a danger to life and limb when work is carried
out improperly.<
High beams, parking lamps
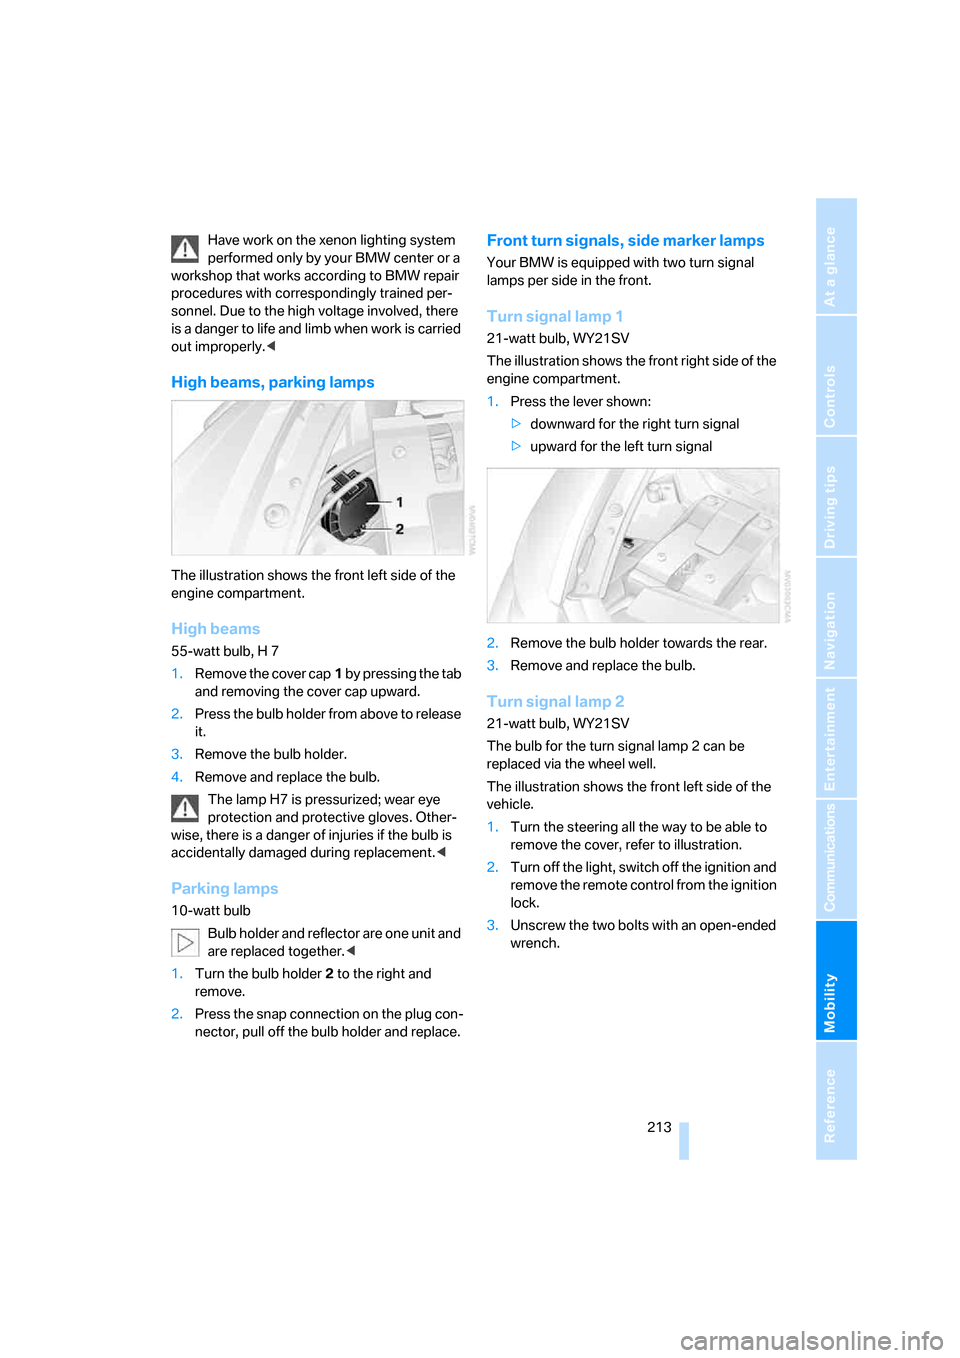
The illustration shows the front left side of the
engine compartment.
High beams
55-watt bulb, H 7
1.Remove the cover cap1 by pressing the tab
and removing the cover cap upward.
2.Press the bulb holder from above to release
it.
3.Remove the bulb holder.
4.Remove and replace the bulb.
The lamp H7 is pressurized; wear eye
protection and protective gloves. Other-
wise, there is a danger of injuries if the bulb is
accidentally damaged during replacement.<
Parking lamps
10-watt bulb
Bulb holder and reflector are one unit and
are replaced together.<
1.Turn the bulb holder2 to the right and
remove.
2.Press the snap connection on the plug con-
nector, pull off the bulb holder and replace.
Front turn signals, side marker lamps
Your BMW is equipped with two turn signal
lamps per side in the front.
Turn signal lamp 1
21-watt bulb, WY21SV
The illustration shows the front right side of the
engine compartment.
1.Press the lever shown:
>downward for the right turn signal
>upward for the left turn signal
2.Remove the bulb holder towards the rear.
3.Remove and replace the bulb.
Turn signal lamp 2
21-watt bulb, WY21SV
The bulb for the turn signal lamp 2 can be
replaced via the wheel well.
The illustration shows the front left side of the
vehicle.
1.Turn the steering all the way to be able to
remove the cover, refer to illustration.
2.Turn off the light, switch off the ignition and
remove the remote control from the ignition
lock.
3.Unscrew the two bolts with an open-ended
wrench.
Page 216 of 254
Replacing components
214 4.Turn the bulb holder to the left and remove,
refer to arrow.
5.Remove and replace the bulb.
Side marker lamps
5-watt bulb, WY5WST
The bulb can be replaced via a cover at the front
of the wheel well, refer to the description for
turn signal lamp 2.
1.The bulb holder of the side marker lamp is
located toward the outside of the vehicle
next to the bulb holder of turn signal lamp 2.
2.Turn the bulb holder to the left and remove.
3.Remove and replace the bulb.
Side turn signals
5-watt bulb, WY5W
1.Press against the front edge of the lamp
with the tip of your finger, then push it to the
rear, release the snap connection at the
front and take it off the trim strip.
2.Turn the bulb holder to the left by 905 and
remove.
3.Remove and replace the bulb.
Tail lamps
The roadside parking, rear and brake
lamps are LEDs. The backup lamps are
equipped with long-life bulbs. Please contact a
BMW center in case of a malfunction.<
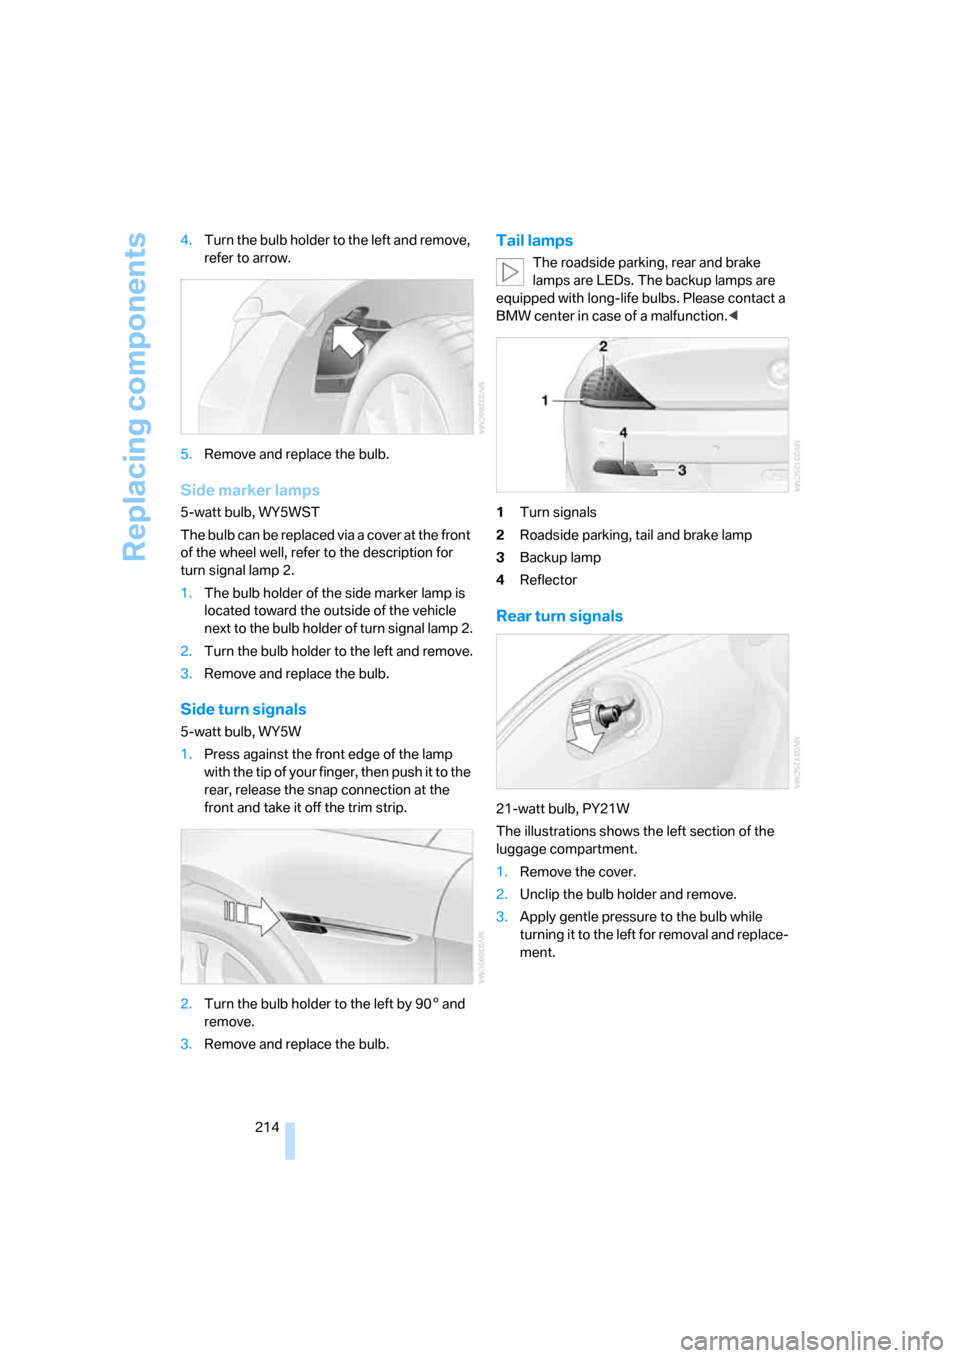
1Turn signals
2Roadside parking, tail and brake lamp
3Backup lamp
4Reflector
Rear turn signals
21-watt bulb, PY21W
The illustrations shows the left section of the
luggage compartment.
1.Remove the cover.
2.Unclip the bulb holder and remove.
3.Apply gentle pressure to the bulb while
turning it to the left for removal and replace-
ment.
Page 222 of 254
Giving and receiving assistance
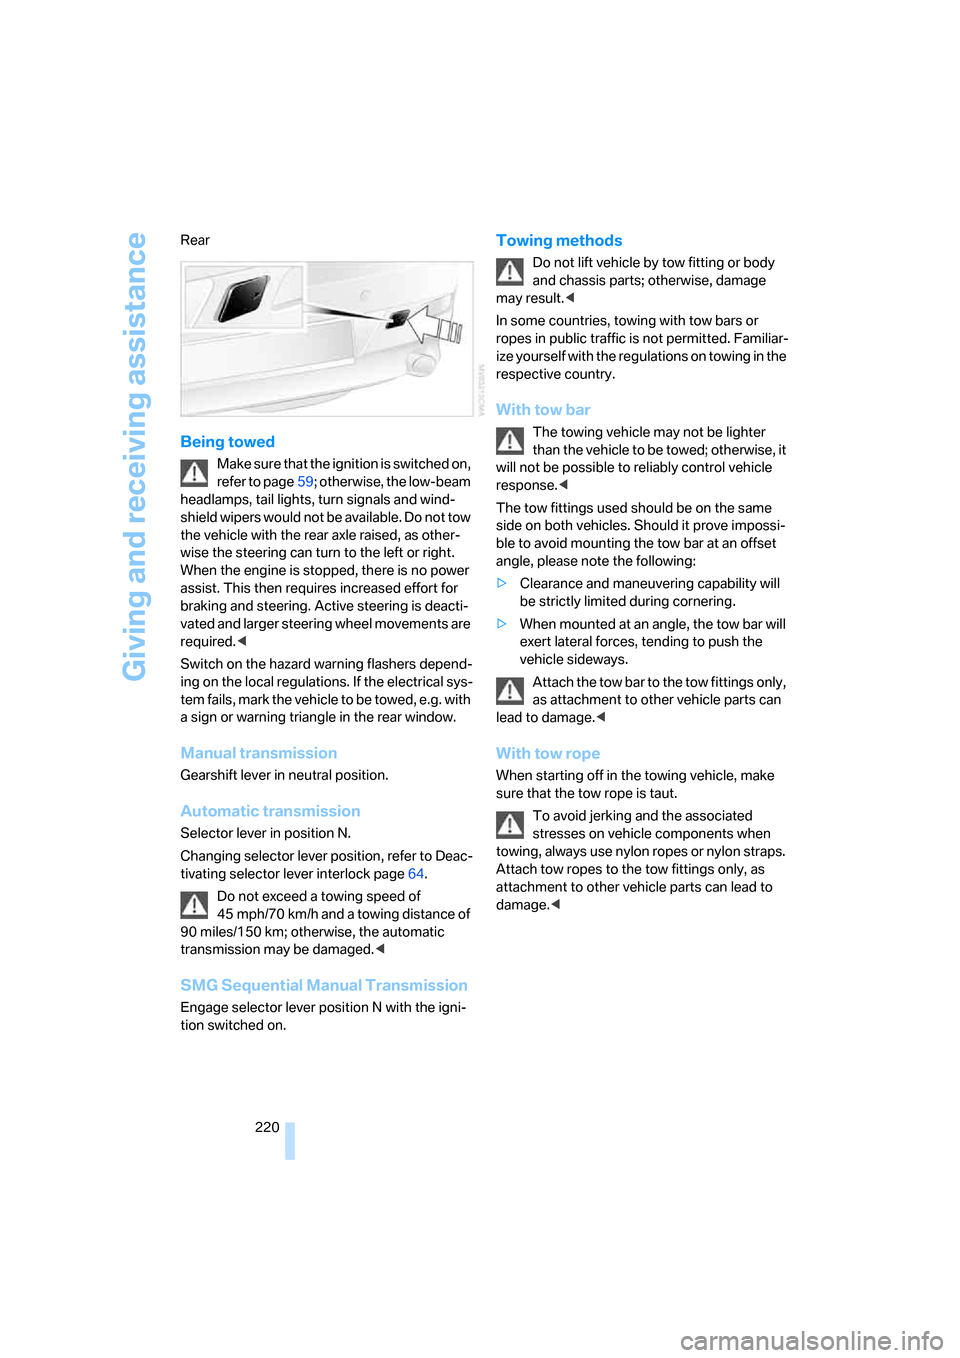
220 Rear
Being towed
Make sure that the ignition is switched on,
refer to page59; otherwise, the low-beam
headlamps, tail lights, turn signals and wind-
shield wipers would not be available. Do not tow
the vehicle with the rear axle raised, as other-
wise the steering can turn to the left or right.
When the engine is stopped, there is no power
assist. This then requires increased effort for
braking and steering. Active steering is deacti-
vated and larger steering wheel movements are
required.<
Switch on the hazard warning flashers depend-
ing on the local regulations. If the electrical sys-
tem fails, mark the vehicle to be towed, e.g. with
a sign or warning triangle in the rear window.
Manual transmission
Gearshift lever in neutral position.
Automatic transmission
Selector lever in position N.
Changing selector lever position, refer to Deac-
tivating selector lever interlock page64.
Do not exceed a towing speed of
45 mph/70 km/h and a towing distance of
90 miles/150 km; otherwise, the automatic
transmission may be damaged.<
SMG Sequential Manual Transmission
Engage selector lever position N with the igni-
tion switched on.
Towing methods
Do not lift vehicle by tow fitting or body
and chassis parts; otherwise, damage
may result.<
In some countries, towing with tow bars or
ropes in public traffic is not permitted. Familiar-
ize yourself with the regulations on towing in the
respective country.
With tow bar
The towing vehicle may not be lighter
than the vehicle to be towed; otherwise, it
will not be possible to reliably control vehicle
response.<
The tow fittings used should be on the same
side on both vehicles. Should it prove impossi-
ble to avoid mounting the tow bar at an offset
angle, please note the following:
>Clearance and maneuvering capability will
be strictly limited during cornering.
>When mounted at an angle, the tow bar will
exert lateral forces, tending to push the
vehicle sideways.
Attach the tow bar to the tow fittings only,
as attachment to other vehicle parts can
lead to damage.<
With tow rope
When starting off in the towing vehicle, make
sure that the tow rope is taut.
To avoid jerking and the associated
stresses on vehicle components when
towing, always use nylon ropes or nylon straps.
Attach tow ropes to the tow fittings only, as
attachment to other vehicle parts can lead to
damage.<
Page 238 of 254

Everything from A to Z
236 Convertible top
– care, refer to Caring for your
vehicle brochure
– closing manually44
– comfort operation32
– emergency closing44
– opening and closing43
Coolant209
– checking level209
– temperature75
Cooling, maximum109
Cooling function, automatic
climate control108
Cooling system, refer to
Coolant209
Copyright2
Cornering Brake Control
CBC87
Country of destination for
navigation129
Courtesy lamps, refer to
Interior lamps104
Cradle for telephone or mobile
phone114
Cruise control67
– active cruise control68
Cruising range76
Cup holders115
Curb weight, refer to
Weights226
"Current position"148
Current position
– displaying148
– entering136
– storing136
"Curve mode" with
BMW Night Vision101
"Customer
Relations"184,192
D
Dashboard, refer to
Cockpit10
Data, technical224
– capacities226
– dimensions224
– measurements224
– weights226"Date"84
Date75
– display format84
– setting84
"Date format"84
"Daytime running lamps"103
Daytime running lamps103
DBC Dynamic Brake Control,
warning lamp89
"Deactivated"51
Deactivating selector lever
interlock64
Decommissioning the vehicle,
refer to Caring for your
vehicle brochure
Defect
– tires, refer to Flat Tire
Monitor89
– tires, refer to Tire Pressure
Monitor91
Defrosting windows108
Defrosting windows and
removing condensation108
Defrosting windshield, refer to
Defrosting windows108
Defrost position, refer to
Defrosting windows108
"Delete address book" for
navigation system137
"Delete all numbers" for
mobile phone183
"Delete data" for navigation
system137
"Delete" for mobile
phone183
Destination address
– deleting137
– entering128,131
Destination for navigation
– destination list135
– entering via voice131
– entry128
– home address138
– selecting from address
book136
– selecting using
information134
– storing136Destination guidance140
– bypassing route
sections144
– canceling voice
instructions56
– changing specified
route
138
– displaying route141
– distance and arrival140
– interrupting140
– starting140
– terminating/continuing140
– voice instructions143
– volume of voice
instructions144
Destination list for
navigation135
Destinations recently driven
to135
"Details" in audio mode167
"Detour" for navigation
system147
"Dial" for mobile phone181
"Dial number"181
"Diamond button"56
Digital clock75
Digital radio, refer to High
Definition Radio160
Dimensions
– Convertible225
– Coupe224
Directional indicators, refer to
Turn signals65
Direction announcements,
refer to Voice
instructions143
Direction instructions, refer to
Voice instructions143
Directory, refer to Phone
book182
Directory for navigation, refer
to Address book136
"Display"85
Display, refer to iDrive
controls16
Display elements, refer to
Instrument cluster12
Displaying vehicle data195