2007 BMW 650I CONVERTIBLE parking
[x] Cancel search: parkingPage 12 of 254

Cockpit
10
Cockpit
Around the steering wheel: controls and displays
1Convertible: opening and closing rear
window40
2Convertible: opening and closing windows
together39
3Convertible: opening and closing rear
windows39
4Opening and closing front windows39
5Adjusting exterior mirrors54
Automatic curb monitor546
Turn signals65
High beams,
headlamp flasher104
Roadside parking lamps104
Check Control80
Computer76
Page 13 of 254

At a glance
11Reference
Controls
Driving tips
Communications
Navigation
Entertainment
Mobility
7Buttons on steering wheel
8Instrument cluster12
11Ignition lock59
12Horn, entire surface15Releasing hood206
16Opening luggage compartment lid34 Mobile phone
*175
>Press: accepting and ending
call, starting dialing
* for
selected phone number and
redialing if no phone number is
selected
>Press and hold: redialing
Volume
Activating/deactivating voice
command system
* 22
Changing radio station156
Selecting music track166
Scrolling in phone book and in lists
with stored phone numbers
Individually programmable
*55
Individually programmable55
9
Windshield wipers66
Rain sensor66
10Starting/stopping engine and
switching ignition on/off 59
13
Steering wheel heater
*55
Steering wheel adjustment55
14
Cruise control67
Active cruise control
*68
17
Head-Up Display
*97
BMW Night Vision
*99
18
Parking lamps102
Low beams102
Daytime running lamps
*103
Automatic headlamp control102
Daytime running lamps
*103
Adaptive Head Light
*103
19
Instrument lighting104
Fog lamps104
Page 33 of 254

Controls
31Reference
At a glance
Driving tips
Communications
Navigation
Entertainment
Mobility
9.Press the controller.
Comfort opening mode
Press the button longer:
>Coupe: the windows are opened, the glass
sunroof
* is raised and the sliding visor
slides back.
>Convertible: the windows and the convert-
ible top are opened.
Watch the convertible top during the
opening process to be sure that no
one is injured. Releasing the button stops
the operation.<
Locking doors
Press the button.
Do not lock the vehicle from the outside if
persons are inside, as unlocking from the
inside is not possible without special knowl-
edge.<
Switching on interior lamps
With vehicle locked:
Press the button.
You can also use this function to locate your
vehicle in parking garages etc.
Panic mode*
You can trigger the alarm system in case of dan-
ger:
Press the button for at least 3 seconds.
To switch off alarm: press any button.
Opening luggage compartment lid
Press the button for approx. 1 second.
The luggage compartment lid opens, regard-
less of whether it was previously locked or
unlocked.
A previously locked luggage compart-
ment lid is also locked again after closing.
Coupe: during opening, the luggage compart-
ment lid pivots back and up. Make sure there is
sufficient clearance.<
Setting confirmation signals
You can vary or deactivate the confirmation sig-
nals for locking or unlocking.
1.Open the start menu.
2.Press the controller to open the menu.
3.Select "Settings" and press the controller.
4.Select "Vehicle / Tires" and press the con-
troller.
5.Change to upper field if necessary. Turn the
controller until "Door locks" is selected and
press the controller.
6.Select "Confirmation" and press the con-
troller.
7.Select the desired signal.
8.Press the controller.
The signal is activated.
Malfunction
The remote control may malfunction due to
local radio waves. Should the remote control fail
to operate due to interference of this kind,
unlock and lock the vehicle via the door lock
using a key.
Page 62 of 254
Driving
60
Starting engine
Do not run the engine in closed rooms,
otherwise the inhalation of toxic exhaust
gases can cause unconsciousness and death.
The exhaust gases contain carbon monoxide,
an odorless and colorless, but highly toxic gas.
Never leave an unattended vehicle with the
engine running, as such a vehicle represents a
potential safety hazard.
Before leaving the vehicle with the engine run-
ning, shift into neutral or move the selector lever
into position P and firmly apply the handbrake,
otherwise the vehicle can begin to roll.<
Do not allow the engine to warm up by leaving it
running while the vehicle remains stationary.
Instead, drive off at a moderate engine speed.
Avoid frequent starting in quick succes-
sion or repeated starting attempts in
which the engine does not start. Otherwise, the
fuel is not burned at all or is burned inade-
quately and there is a danger of overheating and
damage to the catalytic converter.<
Manual transmission
Remote control in ignition lock or with comfort
access in vehicle, refer to page37.
1.Depress brake pedal.
2.Depress the clutch pedal and select the
idling position.
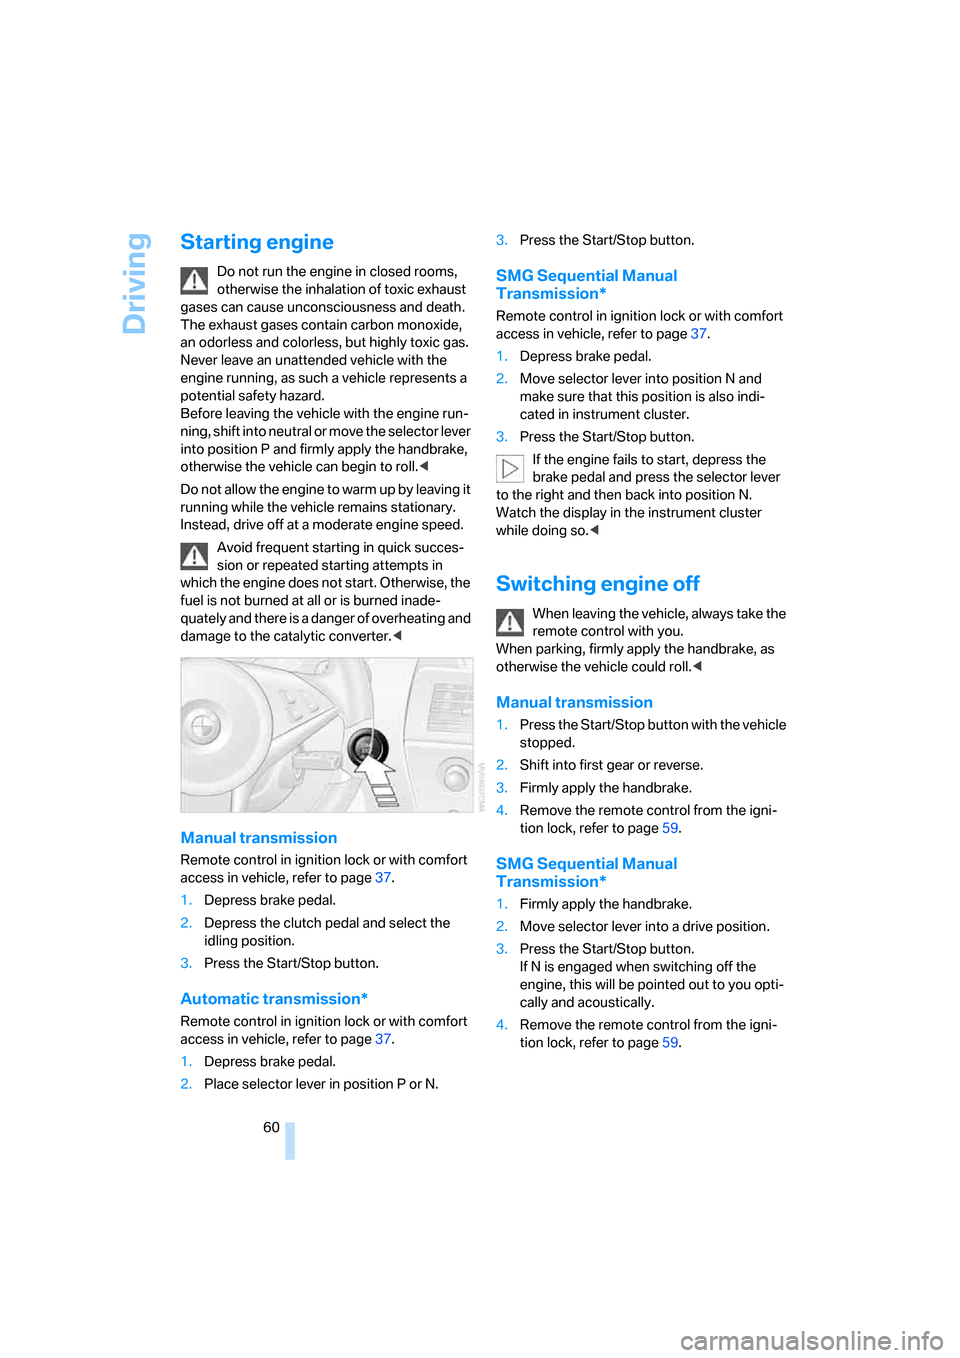
3.Press the Start/Stop button.
Automatic transmission*
Remote control in ignition lock or with comfort
access in vehicle, refer to page37.
1.Depress brake pedal.
2.Place selector lever in position P or N.3.Press the Start/Stop button.
SMG Sequential Manual
Transmission*
Remote control in ignition lock or with comfort
access in vehicle, refer to page37.
1.Depress brake pedal.
2.Move selector lever into position N and
make sure that this position is also indi-
cated in instrument cluster.
3.Press the Start/Stop button.
If the engine fails to start, depress the
brake pedal and press the selector lever
to the right and then back into position N.
Watch the display in the instrument cluster
while doing so.<
Switching engine off
When leaving the vehicle, always take the
remote control with you.
When parking, firmly apply the handbrake, as
otherwise the vehicle could roll.<
Manual transmission
1.Press the Start/Stop button with the vehicle
stopped.
2.Shift into first gear or reverse.
3.Firmly apply the handbrake.
4.Remove the remote control from the igni-
tion lock, refer to page59.
SMG Sequential Manual
Transmission*
1.Firmly apply the handbrake.
2.Move selector lever into a drive position.
3.Press the Start/Stop button.
If N is engaged when switching off the
engine, this will be pointed out to you opti-
cally and acoustically.
4.Remove the remote control from the igni-
tion lock, refer to page59.
Page 74 of 254
Driving
72
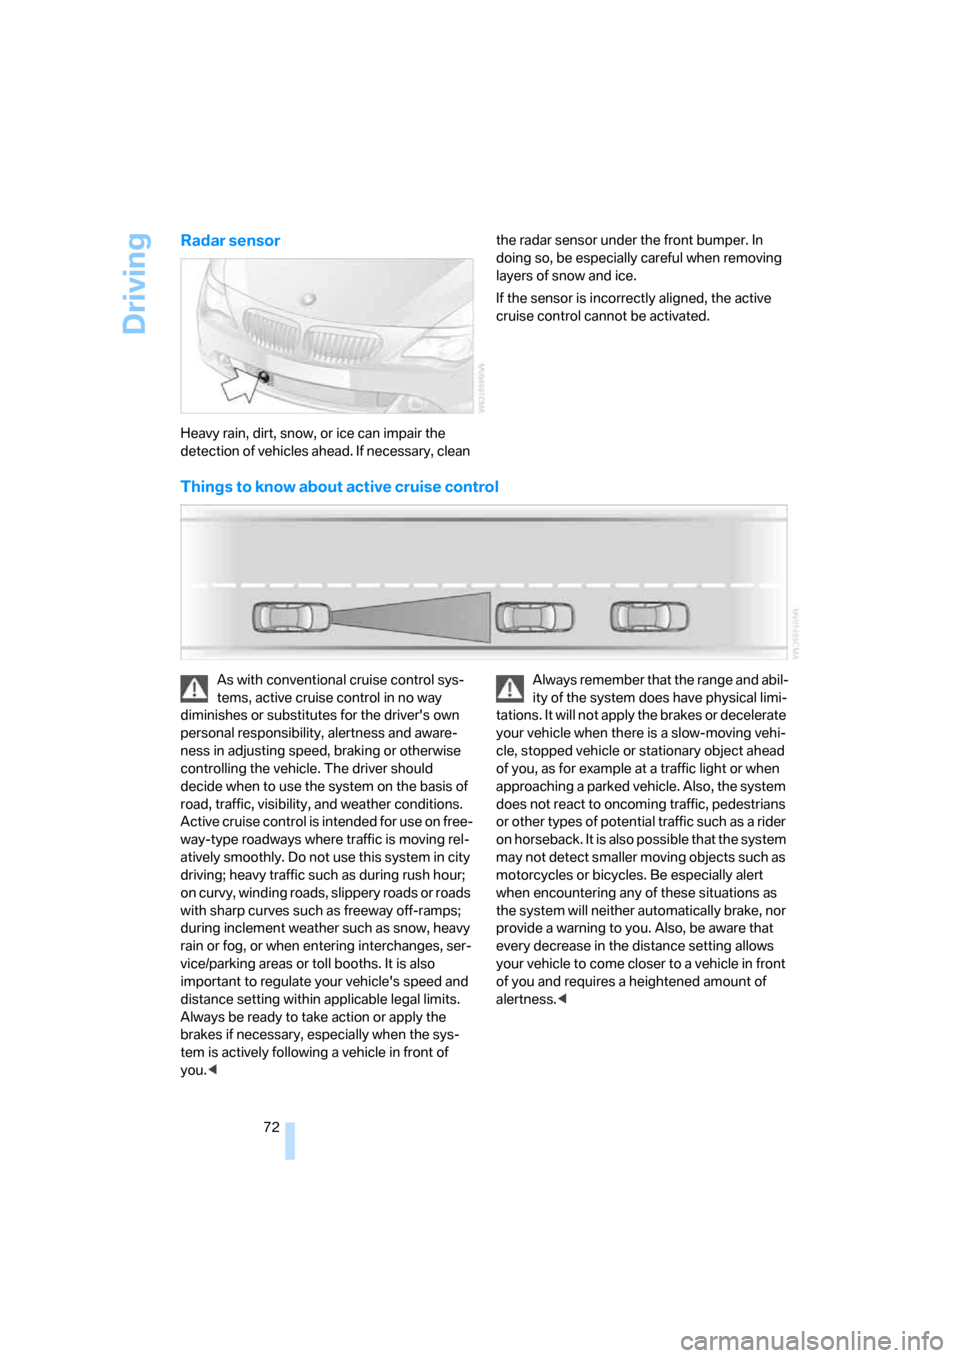
Radar sensor
Heavy rain, dirt, snow, or ice can impair the
detection of vehicles ahead. If necessary, clean the radar sensor under the front bumper. In
doing so, be especially careful when removing
layers of snow and ice.
If the sensor is incorrectly aligned, the active
cruise control cannot be activated.
Things to know about active cruise control
As with conventional cruise control sys-
tems, active cruise control in no way
diminishes or substitutes for the driver's own
personal responsibility, alertness and aware-
ness in adjusting speed, braking or otherwise
controlling the vehicle. The driver should
decide when to use the system on the basis of
road, traffic, visibility, and weather conditions.
A c t iv e c r ui s e c o n t r o l is i n t en d e d f o r u s e o n f r ee -
way-type roadways where traffic is moving rel-
atively smoothly. Do not use this system in city
driving; heavy traffic such as during rush hour;
on curvy, winding roads, slippery roads or roads
with sharp curves such as freeway off-ramps;
during inclement weather such as snow, heavy
rain or fog, or when entering interchanges, ser-
vice/parking areas or toll booths. It is also
important to regulate your vehicle's speed and
distance setting within applicable legal limits.
Always be ready to take action or apply the
brakes if necessary, especially when the sys-
tem is actively following a vehicle in front of
you.
tations. It will not apply the brakes or decelerate
your vehicle when there is a slow-moving vehi-
cle, stopped vehicle or stationary object ahead
of you, as for example at a traffic light or when
approaching a parked vehicle. Also, the system
does not react to oncoming traffic, pedestrians
or other types of potential traffic such as a rider
on horseback. It is also possible that the system
may not detect smaller moving objects such as
motorcycles or bicycles. Be especially alert
when encountering any of these situations as
the system will neither automatically brake, nor
provide a warning to you. Also, be aware that
every decrease in the distance setting allows
your vehicle to come closer to a vehicle in front
of you and requires a heightened amount of
alertness.<
Page 88 of 254

Technology for comfort, convenience and safety
86
Technology for comfort, convenience and
safety
PDC Park Distance Control*
The concept
The PDC assists you when you are parking.
Acoustic signals and an optical display
* alert
you to the approach of an object from behind
your vehicle. To measure the distance, there
are four ultrasonic sensors in each bumper.
The range of these sensors is approx. 7 ft/2 m.
However, an acoustic warning first sounds for
the sensors at the front and at the two rear cor-
ners at approx. 24 in/60 cm, and for the center
rear sensors at approx. 5 ft/1.50 m.
PDC is a parking aid that can indicate the
presence of objects when they are being
approached slowly, as is usually the case when
parking. Avoid approaching an object at high
speed; otherwise, the physical circumstances
could cause the system warning to be activated
too late.<
Switching on automatically
The system starts to operate approx. 1 second
after you shift into reverse gear or move the
selector lever into position R with the engine
running or the ignition switched on.
Wait this short period before driving.
Switching on manually
Press the button; the LED lights up.
Switching off manually
Press the button again; the LED goes out.
After driving approx. 165 ft/50 m or at over
approx. 20 mph/30 km/h, the system is
switched off and the LED goes out. You can
reactivate the system manually as needed.
Signal tones
An intermittent signal indicates the distance of
the vehicle from an object being approached.
Thus, an object detected to the left rear of the
vehicle will be indicated by a signal tone from
the left rear speaker, etc. As the distance
between vehicle and object decreases, the
intervals between the tones become shorter. If
the distance to the nearest object falls to below
roughly 1 ft/30 cm, then a continuous tone
sounds.
An intermittent tone is interrupted after approx.
3seconds:
>if you remain in front of an object that was
only detected by one of the corner sensors
>if you drive parallel to a wall
Malfunction
The LED in the button flashes and a message
appears on the Control Display. PDC is mal-
functioning. Have the system checked.
As a preventive measure, keep the sensors
clean and free of ice or snow in order to ensure
that they will continue to operate effectively. Do
not spray the sensors with high-pressure clean-
ers for long periods and maintain a distance of
at least 4 in/10 cm to them.
Page 96 of 254
Technology for comfort, convenience and safety
94 the TPMS malfunction indicator after replacing
one or more tires or wheels on your vehicle to
ensure that the replacement or alternate tires
and wheels allow the TPMS to continue to func-
tion properly.
Active steering*
The concept
The active steering is a system that actively var-
ies the steering angle of the front wheels in rela-
tion to the steering wheel movements.
When you are driving in the low road speed
range, e. g. in a town or when parking, the steer-
ing angle increases, i.e. the steering becomes
very direct. In the higher speed range, on the
other hand, the steering angle is reduced more
and more. This improves the handling capability
of your BMW over the entire speed range.
In critical situations, the system can make tar-
geted corrections to the steering angle pro-
vided by the driver and thus stabilize the vehicle
before the driver intervenes. This stability-pro-
moting intervention is deactivated when DSC is
switched off, refer to page88.
Malfunction
The warning lamp lights up yellow and
a message is shown on the Control Dis-
play. The active steering is no longer
operational. At low speed, larger steering wheel
movements are required, while the vehicle
reacts more sensitively to steering wheel move-
ments in the higher road speed range. The sta-
bility-promoting intervention can also be deac-
tivated. Proceed cautiously and drive
defensively. Have the system checked.
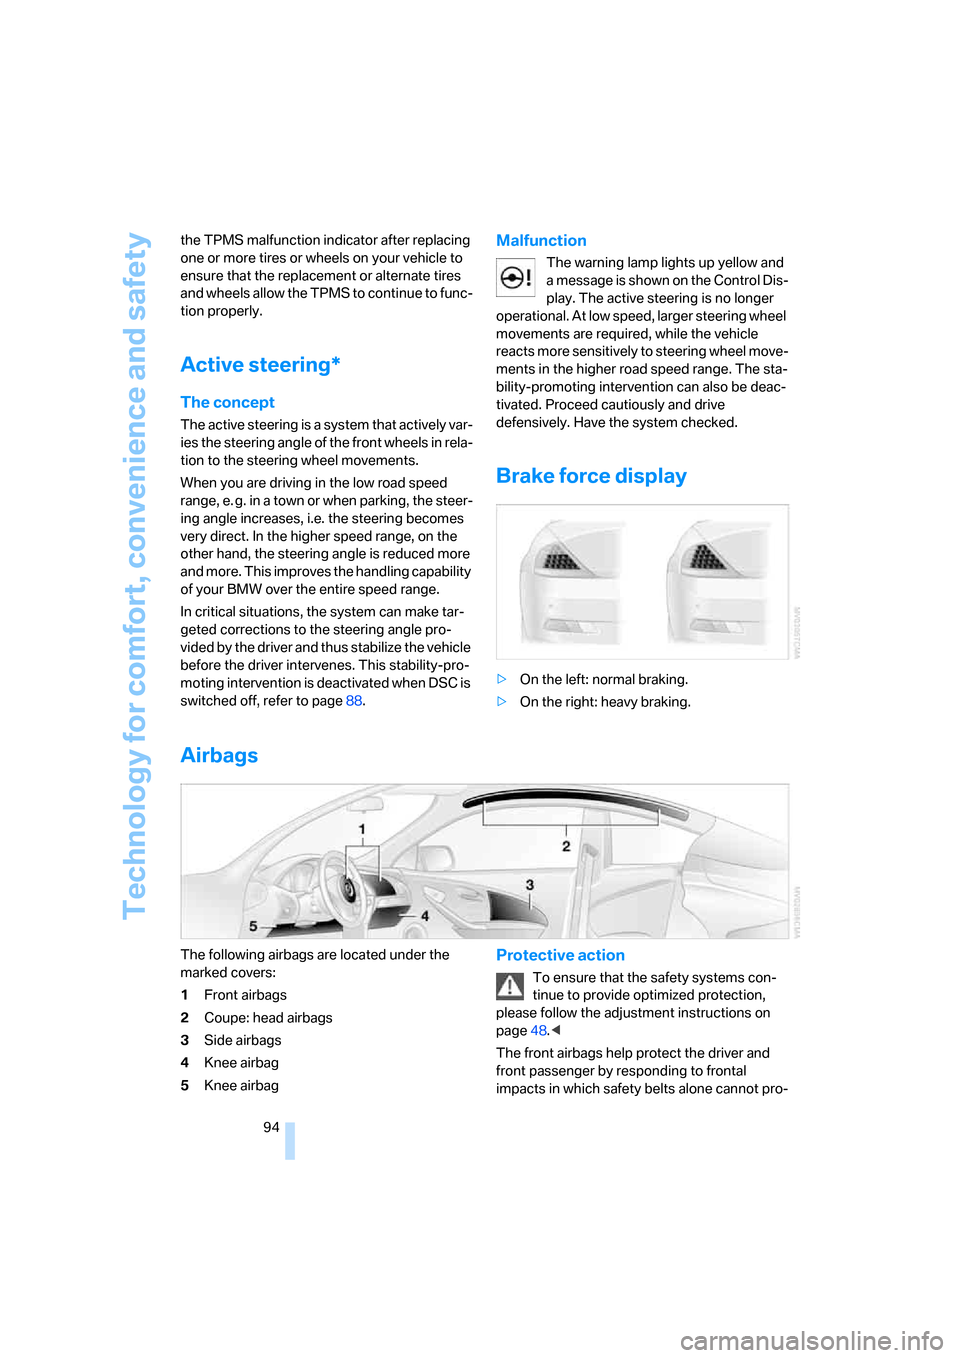
Brake force display
>On the left: normal braking.
>On the right: heavy braking.
Airbags
The following airbags are located under the
marked covers:
1Front airbags
2Coupe: head airbags
3Side airbags
4Knee airbag
5Knee airbagProtective action
To ensure that the safety systems con-
tinue to provide optimized protection,
please follow the adjustment instructions on
page48.<
The front airbags help protect the driver and
front passenger by responding to frontal
impacts in which safety belts alone cannot pro-
Page 104 of 254
Lamps
102
Lamps
Parking lamps/low beams
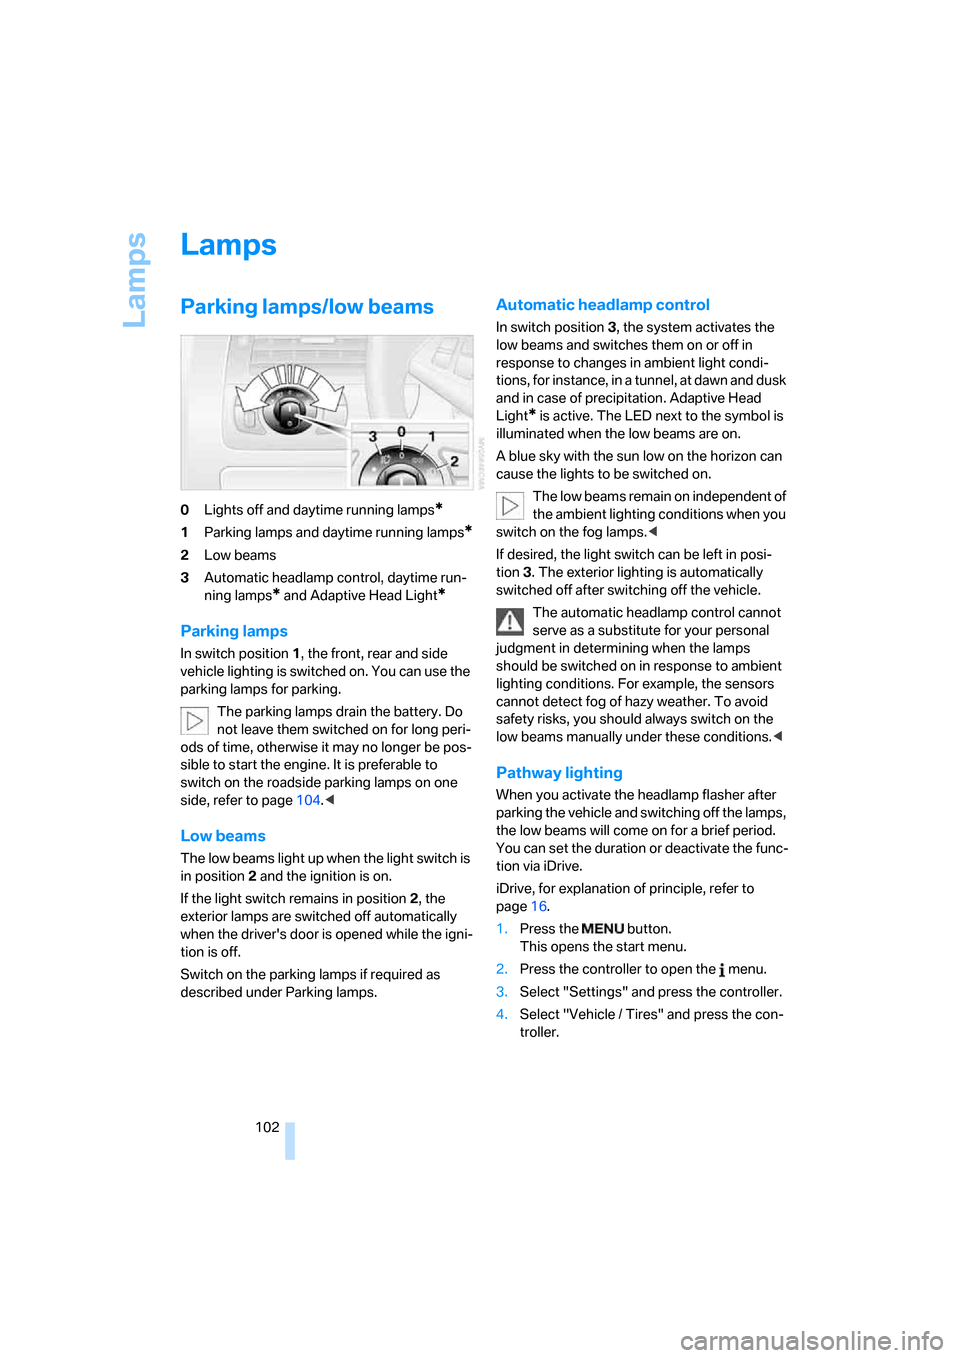
0Lights off and daytime running lamps*
1Parking lamps and daytime running lamps*
2Low beams
3Automatic headlamp control,
daytime run-
ning lamps
* and Adaptive Head Light*
Parking lamps
In switch position1, the front, rear and side
vehicle lighting is switched on. You can use the
parking lamps for parking.
The parking lamps drain the battery. Do
not leave them switched on for long peri-
ods of time, otherwise it may no longer be pos-
sible to start the engine. It is preferable to
switch on the roadside parking lamps on one
side, refer to page104.<
Low beams
The low beams light up when the light switch is
in position 2 and the ignition is on.
If the light switch remains in position 2, the
exterior lamps are switched off automatically
when the driver's door is opened while the igni-
tion is off.
Switch on the parking lamps if required as
described under Parking lamps.
Automatic headlamp control
In switch position3, the system activates the
low beams and switches them on or off in
response to changes in ambient light condi-
tions, for instance, in a tunnel, at dawn and dusk
and in case of precipitation. Adaptive Head
Light
* is active. The LED next to the symbol is
illuminated when the low beams are on.
A blue sky with the sun low on the horizon can
cause the lights to be switched on.
The low beams remain on independent of
the ambient lighting conditions when you
switch on the fog lamps.<
If desired, the light switch can be left in posi-
tion3. The exterior lighting is automatically
switched off after switching off the vehicle.
The automatic headlamp control cannot
serve as a substitute for your personal
judgment in determining when the lamps
should be switched on in response to ambient
lighting conditions. For example, the sensors
cannot detect fog of hazy weather. To avoid
safety risks, you should always switch on the
low beams manually under these conditions.<
Pathway lighting
When you activate the headlamp flasher after
parking the vehicle and switching off the lamps,
the low beams will come on for a brief period.
You can set the duration or deactivate the func-
tion via iDrive.
iDrive, for explanation of principle, refer to
page16.
1.Press the button.
This opens the start menu.
2.Press the controller to open the menu.
3.Select "Settings" and press the controller.
4.Select "Vehicle / Tires" and press the con-
troller.