2007 BMW 650I CONVERTIBLE ignition
[x] Cancel search: ignitionPage 50 of 254

Adjusting
48
Adjusting
Sitting safely
The ideal sitting position can make a vital con-
tribution to relaxed, fatigue-free driving. In the
interaction with the safety belts, the head
restraints and the airbags, the seat position
plays an important role in an accident. To
ensure that the safety systems operate with
optimal efficiency, we strongly urge you to fol-
low the instructions contained in the following
section.
For additional information on Transporting chil-
dren safely, refer to page57.
Airbags
Always maintain an adequate distance
between yourself and the airbags. Always
hold the steering wheel by its rim with hands at
the 9 o'clock and 3 o'clock positions to mini-
mize the risk of injuries to your hands and arms
in the event of airbag deployment.
No one and nothing is to come between the air-
bags and the seat occupant.
Do not use the cover of the front airbag on the
front passenger side as a storage area. Make
sure that the front passenger is sitting correctly
and does not rest feet or legs on the instrument
panel, otherwise leg injuries can occur if the
knee and front airbags are triggered.
Make sure that occupants do not rest their head
on the side or head airbags; otherwise, injuries
can occur if the airbags are triggered.<
Even if you adhere to all the instructions, inju-
ries resulting from contact with airbags cannot
be fully excluded, depending on the circum-
stances. The ignition and inflation noise may
provoke a mild hearing loss in extremely sensi-
tive individuals. This effect is usually only tem-
porary.
For airbag locations and additional information
on airbags, refer to page94.
Head restraints
A correctly adjusted head restraint reduces the
ris k of injury to cervical vertebrae in an accident.
Adjust the head restraint so that its center
is approx. at ear level. Otherwise, there is
increased danger of injury in the event of an
accident.<
Head restraints, refer to page51.
Safety belt
Before every drive, make sure that safety belts
are being worn at all of the occupied seats. Air-
bags complement the safety belt as an addi-
tional safety device, but they do not represent a
substitute.
Your vehicle has four seats that are each
equipped with a safety belt.
Never allow more than one person to
wear a single safety belt. Never allow
infants or small children to ride in a passenger's
lap. Make sure that the belt lies low around the
hips in the lap area and does not press on the
abdomen. The safety belt may not lie across the
neck, rub on sharp edges, be routed over solid
or breakable objects or be pinched. Wear the
safety belt without twisting, snugly across the
lap and shoulders, as close to the body as pos-
sible. Otherwise, the belt can slip over the hips
in the lap area in a frontal impact and injure the
abdomen. Avoid wearing clothing that prevents
the belt from fitting properly and pull the shoul-
der belt upward periodically to readjust the ten-
sion across your lap in order to avoid a reduc-
tion in the restraining effect of the safety belt.<
Safety belts refer to page53.
Page 52 of 254

Adjusting
50
Seat, mirror and steering
wheel memory
You can store and select three different adjust-
ment settings for the driver's seat, exterior mir-
rors and steering wheel.
The adjustment of the lumbar support is not
stored in the memory.
Storing
1.Switch on radio readiness or ignition, refer
to page59.
2.Adjust the desired seat, exterior mirror and
steering-wheel positions.
3.Press the button:
The LED in the button lights up.
4.Press the desired memory button 1, 2 or3:
The LED goes out.
Requesting
Do not request a position from the mem-
ory while the vehicle is moving. There is a
risk of accident from unexpected movement of
the seat or steering wheel.<
Comfort mode
1.Open the driver's door after unlocking or
switch on radio readiness, refer to page59.
2.Briefly press the desired memory button1,
2 or3.
The system cancels the adjustment procedure
when you briefly press one of the seat adjust-
ment switches or one of the memory buttons.The adjusting procedure for the steering wheel
is interrupted if you briefly press the switch for
the steering wheel adjustment in any direction,
refer to page55.
Safety feature
1.Close the driver's door and switch ignition
on or off, refer to page59.
2.Press the desired memory button 1, 2 or3
and maintain pressure until the adjustment
process has been completed.
If the button was pressed inadvertently:
press the button again; the LED goes out.
Activating with remote control
The last positions of the driver's seat, external
rearview mirrors, and steering wheel are stored
for the remote key currently in use.
You can choose when the position is requested:
>Request when unlocking vehicle
>Request when opening driver's door
When using this feature, always make
sure that the footwell behind the driver's
seat is empty and unobstructed. If you fail to do
so, any persons or objects behind the seat
could be injured or damaged by a rearward
movement of the seat.<
The system cancels the adjustment procedure
when you briefly press one of the seat adjust-
ment switches or one of the memory buttons.
iDrive, for explanation of principle, refer to
page16.
1.Open the start menu.
2.Press the controller to open the menu.
3.Select "Settings" and press the controller.
4.Select "Vehicle / Tires" and press the con-
troller.
5.Change to upper field if necessary. Turn the
controller until "Door locks" is selected and
press the controller.
Page 56 of 254

Adjusting
54
Mirrors
Exterior mirrors
The mirror on the passenger's side is
more curved than the driver's mirror.
Objects reflected in the mirror are closer than
they appear. Do not estimate the distance of
following traffic based on what you see in the
mirrors; otherwise, there is an increased acci-
dent risk.<
1Adjusting
2Switching to the other mirror or to the auto-
matic curb monitor
Storing the mirror positions, refer to Seat, mir-
ror and steering wheel memory on page50.
Adjusting manually
You can also adjust the mirrors manually by
pressing against the outer edges of their mirror
glass.
Folding exterior mirrors in and out
To prevent the exterior mirrors from being
damaged due to the width of the vehicle,
always fold them in by hand before entering an
automatic car wash.<
Automatic heating
Below a certain outdoor temperature, both
exterior mirrors are automatically heated when
the motor is running or the ignition is switched
on.
Tilting down passenger-side mirror –
automatic curb monitor
Activating
1.Slide switch into the driver's side mirror
position, arrow 1.
2.Engage reverse gear or selector lever posi-
tion R.
The mirror glass tilts downward somewhat
on the passenger's side. This allows the
driver to see the area immediately adjacent
to the vehicle – such as a curb – when park-
ing, etc.
Deactivating
Slide switch into the passenger side mirror
position, arrow 2.
Interior and exterior mirrors, automatic
dimming feature
This feature is controlled by two photocells in
the inside rearview mirror. One is integrated
within the mirror's lens, while the other is
located at an offset position on the rear of the
mirror housing.
For trouble-free operation, keep the photocells
clean and do not cover the area between the
interior rearview mirror and the windshield.
Page 61 of 254

Controls
59Reference
At a glance
Driving tips
Communications
Navigation
Entertainment
Mobility
Driving
Ignition lock
Inserting remote control into ignition
lock
Insert the remote control as far as possible into
the ignition lock.
Radio readiness switches on.
Some electronic systems/consumers are ready
for operation.
Comfort access*
With comfort access, only insert the remote
control into the ignition lock in exceptional
cases, refer to page37.
Removing remote control from ignition
lock
Do not pull the remote control out of the
ignition lock using force, as otherwise
damage may result.<
Before removing the remote control, first press
it in as far as possible to release the locking
device.
The ignition is switched off if it was still
switched on.
Automatic transmission
The remote control can only be removed when
the selector lever is in position P: interlock.
Start/Stop button
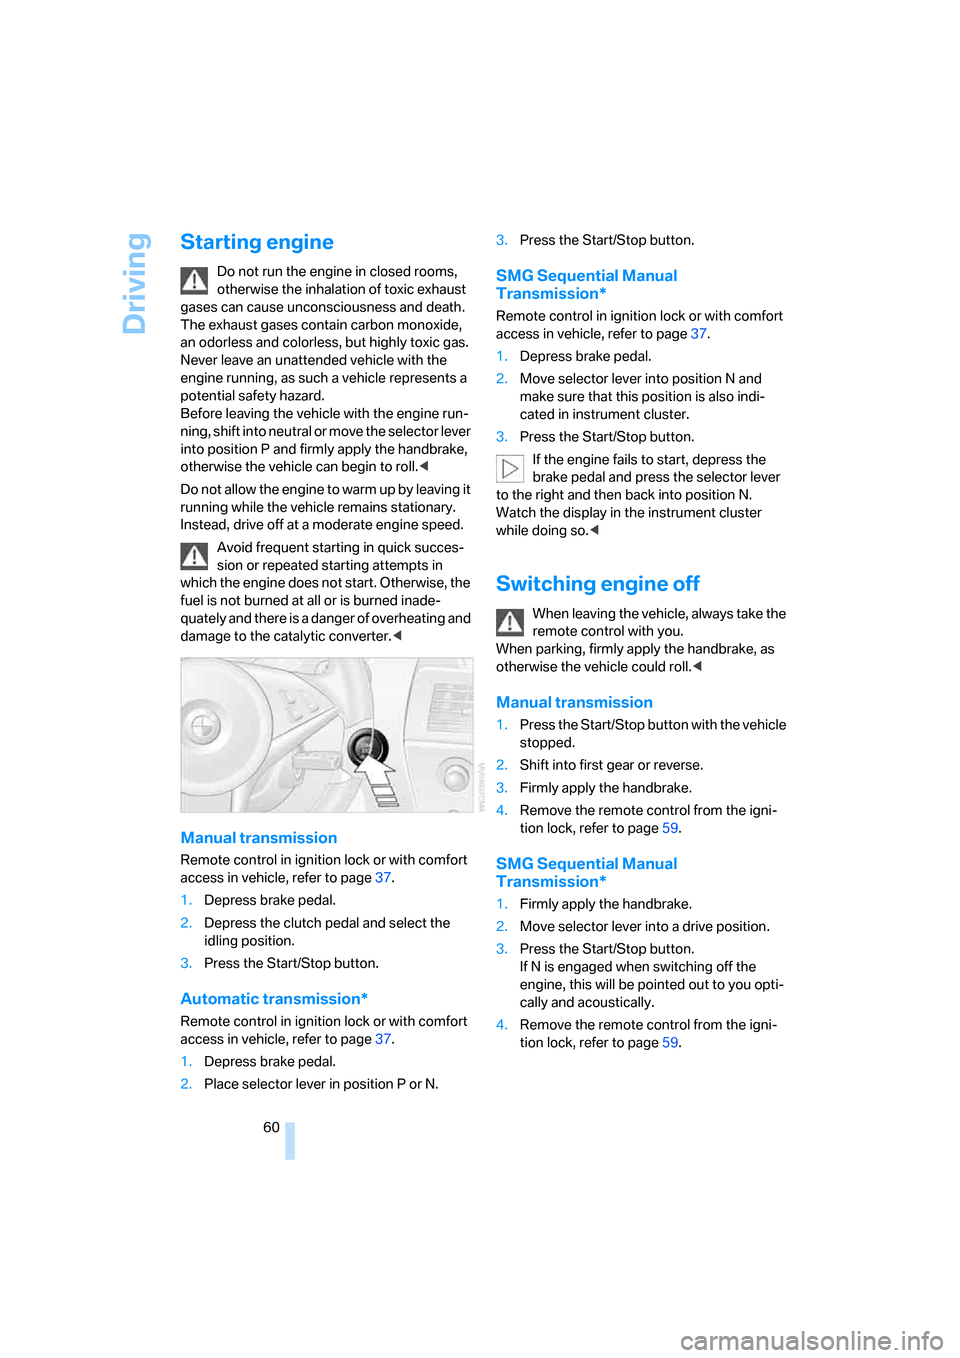
Pressing the Start/Stop button switches the
radio readiness or the ignition on and off.
The engine is started when you press the
Start/Stop button and depress the clutch
if the car has manual transmission or the brake if
the car has automatic transmission.<
Radio readiness
Some electronic systems/consumers are ready
for operation. The time and outside tempera-
ture are displayed in the instrument cluster.
Radio readiness is automatically switched off:
>when the remote control is removed from
the ignition lock
>with comfort access
* by touching the sen-
sitive surface on the door handle, refer to
Locking doors on page37
Ignition on
All electronic systems/consumers are ready for
operation. The odometer and the trip odometer
are displayed in the instrument cluster, refer to
page75.
Please switch off the ignition and the
electronic systems/consumers which are
not required when the engine is not running to
save the battery.<
Radio readiness and ignition off
All indicator and warning lamps in the instru-
ment cluster go out.
Page 62 of 254

Driving
60
Starting engine
Do not run the engine in closed rooms,
otherwise the inhalation of toxic exhaust
gases can cause unconsciousness and death.
The exhaust gases contain carbon monoxide,
an odorless and colorless, but highly toxic gas.
Never leave an unattended vehicle with the
engine running, as such a vehicle represents a
potential safety hazard.
Before leaving the vehicle with the engine run-
ning, shift into neutral or move the selector lever
into position P and firmly apply the handbrake,
otherwise the vehicle can begin to roll.<
Do not allow the engine to warm up by leaving it
running while the vehicle remains stationary.
Instead, drive off at a moderate engine speed.
Avoid frequent starting in quick succes-
sion or repeated starting attempts in
which the engine does not start. Otherwise, the
fuel is not burned at all or is burned inade-
quately and there is a danger of overheating and
damage to the catalytic converter.<
Manual transmission
Remote control in ignition lock or with comfort
access in vehicle, refer to page37.
1.Depress brake pedal.
2.Depress the clutch pedal and select the
idling position.
3.Press the Start/Stop button.
Automatic transmission*
Remote control in ignition lock or with comfort
access in vehicle, refer to page37.
1.Depress brake pedal.
2.Place selector lever in position P or N.3.Press the Start/Stop button.
SMG Sequential Manual
Transmission*
Remote control in ignition lock or with comfort
access in vehicle, refer to page37.
1.Depress brake pedal.
2.Move selector lever into position N and
make sure that this position is also indi-
cated in instrument cluster.
3.Press the Start/Stop button.
If the engine fails to start, depress the
brake pedal and press the selector lever
to the right and then back into position N.
Watch the display in the instrument cluster
while doing so.<
Switching engine off
When leaving the vehicle, always take the
remote control with you.
When parking, firmly apply the handbrake, as
otherwise the vehicle could roll.<
Manual transmission
1.Press the Start/Stop button with the vehicle
stopped.
2.Shift into first gear or reverse.
3.Firmly apply the handbrake.
4.Remove the remote control from the igni-
tion lock, refer to page59.
SMG Sequential Manual
Transmission*
1.Firmly apply the handbrake.
2.Move selector lever into a drive position.
3.Press the Start/Stop button.
If N is engaged when switching off the
engine, this will be pointed out to you opti-
cally and acoustically.
4.Remove the remote control from the igni-
tion lock, refer to page59.
Page 67 of 254

Controls
65Reference
At a glance
Driving tips
Communications
Navigation
Entertainment
Mobility
Activating system
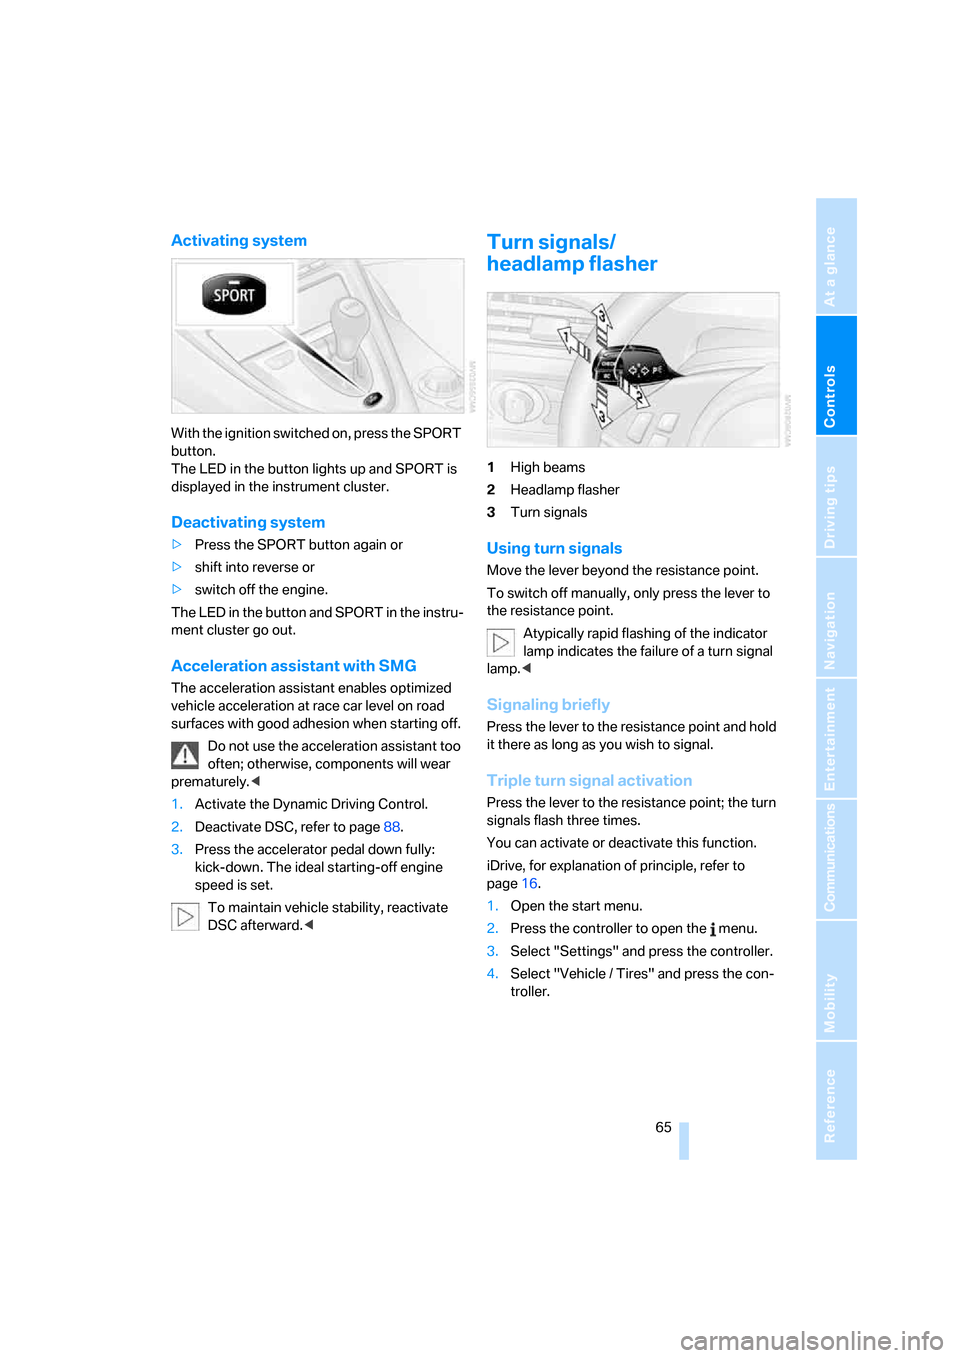
With the ignition switched on, press the SPORT
button.
The LED in the button lights up and SPORT is
displayed in the instrument cluster.
Deactivating system
>Press the SPORT button again or
>shift into reverse or
>switch off the engine.
The LED in the button and SPORT in the instru-
ment cluster go out.
Acceleration assistant with SMG
The acceleration assistant enables optimized
vehicle acceleration at race car level on road
surfaces with good adhesion when starting off.
Do not use the acceleration assistant too
often; otherwise, components will wear
prematurely.<
1.Activate the Dynamic Driving Control.
2.Deactivate DSC, refer to page88.
3.Press the accelerator pedal down fully:
kick-down. The ideal starting-off engine
speed is set.
To maintain vehicle stability, reactivate
DSC afterward.<
Turn signals/
headlamp flasher
1High beams
2Headlamp flasher
3Turn signals
Using turn signals
Move the lever beyond the resistance point.
To switch off manually, only press the lever to
the resistance point.
Atypically rapid flashing of the indicator
lamp indicates the failure of a turn signal
lamp.<
Signaling briefly
Press the lever to the resistance point and hold
it there as long as you wish to signal.
Triple turn signal activation
Press the lever to the resistance point; the turn
signals flash three times.
You can activate or deactivate this function.
iDrive, for explanation of principle, refer to
page16.
1.Open the start menu.
2.Press the controller to open the menu.
3.Select "Settings" and press the controller.
4.Select "Vehicle / Tires" and press the con-
troller.
Page 70 of 254

Driving
68
Maintaining speed, storing speed, and
accelerating
Press lever to resistance point, arrow 1:
The system maintains and stores the current
vehicle speed. The display1 in the speedome-
ter, see below, indicates this regulated speed.
Every time you press the lever, the vehicle's
speed increases by roughly 1 mph/1 km/h.
Press the lever to the resistance point and
hold it:
The vehicle accelerates without pressure on
the accelerator pedal. The system maintains
and stores your current speed as soon as you
release the lever.
Press the lever beyond the resistance point:
Increase speed each time to the next fives place
on the mph speedometer or to the next tens
place on the km/h speedometer.
If, on a downhill grade, the engine's braking
effect is not sufficient, the controlled speed can
be exceeded. Speed can drop on uphill grades if
the engine output is insufficient.
Maintaining speed, storing speed, and
decelerating
Pull the lever, arrow2:
Functions are the same as1, only the vehicle
speed is reduced.
Interrupting cruise control
Press the lever up or down, arrow3.
Cruise control is also interrupted automatically:
>When you apply pressure to the brake pedal
>When you depress the clutch pedal or shift
the automatic transmission/SMG into posi-
tion N
>When DSC controls
Resuming stored speed
Press button4:
The vehicle accelerates to and maintains the
stored speed.
Deactivating system
When the ignition is switched off, the system is
deactivated and the stored speed is deleted.
Displays in instrument cluster
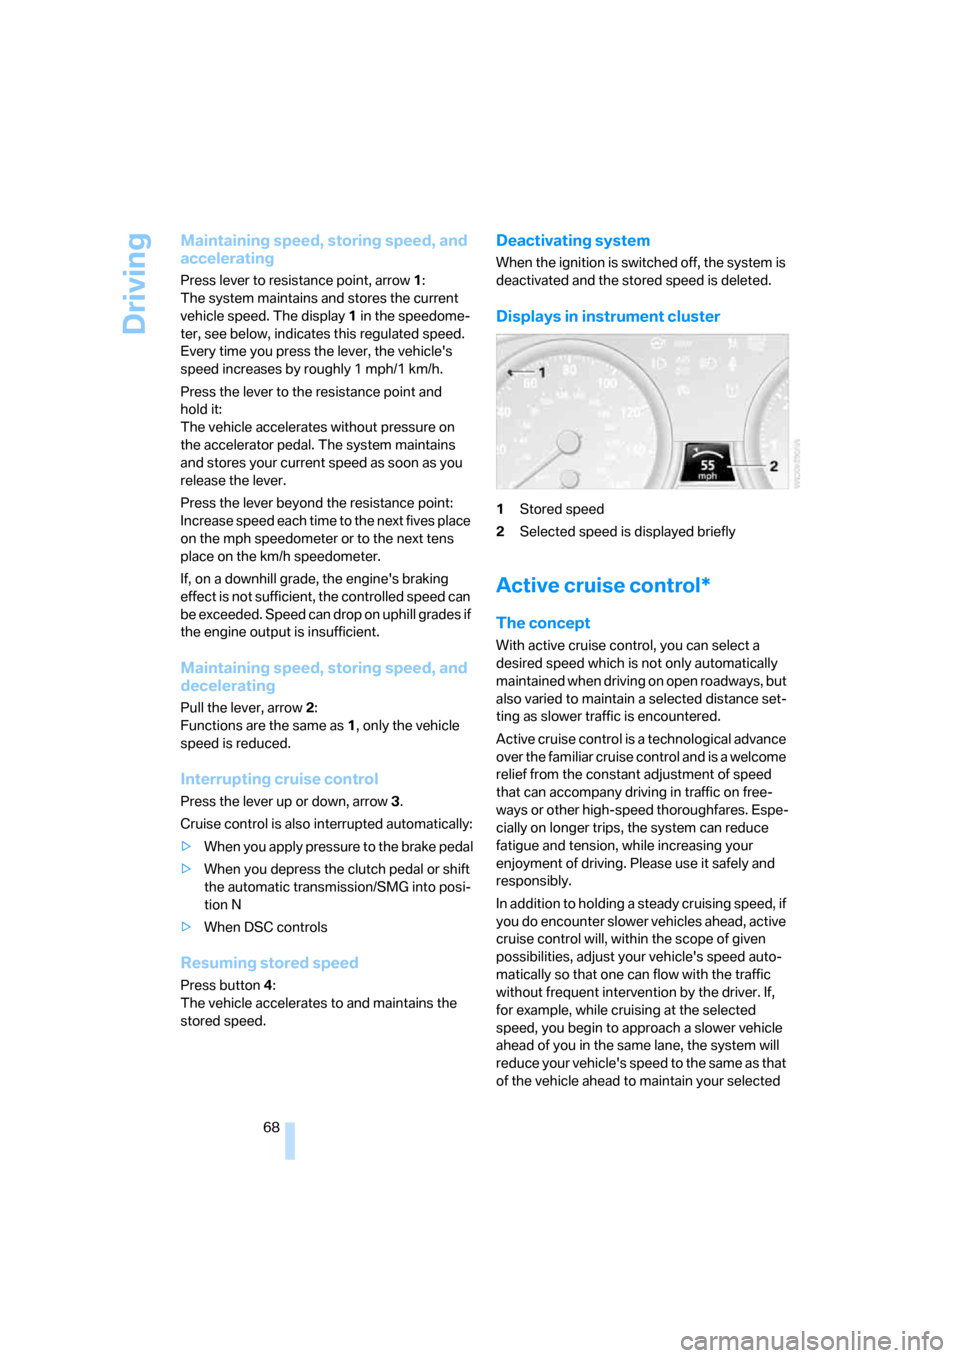
1Stored speed
2Selected speed is displayed briefly
Active cruise control*
The concept
With active cruise control, you can select a
desired speed which is not only automatically
maintained when driving on open roadways, but
also varied to maintain a selected distance set-
ting as slower traffic is encountered.
Active cruise control is a technological advance
over the familiar cruise control and is a welcome
relief from the constant adjustment of speed
that can accompany driving in traffic on free-
ways or other high-speed thoroughfares. Espe-
cially on longer trips, the system can reduce
fatigue and tension, while increasing your
enjoyment of driving. Please use it safely and
responsibly.
In addition to holding a steady cruising speed, if
you do encounter slower vehicles ahead, active
cruise control will, within the scope of given
possibilities, adjust your vehicle's speed auto-
matically so that one can flow with the traffic
without frequent intervention by the driver. If,
for example, while cruising at the selected
speed, you begin to approach a slower vehicle
ahead of you in the same lane, the system will
reduce your vehicle's speed to the same as that
of the vehicle ahead to maintain your selected
Page 73 of 254

Controls
71Reference
At a glance
Driving tips
Communications
Navigation
Entertainment
Mobility
Deactivating system
Press the lever up or down. The displays in the
instrument cluster disappear.
You also deactivate the system when you apply
the brakes, shift very slowly, or shift into neutral.
In addition, the system is deactivated automati-
cally:
>when you activate the DTC Dynamic Trac-
tion Control
>when you deactivate the DSC Dynamic Sta-
bility Control
>when the system does not recognize any
objects for a longer time, e. g. on infre-
quently traveled roads without a shoulder or
guard rails, or if the radar sensor is covered
with dirt, refer to page72
>when the speed is reduced to below
20 mph/30 km/h due to a traffic situation
The system deactivates automatically
when the speed is set to below 20 mph/
30 km/h. A signal sounds and a message
appears in the Control Display. The active inter-
vention of the driver is required, otherwise there
is a risk of an accident.<
Resuming stored desired speed and
distance
Press button 4.
The displays appear in the instrument cluster.
When you switch off the ignition, the stored
desired speed is deleted.
Displays in instrument cluster
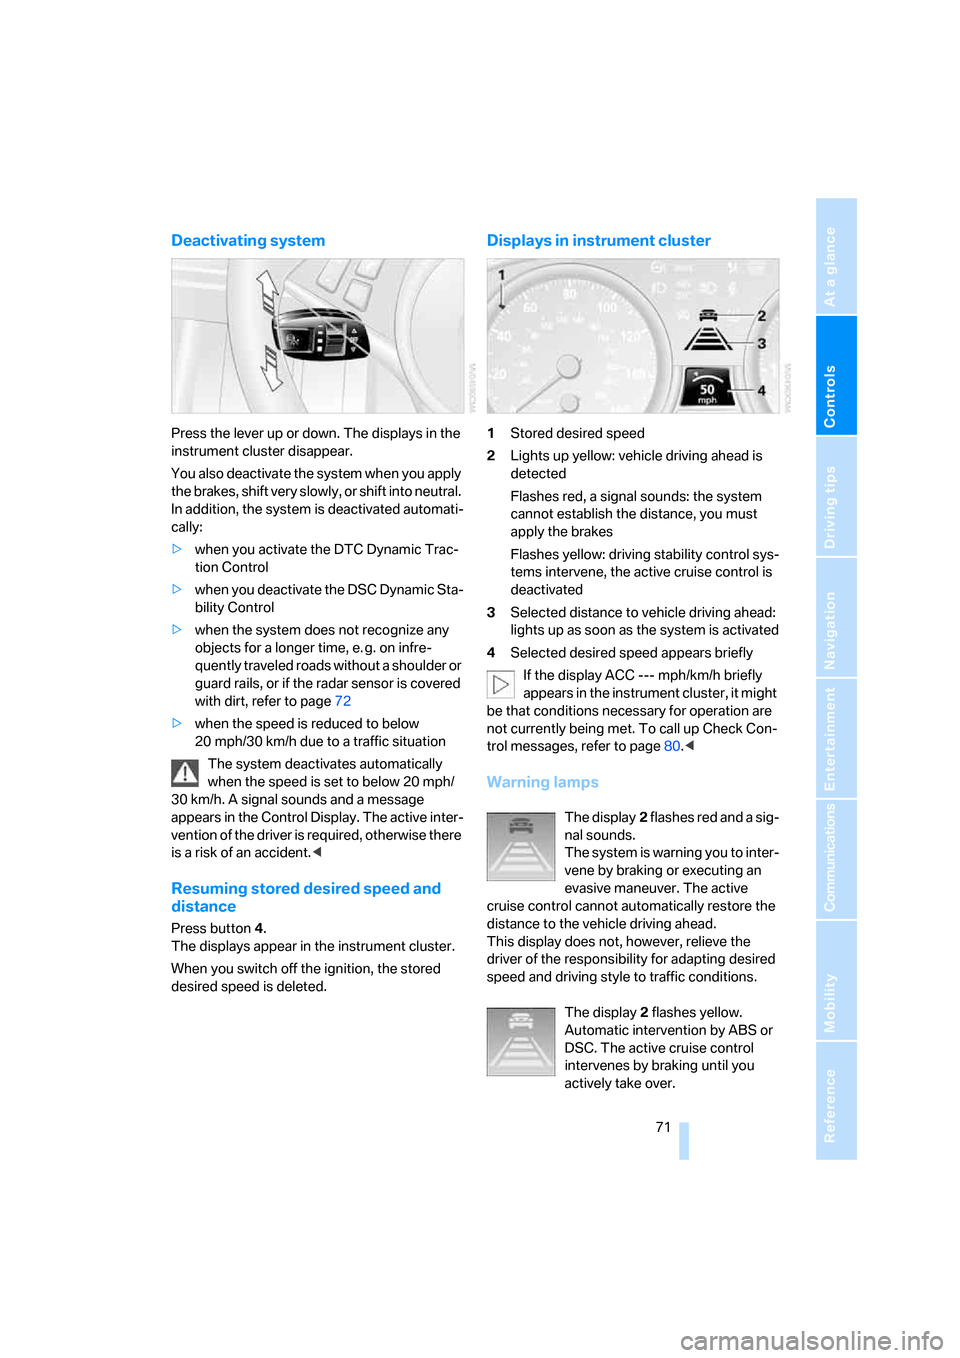
1Stored desired speed
2Lights up yellow: vehicle driving ahead is
detected
Flashes red, a signal sounds: the system
cannot establish the distance, you must
apply the brakes
Flashes yellow: driving stability control sys-
tems intervene, the active cruise control is
deactivated
3Selected distance to vehicle driving ahead:
lights up as soon as the system is activated
4Selected desired speed appears briefly
If the display ACC --- mph/km/h briefly
appears in the instrument cluster, it might
be that conditions necessary for operation are
not currently being met. To call up Check Con-
trol messages, refer to page80.<
Warning lamps
The display2 flashes red and a sig-
nal sounds.
The system is warning you to inter-
vene by braking or executing an
evasive maneuver. The active
cruise control cannot automatically restore the
distance to the vehicle driving ahead.
This display does not, however, relieve the
driver of the responsibility for adapting desired
speed and driving style to traffic conditions.
The display2 flashes yellow.
Automatic intervention by ABS or
DSC. The active cruise control
intervenes by braking until you
actively take over.