2007 BMW 550I SEDAN child
[x] Cancel search: childPage 5 of 286

Reference
At a glance
Controls
Driving tips
Communications
Navigation
Entertainment
Mobility
Contents
The fastest way to find specific topics is to use
the index, refer to page262.
Using this Owner's Manual
4Notes
7Reporting safety defects
At a glance
10Cockpit
16iDrive
23Voice command system
Controls
28Opening and closing
45Adjusting
56Transporting children safely
60Driving
77Everything under control
89Technology for comfort, convenience
and safety
107Lamps
111Climate
118Practical interior accessories
Driving tips
132Things to remember when driving
Navigation
140Starting navigation system
142Destination entry
154Destination guidance
163What to do if …
Entertainment
166On/off and tone
170Radio
179CD player and CD changer
185AUX-In connection
186 USB/audio interface
Communications
192Telephoning
207BMW Assist
Mobility
216Refueling
218Wheels and tires
228Under the hood
232Maintenance
234Replacing components
244Giving and receiving assistance
Reference
252Technical data
257Short commands of voice command
system
262Everything from A to Z
Page 42 of 286

Opening and closing
40 tailgate or the rear window, the lid or rear win-
dow opens again. The hazard warning flashers
flash and a signal
* sounds.<
Sports Wagon: opening rear window
separately
Press the button on the rear window, refer to
page35.
Switching on radio readiness
By briefly pressing the Start/Stop button, you
switch on the radio readiness, refer to page60.
When doing so, do not depress the brake
or clutch pedal, otherwise the engine will
start immediately.<
Starting engine
You can start the engine or switch on the igni-
tion if a remote control is located in the interior
of the vehicle. It need not be inserted in the igni-
tion lock, refer to page60.
If you take the remote control with you when
leaving the vehicle with the engine running, a
warning lamp lights up. In addition, a message
appears on the Control Display. As long as no
remote control is detected in the vehicle, it is
only possible to restart the engine within
approx. 10 seconds after it is switched off.
Switching off engine with automatic
and sport automatic transmission
The engine can only be switched off in trans-
mission position P, refer to page61.
To switch off the engine in transmission posi-
tion N, the remote control must be inserted in
the ignition lock.
Before driving into a car wash with
automatic and sport automatic
transmission
1.Insert remote control into ignition lock.
2.Depress brake pedal.
3.Engage transmission position N.
4.Switch off the engine.
The vehicle can roll.
Malfunction
The comfort access function may malfunction
due to local radio waves. Then open or close the
vehicle with the buttons on the remote control
or with a key. To start the engine following this,
insert the remote control in the ignition lock.
Replacing battery
The remote control for comfort access contains
a battery which must be replaced if necessary.
1.Remove integrated key from remote con-
trol, refer to page28.
2.Remove cover.
3.Lay in new battery with positive side facing
upward.
4.Press cover closed.
Return used battery to a recycling collec-
tion point or to your BMW center.<
Windows
To prevent injuries, exercise care when
closing the windows and keep them in
your field of vision until they are shut.
Always take along the remote control when you
leave the vehicle, otherwise children could, for
example, operate the windows and injure them-
selves.<
Page 43 of 286

Controls
41Reference
At a glance
Driving tips
Communications
Navigation
Entertainment
Mobility
Opening, closing
>Press switch to resistance point:
The window continues to open as long as
you keep the switch pressed.
>Press switch beyond resistance point:
The window opens automatically. Pressing
the switch again stops the opening move-
ment.
You can close the windows in the same manner
by pulling the switch.
Separate switches for the rear windows are
located in the rear.
For information on using the comfort operation
at the door lock or with the remote control, refer
to page31 or32.
For information on comfort closing with comfort
access, refer to page39.
After switching off ignition
You can still operate the windows with the
remote control removed or the ignition
switched off for approx. 1 minute, as long as
neither of the front doors has been opened.
Pinch protection system
If the closing force exceeds a specific value as a
window closes, the closing action is interrupted
and the window reopens slightly.
Despite the pinch protection system,
inspect the window's travel path prior to
closing it, as the safety system might fail to
detect certain kinds of obstructions, such as
thin objects, and the window would continue
closing.
Do not install any accessories in the range of
movement of the windows, otherwise the pinch
protection system will be impaired.<
Closing without pinch protection
system
In case of danger from outside or if, for example,
ice on the window prevents normal closing, pro-
ceed as follows:
1.Pull the switch beyond the resistance point
and hold. The pinch protection system is
limited and the window opens slightly if the
closing force exceeds a certain value.
2.Pull the switch beyond the resistance point
and hold again within approx. 4 seconds.
The window closes without the pinch pro-
tection system.
Safety switch
With the safety switch, you can prevent the rear
windows from being opened or closed via the
switches in the rear passenger area, by chil-
dren, for example. The LED lights up when this
safety feature is activated.
Always press the safety switch when chil-
dren ride in the rear, otherwise uncon-
trolled closing of the windows could lead to
injuries.<
Glass sunroof*, electric
To prevent injuries, exercise care when
closing the glass sunroof and keep it in
your field of vision until it is closed.
Always take along the remote control when you
leave the vehicle, otherwise children could, for
example, operate the roof and injure them-
selves.<
Page 45 of 286

Controls
43Reference
At a glance
Driving tips
Communications
Navigation
Entertainment
Mobility
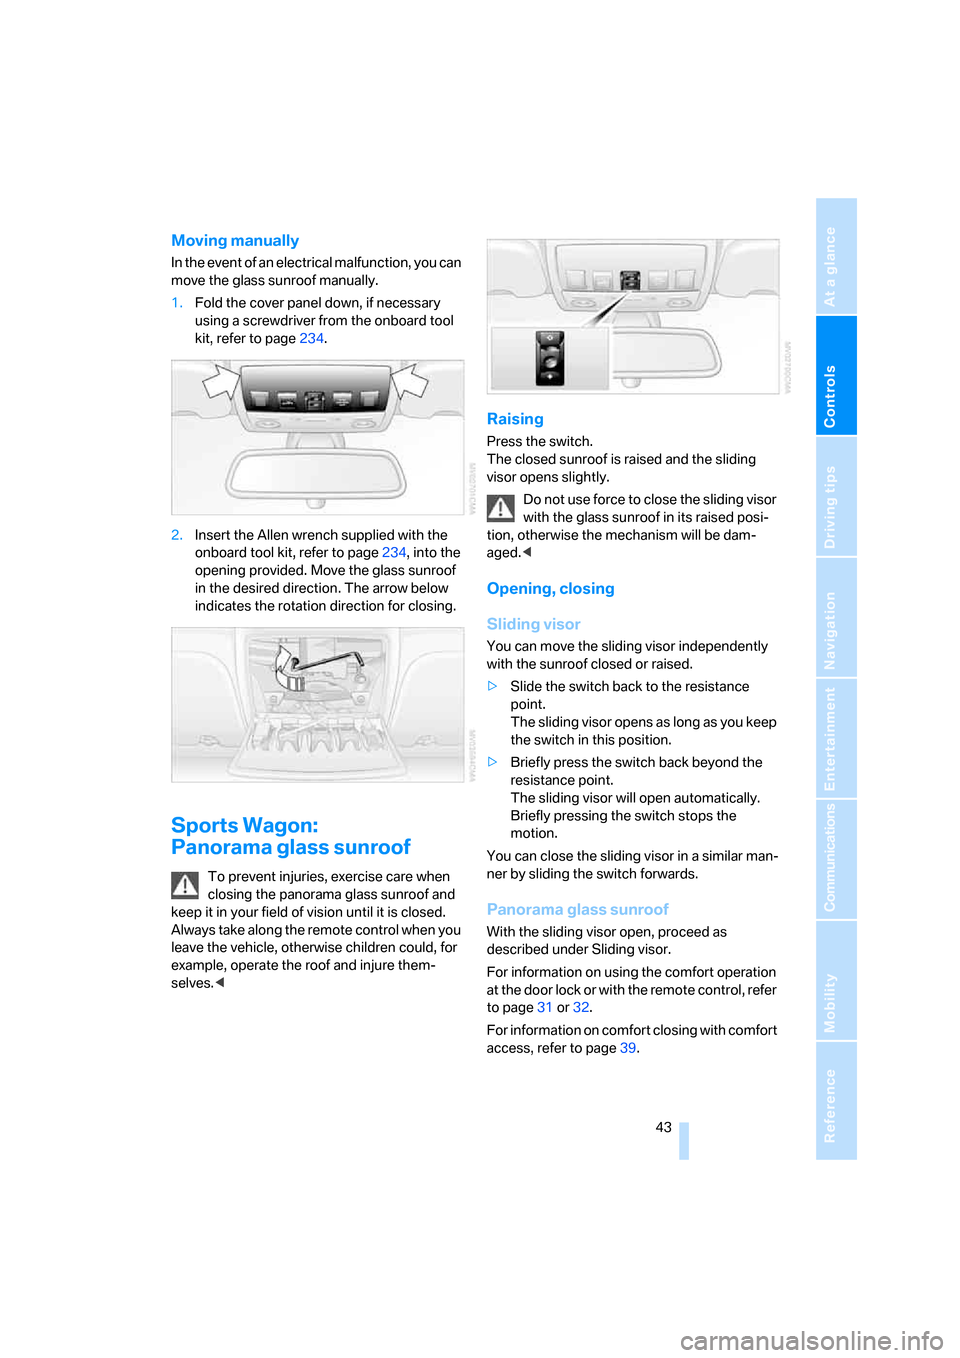
Moving manually
In the event of an electrical malfunction, you can
move the glass sunroof manually.
1.Fold the cover panel down, if necessary
using a screwdriver from the onboard tool
kit, refer to page234.
2.Insert the Allen wrench supplied with the
onboard tool kit, refer to page234, into the
opening provided. Move the glass sunroof
in the desired direction. The arrow below
indicates the rotation direction for closing.
Sports Wagon:
Panorama glass sunroof
To prevent injuries, exercise care when
closing the panorama glass sunroof and
keep it in your field of vision until it is closed.
Always take along the remote control when you
leave the vehicle, otherwise children could, for
example, operate the roof and injure them-
selves.<
Raising
Press the switch.
The closed sunroof is raised and the sliding
visor opens slightly.
Do not use force to close the sliding visor
with the glass sunroof in its raised posi-
tion, otherwise the mechanism will be dam-
aged.<
Opening, closing
Sliding visor
You can move the sliding visor independently
with the sunroof closed or raised.
>Slide the switch back to the resistance
point.
The sliding visor opens as long as you keep
the switch in this position.
>Briefly press the switch back beyond the
resistance point.
The sliding visor will open automatically.
Briefly pressing the switch stops the
motion.
You can close the sliding visor in a similar man-
ner by sliding the switch forwards.
Panorama glass sunroof
With the sliding visor open, proceed as
described under Sliding visor.
For information on using the comfort operation
at the door lock or with the remote control, refer
to page31 or32.
For information on comfort closing with comfort
access, refer to page39.
Page 47 of 286

Controls
45Reference
At a glance
Driving tips
Communications
Navigation
Entertainment
Mobility
Adjusting
Sitting safely
The ideal sitting position can make a vital con-
tribution to relaxed, fatigue-free driving. In the
interaction with the safety belts, the head
restraints and the airbags, the sitting position
plays an important role in an accident. To
ensure that the safety systems operate with
optimal efficiency, we strongly urge you to
observe the instructions contained in the fol-
lowing section.
For additional information on transporting chil-
dren safely, refer to page56.
Airbags
Always maintain an adequate distance
between yourself and the airbags. Always
hold the steering wheel by its rim with hands at
the 9 o'clock and 3 o'clock positions, to mini-
mize the risk of injuries to your hands and arms
in the event of airbag deployment.
No one and nothing is to come between the air-
bags and the seat occupant.
Do not use the cover of the front airbag on the
front passenger side as a storage area. Make
sure that the front passenger is sitting correctly
and does not rest feet or legs on the instrument
panel, otherwise leg injuries can occur if the
front airbags are triggered.
Make sure that occupants do not rest their head
on the side or head airbags, otherwise injuries
can occur if the airbags are triggered.<
Even if you adhere to all the instructions, inju-
ries resulting from contact with airbags cannot
be fully excluded, depending on the circum-
stances. The ignition and inflation noise may
provoke a mild hearing loss in extremely sensi-
tive individuals. This effect is usually only tem-
porary.
For airbag locations and additional information
on airbags, refer to page99.
Head restraints
A correctly adjusted head restraint reduces the
risk of spinal injury in the event of an accident.
Adjust the head restraint so that its center
is approx. at ear level. Otherwise there is
increased danger of injury in the event of an
accident.<
Head restraints, refer to page49.
Safety belts
Before every drive, make sure that safety belts
are being worn at all of the occupied seats. Air-
bags complement the safety belt as an addi-
tional safety device, but they do not represent a
substitute.
Your vehicle is provided with five seats, which
are all equipped with a safety belt.
Never allow more than one person to
wear a single safety belt. Never allow
infants or small children to ride in a passenger's
lap. Make sure that the belt lies low around the
hips in the lap area and does not press on the
abdomen. The safety belt may not lie across the
neck, rub on sharp edges, be routed over solid
or breakable objects or be pinched. Wear the
safety belt without twisting, snugly across the
lap and shoulders, as close to the body as pos-
sible. Otherwise the belt can slip over the hips
in the lap area in a frontal impact and injure the
abdomen. Avoid wearing clothing that prevents
the belt from fitting properly and pull the belt in
the upper body area periodically to readjust the
tension, in order to avoid a reduction in the
restraint of the safety belt.
Sports Wagon: if the center safety belt in the
rear is used, the larger backrest half must be
locked, refer to page125, otherwise the middle
safety belt has no restraining action.<
Safety belts, refer to page50.
Page 52 of 286

Adjusting
50
Removing
1.Pull the head restraint upward to the stop.
2.Press the button, arrow1, and pull the head
restraint all the way out.
Safety belts
To ensure that the safety systems con-
tinue to provide optimized protection,
please observe the adjustment instructions on
page45.<
Before every drive, make sure that safety belts
are being worn at all of the occupied seats. Air-
bags complement the safety belt as an addi-
tional safety device, but they do not represent a
substitute.
Fastening
Make sure you hear the latch plate engage in
the belt buckle.
Safety belt reminder for driver's seat
and passenger seat*
The indicator lamp lights up and a sig-
nal sounds. A message also appears on
the Control Display. Please check
whether the safety belt is correctly positioned.
The safety belt reminder is operative at speeds
above approx. 5 mph/8 km/h. It can also be acti-
vated if objects are placed on the passenger
seat.
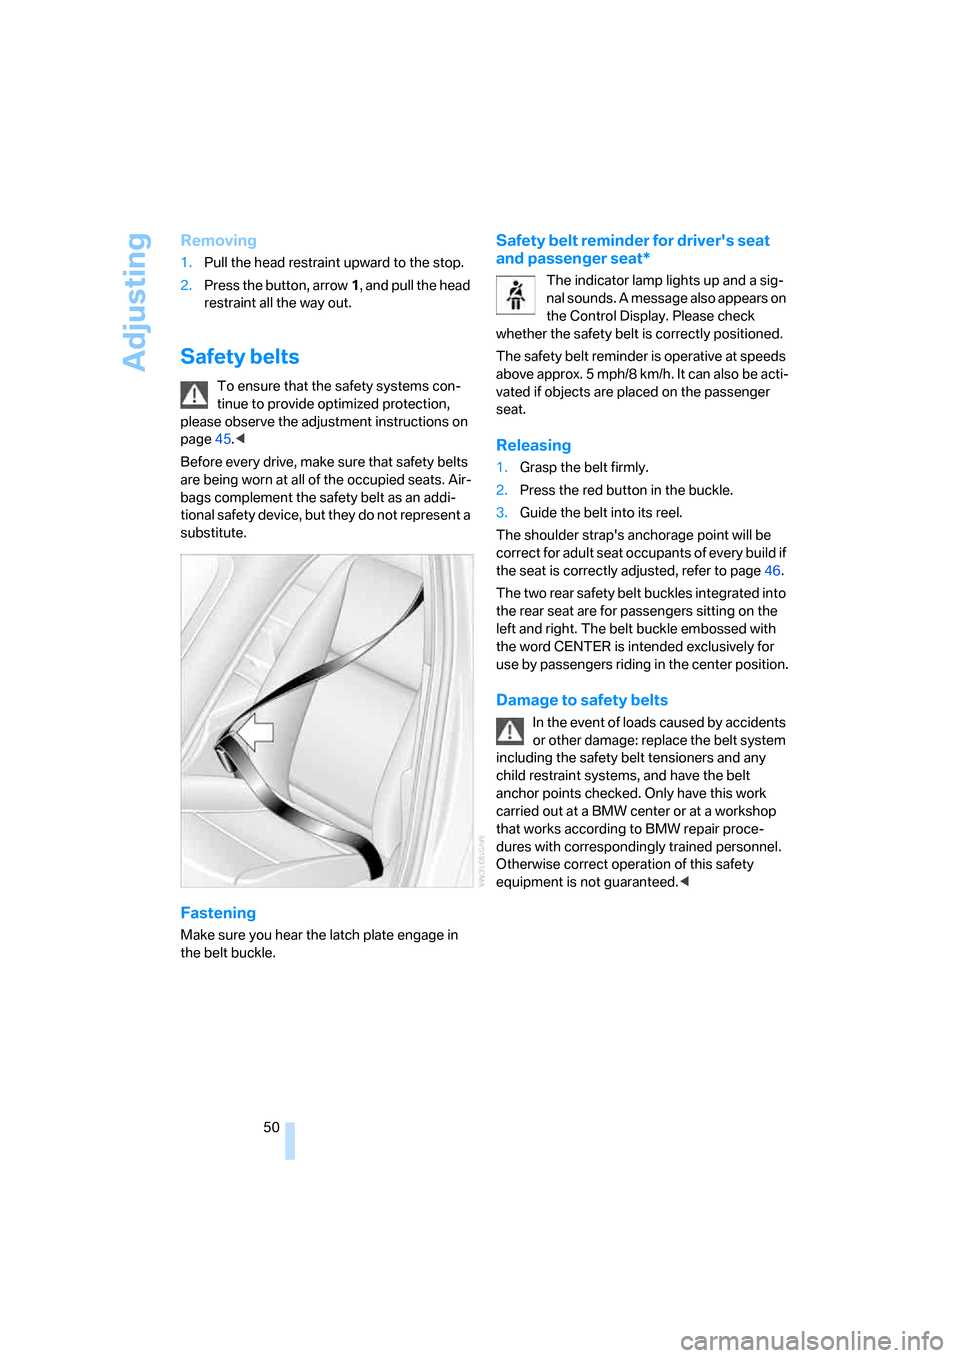
Releasing
1.Grasp the belt firmly.
2.Press the red button in the buckle.
3.Guide the belt into its reel.
The shoulder strap's anchorage point will be
correct for adult seat occupants of every build if
the seat is correctly adjusted, refer to page46.
The two rear safety belt buckles integrated into
the rear seat are for passengers sitting on the
left and right. The belt buckle embossed with
the word CENTER is intended exclusively for
use by passengers riding in the center position.
Damage to safety belts
In the event of loads caused by accidents
or other damage: replace the belt system
including the safety belt tensioners and any
child restraint systems, and have the belt
anchor points checked. Only have this work
carried out at a BMW center or at a workshop
that works according to BMW repair proce-
dures with correspondingly trained personnel.
Otherwise correct operation of this safety
equipment is not guaranteed.<
Page 58 of 286

Transporting children safely
56
Transporting children safely
The right place for children
Do not leave children unattended in the
vehicle, otherwise they could endanger
themselves and other persons, e.g. by opening
the doors.<
Children always in the rear
Accident research shows that the safest place
for children is on the rear seat.
Children younger than 13 years of age or
with a height under 5 ft/150 cm may only
be transported in the rear in child restraint sys-
tems which correspond to the age, weight and
height of the child. Otherwise there is an
increased danger of injury in an accident.<
Children 13 years of age or older must wear a
safety belt as soon as a suitable child restraint
system can no longer be used due to their age,
size and weight.
Exception for front passenger seat
Should it be necessary to use a child
restraint system on the front passenger
seat, the front and side airbags on the passen-
ger side must be deactivated. Otherwise, there
is an increased risk of injury for the child if the
airbags are triggered, even with a child restraint
system.<
For more information on automatic deactivation
of the front passenger airbags, refer to
page100.
Installing child restraint
systems
Observe the child restraint system manu-
facturer's instructions for selection,
installation and use of the child restraint sys-
tems. Otherwise the degree of protection may
be reduced.<
On front passenger seat
After mounting a child restraint system on
the front passenger seat, make sure that
the front and side airbags on the front passen-
ger side are deactivated, as otherwise there is
an increased risk of injury if the airbags are trig-
gered.<
Backrest width*
Before mounting a child restraint system
on the front passenger seat, the backrest
width adjustment must be open completely.
After mounting the child's seat, no memory
position may be called up and the active back-
rest width adjustment must be deactivated,
otherwise the stability of the child's seat on the
front passenger seat is limited.<
1.After unlocking the vehicle, sit on the front
passenger seat and close the door to call up
the memory position.
2.Completely open the backrest width adjust-
ment, refer to page46.
3.Deactivate active backrest width adjust-
ment, refer to page47.
4.Install child's seat.
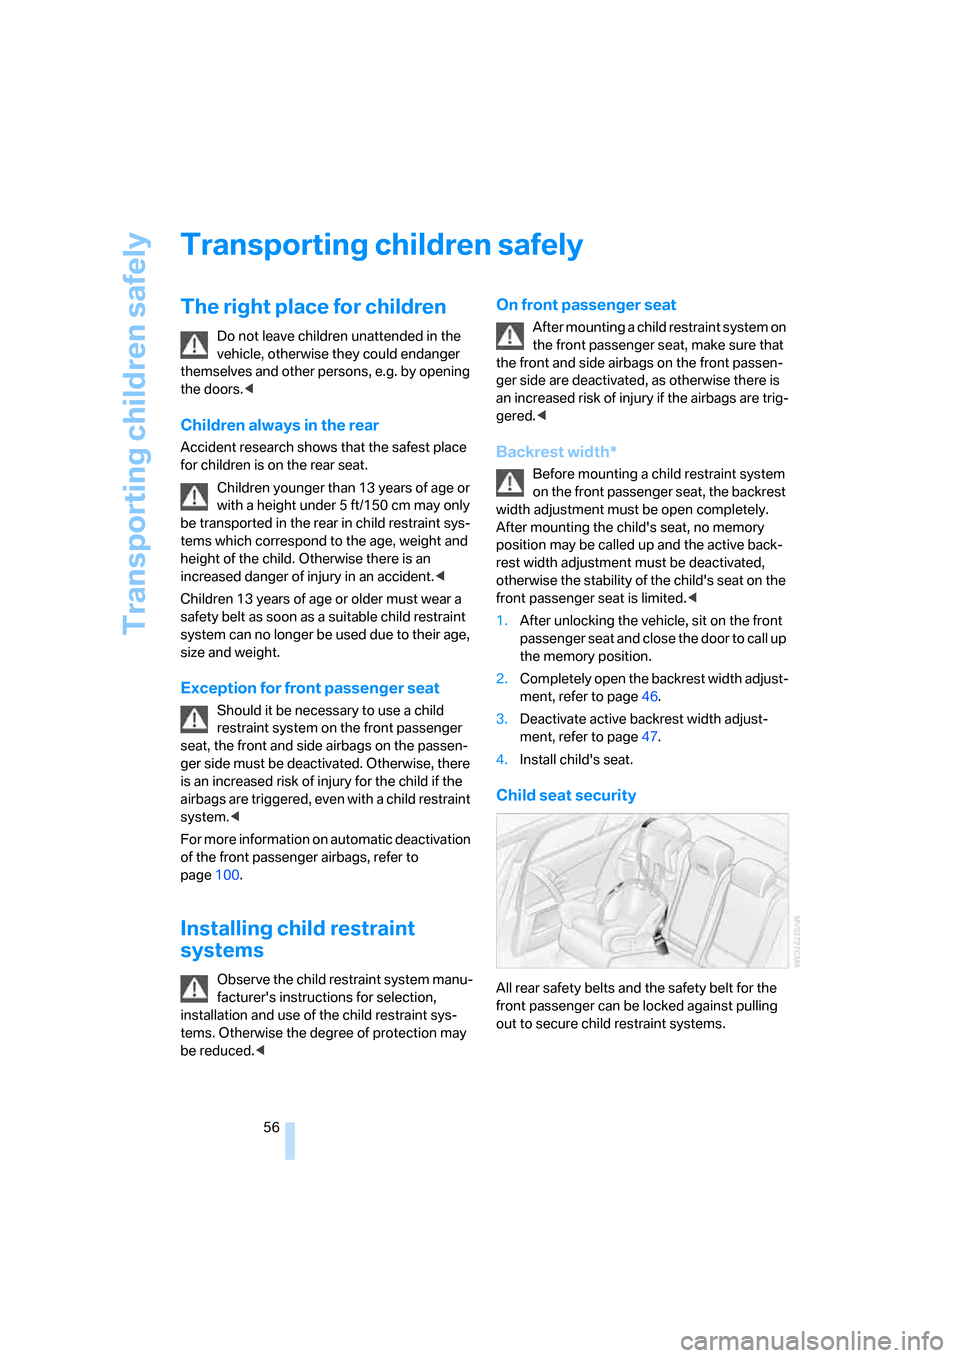
Child seat security
All rear safety belts and the safety belt for the
front passenger can be locked against pulling
out to secure child restraint systems.
Page 59 of 286

Controls
57Reference
At a glance
Driving tips
Communications
Navigation
Entertainment
Mobility
Locking safety belt
1.Secure the child restraint system with the
belt.
2.Pull out the belt webbing completely.
3.Allow the belt webbing to be pulled in and
pull taut against the child restraint system.
The safety belt is locked.
Unlocking safety belt
1.Open the belt buckle.
2.Remove the child restraint system.
3.Allow the belt webbing to be pulled in com-
pletely.
Child restraint system with tether strap
Only use the tether-strap mounting
points to secure child restraint systems,
otherwise the mounting points could be dam-
aged.<
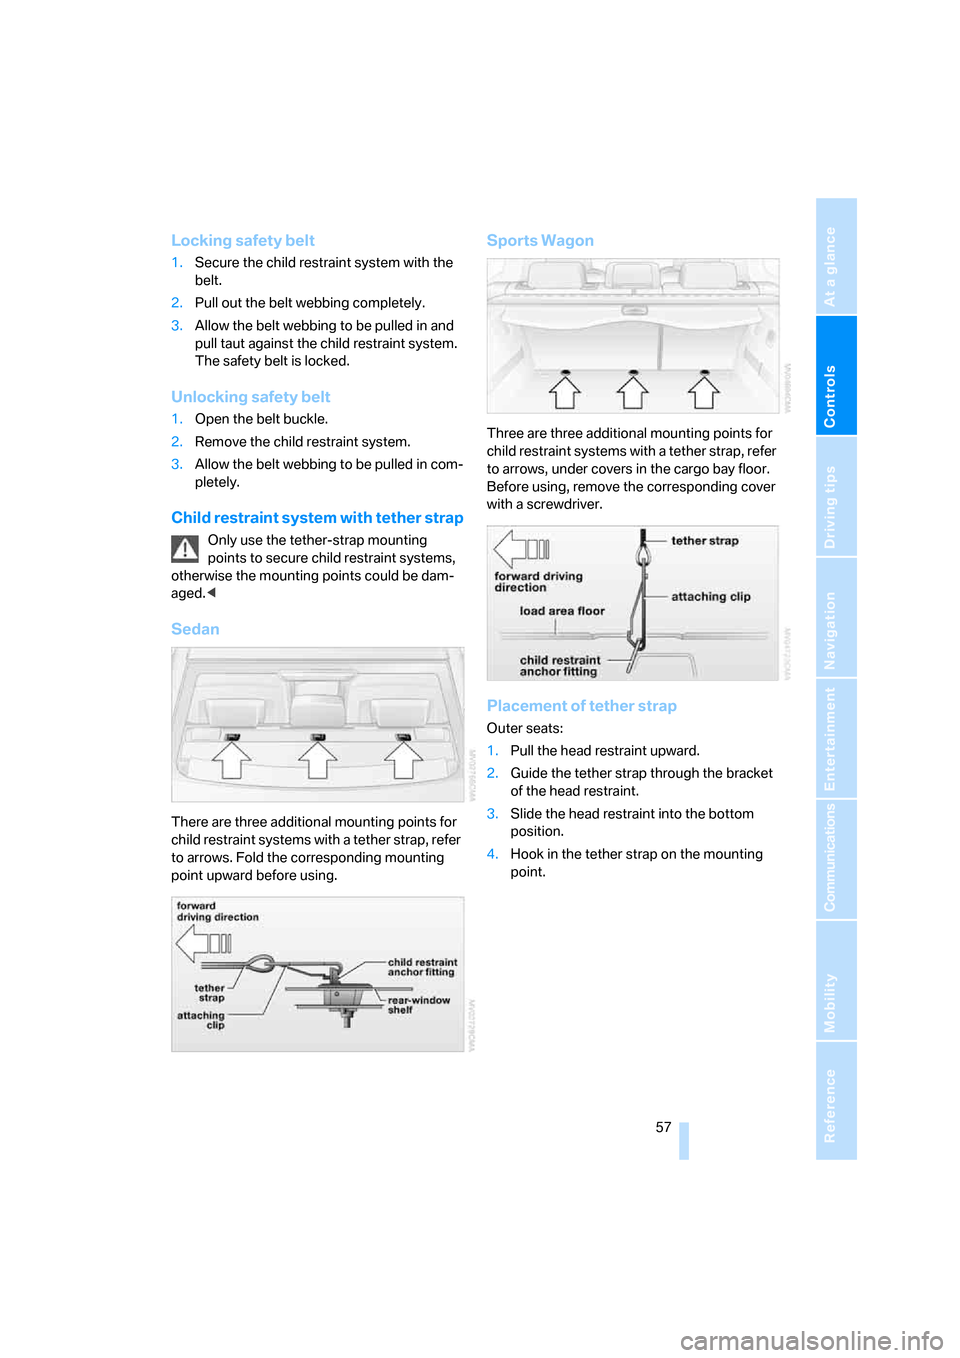
Sedan
There are three additional mounting points for
child restraint systems with a tether strap, refer
to arrows. Fold the corresponding mounting
point upward before using.
Sports Wagon
Three are three additional mounting points for
child restraint systems with a tether strap, refer
to arrows, under covers in the cargo bay floor.
Before using, remove the corresponding cover
with a screwdriver.
Placement of tether strap
Outer seats:
1.Pull the head restraint upward.
2.Guide the tether strap through the bracket
of the head restraint.
3.Slide the head restraint into the bottom
position.
4.Hook in the tether strap on the mounting
point.