2007 BMW 530I TOURING idrive
[x] Cancel search: idrivePage 25 of 286

At a glance
23Reference
Controls
Driving tips
Communications
Navigation
Entertainment
Mobility
Voice command system
The concept
The voice command system allows you to con-
trol operation of various vehicle systems with-
out ever removing your hands from the steering
wheel.
Individual menu items on the Control Display
can be spoken as commands. This frees you of
having to use the controller.
The voice command system transforms your
oral commands into control signals for the
selected systems and provides support in the
form of instructions or questions.
The voice command system uses a special
microphone located in the area of the interior
rearview mirror, refer to page14.
Precondition
Via iDrive, set the language that applies for the
voice command system in order to enable iden-
tification of the spoken commands. To set the
language of iDrive, refer to page87.
Symbols in Owner's Manual
Voice commands
Activating voice command system
1.Press the button.
This symbol on the Control Display and
an acoustic signal tell you that the voice
command system can respond to com-
mands.
2.Say the command.
The command is displayed on the Control
Display.
This symbol is shown on the Control Display
when you can input additional commands.
*
{...} Say the specified commands word for
word.
{{...}} Indicates responses of the voice
command system.
Page 26 of 286

Voice command system
24 If no other commands are possible, then oper-
ate the equipment via iDrive.
Terminating or canceling voice
command system
Press the button on the steering wheel
or
Commands
Having possible commands read aloud
You can have the system read aloud the possi-
ble commands related to the selected menu
item on the Control Display.
To have the system list the possible com-
mands:
For example, if you have selected "CD", the
system will read aloud the possible commands
for operating the CD player and the CD
changer
*.
Opening help
Using alternative commands
There are often a number of commands to run a
function, e.g.:
Running functions directly with short
commands
With short commands you can run certain func-
tions directly, regardless of which menu item is
selected, refer to page257.
Opening start menuExample: selecting a track
1.Switch on Entertainment sound output if
necessary.
2.Press the button on the steering wheel.
5.Press the button on the steering wheel. {Cancel}
{Options}
{Help}
{Radio on} or {Turn radio on}
{Main menu}
3.{Entertainment}
The system says:
{{Entertainment}}
4.{CD}
The system says:
{{CD on}}
6.Select track, e.g.:
{Track 1}
The system says:
{{Track 1}}
Page 32 of 286

Opening and closing
30 >Telephone, setting volume, refer to
pages198,204
>With programmable memory/direct selec-
tion buttons, selection of stored functions,
refer to page21
Central locking system
The concept
The central locking system is ready for opera-
tion whenever the driver's door is closed.
The system simultaneously engages and
releases the locks on the following:
>Doors
>Luggage compartment lid or tailgate and
rear window
>Fuel filler door
Operating from outside
>via the remote control
>via the door lock
>with comfort access
* via the door handles
At the same time, the anti-theft system is also
operated. It prevents the doors from being
unlocked using the lock buttons or door han-
dles. In addition, it the remote control is used,
the welcome lamps, the interior lamps and the
courtesy lamps
* are switched on or off. The
alarm system
is armed/disarmed at the same
time.
You can find more detailed information on the
alarm system
on page37.
Operating from inside
Via the button for central locking, refer to
page33. The fuel filler door is not locked.
In the event of a sufficiently severe accident, the
central locking system unlocks automatically. In
addition, the hazard warning flashers and inte-
rior lamps come on.
Opening and closing: from
outside
Using remote control
Persons or animals left unattended in a
parked vehicle can lock the doors from
the inside. Always take along the remote control
when leaving the vehicle so that the vehicle can
then be opened from the outside.<
Unlocking
Press the button.
The interior lamps, the courtesy lamps
* of the
doors and the welcome lamps are switched on.
You can set how the vehicle is unlocked. The
setting is stored for the remote control currently
in use.
iDrive, for explanation of principle, refer to
page16.
1.Press the button.
This opens the start menu.
2.Press the controller to open the menu.
3.Select "Settings" and press the controller.
4.Select "Vehicle / Tires" and press the con-
troller.
5.Change to upper field if necessary. Turn the
controller until "Door locks" is selected and
press the controller.
6.Select "Central locking" and press the con-
troller.
7.Select "Unlock button" and press the con-
troller.
Page 35 of 286

Controls
33Reference
At a glance
Driving tips
Communications
Navigation
Entertainment
Mobility
Opening and closing: from
inside
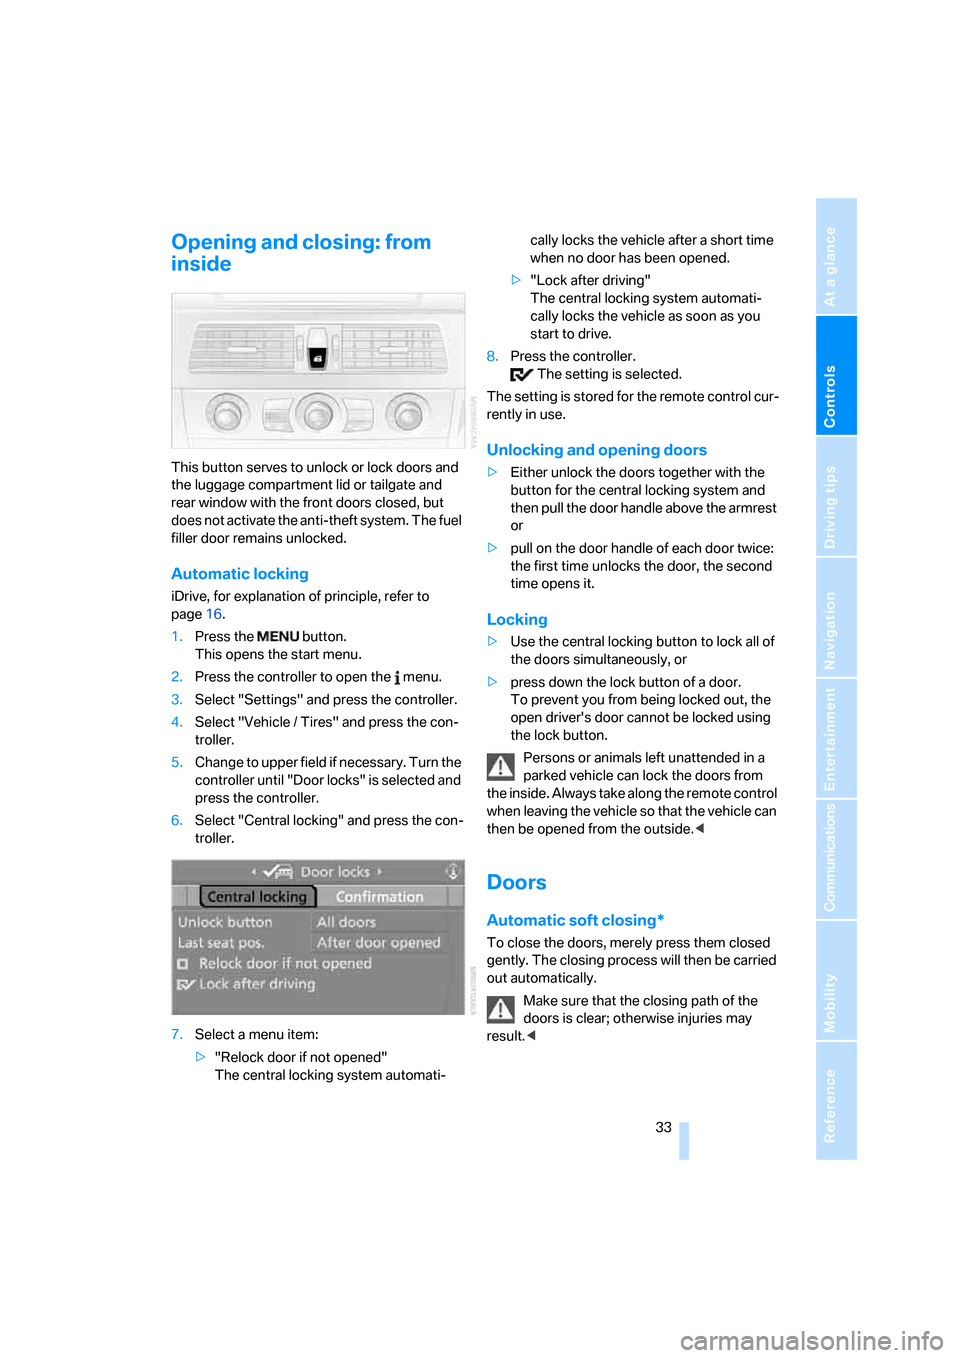
This button serves to unlock or lock doors and
the luggage compartment lid or tailgate and
rear window with the front doors closed, but
does not activate the anti-theft system. The fuel
filler door remains unlocked.
Automatic locking
iDrive, for explanation of principle, refer to
page16.
1.Press the button.
This opens the start menu.
2.Press the controller to open the menu.
3.Select "Settings" and press the controller.
4.Select "Vehicle / Tires" and press the con-
troller.
5.Change to upper field if necessary. Turn the
controller until "Door locks" is selected and
press the controller.
6.Select "Central locking" and press the con-
troller.
7.Select a menu item:
>"Relock door if not opened"
The central locking system automati-cally locks the vehicle after a short time
when no door has been opened.
>"Lock after driving"
The central locking system automati-
cally locks the vehicle as soon as you
start to drive.
8.Press the controller.
The setting is selected.
The setting is stored for the remote control cur-
rently in use.
Unlocking and opening doors
>Either unlock the doors together with the
button for the central locking system and
then pull the door handle above the armrest
or
>pull on the door handle of each door twice:
the first time unlocks the door, the second
time opens it.
Locking
>Use the central locking button to lock all of
the doors simultaneously, or
>press down the lock button of a door.
To prevent you from being locked out, the
open driver's door cannot be locked using
the lock button.
Persons or animals left unattended in a
parked vehicle can lock the doors from
the inside. Always take along the remote control
when leaving the vehicle so that the vehicle can
then be opened from the outside.<
Doors
Automatic soft closing*
To close the doors, merely press them closed
gently. The closing process will then be carried
out automatically.
Make sure that the closing path of the
doors is clear; otherwise injuries may
result.<
Page 38 of 286

Opening and closing
36 When opening the tailgate, the roll-up
cover is raised. Before closing the tail-
gate, press down the roll-up cover until it
engages.<
Opening manually
In case of an electrical malfunction:
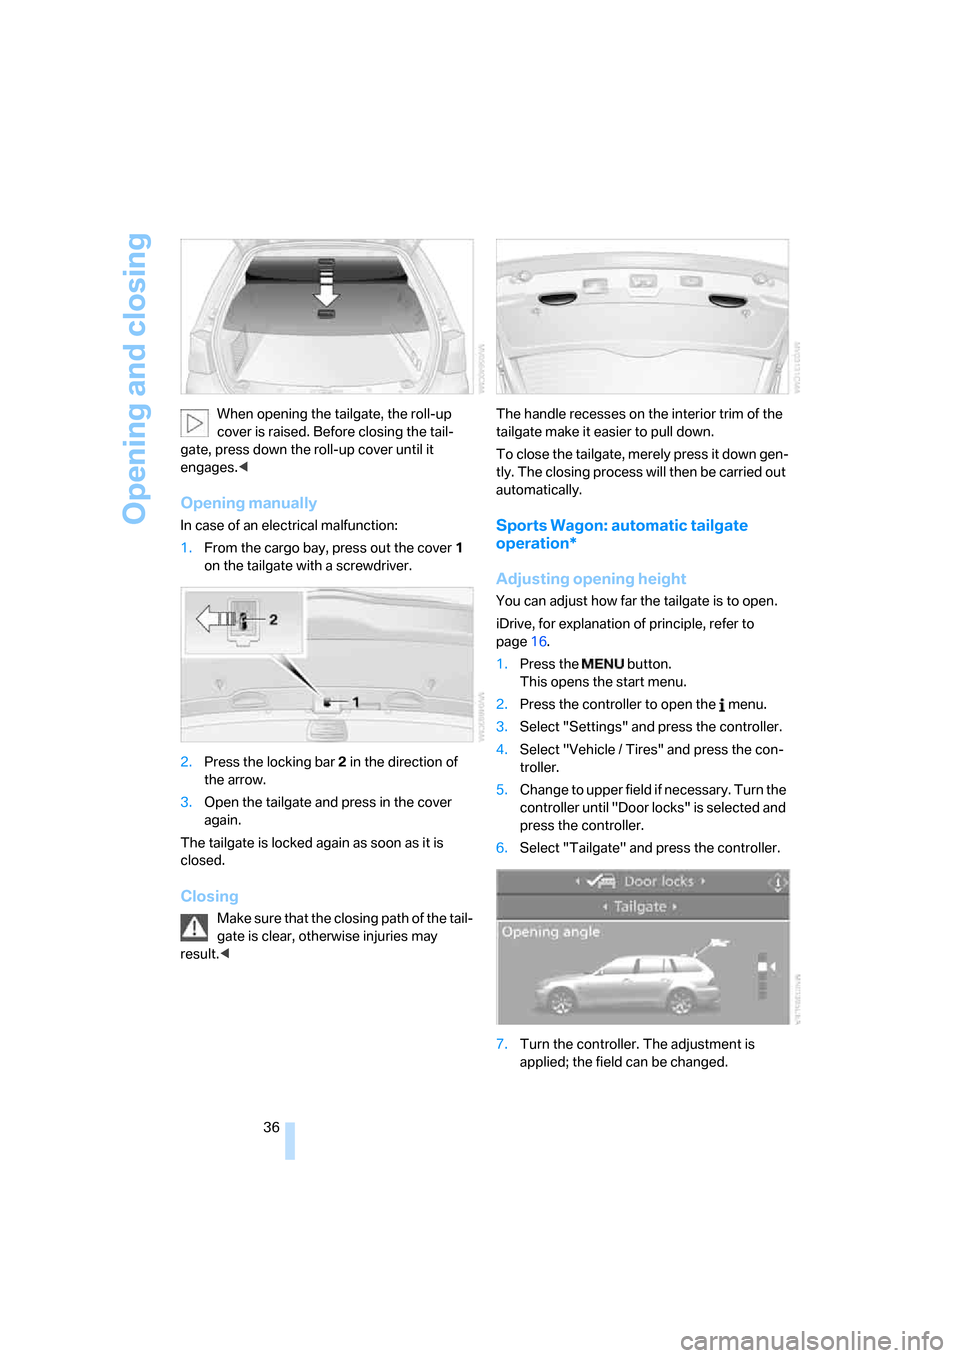
1.From the cargo bay, press out the cover1
on the tailgate with a screwdriver.
2.Press the locking bar2 in the direction of
the arrow.
3.Open the tailgate and press in the cover
again.
The tailgate is locked again as soon as it is
closed.
Closing
Make sure that the closing path of the tail-
gate is clear, otherwise injuries may
result.
To close the tailgate, merely press it down gen-
tly. The closing process will then be carried out
automatically.
Sports Wagon: automatic tailgate
operation*
Adjusting opening height
You can adjust how far the tailgate is to open.
iDrive, for explanation of principle, refer to
page16.
1.Press the button.
This opens the start menu.
2.Press the controller to open the menu.
3.Select "Settings" and press the controller.
4.Select "Vehicle / Tires" and press the con-
troller.
5.Change to upper field if necessary. Turn the
controller until "Door locks" is selected and
press the controller.
6.Select "Tailgate" and press the controller.
7.Turn the controller. The adjustment is
applied; the field can be changed.
Page 50 of 286

Adjusting
48 The adjustment of the lumbar support is not
stored in the memory.
Storing
1.Switch on radio readiness or ignition, refer
to page60.
2.Set the desired seat, exterior mirror and
steering wheel positions.
3.Press the button:
The LED in the button lights up.
4.Press the desired memory button1 or2:
The LED goes out.
Requesting
Do not request a position from the mem-
ory while the vehicle is moving. There is a
risk of accident from unexpected movement of
the seat or steering wheel.<
Comfort mode
1.Open the driver's door after unlocking or
switch on radio readiness.
2.Briefly press the desired memory button1
or2.
The system cancels the adjustment procedure
when you briefly press one of the seat adjust-
ment switches or one of the memory buttons.
Safety feature
1.Close the driver's door and switch the igni-
tion on or off.
2.Press the desired memory button1 or2
and maintain pressure until the adjustment
process has been completed.
If the button was pressed inadvertently:
press the button again; the LED goes out.
Requesting with remote control
The last positions of the driver's seat, the exte-
rior rearview mirrors, and steering wheel are
stored for the remote control currently in use.
You can choose when the position is requested:
>Request when unlocking vehicle
>Request when opening driver's doorWhen using this feature, always make
sure that the footwell behind the driver's
seat is empty and unobstructed. Failure to do
so could cause injury to persons or damage to
objects behind the seat as a result of a rearward
movement of the seat.<
The system cancels the adjustment procedure
when you briefly press one of the seat adjust-
ment switches or one of the memory buttons.
iDrive, for explanation of principle, refer to
page16.
1.Open the start menu.
2.Press the controller to open the menu.
3.Select "Settings" and press the controller.
4.Select "Vehicle / Tires" and press the con-
troller.
5.Change to upper field if necessary. Turn the
controller until "Door locks" is selected and
press the controller.
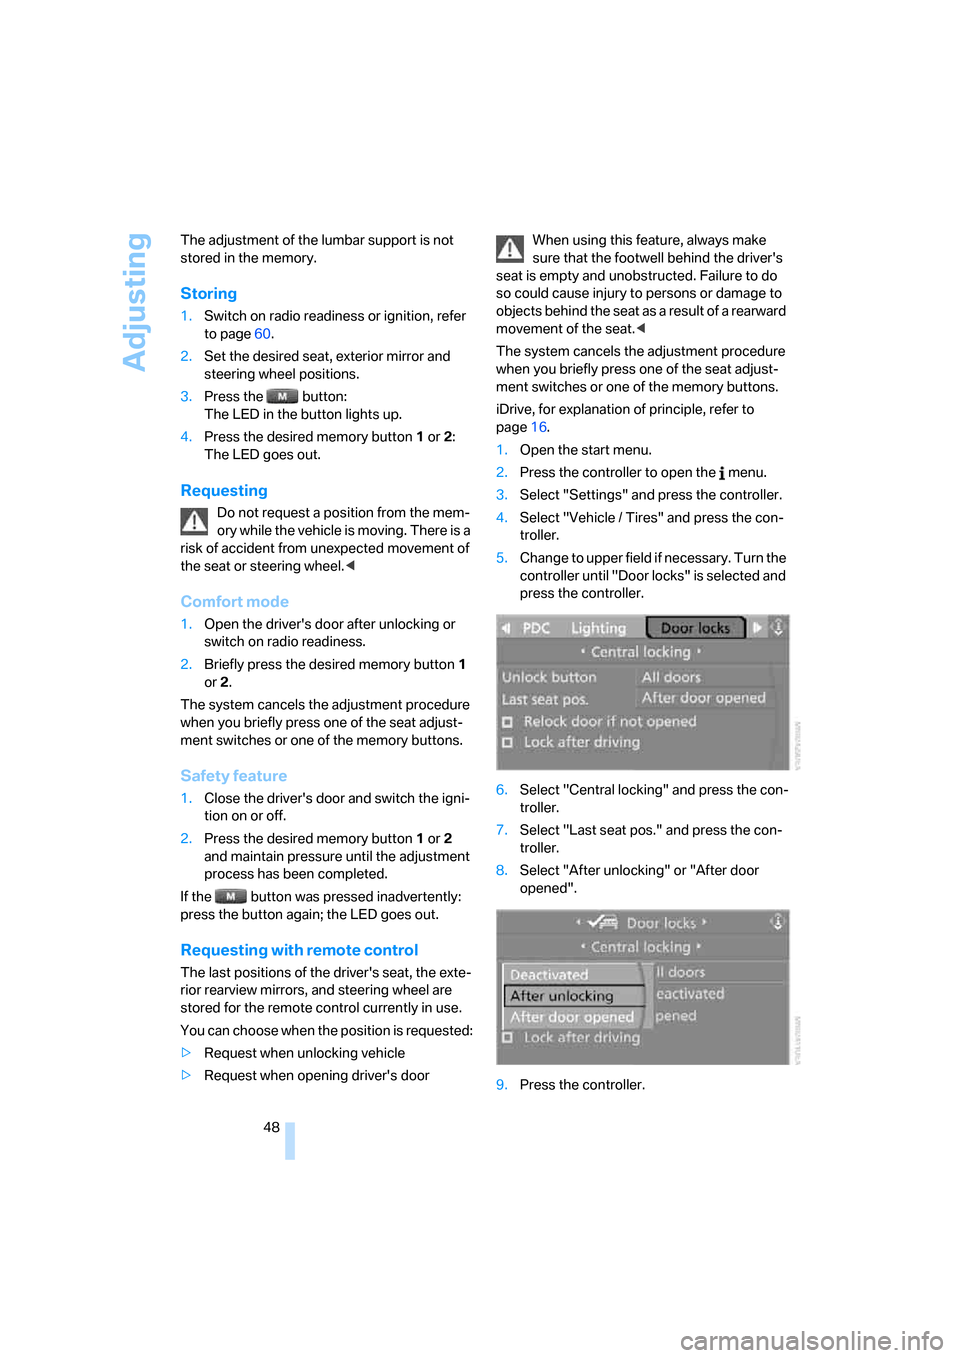
6.Select "Central locking" and press the con-
troller.
7.Select "Last seat pos." and press the con-
troller.
8.Select "After unlocking" or "After door
opened".
9.Press the controller.
Page 53 of 286

Controls
51Reference
At a glance
Driving tips
Communications
Navigation
Entertainment
Mobility
Seat heating*
Front
The appearance and arrangement of the but-
tons may vary depending on the equipment.
1Seat heating, three LEDs
2Seat heating, one LED
3Seat heating with active seat ventilation
*
Press the respective button once per tempera-
ture level. The temperature level is shown on
the Control Display with buttons2 and3. The
maximum temperature is supplied when three
LEDs are lit.
To switch off: press button longer.
Temperature distribution without
active seat ventilation
The heat output can be distributed variously in
the seat cushion and the backrest.
iDrive, for explanation of principle, refer to
page16.
1.Open the start menu.
2.Move the controller to the left to open "Cli-
mate".
3.Select "Seat heater distribution" and press
the controller.4.Move the controller to the left or right to
select "Driver" or "Passenger".
5.Turn the controller to adjust the distribu-
tion.
The setting is applied.
Temperature distribution with active
seat ventilation
The heat output can be distributed variously in
the seat cushion and the backrest.
iDrive, for explanation of principle, refer to
page16.
1.Open the start menu.
2.Move the controller to the left to open "Cli-
mate".
3.Select "Driver's seat climate" or "Passen-
ger's seat climate" and press the controller.
Turn the controller to adjust the distribution.
The setting is applied.
Page 56 of 286

Adjusting
54
Steering wheel
Adjusting
Do not adjust the steering wheel while the
vehicle is moving. There is a risk of acci-
dent as the result of unexpected movement.<
The steering wheel can be adjusted in four
directions.
Storing steering wheel positions, refer to Seat,
mirror and steering wheel memory on page47.
Easy entry/exit*
To facilitate entry and exit, the steering wheel
temporarily moves into the uppermost position.
Steering wheel heating*
Press the button.
When the steering wheel heater is operating,
the LED in the button lights up.
Programmable buttons* on steering
wheel
You can program the buttons individually.
The setting is stored for the remote control cur-
rently in use.
iDrive, for explanation of principle, refer to
page16.
1.Press the button.
This opens the start menu.
2.Press the controller to open the menu.
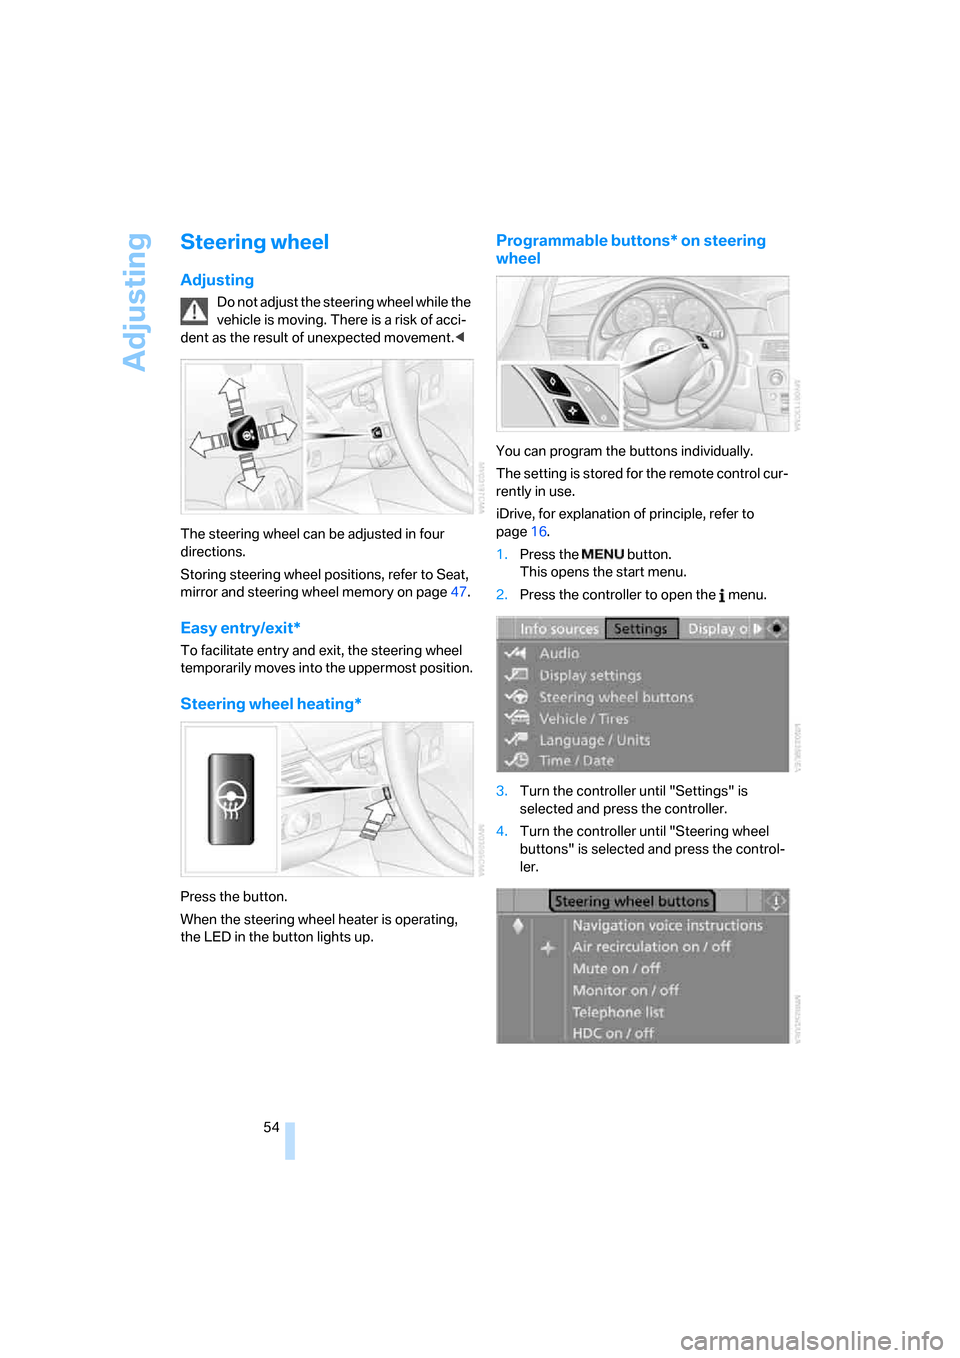
3.Turn the controller until "Settings" is
selected and press the controller.
4.Turn the controller until "Steering wheel
buttons" is selected and press the control-
ler.