2007 BMW 525XI remote start
[x] Cancel search: remote startPage 55 of 273

Controls
53Reference
At a glance
Driving tips
Communications
Navigation
Entertainment
Mobility
Interior and exterior mirrors,
automatic dimming feature*
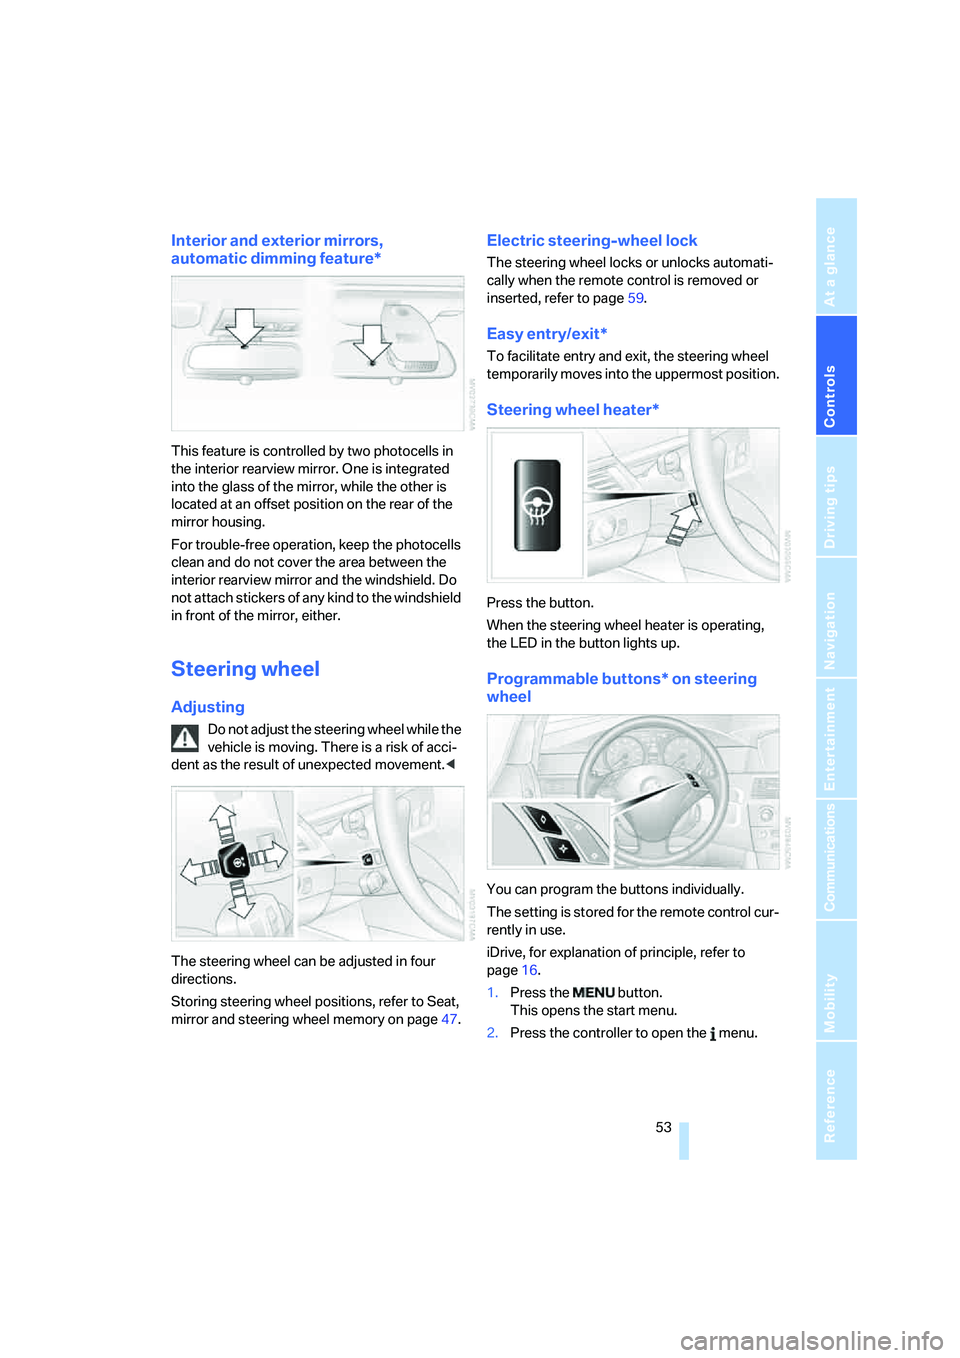
This feature is controlled by two photocells in
the interior rearview mirror. One is integrated
into the glass of the mirror, while the other is
located at an offset position on the rear of the
mirror housing.
For trouble-free operation, keep the photocells
clean and do not cover the area between the
interior rearview mirror and the windshield. Do
not attach stickers of any kind to the windshield
in front of the mirror, either.
Steering wheel
Adjusting
Do not adjust the steering wheel while the
vehicle is moving. There is a risk of acci-
dent as the result of unexpected movement.<
The steering wheel can be adjusted in four
directions.
Storing steering wheel positions, refer to Seat,
mirror and steering wheel memory on page47.
Electric steering-wheel lock
The steering wheel locks or unlocks automati-
cally when the remote control is removed or
inserted, refer to page59.
Easy entry/exit*
To facilitate entry and exit, the steering wheel
temporarily moves into the uppermost position.
Steering wheel heater*
Press the button.
When the steering wheel heater is operating,
the LED in the button lights up.
Programmable buttons* on steering
wheel
You can program the buttons individually.
The setting is stored for the remote control cur-
rently in use.
iDrive, for explanation of principle, refer to
page16.
1.Press the button.
This opens the start menu.
2.Press the controller to open the menu.
Page 61 of 273

Controls
59Reference
At a glance
Driving tips
Communications
Navigation
Entertainment
Mobility
Driving
Ignition lock
Insert the remote control as far as possible into
the ignition lock.
>Radio readiness switches on.
Some electronic systems/consumers are
ready for operation.
>The electric steering-wheel lock audibly
unlocks.
Before moving the vehicle, insert the
remote control into the ignition lock;
otherwise, the electric steering-wheel lock will
not be unlocked and the vehicle cannot be
steered.<
Removing remote control from ignition
lock
Briefly press in the remote control; it is pushed
out somewhat.
>The ignition is switched off if it was still
switched on.
>The electric steering-wheel lock audibly
locks.
Automatic transmission
The remote control can only be removed when
selector lever position P is selected: interlock.
Start/Stop button
Briefly pressing the Start/Stop button several
times switches the radio readiness or the igni-
tion on and off.
Briefly pressing the Start/Stop button
with the brake or clutch pedal depressed
starts the engine.<
Radio readiness
Some electronic systems/consumers are ready
for operation. The time and outside tempera-
ture are displayed in the instrument cluster.
Radio readiness is automatically switched off:
>when the remote control is removed from
the ignition lock
>with comfort access
* by touching the sen-
sitive surface on the door handle, refer to
Locking on page39
Ignition on
All electronic systems/consumers are ready for
operation. The odometer and the trip odometer
are displayed in the instrument cluster, refer to
page75.
Please switch off the ignition and the
electronic systems/consumers which are
not required when the engine is not running to
save the battery.<
Page 63 of 273

Controls
61Reference
At a glance
Driving tips
Communications
Navigation
Entertainment
Mobility
Avoid frequent starting in quick succes-
sion or repeated starting attempts in
which the engine does not start. Otherwise, the
fuel is not burned or inadequately burned and
there is a danger of overheating and damaging
the catalytic converter.<
Switching off engine
Do not remove the remote control from
the ignition lock while the vehicle is roll-
ing, otherwise the steering-wheel lock would
engage while steering.
When leaving the vehicle, always take the
remote control with you.
When parking on a downhill incline, apply the
handbrake, otherwise the vehicle could roll
away.<
Manual transmission
1.Briefly press the Start/Stop button with the
vehicle stopped.
2.Shift into first gear or reverse.
3.Apply the handbrake.
SMG Sequential Manual
Transmission*
1.Apply the handbrake.
2.Engage a driving position.
3.Briefly press the Start/Stop button.
If N is engaged when switching off the
engine, this will be pointed out to you opti-
cally and acoustically.
Automatic transmission*
1.Select selector lever position P with the
vehicle stopped.
2.Briefly press the Start/Stop button.
Handbrake
The handbrake is primarily intended to prevent
the vehicle from rolling while parked; it brakes
the rear wheels.
Indicator lamp
The indicator lamp lights up, and a sig-
nal also sounds when starting off. The
handbrake is applied.
Indicator lamp for Canadian models.
Engaging
The lever locks in position automatically.
Releasing
Pull slightly upwards, press the button and
lower the lever.
If exceptional circumstances should
make it necessary to apply the handbrake
while the vehicle is in motion, do not pull it too
strongly. In doing so, continuously press the
button of the handbrake lever. Otherwise
excessive pressure can lead to the rear wheels
locking up and loss of traction – fishtailing – at
the rear axle.<
To prevent corrosion and one-sided brak-
ing action, occasionally apply the hand-
brake lightly when the vehicle is slowly coming
to a stop if the traffic conditions are suitable.
The brake lamps do not light up when the hand-
brake is applied.<
Page 68 of 273

Driving
66
Signaling briefly
Press lever to resistance point and hold for as
long as you wish to signal.
Triple turn signal activation
Press the lever to the resistance point; the turn
signal flashes three times.
You can activate or deactivate this function.
iDrive, for explanation of principle, refer to
page16.
1.Open the start menu.
2.Press the controller to open the menu.
3.Select "Settings" and press the controller.
4.Select "Vehicle / Tires" and press the con-
troller.
5.Change to upper field if necessary. Turn the
controller until "Lighting" is selected and
press the controller.
6.Select "Triple turn signal" and press the
controller.
Triple turn signaling is activated.
The setting is stored for the remote control cur-
rently in use.
Wiper system
1Switching on wipers
2Switching off wipers or brief wipe
3Activating/deactivating rain sensor
4Cleaning windshield, headlamps and
BMW Night Vision camera
*
5Adjusting rain sensor sensitivity level
Switching on wipers
Pull the lever upward, arrow1.
The lever automatically returns to its initial posi-
tion when released.
Normal wiper speed
Press once.
The system reverts to operation in the intermit-
tent mode when the vehicle is stationary.
Fast wiper speed
Press twice or press beyond the resistance
point.
The system reverts to normal speed when the
vehicle is stationary.
Rain sensor
The wiper operation is controlled automatically
as a function of the rain intensity. The rain sen-
sor is located on the windshield, directly in front
of the interior rearview mirror.
Page 80 of 273

Everything under control
78 1.Open the start menu.
2.Open "Navigation".
Without navigation system
*:
Open "Car Data".
3.Select "Car Data" and press the controller.
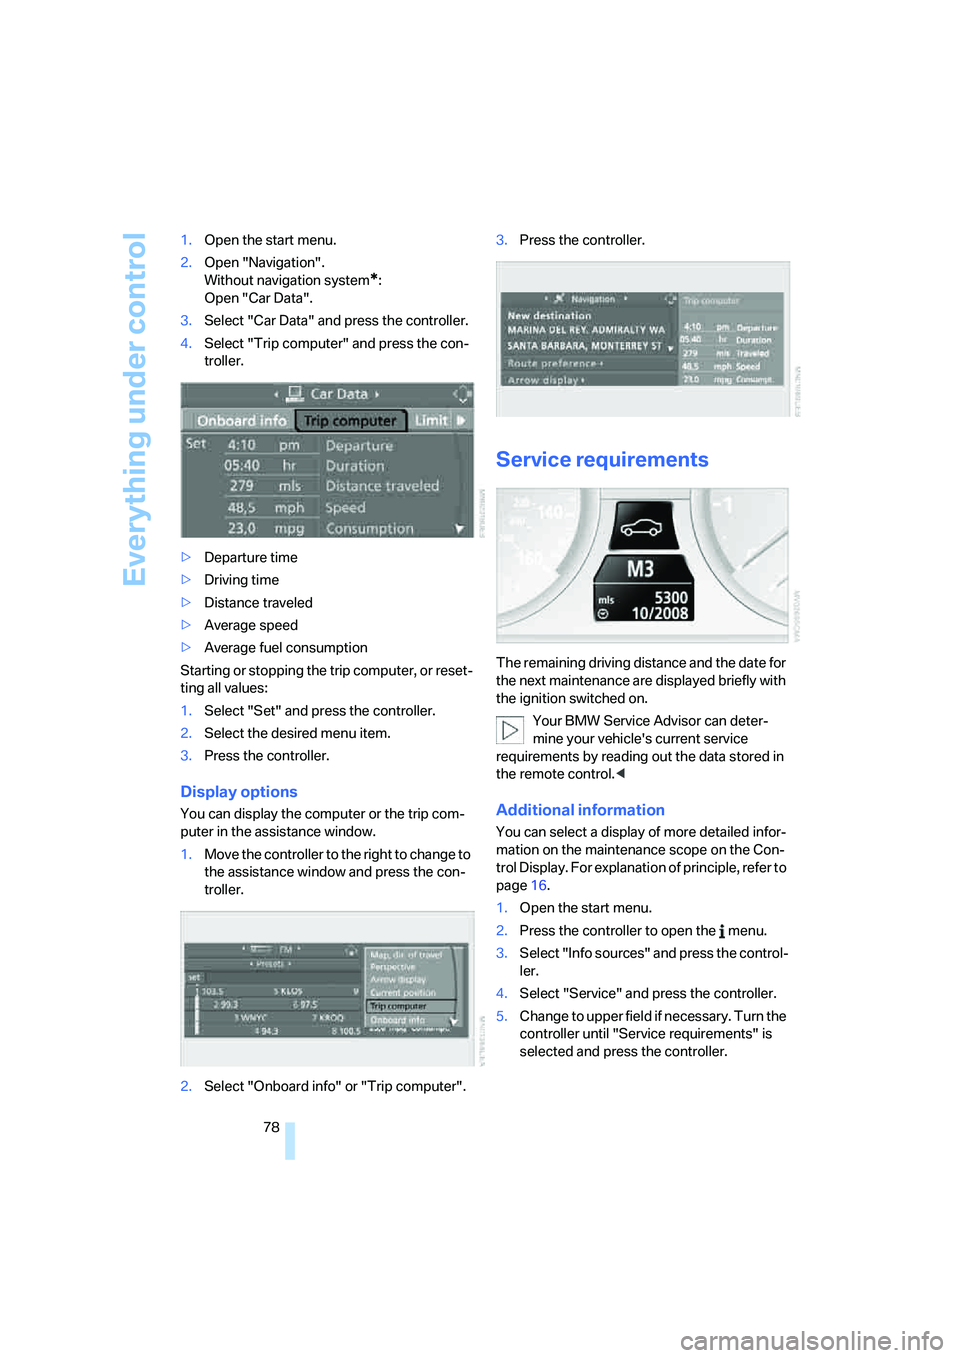
4.Select "Trip computer" and press the con-
troller.
>Departure time
>Driving time
>Distance traveled
>Average speed
>Average fuel consumption
Starting or stopping the trip computer, or reset-
ting all values:
1.Select "Set" and press the controller.
2.Select the desired menu item.
3.Press the controller.
Display options
You can display the computer or the trip com-
puter in the assistance window.
1.Move the controller to the right to change to
the assistance window and press the con-
troller.
2.Select "Onboard info" or "Trip computer".3.Press the controller.
Service requirements
The remaining driving distance and the date for
the next maintenance are displayed briefly with
the ignition switched on.
Your BMW Service Advisor can deter-
mine your vehicle's current service
requirements by reading out the data stored in
the remote control.<
Additional information
You can select a display of more detailed infor-
mation on the maintenance scope on the Con-
trol Display. For explanation of principle, refer to
page16.
1.Open the start menu.
2.Press the controller to open the menu.
3.Select "Info sources" and press the control-
ler.
4.Select "Service" and press the controller.
5.Change to upper field if necessary. Turn the
controller until "Service requirements" is
selected and press the controller.
Page 86 of 273

Everything under control
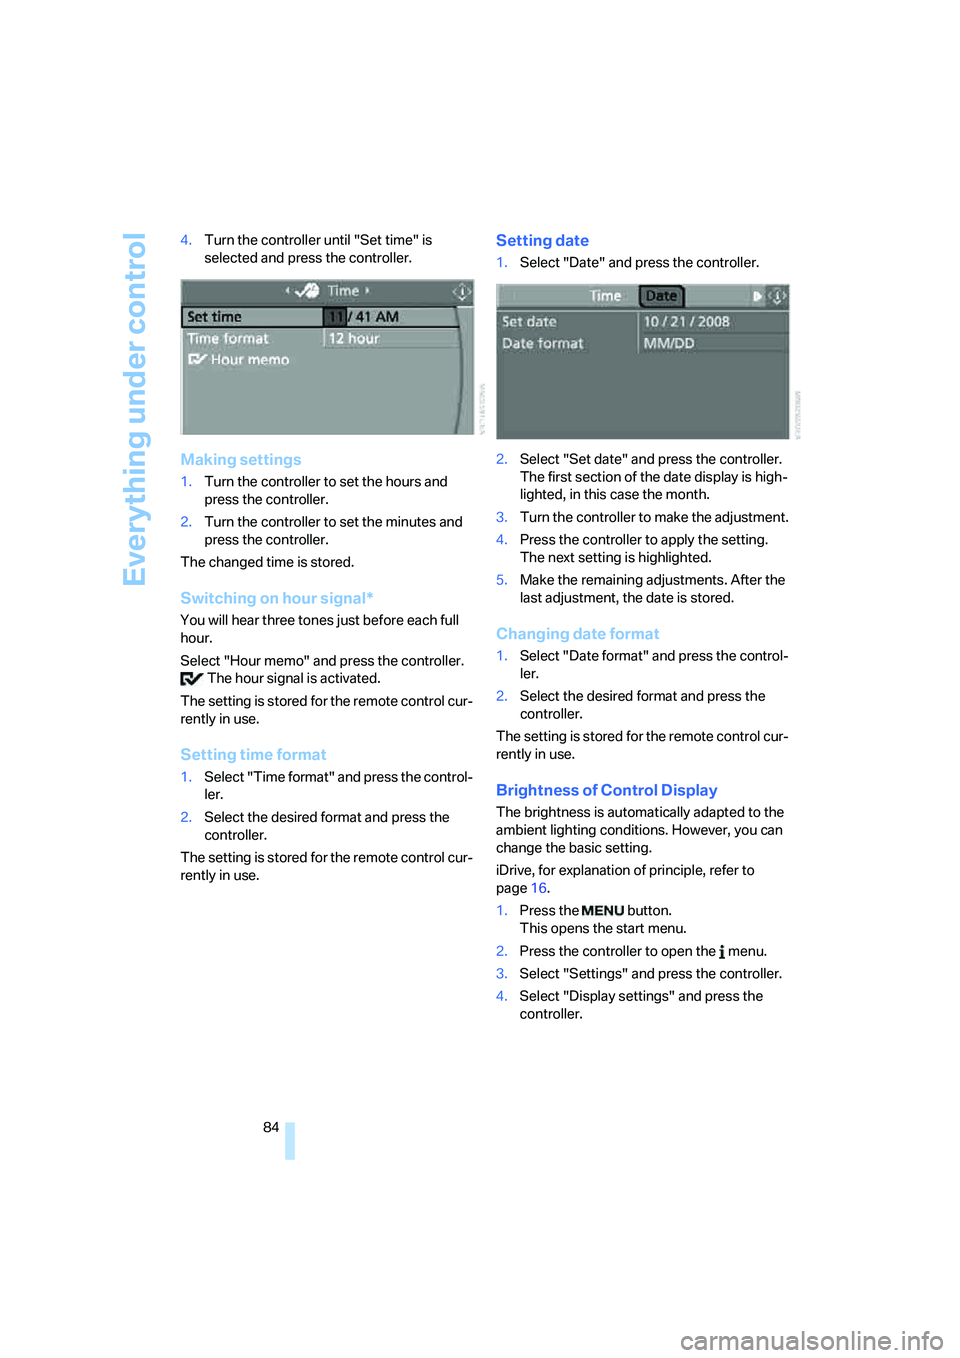
84 4.Turn the controller until "Set time" is
selected and press the controller.
Making settings
1.Turn the controller to set the hours and
press the controller.
2.Turn the controller to set the minutes and
press the controller.
The changed time is stored.
Switching on hour signal*
You will hear three tones just before each full
hour.
Select "Hour memo" and press the controller.
The hour signal is activated.
The setting is stored for the remote control cur-
rently in use.
Setting time format
1.Select "Time format" and press the control-
ler.
2.Select the desired format and press the
controller.
The setting is stored for the remote control cur-
rently in use.
Setting date
1.Select "Date" and press the controller.
2.Select "Set date" and press the controller.
The first section of the date display is high-
lighted, in this case the month.
3.Turn the controller to make the adjustment.
4.Press the controller to apply the setting.
The next setting is highlighted.
5.Make the remaining adjustments. After the
last adjustment, the date is stored.
Changing date format
1.Select "Date format" and press the control-
ler.
2.Select the desired format and press the
controller.
The setting is stored for the remote control cur-
rently in use.
Brightness of Control Display
The brightness is automatically adapted to the
ambient lighting conditions. However, you can
change the basic setting.
iDrive, for explanation of principle, refer to
page16.
1.Press the button.
This opens the start menu.
2.Press the controller to open the menu.
3.Select "Settings" and press the controller.
4.Select "Display settings" and press the
controller.
Page 87 of 273

Controls
85Reference
At a glance
Driving tips
Communications
Navigation
Entertainment
Mobility
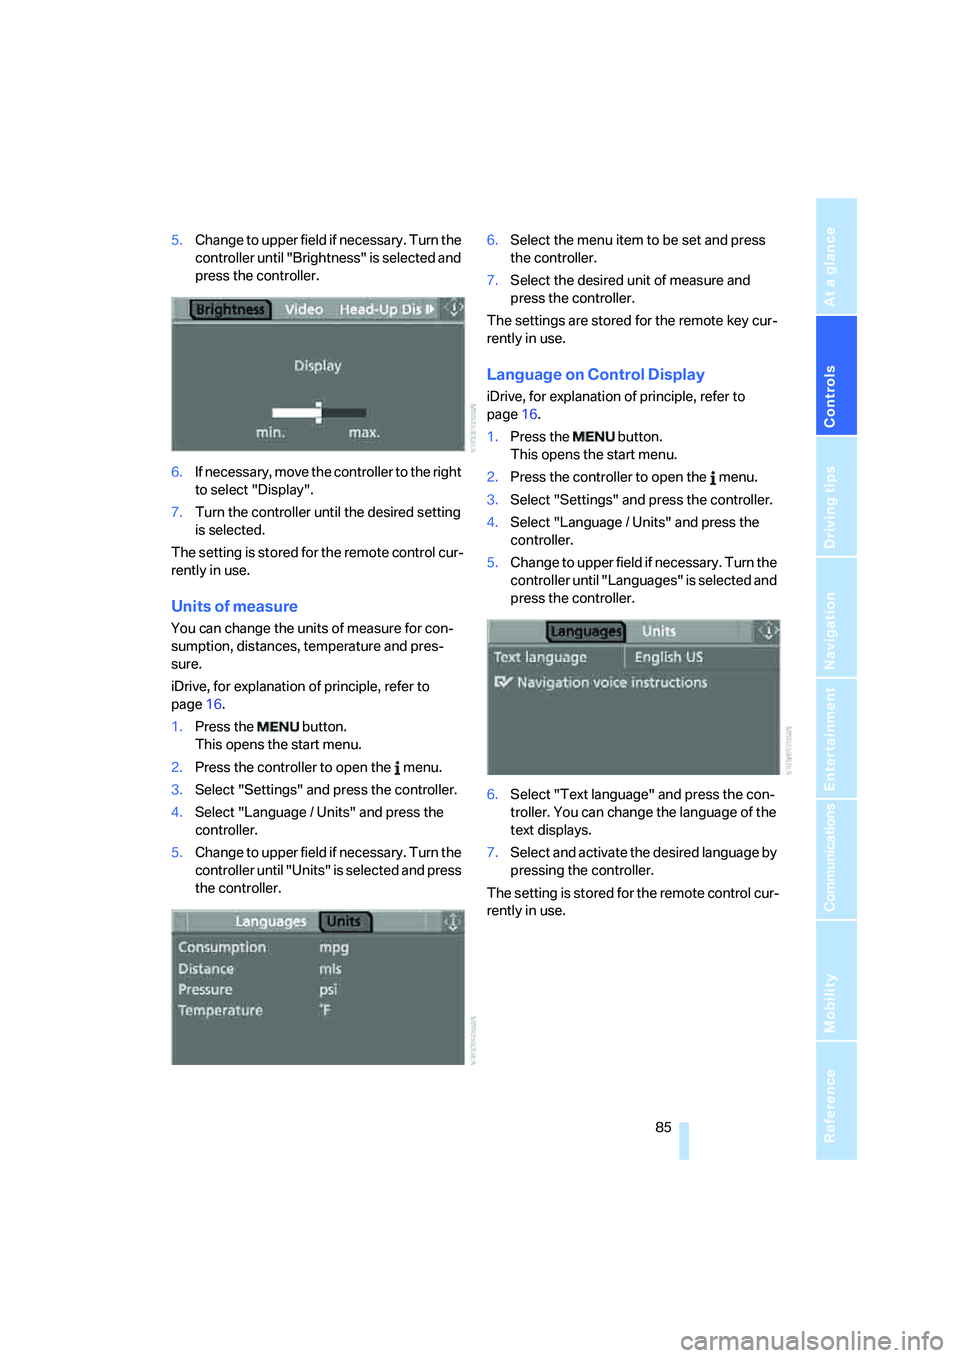
5.Change to upper field if necessary. Turn the
controller until "Brightness" is selected and
press the controller.
6.If necessary, move the controller to the right
to select "Display".
7.Turn the controller until the desired setting
is selected.
The setting is stored for the remote control cur-
rently in use.
Units of measure
You can change the units of measure for con-
sumption, distances, temperature and pres-
sure.
iDrive, for explanation of principle, refer to
page16.
1.Press the button.
This opens the start menu.
2.Press the controller to open the menu.
3.Select "Settings" and press the controller.
4.Select "Language / Units" and press the
controller.
5.Change to upper field if necessary. Turn the
controller until "Units" is selected and press
the controller.6.Select the menu item to be set and press
the controller.
7.Select the desired unit of measure and
press the controller.
The settings are stored for the remote key cur-
rently in use.
Language on Control Display
iDrive, for explanation of principle, refer to
page16.
1.Press the button.
This opens the start menu.
2.Press the controller to open the menu.
3.Select "Settings" and press the controller.
4.Select "Language / Units" and press the
controller.
5.Change to upper field if necessary. Turn the
controller until "Languages" is selected and
press the controller.
6.Select "Text language" and press the con-
troller. You can change the language of the
text displays.
7.Select and activate the desired language by
pressing the controller.
The setting is stored for the remote control cur-
rently in use.
Page 88 of 273

Technology for comfort, convenience and safety
86
Technology for comfort, convenience and
safety
PDC Park Distance Control*
The concept
The PDC assists you when you are parking.
Acoustic signals and an optical display
* alert
you to the approach of an object from behind
your vehicle. To measure the distance, there
are four ultrasonic sensors in each bumper.
The range of these sensors is approx. 7 ft/2 m.
However, an acoustic warning first sounds for
the sensors at the front and at the two rear cor-
ners at approx. 24 in/60 cm, and for the center
rear sensors at approx. 5 ft/1.50 m.
PDC is a parking aid that can indicate
objects when they are approached
slowly, as is usually the case when parking.
Avoid approaching an object at high speed, oth-
erwise the physical circumstances would mean
that the system warning was too late.<
Automatic activation
The system starts to operate automatically
approx. 1 second after you select reverse gear
or move the selector lever into position R with
the engine running or the ignition switched on.
Wait this short period before driving.
Manual activation
Press button, the LED lights up.
Manual deactivation
Press the button again; the LED goes out.
After driving approx. 165 ft/50 m or at over
approx. 20 mph/30 km/h, the system is
switched off and the LED goes out. You can
reactivate the system manually as needed.
Signal tones
When nearing an object, the position is corre-
spondingly indicated by an interval tone. Thus,
an object detected to the left rear of the vehicle
will be indicated by a signal tone from the left
rear speaker, etc. As the distance between
vehicle and object decreases, the intervals
between the tones become shorter. If the dis-
tance to the nearest object falls to below
roughly 1 ft/30 cm, then a continuous tone
sounds.
An intermittent tone is interrupted after approx.
3seconds:
>if you remain in front of an object that was
only detected by one of the corner sensors
>if you drive parallel to a wall
Malfunction
The LED in the button flashes and a message
appears on the Control Display. PDC is mal-
functioning. Have the system checked.
To prevent this problem, keep the sensors
clean and free of ice or snow in order to ensure
that they will continue to operate effectively. Do
not spray the sensors with high-pressure clean-
ers for long periods and maintain a distance of
at least 4 in/10 cm to them.
PDC with visual warning*
You can also have the system show distances
to objects on the Control Display. Objects that
are farther away are already shown there before
a signal tone sounds. The setting is stored for
the remote control currently in use.