2007 BMW 525I radio controls
[x] Cancel search: radio controlsPage 163 of 273
Navigation
Entertainment
Driving tips
161Reference
At a glance
Controls
Communications
Mobility
You have the following choices:
>"FM" and "AM": radio reception
>"WB": Weather Band station
>"SAT": satellite radio
>"CD": CD player or CD changer
>"AUX": external audio device
>"Set": depending on the audio source,
other adjustments can be made, e.g. with
the radio: update station with strongest
reception, store station, tone control, sam-
ple stations.
From another menu, you can change
directly to the screen last displayed,
refer to Comfort opening of menu items on
page18.<
From radio readiness, the selected audio
source is stored for the remote control currently
in use.
Switching on/off
To switch the Entertainment sound output on
and off:
Press knob1 next to the CD player.
This symbol on the Control Display indi-
cates that sound output is switched off.
For a single drive, the sound output is available
for approx. 20 minutes with the ignition
switched off.
Switch on the sound output again for this pur-
pose.
Adjusting volume
Turn knob1 next to the CD player until the
desired volume is set.
You can also adjust the volume with buttons on
the steering wheel, refer to page11.
From radio readiness, the setting is stored for
the remote control currently in use.
Tone control
You can alter various tone settings, e. g. treble
and bass, or the speed-dependent volume
increase.
The tone settings are set for all audio sources at
once.
From radio readiness, the settings are stored
for the remote control currently in use.
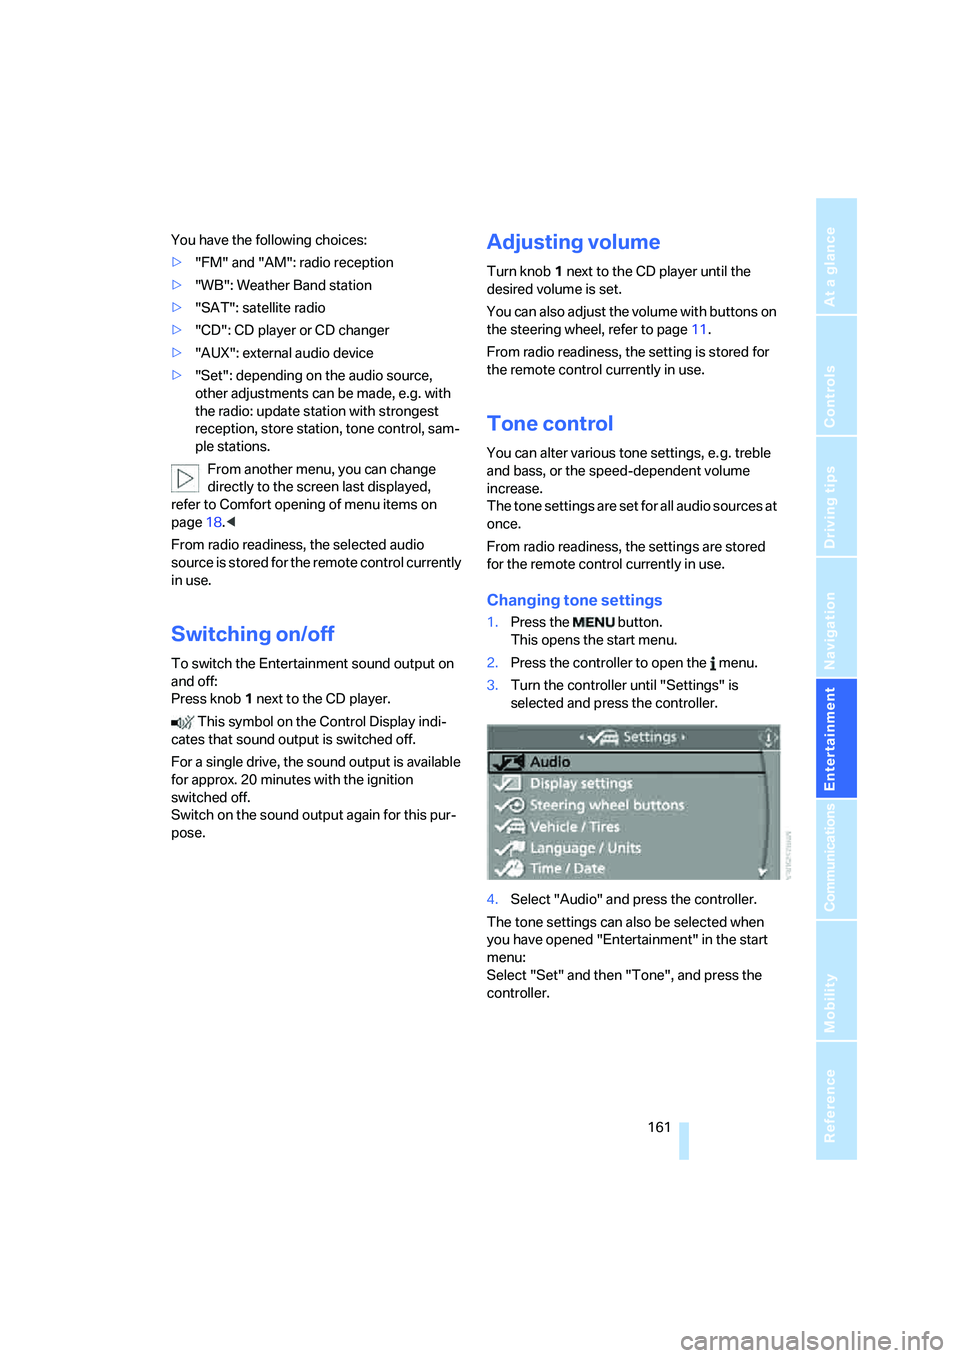
Changing tone settings
1.Press the button.
This opens the start menu.
2.Press the controller to open the menu.
3.Turn the controller until "Settings" is
selected and press the controller.
4.Select "Audio" and press the controller.
The tone settings can also be selected when
you have opened "Entertainment" in the start
menu:
Select "Set" and then "Tone", and press the
controller.
Page 167 of 273
Navigation
Entertainment
Driving tips
165Reference
At a glance
Controls
Communications
Mobility
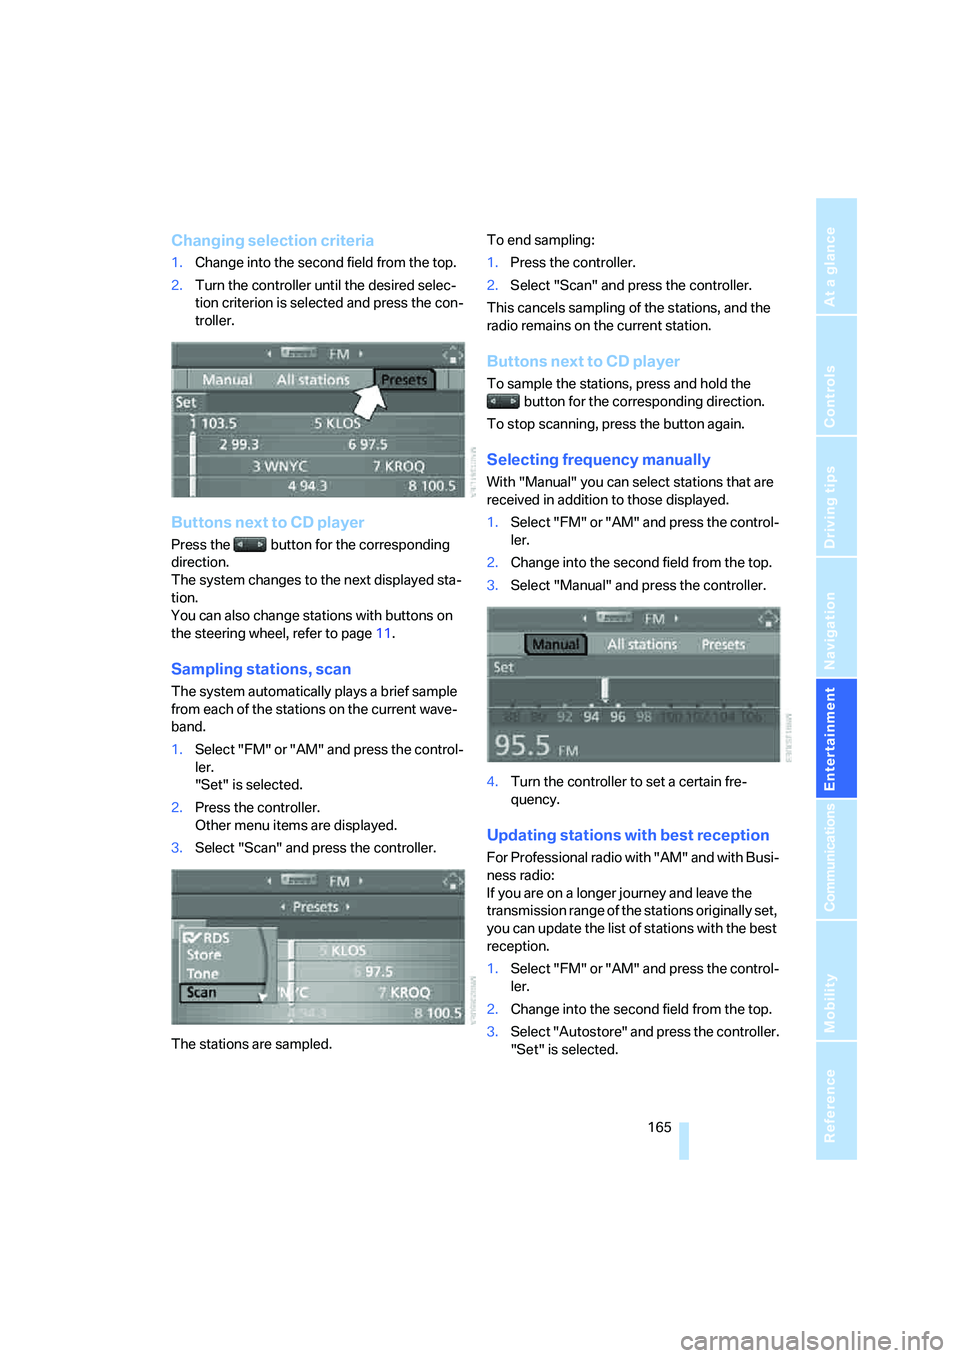
Changing selection criteria
1.Change into the second field from the top.
2.Turn the controller until the desired selec-
tion criterion is selected and press the con-
troller.
Buttons next to CD player
Press the button for the corresponding
direction.
The system changes to the next displayed sta-
tion.
You can also change stations with buttons on
the steering wheel, refer to page11.
Sampling stations, scan
The system automatically plays a brief sample
from each of the stations on the current wave-
band.
1.Select "FM" or "AM" and press the control-
ler.
"Set" is selected.
2.Press the controller.
Other menu items are displayed.
3.Select "Scan" and press the controller.
The stations are sampled.To end sampling:
1.Press the controller.
2.Select "Scan" and press the controller.
This cancels sampling of the stations, and the
radio remains on the current station.
Buttons next to CD player
To sample the stations, press and hold the
button for the corresponding direction.
To stop scanning, press the button again.
Selecting frequency manually
With "Manual" you can select stations that are
received in addition to those displayed.
1.Select "FM" or "AM" and press the control-
ler.
2.Change into the second field from the top.
3.Select "Manual" and press the controller.
4.Turn the controller to set a certain fre-
quency.
Updating stations with best reception
For Professional radio with "AM" and with Busi-
ness radio:
If you are on a longer journey and leave the
transmission range of the stations originally set,
you can update the list of stations with the best
reception.
1.Select "FM" or "AM" and press the control-
ler.
2.Change into the second field from the top.
3.Select "Autostore" and press the controller.
"Set" is selected.
Page 169 of 273
Navigation
Entertainment
Driving tips
167Reference
At a glance
Controls
Communications
Mobility
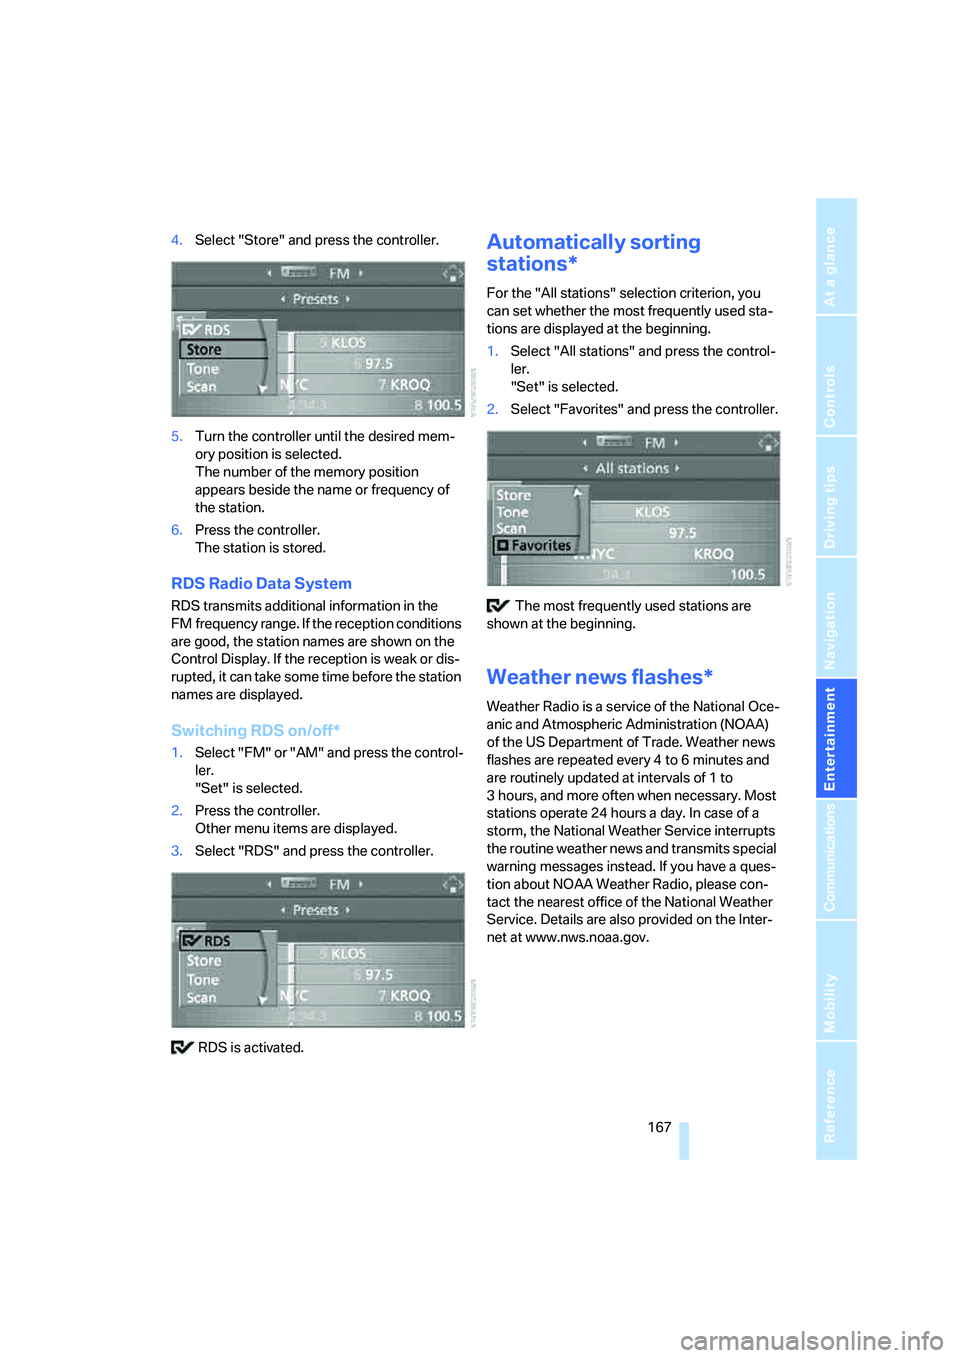
4.Select "Store" and press the controller.
5.Turn the controller until the desired mem-
ory position is selected.
The number of the memory position
appears beside the name or frequency of
the station.
6.Press the controller.
The station is stored.
RDS Radio Data System
RDS transmits additional information in the
FM frequency range. If the reception conditions
are good, the station names are shown on the
Control Display. If the reception is weak or dis-
rupted, it can take some time before the station
names are displayed.
Switching RDS on/off*
1.Select "FM" or "AM" and press the control-
ler.
"Set" is selected.
2.Press the controller.
Other menu items are displayed.
3.Select "RDS" and press the controller.
RDS is activated.
Automatically sorting
stations*
For the "All stations" selection criterion, you
can set whether the most frequently used sta-
tions are displayed at the beginning.
1.Select "All stations" and press the control-
ler.
"Set" is selected.
2.Select "Favorites" and press the controller.
The most frequently used stations are
shown at the beginning.
Weather news flashes*
Weather Radio is a service of the National Oce-
anic and Atmospheric Administration (NOAA)
of the US Department of Trade. Weather news
flashes are repeated every 4 to 6 minutes and
are routinely updated at intervals of 1 to
3 hours, and more often when necessary. Most
stations operate 24 hours a day. In case of a
storm, the National Weather Service interrupts
the routine weather news and transmits special
warning messages instead. If you have a ques-
tion about NOAA Weather Radio, please con-
tact the nearest office of the National Weather
Service. Details are also provided on the Inter-
net at www.nws.noaa.gov.
Page 171 of 273
Navigation
Entertainment
Driving tips
169Reference
At a glance
Controls
Communications
Mobility
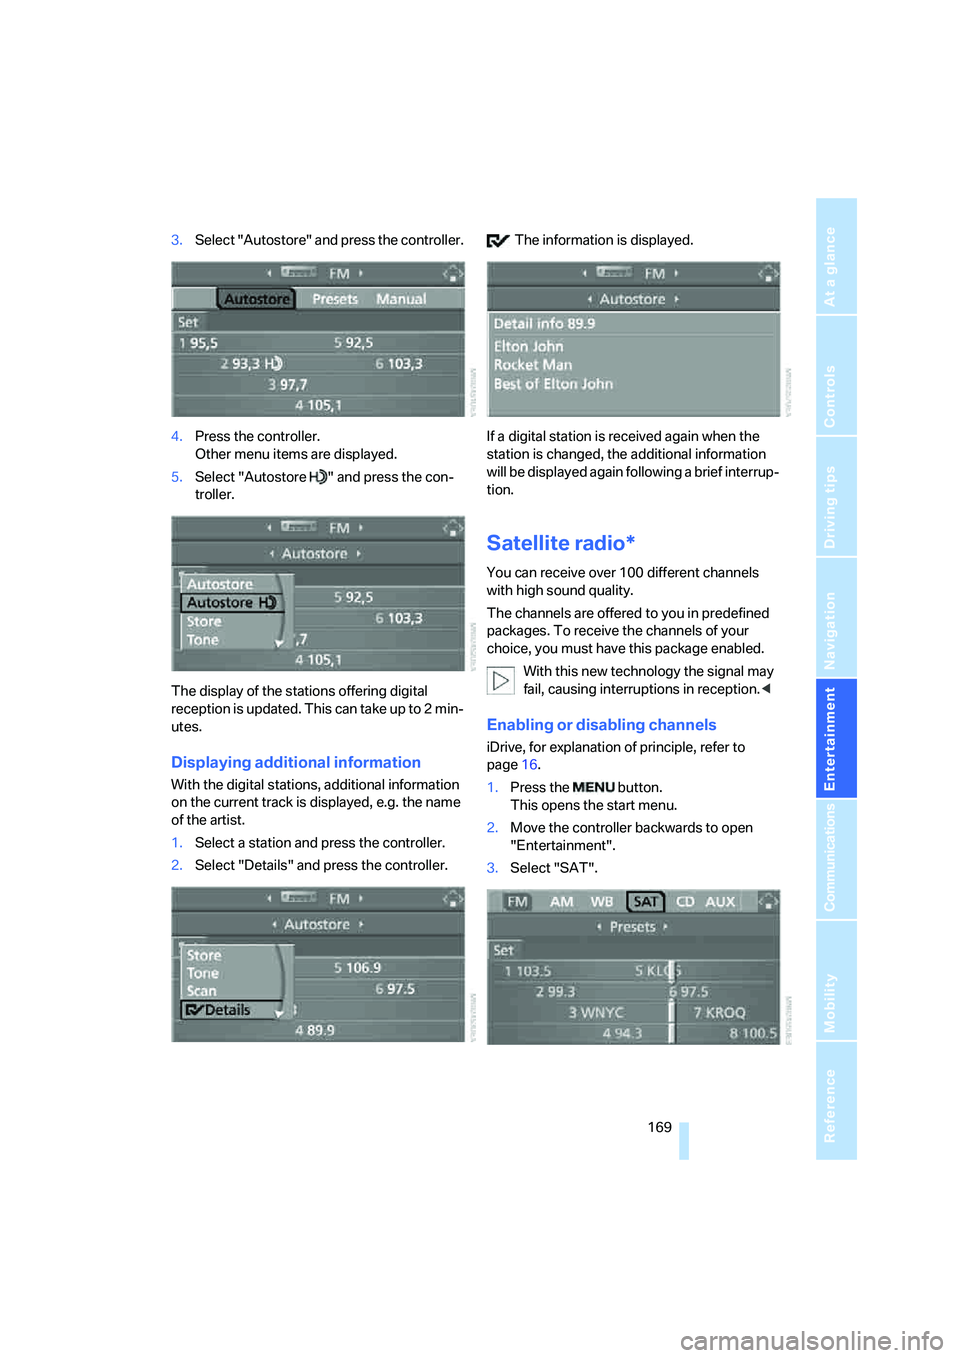
3.Select "Autostore" and press the controller.
4.Press the controller.
Other menu items are displayed.
5.Select "Autostore " and press the con-
troller.
The display of the stations offering digital
reception is updated. This can take up to 2 min-
utes.
Displaying additional information
With the digital stations, additional information
on the current track is displayed, e.g. the name
of the artist.
1.Select a station and press the controller.
2.Select "Details" and press the controller. The information is displayed.
If a digital station is received again when the
station is changed, the additional information
will be displayed again following a brief interrup-
tion.
Satellite radio*
You can receive over 100 different channels
with high sound quality.
The channels are offered to you in predefined
packages. To receive the channels of your
choice, you must have this package enabled.
With this new technology the signal may
fail, causing interruptions in reception.<
Enabling or disabling channels
iDrive, for explanation of principle, refer to
page16.
1.Press the button.
This opens the start menu.
2.Move the controller backwards to open
"Entertainment".
3.Select "SAT".
Page 177 of 273

Navigation
Entertainment
Driving tips
175Reference
At a glance
Controls
Communications
Mobility
To exit from the menu:
Select the arrow and press the controller.
Displaying information on track*
With compressed audio files, you can display
any information stored on the current track, e.g.
the name of the artist.
1.Press the controller.
2.Select "Details" and press the controller.
The information for the current track are dis-
played.
From radio readiness, the setting is stored for
the remote control currently in use.
Sampling tracks, scan
The system automatically plays a brief sample
from each of the tracks on the current CD.
1.Select "Set" and press the controller.
Other menu items are displayed.2.Select "Scan" and press the controller.
To end sampling:
1.Press the controller.
2.Select "Scan" and press the controller.
This cancels sampling of the tracks, and the
player remains on the current track.
Compressed audio files*
1.Select the current track and press the con-
troller.
2.Select the desired menu item:
>To sample all tracks of the current direc-
tory, select "Scan directory" and press
the controller.
>To sample all tracks of the CD, select
"Scan all" and press the controller.
To end sampling:
1.Press the controller.
2.Select "Scan directory" or "Scan all" and
press the controller.
This cancels sampling, and the player remains
on the current track.
Page 189 of 273
187
Entertainment
Reference
At a glance
Controls
Driving tips Communications
Navigation
Mobility
When the ignition and radio readiness are
switched off, e.g. after removing the remote
control from the ignition lock, you can continue
an ongoing call via the hands-free system for no
more than 25 minutes.
Speech quality
If the person you are talking to cannot under-
stand you well, this may be due to excessively
loud background noises. The full mobile phone
preparation package can compensate for these
noises to a certain degree. To optimize the
speech quality during a call, we recommend
that you:
>Reduce background noises, e.g. by closing
the windows, reducing the air volume of the
automatic climate control or pointing the
front vent outlets downward
>Reduce volume of hands-free system
Requirements
The logon data of the mobile phone are stored
in the vehicle and the mobile phone is ready to
operate.
The engine is running or the ignition is switched
on.
The mobile phone is detected by the vehicle.
iDrive, for explanation of principle, refer to
page16.
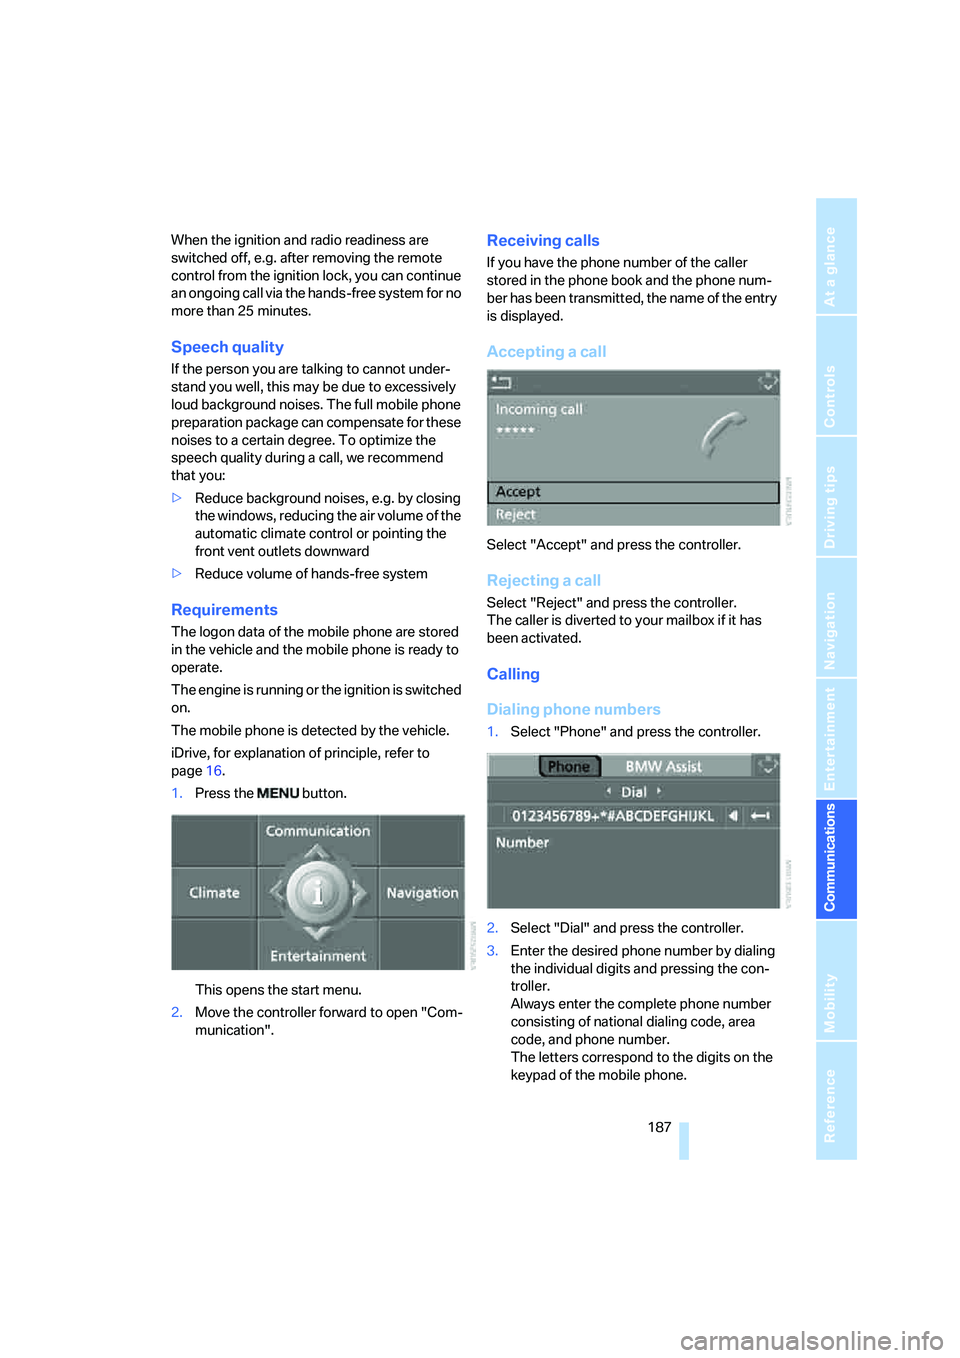
1.Press the button.
This opens the start menu.
2.Move the controller forward to open "Com-
munication".
Receiving calls
If you have the phone number of the caller
stored in the phone book and the phone num-
ber has been transmitted, the name of the entry
is displayed.
Accepting a call
Select "Accept" and press the controller.
Rejecting a call
Select "Reject" and press the controller.
The caller is diverted to your mailbox if it has
been activated.
Calling
Dialing phone numbers
1.Select "Phone" and press the controller.
2.Select "Dial" and press the controller.
3.Enter the desired phone number by dialing
the individual digits and pressing the con-
troller.
Always enter the complete phone number
consisting of national dialing code, area
code, and phone number.
The letters correspond to the digits on the
keypad of the mobile phone.
Page 197 of 273
195
Entertainment
Reference
At a glance
Controls
Driving tips Communications
Navigation
Mobility
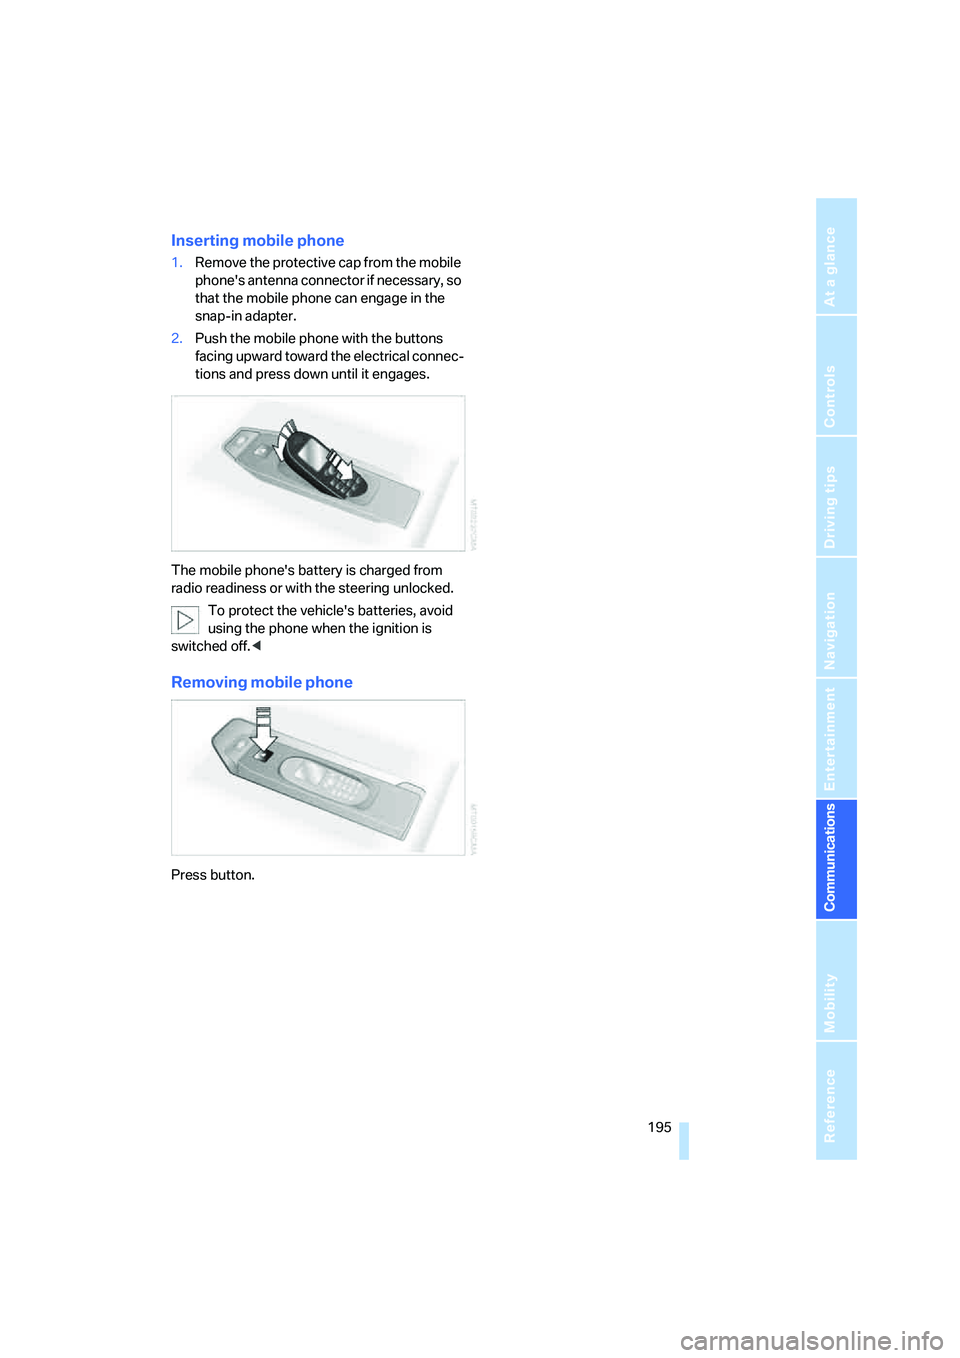
Inserting mobile phone
1.Remove the protective cap from the mobile
phone's antenna connector if necessary, so
that the mobile phone can engage in the
snap-in adapter.
2.Push the mobile phone with the buttons
facing upward toward the electrical connec-
tions and press down until it engages.
The mobile phone's battery is charged from
radio readiness or with the steering unlocked.
To protect the vehicle's batteries, avoid
using the phone when the ignition is
switched off.<
Removing mobile phone
Press button.
Page 203 of 273
201
Entertainment
Reference
At a glance
Controls
Driving tips Communications
Navigation
Mobility
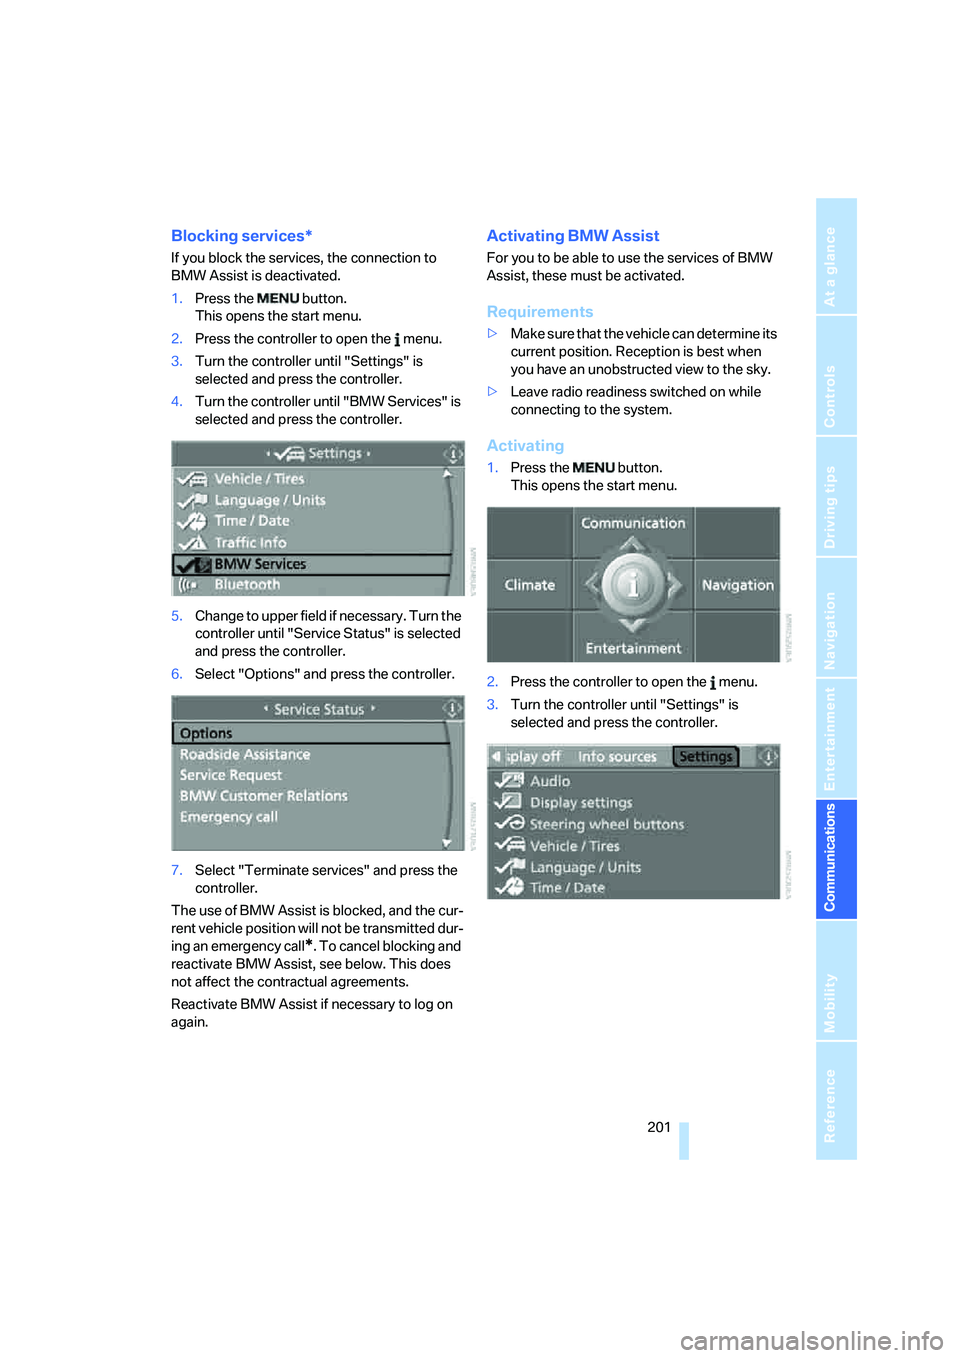
Blocking services*
If you block the services, the connection to
BMW Assist is deactivated.
1.Press the button.
This opens the start menu.
2.Press the controller to open the menu.
3.Turn the controller until "Settings" is
selected and press the controller.
4.Turn the controller until "BMW Services" is
selected and press the controller.
5.Change to upper field if necessary. Turn the
controller until "Service Status" is selected
and press the controller.
6.Select "Options" and press the controller.
7.Select "Terminate services" and press the
controller.
The use of BMW Assist is blocked, and the cur-
rent vehicle position will not be transmitted dur-
ing an emergency call
*. To cancel blocking and
reactivate BMW Assist, see below. This does
not affect the contractual agreements.
Reactivate BMW Assist if necessary to log on
again.
Activating BMW Assist
For you to be able to use the services of BMW
Assist, these must be activated.
Requirements
>Make sure that the vehicle can determine its
current position. Reception is best when
you have an unobstructed view to the sky.
>Leave radio readiness switched on while
connecting to the system.
Activating
1.Press the button.
This opens the start menu.
2.Press the controller to open the menu.
3.Turn the controller until "Settings" is
selected and press the controller.