Page 152 of 268
Destination guidance
150
Driving around a traffic congestion
Select "Detour" and press the controller.
The navigation system calculates a new route
to avoid the traffic incident.
Traffic information iconsDisplaying current position
You can have your current position displayed
even when the destination guidance is
switched off.
1.Select "Navigation" and press the control-
ler.
2.Move the highlight marker to the fourth field
from the top. Turn the controller until "Cur-
rent position" is selected and press the
controller.
The current position of your BMW is displayed. Traffic light failure
Roadworks
General traffic obstruction
Transport of hazardous load
Danger
Low clearance
No parking
Fog
Heavy rain
Slippery road
Cross winds
Smog
Road closed
Slow traffic
Traffic backup
Stopped traffic
Icy roads
Uneven surface
Accident
Lane closure
Delay
Police checkpoint
Page 153 of 268
Navigation
Driving tips
151Reference
At a glance
Controls
Communications
Entertainment
Mobility
If the navigation system is unable to identify a
town or city, your current map coordinates will
appear.
To exit from the menu:
Select the arrow and press the controller.
You can also have the current position dis-
played on a map, refer to page145.
Page 154 of 268
What to do if …
152
What to do if …
What to do if …
>a navigation DVD is inserted, but an instruc-
tion to insert the DVD appears on the Con-
trol Display?
The navigation DVD may not be the correct
DVD for the navigation system. This infor-
mation is indicated on the DVD label.
>you request the current position of your
vehicle, but do not receive a precise dis-
play?
The system is unable to receive enough
GPS signals at your current position due to
obstructions, your current position is not
yet available on your navigation DVD, or the
system is in the process of calculating your
current position. As a rule, reception is
guaranteed when you are in the open.
>the destination guidance does not accept a
destination?
The data of the destination is not stored on
the navigation DVD that is loaded. Choose a
destination as close as possible to the orig-
inal one.
>the destination guidance does not accept
an address without the street name?
On the navigation DVD, no downtown area
can be determined for the city or town
entered. Enter any street, or a destination
such as the railway station in the selected
town, and then start the destination guid-
ance.
>you want to enter a destination for the des-
tination guidance, but it is not possible to
select the letters for your desired entry?
The data of the destination is not stored on
the navigation DVD that is loaded. In this
case, the system will not offer you any let-
ters to choose from. Choose a destination
as close as possible to the original one.
>the system stops furnishing directions on
which way to turn as you approach intersec-
tions?
You are driving in an area that has not yet
been completely recorded on the naviga-tion DVD. Instead of an arrow indicating a
turn, you will see an arrow which indicates
the general direction of your planned route.
Or you have left the recommended route
and the system requires a few seconds to
calculate a new recommended route.
>the navigation system does not react to
entries?
If the battery was disconnected, it takes
about 10 minutes before the system is once
again operational.
Page 165 of 268
Navigation
Entertainment
Driving tips
163Reference
At a glance
Controls
Communications
Mobility
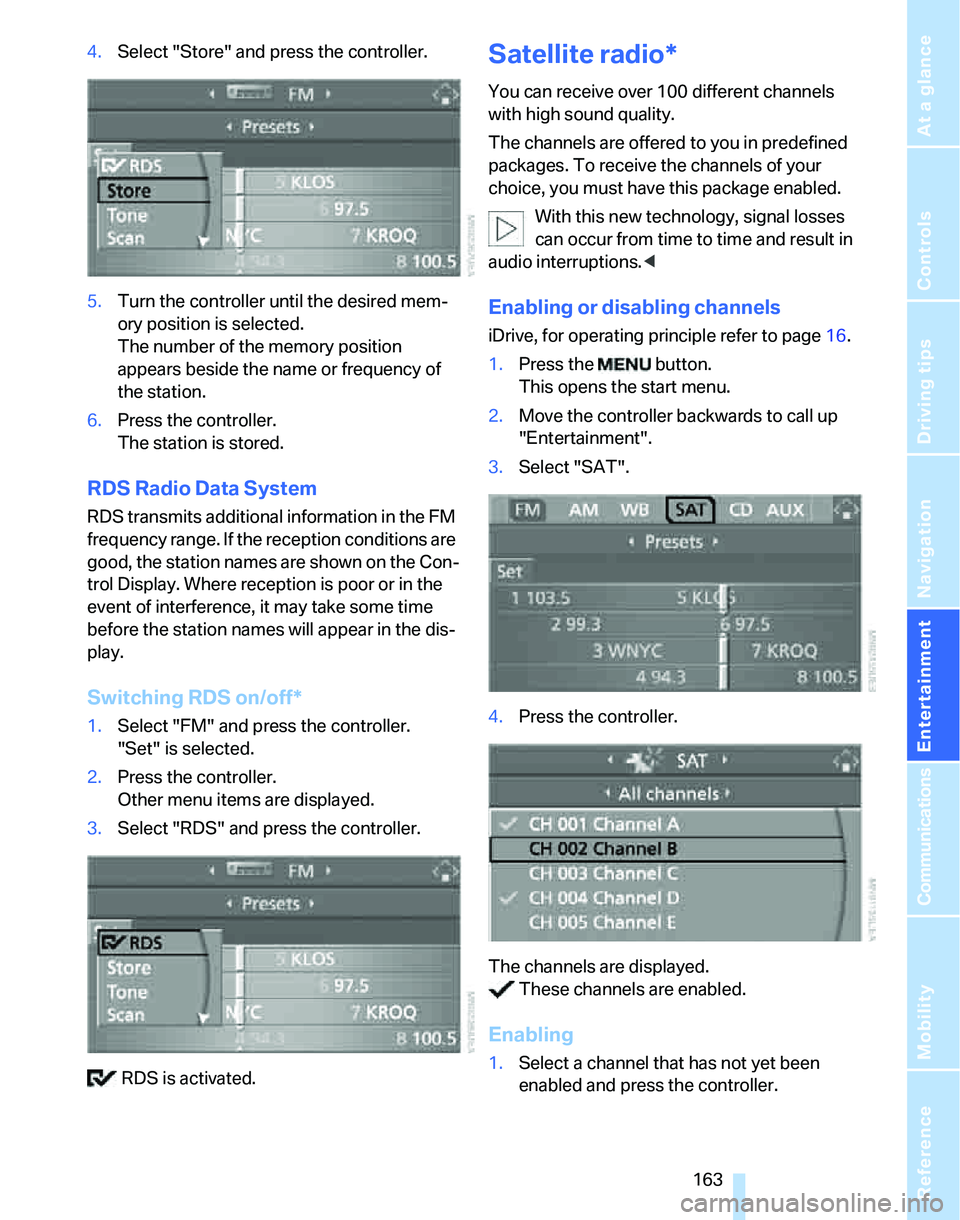
4.Select "Store" and press the controller.
5.Turn the controller until the desired mem-
ory position is selected.
The number of the memory position
appears beside the name or frequency of
the station.
6.Press the controller.
The station is stored.
RDS Radio Data System
RDS transmits additional information in the FM
frequency range. If the reception conditions are
good, the station names are shown on the Con-
trol Display. Where reception is poor or in the
event of interference, it may take some time
before the station names will appear in the dis-
play.
Switching RDS on/off*
1.Select "FM" and press the controller.
"Set" is selected.
2.Press the controller.
Other menu items are displayed.
3.Select "RDS" and press the controller.
RDS is activated.
Satellite radio*
You can receive over 100 different channels
with high sound quality.
The channels are offered to you in predefined
packages. To receive the channels of your
choice, you must have this package enabled.
With this new technology, signal losses
can occur from time to time and result in
audio interruptions.<
Enabling or disabling channels
iDrive, for operating principle refer to page16.
1.Press the button.
This opens the start menu.
2.Move the controller backwards to call up
"Entertainment".
3.Select "SAT".
4.Press the controller.
The channels are displayed.
These channels are enabled.
Enabling
1.Select a channel that has not yet been
enabled and press the controller.
Page 167 of 268
Navigation
Entertainment
Driving tips
165Reference
At a glance
Controls
Communications
Mobility
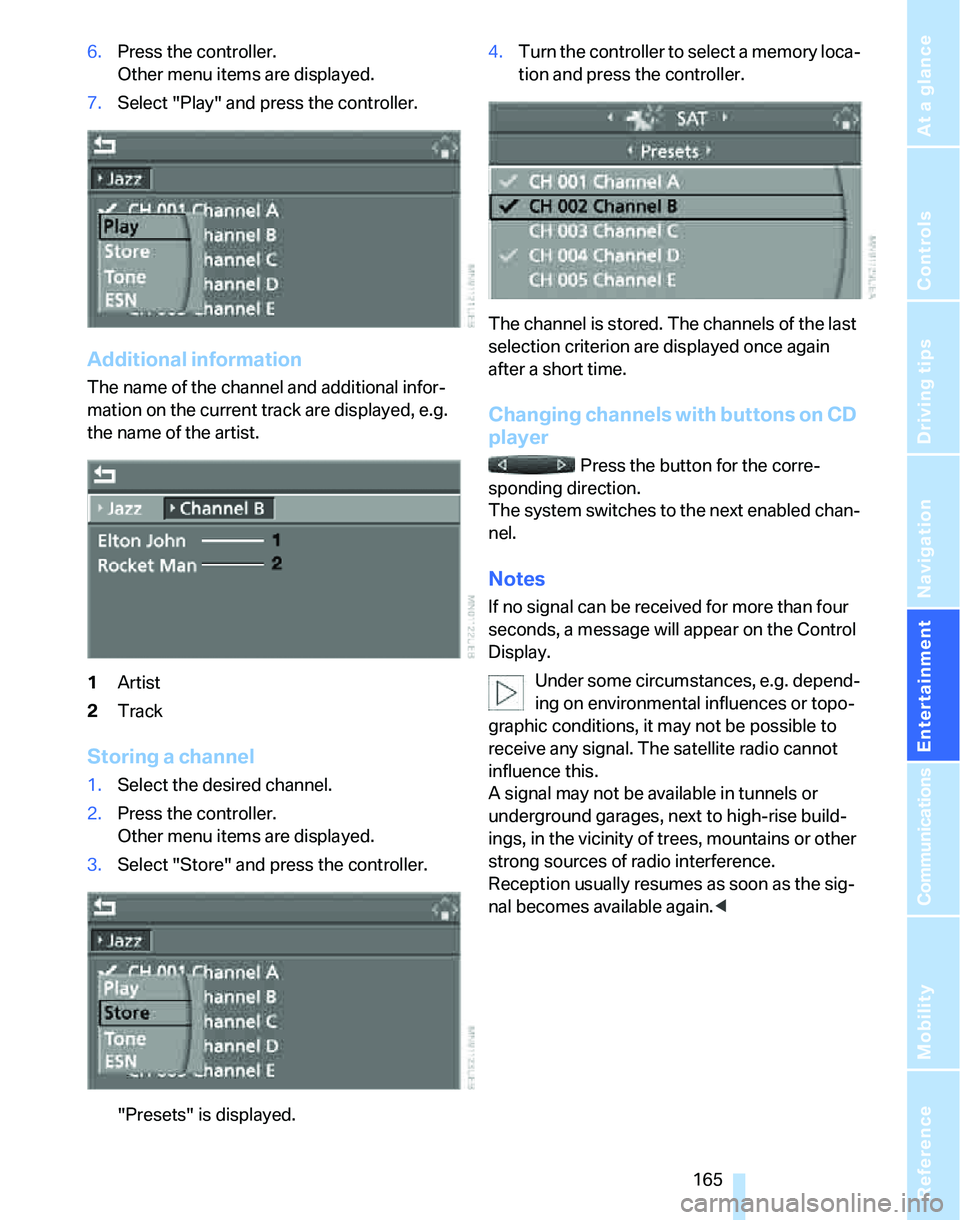
6.Press the controller.
Other menu items are displayed.
7.Select "Play" and press the controller.
Additional information
The name of the channel and additional infor-
mation on the current track are displayed, e.g.
the name of the artist.
1Artist
2Track
Storing a channel
1.Select the desired channel.
2.Press the controller.
Other menu items are displayed.
3.Select "Store" and press the controller.
"Presets" is displayed.4.Turn the controller to select a memory loca-
tion and press the controller.
The channel is stored. The channels of the last
selection criterion are displayed once again
after a short time.
Changing channels with buttons on CD
player
Press the button for the corre-
sponding direction.
The system switches to the next enabled chan-
nel.
Notes
If no signal can be received for more than four
seconds, a message will appear on the Control
Display.
Under some circumstances, e.g. depend-
ing on environmental influences or topo-
graphic conditions, it may not be possible to
receive any signal. The satellite radio cannot
influence this.
A signal may not be available in tunnels or
underground garages, next to high-rise build-
ings, in the vicinity of trees, mountains or other
strong sources of radio interference.
Reception usually resumes as soon as the sig-
nal becomes available again.<
Page 175 of 268
Navigation
Entertainment
Driving tips
173Reference
At a glance
Controls
Communications
Mobility
External audio device
You can connect an external audio device, for
instance an MP3 player, and play audio tracks
over the car's loudspeaker system. You can
adjust the tone using iDrive.
Connecting
Lift up the center armrest.
1Power supply for your external audio
device:
Socket with removable cap
2Connection for audio playback:
jack plug, 3.5 mm
To play audio tracks over the car's loudspeaker
system, connect the headset or line-out port of
the external device to connection 2.
Starting audio playback
The audio device must be switched on.
iDrive, for operating principle refer to page16.
1.Press the button.
This opens the start menu.
2.Move the controller backwards to call up
"Entertainment".3.Select "AUX" and press the controller.
4.Adjust volume and tone, if necessary.
Page 179 of 268
177
Entertainment
Reference
At a glance
Controls
Driving tips Communications
Navigation
Mobility
Making phone calls with the
BMW Assist system*: BMW Assist
calls
You can use the BMW Assist System via the
hands-free unit for BMW Assist calls.
When the status information "BMW Assist" or
"BMW Service" is displayed in "Communica-
tion", only BMW Assist calls are possible.
It may not be possible to establish a telephone
connection using the mobile phone while a con-
nection is being established to BMW Assist or
while a call to BMW Assist is already in
progress. If this happens, you must unpair the
mobile phone and the vehicle if you wish to
place a call with the mobile phone.
Start-up
Pairing the mobile phone with the
vehicle
The following prerequisites must be met:
>The mobile phone is ready to operate
>The Bluetooth link in the vehicle, refer to
page180, and in the mobile phone are acti-
vated
>Depending on the mobile phone, some
default settings may be necessary for the
mobile phone: e.g. via the menu item Blue-
tooth switched on or the menu item Con-
nection without confirmation.
>For pairing purposes, define any number as
the Bluetooth passkey, e.g. 1. This Blue-
tooth passkey is no longer required after
pairing has been successful.
>The ignition is switched on.
Pair the mobile phone with the vehicle
only when the car is stationary, to avoid
endangering the car's occupants and other
road users by being distracted.<
Switch on ignition
1.Insert remote control all the way into the
ignition lock.
2.Switch on ignition without operating the
brake or clutch or pressing the start/stop
button.
Preparation via iDrive
iDrive, for operating principle refer to page16.
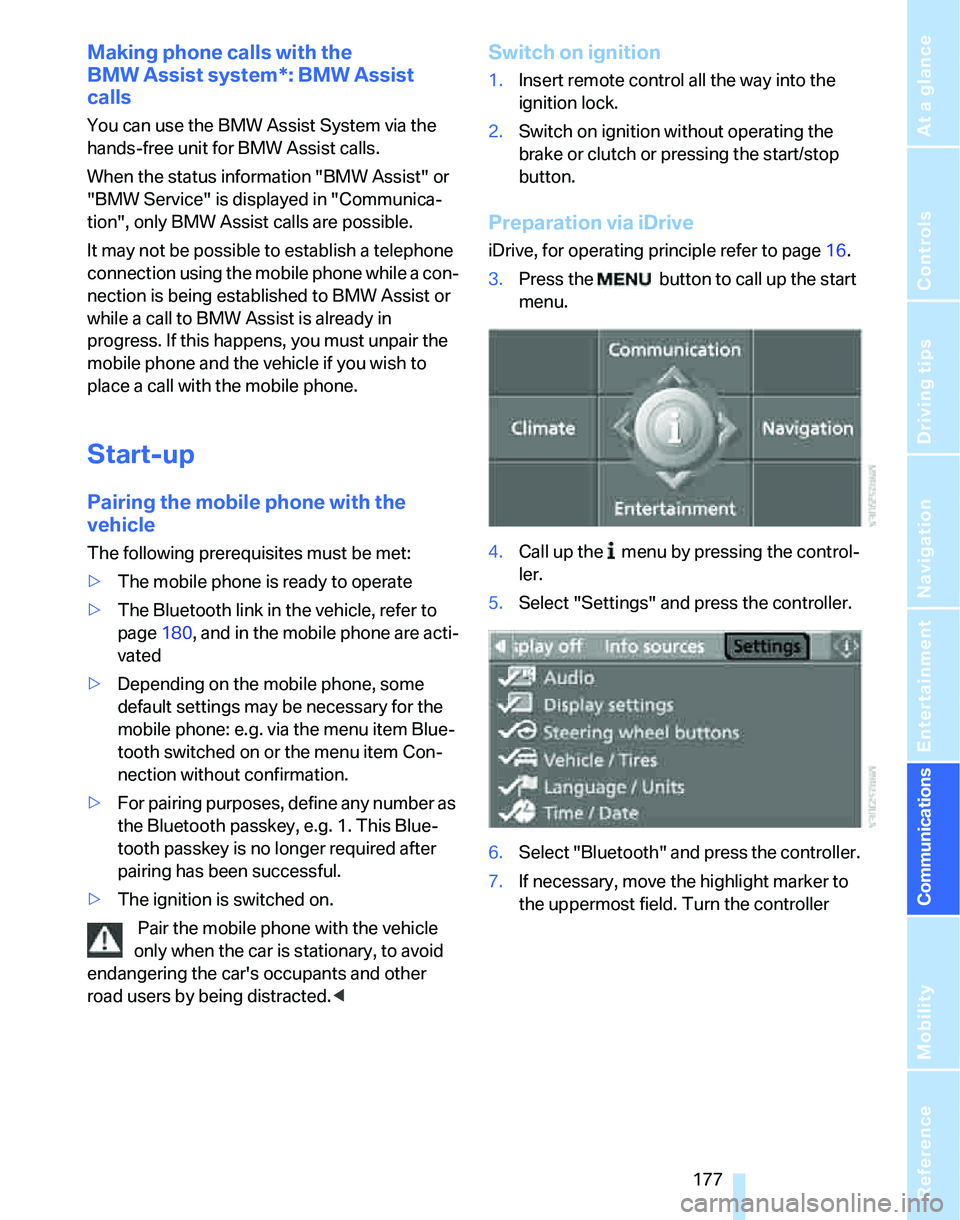
3.Press the button to call up the start
menu.
4.Call up the menu by pressing the control-
ler.
5.Select "Settings" and press the controller.
6.Select "Bluetooth" and press the controller.
7.If necessary, move the highlight marker to
the uppermost field. Turn the controller
Page 183 of 268
181
Entertainment
Reference
At a glance
Controls
Driving tips Communications
Navigation
Mobility
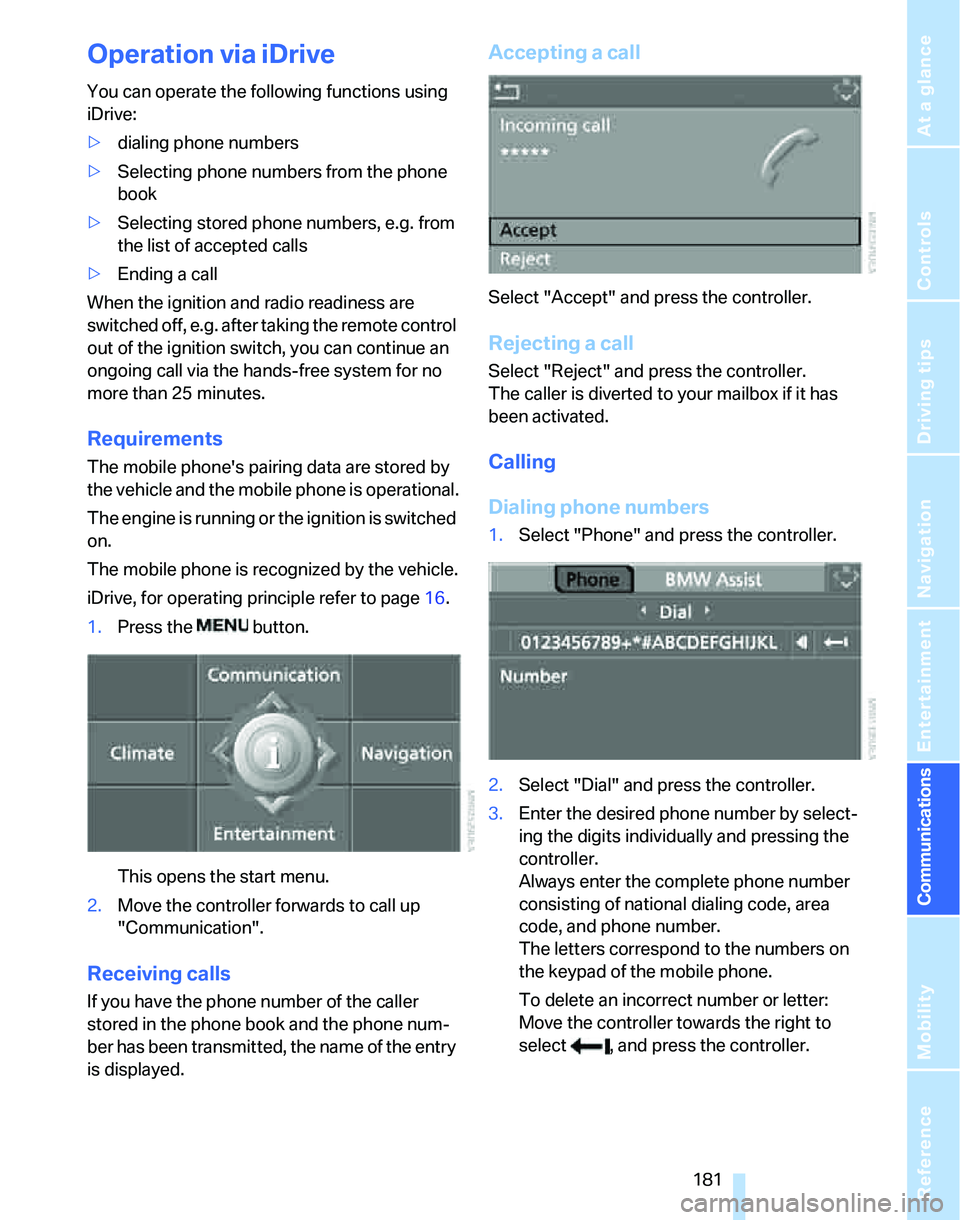
Operation via iDrive
You can operate the following functions using
iDrive:
>dialing phone numbers
>Selecting phone numbers from the phone
book
>Selecting stored phone numbers, e.g. from
the list of accepted calls
>Ending a call
When the ignition and radio readiness are
switched off, e.g. after taking the remote control
out of the ignition switch, you can continue an
ongoing call via the hands-free system for no
more than 25 minutes.
Requirements
The mobile phone's pairing data are stored by
the vehicle and the mobile phone is operational.
The engine is running or the ignition is switched
on.
The mobile phone is recognized by the vehicle.
iDrive, for operating principle refer to page16.
1.Press the button.
This opens the start menu.
2.Move the controller forwards to call up
"Communication".
Receiving calls
If you have the phone number of the caller
stored in the phone book and the phone num-
ber has been transmitted, the name of the entry
is displayed.
Accepting a call
Select "Accept" and press the controller.
Rejecting a call
Select "Reject" and press the controller.
The caller is diverted to your mailbox if it has
been activated.
Calling
Dialing phone numbers
1.Select "Phone" and press the controller.
2.Select "Dial" and press the controller.
3.Enter the desired phone number by select-
ing the digits individually and pressing the
controller.
Always enter the complete phone number
consisting of national dialing code, area
code, and phone number.
The letters correspond to the numbers on
the keypad of the mobile phone.
To delete an incorrect number or letter:
Move the controller towards the right to
select , and press the controller.