2007 BMW 335I SEDAN display
[x] Cancel search: displayPage 102 of 268
Lamps
100
Instrument lighting
You can adjust the brightness of the instrument
lighting only when the parking lamps or the low
beams are switched on.
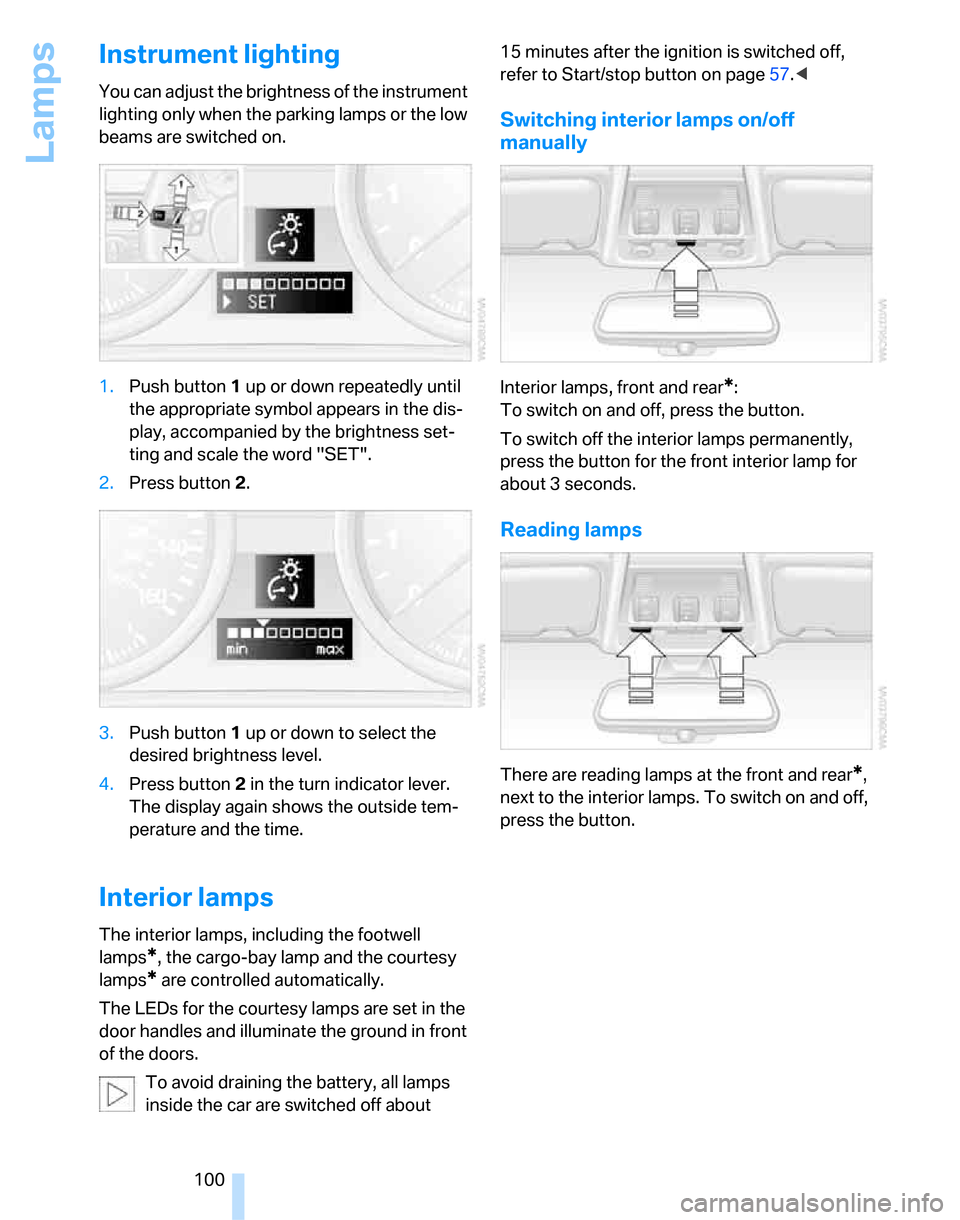
1.Push button 1 up or down repeatedly until
the appropriate symbol appears in the dis-
play, accompanied by the brightness set-
ting and scale the word "SET".
2.Press button 2.
3.Push button 1 up or down to select the
desired brightness level.
4.Press button 2 in the turn indicator lever.
The display again shows the outside tem-
perature and the time.
Interior lamps
The interior lamps, including the footwell
lamps
*, the cargo-bay lamp and the courtesy
lamps
* are controlled automatically.
The LEDs for the courtesy lamps
are set in the
door handles and illuminate the ground in front
of the doors.
To avoid draining the battery, all lamps
inside the car are switched off about 15 minutes after the ignition is switched off,
refer to Start/stop button on page57.<
Switching interior lamps on/off
manually
Interior lamps, front and rear*:
To switch on and off, press the button.
To switch off the interior lamps permanently,
press the button for the front interior lamp for
about 3 seconds.
Reading lamps
There are reading lamps at the front and rear*,
next to the interior lamps. To switch on and off,
press the button.
Page 103 of 268

Controls
101Reference
At a glance
Driving tips
Communications
Navigation
Entertainment
Mobility
Climate
1Airflow directed toward the windshield and
side windows
2Air to the upper body area
Draft-free ventilation104
3Air to the footwell
4Air distribution, manual
5Temperature adjustment, left-hand side of
passenger compartment
6Maximum cooling
7AUTO program
8Air flow rate, manual
9AUC Automatic recirculated-air control/
Recirculated-air mode10Temperature adjustment, right-hand side
of passenger compartment
11Residual heat
12Defrosting windows and removing conden-
sation
13Switching cooling function on/off manually
14Rear window defroster
15Air grill for interior temperature sensor –
please keep clear and unobstructed
The current setting for the air distribution is dis-
played on the Control Display, refer to
page102.
Page 107 of 268
Controls
105Reference
At a glance
Driving tips
Communications
Navigation
Entertainment
Mobility
Ventilation in the rear
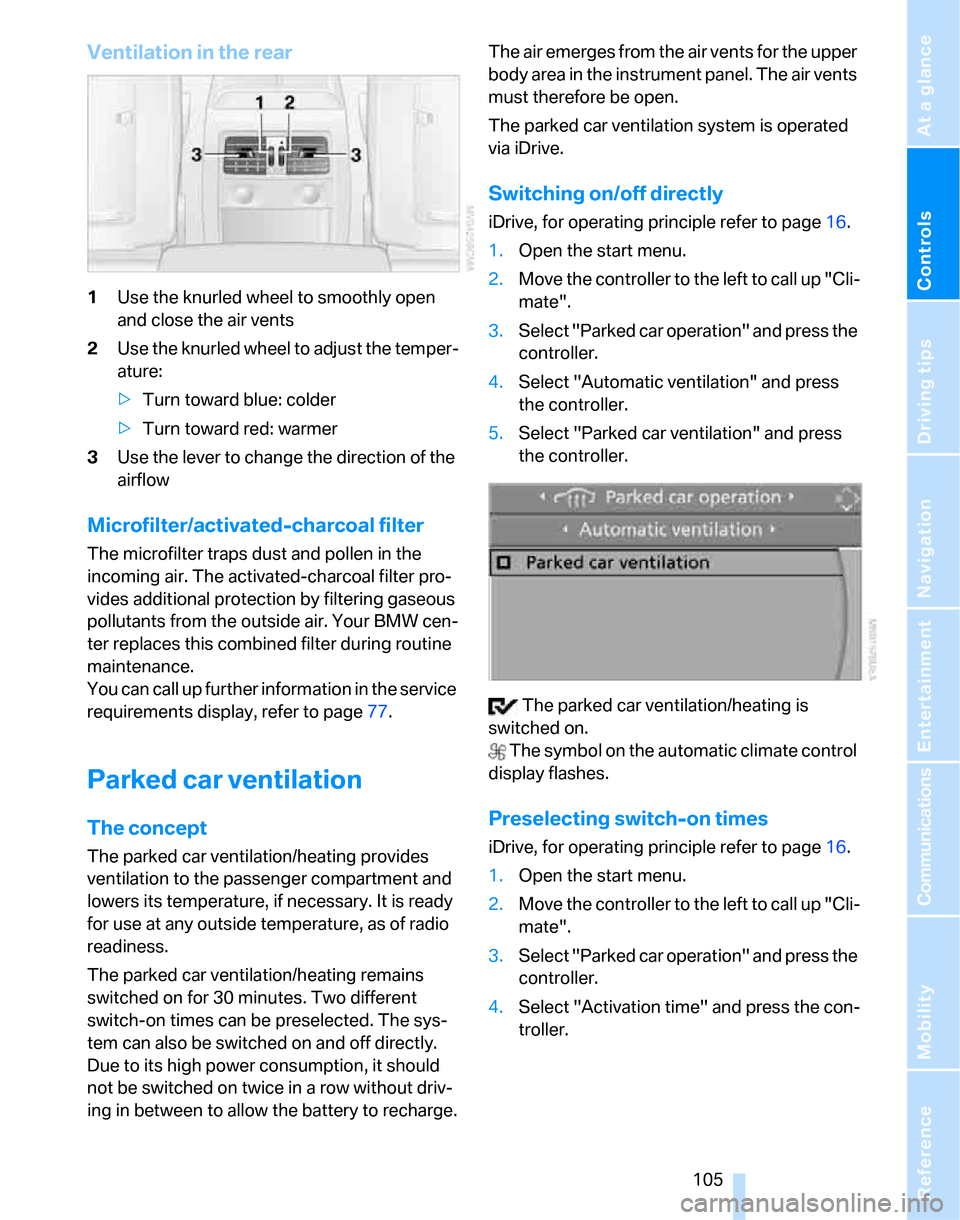
1Use the knurled wheel to smoothly open
and close the air vents
2Use the knurled wheel to adjust the temper-
ature:
>Turn toward blue: colder
>Turn toward red: warmer
3Use the lever to change the direction of the
airflow
Microfilter/activated-charcoal filter
The microfilter traps dust and pollen in the
incoming air. The activated-charcoal filter pro-
vides additional protection by filtering gaseous
pollutants from the outside air. Your BMW cen-
ter replaces this combined filter during routine
maintenance.
You can call up further information in the service
requirements display, refer to page77.
Parked car ventilation
The concept
The parked car ventilation/heating provides
ventilation to the passenger compartment and
lowers its temperature, if necessary. It is ready
for use at any outside temperature, as of radio
readiness.
The parked car ventilation/heating remains
switched on for 30 minutes. Two different
switch-on times can be preselected. The sys-
tem can also be switched on and off directly.
Due to its high power consumption, it should
not be switched on twice in a row without driv-
ing in between to allow the battery to recharge.The air emerges from the air vents for the upper
body area in the instrument panel. The air vents
must therefore be open.
The parked car ventilation system is operated
via iDrive.
Switching on/off directly
iDrive, for operating principle refer to page16.
1.Open the start menu.
2.Move the controller to the left to call up "Cli-
mate".
3.Select "Parked car operation" and press the
controller.
4.Select "Automatic ventilation" and press
the controller.
5.Select "Parked car ventilation" and press
the controller.
The parked car ventilation/heating is
switched on.
The symbol on the automatic climate control
display flashes.
Preselecting switch-on times
iDrive, for operating principle refer to page16.
1.Open the start menu.
2.Move the controller to the left to call up "Cli-
mate".
3.Select "Parked car operation" and press the
controller.
4.Select "Activation time" and press the con-
troller.
Page 108 of 268
Climate
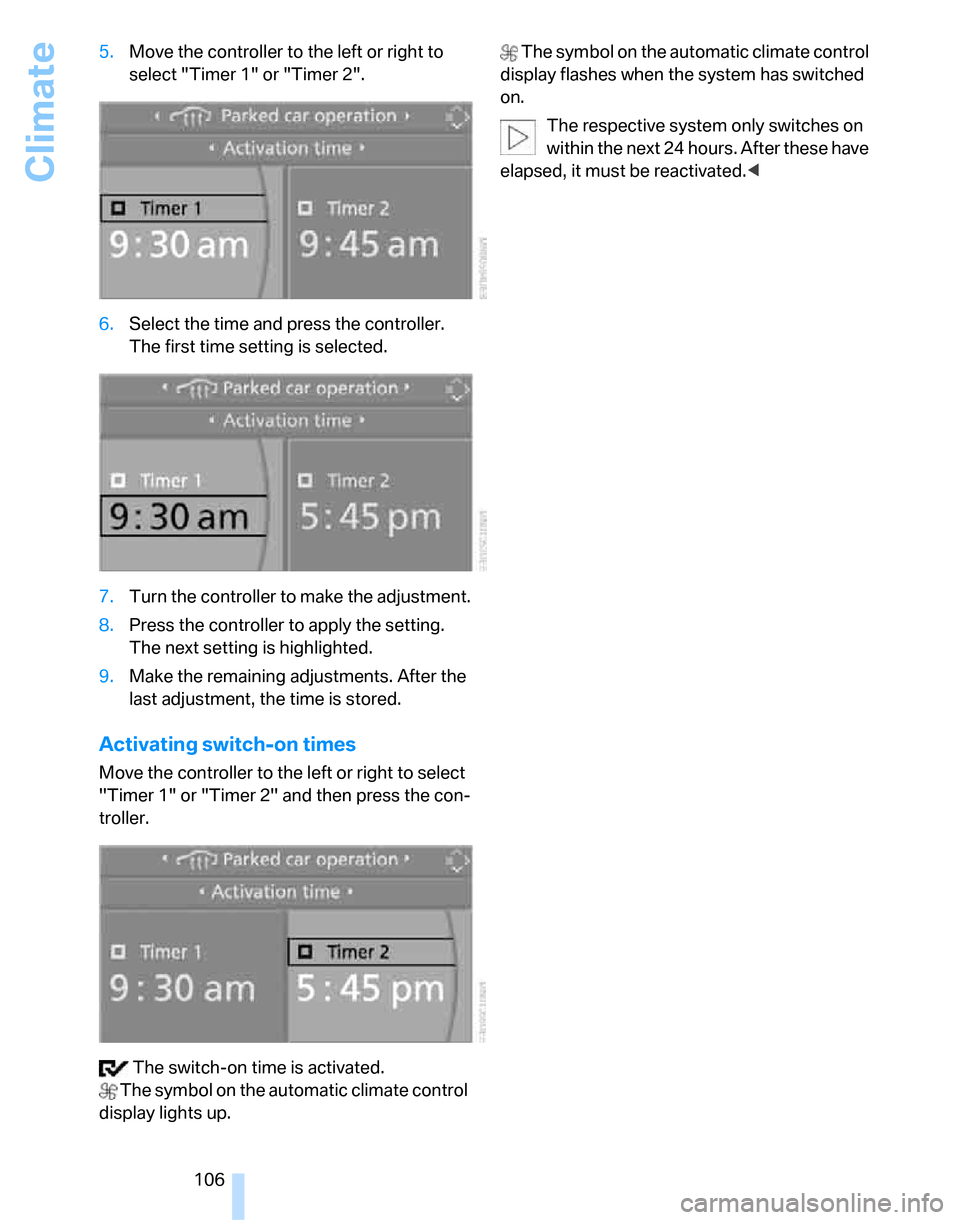
106 5.Move the controller to the left or right to
select "Timer 1" or "Timer 2".
6.Select the time and press the controller.
The first time setting is selected.
7.Turn the controller to make the adjustment.
8.Press the controller to apply the setting.
The next setting is highlighted.
9.Make the remaining adjustments. After the
last adjustment, the time is stored.
Activating switch-on times
Move the controller to the left or right to select
"Timer 1" or "Timer 2" and then press the con-
troller.
The switch-on time is activated.
The symbol on the automatic climate control
display lights up. The symbol on the automatic climate control
display flashes when the system has switched
on.
The respective system only switches on
within the next 24 hours. After these have
elapsed, it must be reactivated.<
Page 110 of 268
Practical interior accessories
108 The corresponding memory button 1 is now
programmed with the signal of the original
hand-held transmitter.
You can operate the device while the ignition is
switched off.
If the device fails to function even after
repeated programming, check whether
the original hand-held transmitter uses an alter-
nating-code system. To do so, either read the
instructions for the original hand-held transmit-
ter or hold down the programmed memory
button1 of the integrated universal remote
control. If the LED2 on the integrated universal
remote control flashes rapidly for a short while
and then remains lit for about two seconds, the
original hand-held transmitter uses an alternat-
ing-code system. If it uses an alternating-code
system, program the memory buttons1 as
described under Alternating-code hand-held
transmitters.<
Alternating-code hand-held
transmitters
To program the integrated universal remote
control, consult the operating instructions for
the device to be set. You will find information
there on the possibilities for synchronization.
When programming hand-held transmitters
that employ an alternating code, please observe
the following supplementary instructions:Programming will be easier with the aid of
a second person.<
1.Park your vehicle within the range of the
remote-controlled device.
2.Program the integrated universal remote
control as described above in the section
Fixed-code hand-held transmitters.
3.Locate the button on the receiver of the
device to be set, e.g. on the drive unit.
4.Press the button on the receiver of the
device to be set. After step 4, you have
approx. 30 seconds for step 5.
5.Press the programmed memory button1 of
the integrated universal remote control
three times.
The corresponding memory button 1 is now
programmed with the signal of the original
hand-held transmitter.
If you have any questions, please contact
your BMW center.
20 seconds until the LED2 flashes: all memory
buttons are cleared.
It is not possible to clear individual memory but-
tons.
Digital compass*
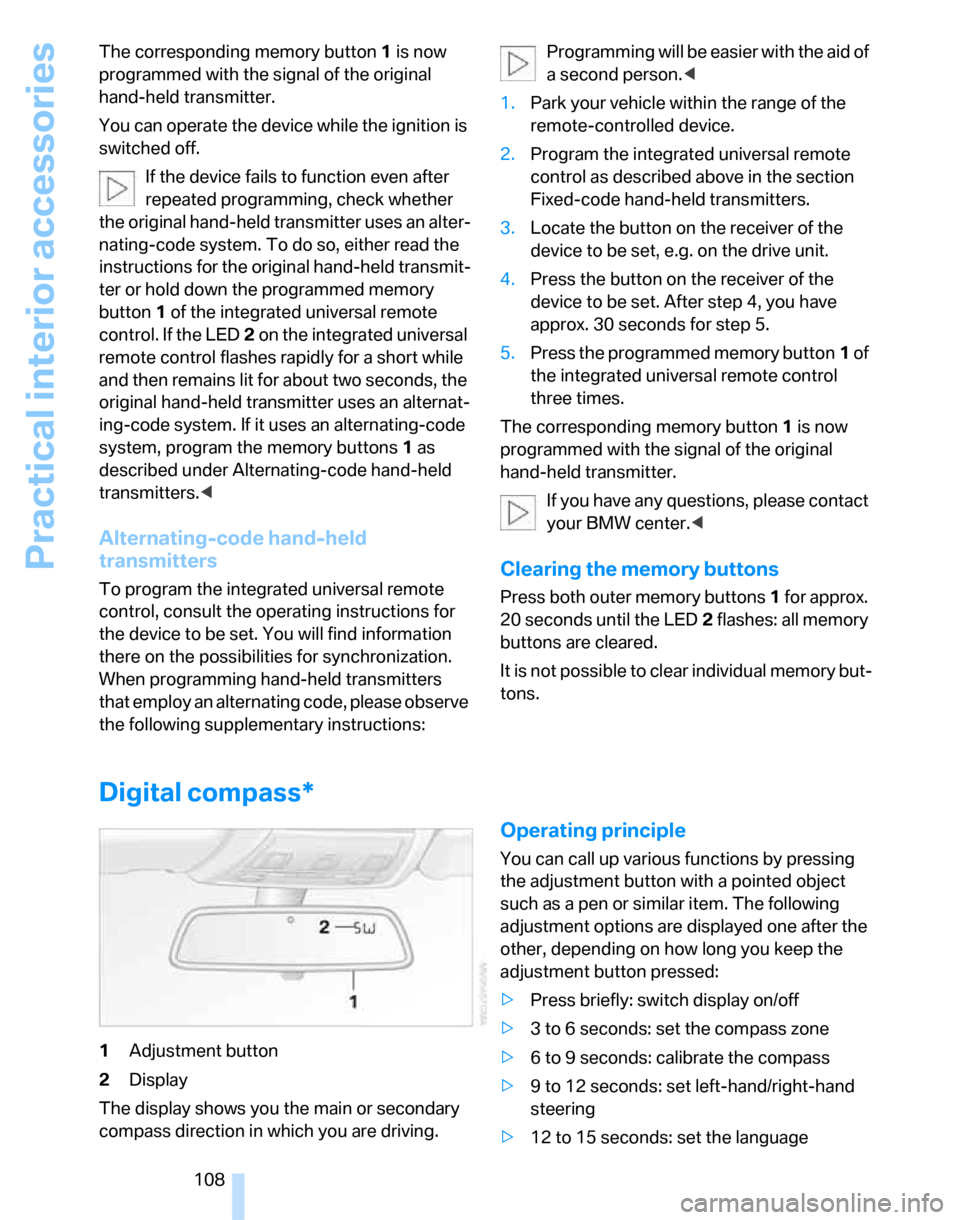
1Adjustment button
2Display
The display shows you the main or secondary
compass direction in which you are driving.
Operating principle
You can call up various functions by pressing
the adjustment button with a pointed object
such as a pen or similar item. The following
adjustment options are displayed one after the
other, depending on how long you keep the
adjustment button pressed:
>Press briefly: switch display on/off
>3 to 6 seconds: set the compass zone
>6 to 9 seconds: calibrate the compass
>9 to 12 seconds: set left-hand/right-hand
steering
>12 to 15 seconds: set the language
Page 111 of 268
Controls
109Reference
At a glance
Driving tips
Communications
Navigation
Entertainment
Mobility
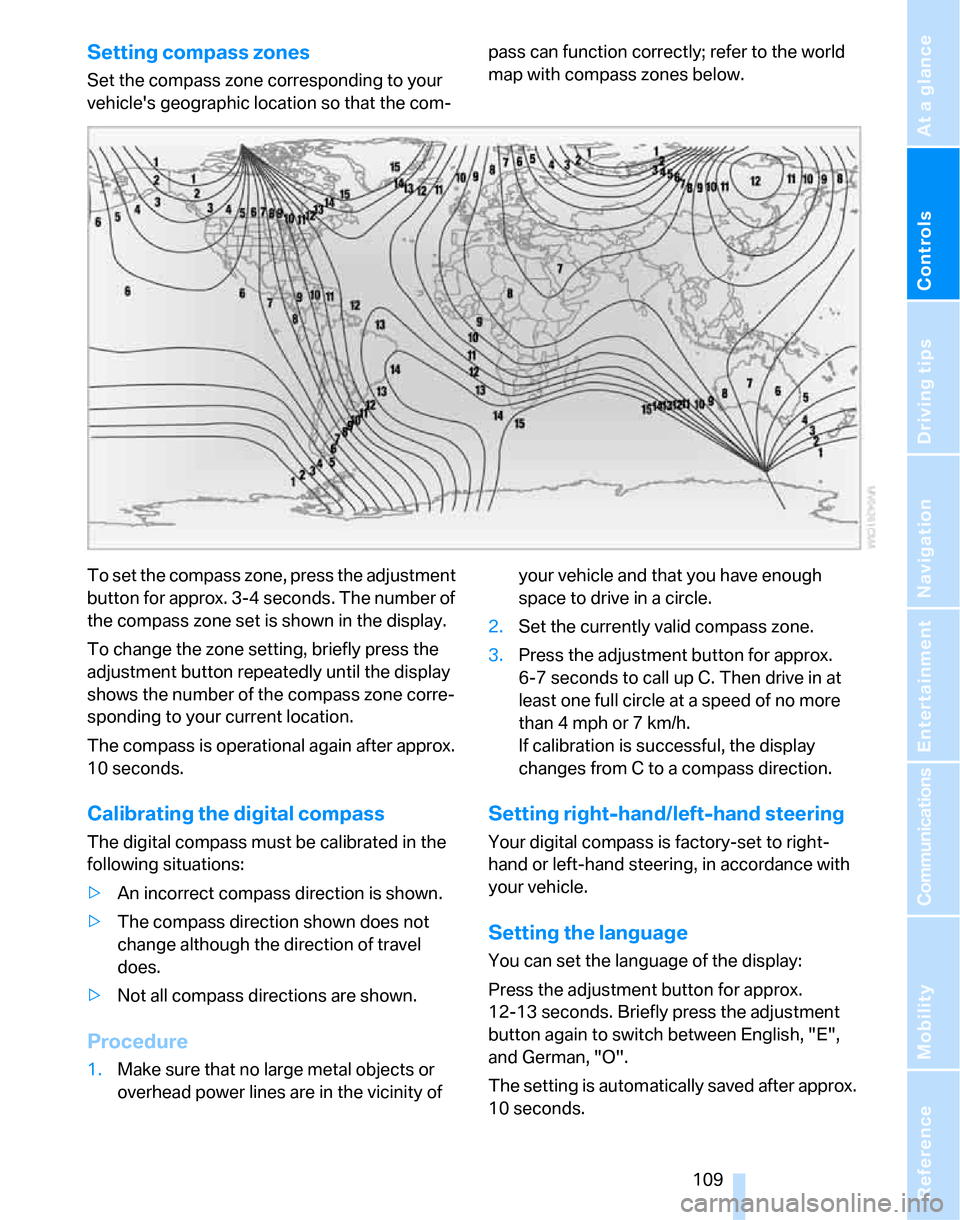
Setting compass zones
Set the compass zone corresponding to your
vehicle's geographic location so that the com-pass can function correctly; refer to the world
map with compass zones below.
To set the compass zone, press the adjustment
button for approx. 3-4 seconds. The number of
the compass zone set is shown in the display.
To change the zone setting, briefly press the
adjustment button repeatedly until the display
shows the number of the compass zone corre-
sponding to your current location.
The compass is operational again after approx.
10 seconds.
Calibrating the digital compass
The digital compass must be calibrated in the
following situations:
>An incorrect compass direction is shown.
>The compass direction shown does not
change although the direction of travel
does.
>Not all compass directions are shown.
Procedure
1.Make sure that no large metal objects or
overhead power lines are in the vicinity of your vehicle and that you have enough
space to drive in a circle.
2.Set the currently valid compass zone.
3.Press the adjustment button for approx.
6-7 seconds to call up C. Then drive in at
least one full circle at a speed of no more
than 4 mph or 7 km/h.
If calibration is successful, the display
changes from C to a compass direction.
Setting right-hand/left-hand steering
Your digital compass is factory-set to right-
hand or left-hand steering, in accordance with
your vehicle.
Setting the language
You can set the language of the display:
Press the adjustment button for approx.
12-13 seconds. Briefly press the adjustment
button again to switch between English, "E",
and German, "O".
The setting is automatically saved after approx.
10 seconds.
Page 132 of 268

Starting the navigation system
130
Starting the navigation system
Your navigation system can use satellites to
ascertain the precise position of your vehicle
and guide you reliably to any destination you
enter.
Navigation DVD
The navigation system requires a special navi-
gation DVD. You can obtain the latest version at
your BMW center.
Inserting navigation DVD
Use the lower drive for navigation DVDs.
1.Insert the navigation DVD with the labeled
side up.
The navigation DVD is pulled in automati-
cally.
2.Wait for several seconds to allow the con-
tents of the DVD to be read in.
Removing navigation DVD
1. Press button 1.
The DVD emerges slightly from the drive.
2.Remove the DVD.
If the DVD is not ejected from the drive, it is pos-
sible that it is blocked. A message appears on
the Control Display.
Display in the assistance
window
You can display the route or the current position
in the assistance window. This display remains
visible even if you change to another applica-
tion.
1.Move the controller to the right to enter the
assistance window.
2.Press the controller.
Other menu items are displayed.
3.Select the desired route view or "Current
position".
4.Press the controller.
*
Page 134 of 268
Destination entry
132 3.Select "Enter address" and press the con-
troller.
The system also supports you with the follow-
ing features:
>If you do not enter a street, the system will
guide you to the downtown area of a town or
city.
>You can skip the entry of country and local-
ity if the current entries should be retained
for your new destination.
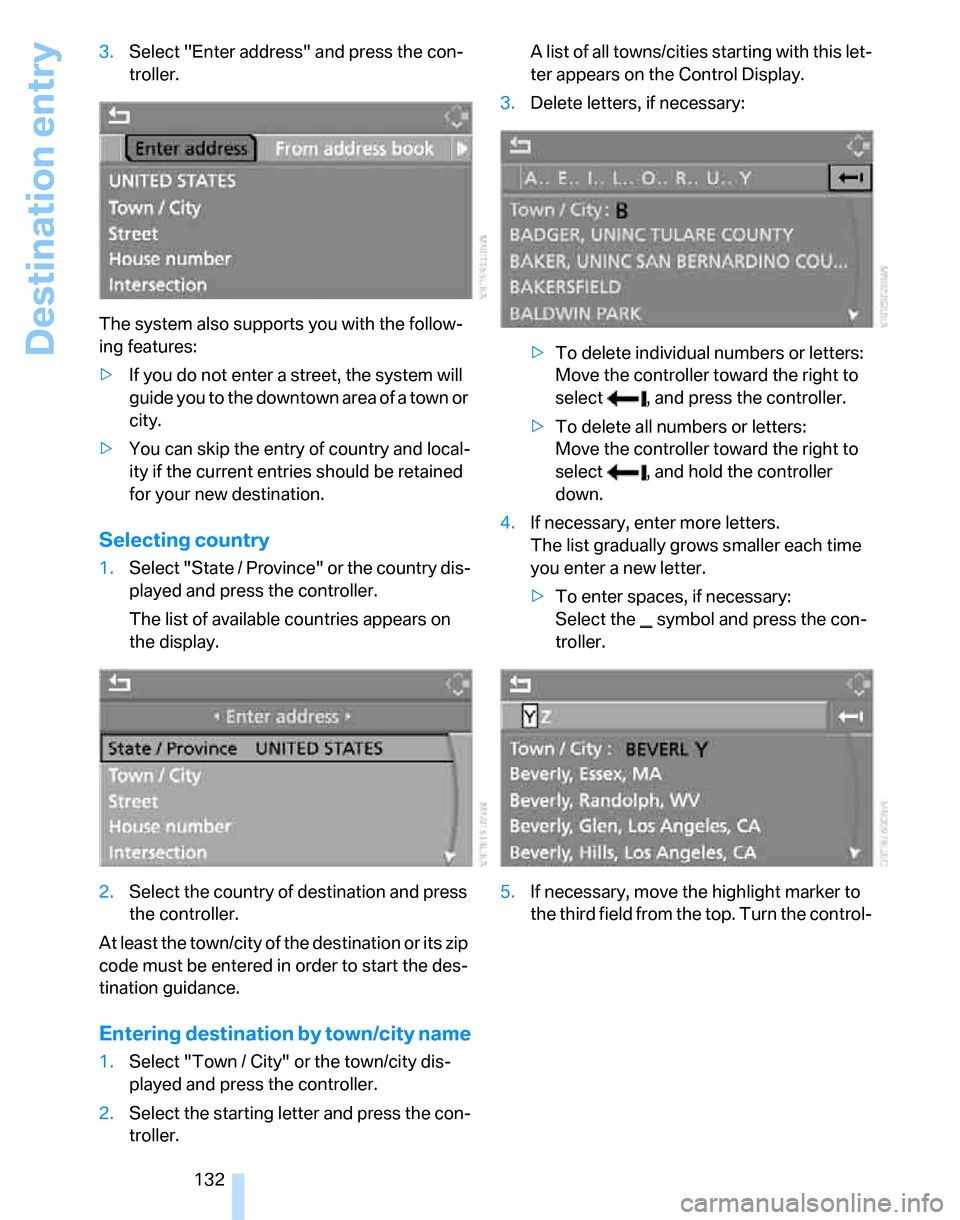
Selecting country
1.Select "State / Province" or the country dis-
played and press the controller.
The list of available countries appears on
the display.
2.Select the country of destination and press
the controller.
At least the town/city of the destination or its zip
code must be entered in order to start the des-
tination guidance.
Entering destination by town/city name
1.Select "Town / City" or the town/city dis-
played and press the controller.
2.Select the starting letter and press the con-
troller.A list of all towns/cities starting with this let-
ter appears on the Control Display.
3.Delete letters, if necessary:
>To delete individual numbers or letters:
Move the controller toward the right to
select , and press the controller.
>To delete all numbers or letters:
Move the controller toward the right to
select , and hold the controller
down.
4.If necessary, enter more letters.
The list gradually grows smaller each time
you enter a new letter.
>To enter spaces, if necessary:
Select the symbol and press the con-
troller.
5.If necessary, move the highlight marker to
the third field from the top. Turn the control-