Navigation (NAV)129
General operation
RADIO, CD
NAME, TEL
NAV, INFO
CAR, SETUP
– Confirm by rotating and pressing the control knob the
third map menu item (destination flag) �page 128,
fig.133.
–Select Set as destination �page 128, fig.134.
– Geben Sie ggf. Enter stopovers for route guidance with
stopovers �page 139.
–Select Start route guidance �page 129.If you enter a city in the destination input menu first, before you
press the control button with the Map function, the system jumps
to the center of the city entered on the map display.
Selection “Detail info”
If additional detailed information is available for the selected point
on the map, you can display it by selecting the Detail info function.
If the Detail info function is greyed out, no details are available on
the navigation DVD.
Selection “Set as stopover”
When you have activated Route with stopover, you can also select
the stopovers from the map.
If you have not activated Route with stopover, this function cannot
be selected (greyed out).
Selection “Save to directory”
The selected map position can also be imported into the directory.
You can assign this position to an existing directory entry or open a
new entry. With a new entry, first input a name using the speller.
Then you can input additional data on the entry. If you activate
Display as top destination, this entry is displayed in the destination
input menu
�page 117, fig.121
�page 133.
Tips
�
Th e d e s t i n a t i o n e n t r y f r o m t h e m a p i s a l s o a v a i l a b l e t o y o u i n t h e
city submenu and street submenu.
�
Yo u c a n a l s o s e t a m a p p o i n t w h i c h i s not l o c a t e d o n a s t r e e t ( e .g .
by means of the geo-coordinates) using the crosshairs. In this case,
the system tries to navigate as close as possible to this destination
using digitized streets.
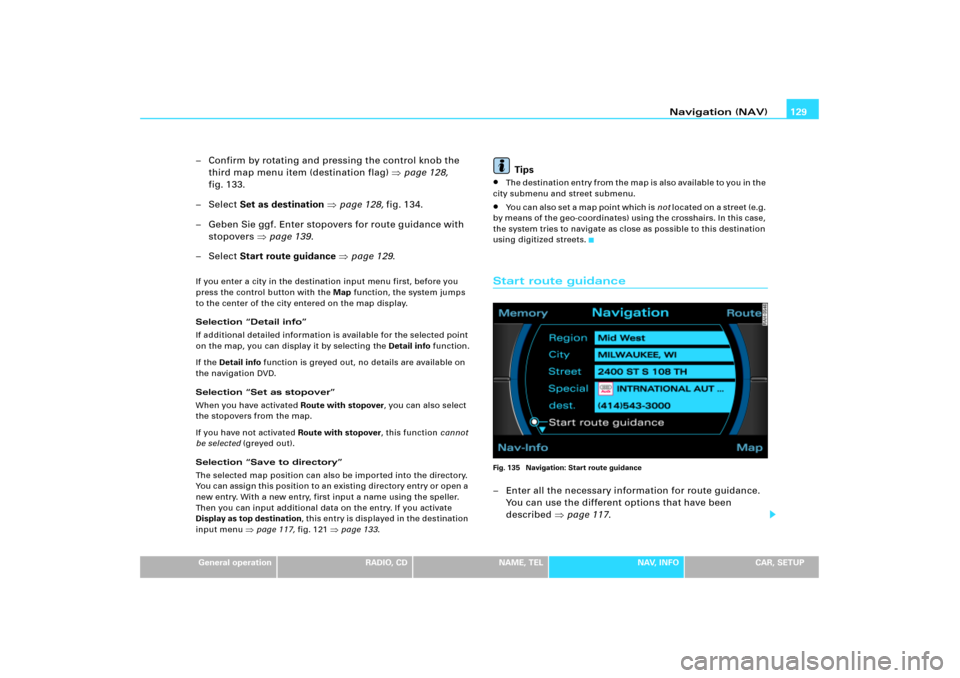
Start route guidanceFig. 135 Navigation: Start route guidance– Enter all the necessary information for route guidance.
You can use the different options that have been
described �page 117.
Navigation (NAV) 162
– In a destination input menu �page 117, fig.121, enter
the desired location data.
– Press the function button �page 16 in the navi-
gation menu.
– Select Set position/direction �page 161, fig.176.
– Using the crosshairs �page 149 on the map, select the
desired starting point for route guidance on the map.
– In the active side meu, select OK �page 161, fig.177.
– Set the direction of the location �page 161, fig.178 by
rotating the control knob.
– When you press the control knob, the system automati-
cally jumps back to the the Setup Navigation menu.You can calculate the route from another position than the present
vehicle location.
We recommend entering the data for the starting point into a desti-
nation input menu
�page 117, fig.121 before you select the Set
position/direction. That way, the system will jump to the point
e n t e r e d i n t h e m a p d i s p l a y. I t i s e a s i e r t o s e t t h e l o c a t i o n o n t h e m a p
from this point.
You can search for the starting point using the crosshairs
�page 149.
You can enter the starting point manually to calculate future routes.
When you have set the location manually on the map, you can
switch to a destination input menu to enter the destination data.
Start route guidance in Demo mode to simulate route guidance �page 161.
Tips
It is only possible to set the location manually and to start route
guidance in Demo mode for a simulation if you vehicle is not
moving and GPS reception is not available
�page 110 (e.g. in an
underground parking garage).
SETUP