Page 67 of 90

PERIODIC MAINTENANCE AND MINOR REPAIR
6-26
6
EAU23290
Checking the wheel bearings The front and rear wheel bearings must
be checked at the intervals specified in
the periodic maintenance and lubrica-
tion chart. If there is play in the wheel
hub or if the wheel does not turn
smoothly, have a Yamaha dealer check
the wheel bearings.
EAU33650
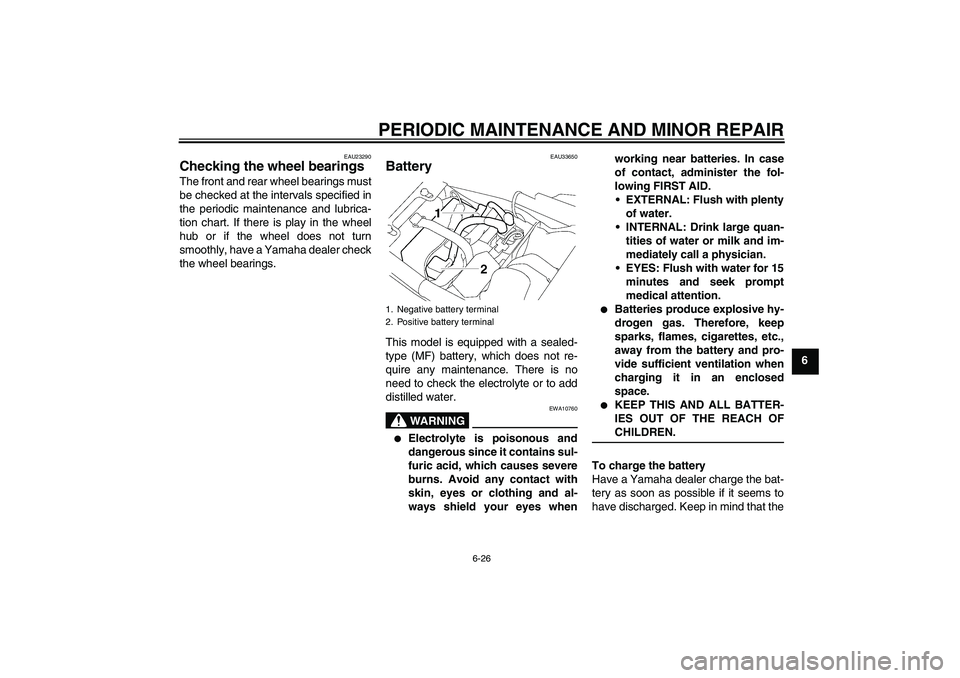
Battery This model is equipped with a sealed-
type (MF) battery, which does not re-
quire any maintenance. There is no
need to check the electrolyte or to add
distilled water.
WARNING
EWA10760
�
Electrolyte is poisonous and
dangerous since it contains sul-
furic acid, which causes severe
burns. Avoid any contact with
skin, eyes or clothing and al-
ways shield your eyes whenworking near batteries. In case
of contact, administer the fol-
lowing FIRST AID.
EXTERNAL: Flush with plenty
of water.
INTERNAL: Drink large quan-
tities of water or milk and im-
mediately call a physician.
EYES: Flush with water for 15
minutes and seek prompt
medical attention.
�
Batteries produce explosive hy-
drogen gas. Therefore, keep
sparks, flames, cigarettes, etc.,
away from the battery and pro-
vide sufficient ventilation when
charging it in an enclosed
space.
�
KEEP THIS AND ALL BATTER-
IES OUT OF THE REACH OFCHILDREN.
To charge the battery
Have a Yamaha dealer charge the bat-
tery as soon as possible if it seems to
have discharged. Keep in mind that the
1. Negative battery terminal
2. Positive battery terminal
U5WME3E0.book Page 26 Thursday, August 4, 2005 8:48 AM
Page 70 of 90

PERIODIC MAINTENANCE AND MINOR REPAIR
6-29
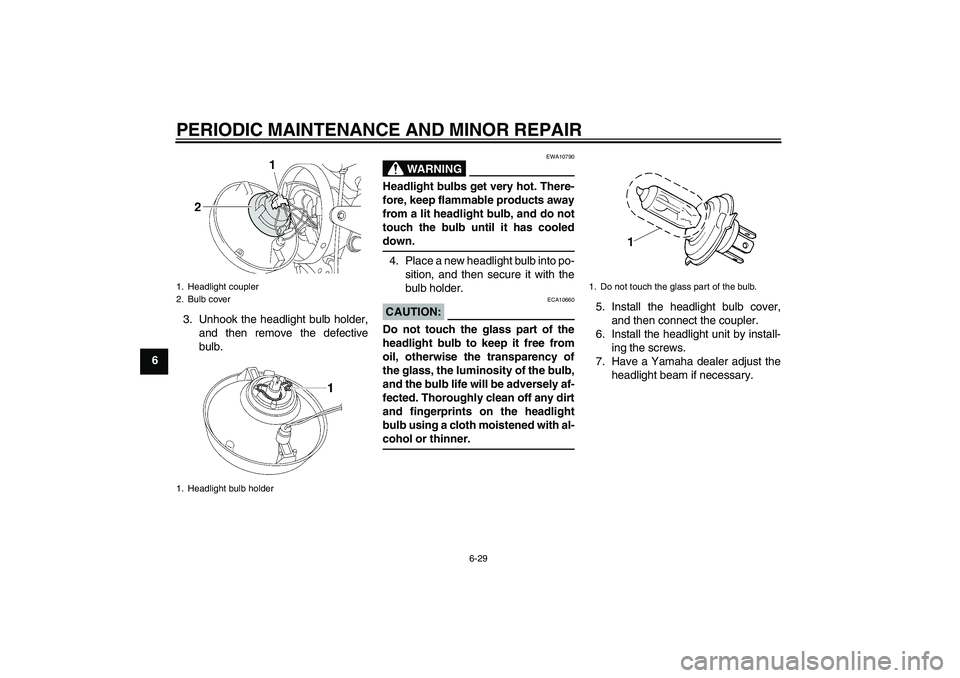
63. Unhook the headlight bulb holder,
and then remove the defective
bulb.
WARNING
EWA10790
Headlight bulbs get very hot. There-
fore, keep flammable products away
from a lit headlight bulb, and do not
touch the bulb until it has cooleddown.
4. Place a new headlight bulb into po-
sition, and then secure it with the
bulb holder.CAUTION:
ECA10660
Do not touch the glass part of the
headlight bulb to keep it free from
oil, otherwise the transparency of
the glass, the luminosity of the bulb,
and the bulb life will be adversely af-
fected. Thoroughly clean off any dirt
and fingerprints on the headlight
bulb using a cloth moistened with al-cohol or thinner.5. Install the headlight bulb cover,
and then connect the coupler.
6. Install the headlight unit by install-
ing the screws.
7. Have a Yamaha dealer adjust the
headlight beam if necessary.
1. Headlight coupler
2. Bulb cover
1. Headlight bulb holder
1. Do not touch the glass part of the bulb.
U5WME3E0.book Page 29 Thursday, August 4, 2005 8:48 AM
Page 72 of 90

PERIODIC MAINTENANCE AND MINOR REPAIR
6-31
6
EAU33541
Replacing the auxiliary light
bulb If the auxiliary light bulb burns out, re-
place it as follows.
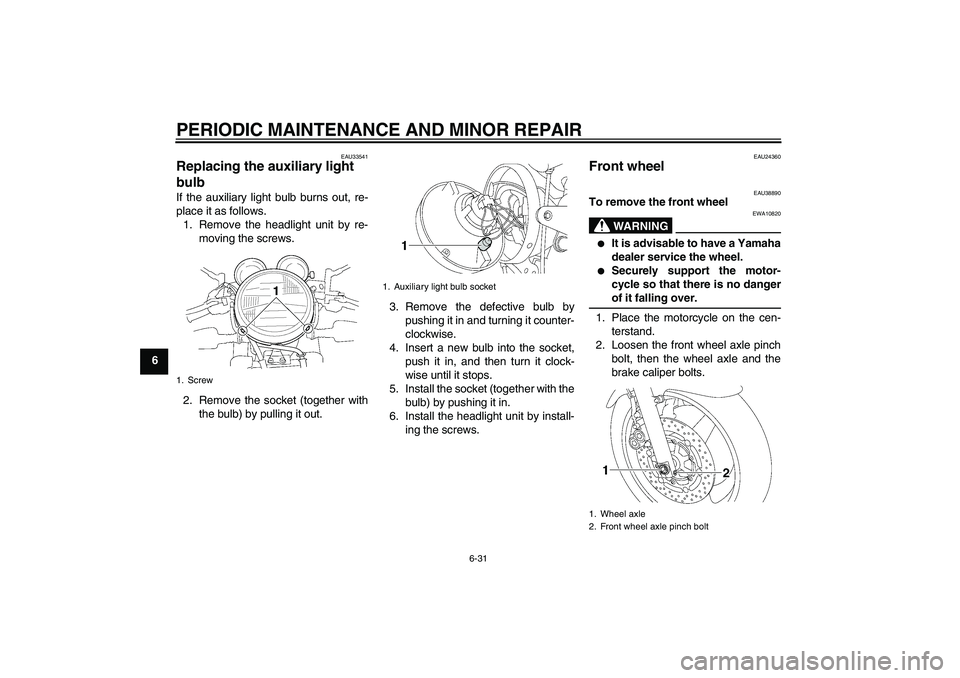
1. Remove the headlight unit by re-
moving the screws.
2. Remove the socket (together with
the bulb) by pulling it out.3. Remove the defective bulb by
pushing it in and turning it counter-
clockwise.
4. Insert a new bulb into the socket,
push it in, and then turn it clock-
wise until it stops.
5. Install the socket (together with the
bulb) by pushing it in.
6. Install the headlight unit by install-
ing the screws.
EAU24360
Front wheel
EAU38890
To remove the front wheel
WARNING
EWA10820
�
It is advisable to have a Yamaha
dealer service the wheel.
�
Securely support the motor-
cycle so that there is no dangerof it falling over.
1. Place the motorcycle on the cen-
terstand.
2. Loosen the front wheel axle pinch
bolt, then the wheel axle and the
brake caliper bolts.
1. Screw
1. Auxiliary light bulb socket
1. Wheel axle
2. Front wheel axle pinch bolt
U5WME3E0.book Page 31 Thursday, August 4, 2005 8:48 AM
Page 74 of 90

PERIODIC MAINTENANCE AND MINOR REPAIR
6-33
6
EAU25080
Rear wheel
EAU25161
To remove the rear wheel
WARNING
EWA10820
�
It is advisable to have a Yamaha
dealer service the wheel.
�
Securely support the motor-
cycle so that there is no dangerof it falling over.
1. Loosen the axle nut and the brake
caliper bolts.
2. Disconnect the brake torque rod
from the brake caliper bracket by
removing the nut and the bolt.3. Place the motorcycle on the cen-
terstand.
4. Remove the axle nut and the brake
caliper by removing the bolts.
CAUTION:
ECA11300
Do not apply the brake after the
brake caliper has been removed,
otherwise the brake pads will beforced shut.5. Loosen the locknuts, and then turn
the drive chain slack adjusting bolt
on each side of the swingarm fully
in direction (a).
6. Push the wheel forward, and then
remove the drive chain from the
rear sprocket.
NOTE:The drive chain does not need to be
disassembled in order to remove andinstall the rear wheel.
7. While supporting the wheel and
the brake caliper bracket, pull the
wheel axle out.
1. Axle nut
1. Brake caliper bolt
2. Brake torque rod
3. Nut
4. Brake caliper bracket
5. Brake caliper
6. Bolt
1. Wheel axle
2. Drive chain slack adjusting bolt
3. Locknut
U5WME3E0.book Page 33 Thursday, August 4, 2005 8:48 AM
Page 76 of 90

PERIODIC MAINTENANCE AND MINOR REPAIR
6-35
6
EAU25891
Troubleshooting chart
WARNING
EWA10840
Keep away open flames and do not smoke while checking or working on the fuel system.
Check the fuel level in
the fuel tank.1. Fuel
There is enough fuel.
There is no fuel.
Check the compression.
Supply fuel.
The engine does not start.
Check the compression.
Operate the electric starter.2. Compression
There is compression.
There is no compression.
Check the ignition.
Have a Yamaha dealer
check the vehicle.
Remove the spark plugs
and check the electrodes.3. Ignition
Wipe off with a dry cloth and correct the
spark plug gaps, or replace the spark plugs.
Have a Yamaha dealer check the vehicle.
The engine does not start.
Have a Yamaha dealer
check the vehicle.
The engine does not start.
Check the battery.
Operate the electric starter.4. Battery
The engine turns over
quickly.
The engine turns over
slowly.
The battery is good.Check the battery lead connections,
and charge the battery if necessary.
DryWet
Open the throttle halfway and operate
the electric starter.
U5WME3E0.book Page 35 Thursday, August 4, 2005 8:48 AM
Page 78 of 90

MOTORCYCLE CARE AND STORAGE
7-2
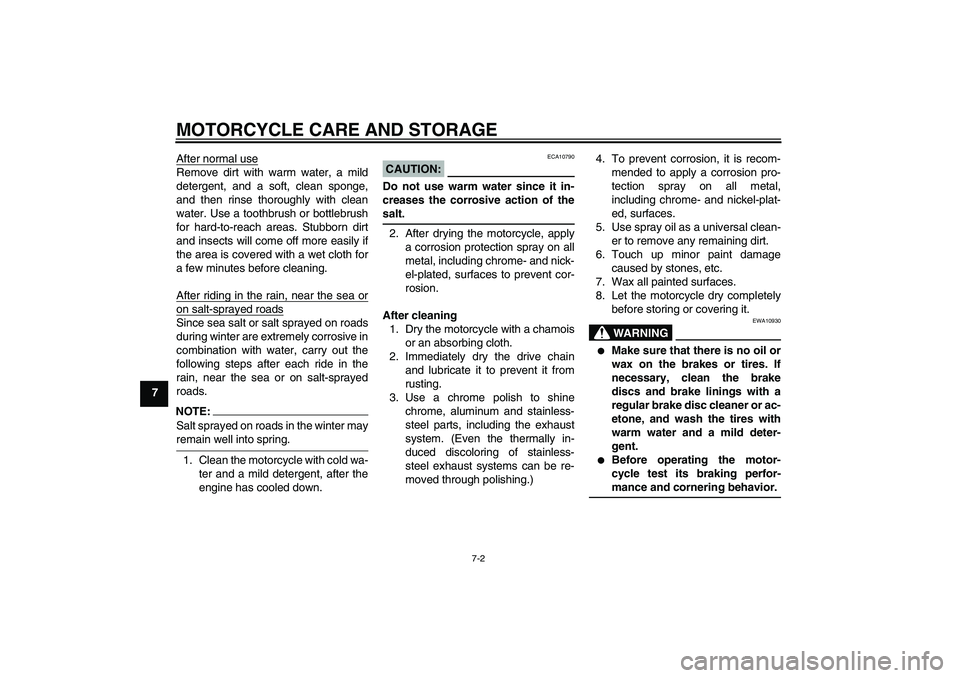
7After normal use
Remove dirt with warm water, a mild
detergent, and a soft, clean sponge,
and then rinse thoroughly with clean
water. Use a toothbrush or bottlebrush
for hard-to-reach areas. Stubborn dirt
and insects will come off more easily if
the area is covered with a wet cloth for
a few minutes before cleaning.
After riding in the rain, near the sea oron salt-sprayed roadsSince sea salt or salt sprayed on roads
during winter are extremely corrosive in
combination with water, carry out the
following steps after each ride in the
rain, near the sea or on salt-sprayed
roads.NOTE:Salt sprayed on roads in the winter mayremain well into spring.
1. Clean the motorcycle with cold wa-
ter and a mild detergent, after the
engine has cooled down.
CAUTION:
ECA10790
Do not use warm water since it in-
creases the corrosive action of thesalt.
2. After drying the motorcycle, apply
a corrosion protection spray on all
metal, including chrome- and nick-
el-plated, surfaces to prevent cor-
rosion.
After cleaning
1. Dry the motorcycle with a chamois
or an absorbing cloth.
2. Immediately dry the drive chain
and lubricate it to prevent it from
rusting.
3. Use a chrome polish to shine
chrome, aluminum and stainless-
steel parts, including the exhaust
system. (Even the thermally in-
duced discoloring of stainless-
steel exhaust systems can be re-
moved through polishing.)4. To prevent corrosion, it is recom-
mended to apply a corrosion pro-
tection spray on all metal,
including chrome- and nickel-plat-
ed, surfaces.
5. Use spray oil as a universal clean-
er to remove any remaining dirt.
6. Touch up minor paint damage
caused by stones, etc.
7. Wax all painted surfaces.
8. Let the motorcycle dry completely
before storing or covering it.
WARNING
EWA10930
�
Make sure that there is no oil or
wax on the brakes or tires. If
necessary, clean the brake
discs and brake linings with a
regular brake disc cleaner or ac-
etone, and wash the tires with
warm water and a mild deter-
gent.
�
Before operating the motor-
cycle test its braking perfor-mance and cornering behavior.
U5WME3E0.book Page 2 Thursday, August 4, 2005 8:48 AM
Page 80 of 90

MOTORCYCLE CARE AND STORAGE
7-4
7
WARNING
EWA10950
To prevent damage or injury from
sparking, make sure to ground the
spark plug electrodes while turningthe engine over.
6. Lubricate all control cables and the
pivoting points of all levers and
pedals as well as of the side-
stand/centerstand.
7. Check and, if necessary, correct
the tire air pressure, and then lift
the motorcycle so that both of its
wheels are off the ground. Alterna-
tively, turn the wheels a little every
month in order to prevent the tires
from becoming degraded in one
spot.
8. Cover the muffler outlets with plas-
tic bags to prevent moisture from
entering them.
9. Remove the battery and fully
charge it. Store it in a cool, dry
place and charge it once a month.
Do not store the battery in an ex-
cessively cold or warm place [less
than 0 °C (30 °F) or more than 30°C (90 °F)]. For more information
on storing the battery, see page
6-26.
NOTE:Make any necessary repairs beforestoring the motorcycle.
U5WME3E0.book Page 4 Thursday, August 4, 2005 8:48 AM
Page 83 of 90
SPECIFICATIONS
8-3
8
Bulb voltage, wattage × quantity:Headlight:
12 V, 60 W/55.0 W × 1
Tail/brake light:
12 V, 5.0 W/21.0 W × 2
Front turn signal light:
12 V, 21.0 W × 2
Rear turn signal light:
12 V, 21.0 W × 2
Auxiliary light:
12 V, 4.0 W × 1
Meter lighting:
LED
Neutral indicator light:
12 V, 1.7 W × 1
High beam indicator light:
12 V, 1.7 W × 1
Oil level warning light:
12 V, 1.7 W × 1
Turn signal indicator light:
12 V, 1.7 W × 2
Immobilizer system indicator light:
LEDFuses:Main fuse:
40.0 A
Headlight fuse:
15.0 A
Signaling system fuse:
10.0 A
Ignition fuse:
15.0 A
Parking lighting fuse:
10.0 ABackup fuse:
10.0 A
U5WME3E0.book Page 3 Thursday, August 4, 2005 8:48 AM