2006 VOLKSWAGEN GOLF engine compartment
[x] Cancel search: engine compartmentPage 9 of 444
Coolant 3.2: 47
Level 3.2:
49
Loss 3.2:49
Coolant leve l
Warning light 3.2: 48
Coolant temperature
Gauge 3.1:9 Safe ty instru ctions 3.2:48
Trail er towing 3.2: 48
Warning light 3.2 : 4 8
C
ras h recorders 3.2: 34
C rui
se control system
Indicator light 3.1:96
without display 3.1: 96
C up ho ld ers 3.
1: 67
in the front center consol e 3 .1: 67
the rear center console 3.1:67
Curbs 3.3:4
Curb weight 3.3 : 6
C
urrent f u el con sumptio n 3.1:21
C
urtain airbags 2.1:
Custome r Center 2.1: 28
D
Danger of fittin g a child seat on the front pas
senger seat 2.1:
Daytime dri ving lights 3.1:4 3
Daytime Hunning Light s 3.1: 43
D
eactiv ating the switchabl e lockin g
2.1: 67
Depress brake ped al 3.1: 6
Determining correct load l im it 3.2: 71
Diff
erential lock 6
Digit al cl
ock 3.1:8
Dimensio n s 3.3: 4, 7
Disp la y 3.1: 1 3
D is t
ance b etween driver and steerin g
w h
eel 2.1:4
D is ta n
ce travele d 3.1: 21
Door re lease h andle 3.1: 3
Doors 3.1:33
close 3.1: 33 closing 3.1: Warning li gh t 3.1: 33
Drive economically 3.2: 19
6 Key words
Drive economic all y and he lp protect the
environment 3.2: 19
Driv er See Seating position
Drivin g outside of the
Driving safety 2.1: 3
Driving lime 3
.1:
E
EDL 3.2:6
See also Electronic Differ ential Lock
Warning light 3.2:5
Electrical socket 3.1: 68
E
lectronic diff ere nti al lock 3.2: 6
Electroni c Differential Lock
Warning light 3.2: 5
Ele c
tronic immobilizer 3.1:85
E l
ectronic Co ntrol 3.2: 9
E l
ectronic Stabilization
How it works 3.2: 6
Eme rge ncy
L
ockin g driver's door 3.2: 88
Opening l eve r for the rear lid 3.2: 89
Unl ocki ng
driver's door 3.2: 88
Em ergency closing 3.2: 88
E m er
gency nasher 3.1: 45
E m
ergency locki ng all doors 3.2: 88
Emergency ope nin g 3.2: 88 Doors 3.1: 34
Emer gency
unlocking of rear lid 3.2: 89
E ng
ine Break-in 3.2: 12
Eng in e compartment
Cleaning 3.2 :27 you should take when work
i
ng in sid e the e ngin e
compartment 3.2:39 Work ing in the engine
compartment 3.2: 39
E n g in e
compartment la yout 3.3 : 5
E n
gine compartment overview 3.3: 5
Page 10 of 444
Engine coo lant 3.2:47
Add i
tive s 3.2:47
Ca n I
add plain water to the en gi ne coolant ? 3.2 :
Engine data 3.3: 5
Eng ine
hood 3.2: 41
How do unlock the engin e hood? 3.2: 41 Warn ing light 3.2: 41
Engin e management 3.2: 9
E ngin e oi l 3.2: 42
Adding 3.2: 45
Add itives 3.2: 46
Check ing leve l 3.2: 44
Consumption 3.2: 4 3
Dip s
tick 3.2: 44
How do know how much oil m y e ngine is
consuming ? 3.2: 43 c h an ge 3.2: 46
S p ecifica tion s 3.2: 42
Specificatio ns gaso line engine 3.2: 42
Wha t kind of e ngine oil should put in my ve hicle? 3.2: 42
When should check the e n gi ne oi l
l eve l? 3.2 : 4 3
Where is th e oil dip stick 3.2:
44
E ngin e oil pr essure
Warning light 3.2: 45
Eng ine oil
senso r
Warning light 3.2:
44
Environme nt
Avoidi ng pollution 3.2:23,36
C le
aning th e e ngin e compartment 3.2 : 28 Drive economicall y 3.2:
Warni ng ligh t 3.2: 9 also Elec tronic Co ntrol
3.2:6
B utt on 3.2 : 7
Warning
lig ht 3.2: 7
Even t Data Hecorder 3.2:
34
Examples of improper seating
position s 2.1:
Infant seats 2.1: 59
Sa fe ty belt ex te
nder 2.1: 24
Sa fet y belts 2.1:
F loor mat s 2.1: 9
Fog light s 3.1
:43
F r
ont ai rbags
De
scription 2.1:32
Front air b ag sys tem
2.1: 32
A irb ag deploym ent zone 2.1:38
Th e bas ics 2.1: 32
Fronta l
collisions and the laws of
physics
1 5
Fr
ont center armres t 3.1: 65
Front seats 3.1: 58
F u el
fille r cap
Warni ng light 3.2:35
Fuel ga uge
Displa y 3.1:
F ue l level 3.1:
Fuse box
th e in strume nt panel, left 3.2: 92 the instrument panel, rig ht 3.2: 92
Fu ses 3.2:
Page 15 of 444
Safety instructions
Belt pretensioners 2.1: 27
Child restraint on the front seat 2.1:
Child seats 2.1 : 56
Coolant tempera ture 3.2:48
Loading
the lu ggage compartment 2.1:
seating position for passengers in
r
ear seat s 2.1: 6 seating position for
driver 2.1: 4
seating position for the front
passenger 2.1: 5
Safety belt extender 2.1: 23
Sa fet y
belts 2.1: 17 S id e airbag s 2.1: 48
Side Curtain ProtectionTM airbags 2.1: 52
Screw-on decorati ve covers 3.2: 58
Seat adjustment 3.1: 55, 58
Seat heating
Front 3.1:
59
Seating ca pacity 2.1: 13
Sea ting
position
Di s
tance between driver and ste erin g
w
hee l 2.1:4 Dr iver 2.1: 4
Fron t passen ger 2.1: 5 Improper seatin g position s 2.1: 8
Speed rating le tter code 3.2: 74
Speed warning 3.1: 21
Starting th e engine W ith the ig nition key 3.1:85
S tartin g
with jumper cables 3.2: 99
Stee rin g 3.1: 25
S
teering lock 3.1: 84
S te ering
wheel
Di s
tance to the driver 2.1: 4
Steerin g wheel height adjustment 3.1: 25
S
teps for determining co rrect load limit 3.2: 71
Sticker on th e left door jamb 3.3 : 3
Stopping the en gine 3.1:8 6
Sto rage
area
Roof 3.1:65
S torage
compartment 3.1: 64
additional sto rage 3.1: 66
Front center armrest 3.1: 65
S torage for
the vehicle literature 3.1: 64
Sunroof 3.1: 41
Sunshade
power roof 3.1:41
Sun viso r 3.1:49
Sw itch
able loc king feature
Activatin g 2.1: 65
D
eacti va tin g 2.1: 67
Sw itches Em ergency flasher 3.1: 45
Light swit ches 3.1: 43 outside mirrors 3.1: 53 ro of 3.1:41 windows 3.1: 38
Sw itching off the engin e
W ith the ignit ion key 3.1: 86
Sw itch
lig htin g 3.1: 3
T
Tachometer 3.1: 9
Ta
ilga te 3.1:35
Page 173 of 444
Booklet 3.1 Controls and Equipment
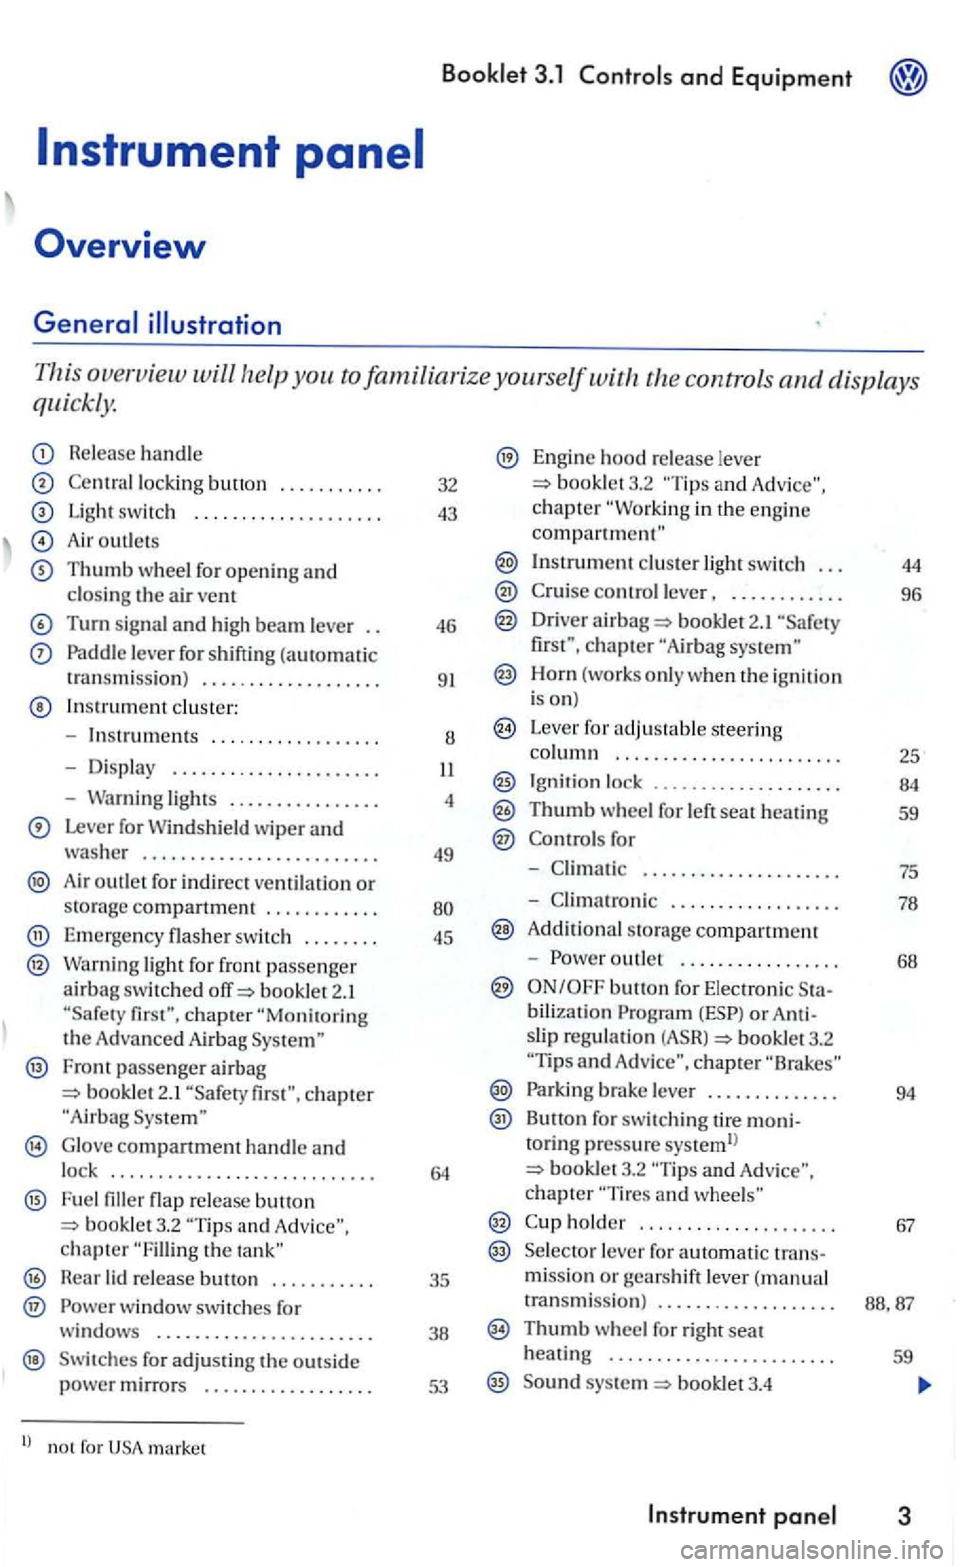
This overview will the controls and displays
quickly.
Release handle
lock ing button ...... .... .
Light switc h ................... .
Air outlet s
Thumb wheel for opening and closin g the a ir vent
Turn signal and high beam leve r
Paddle leve r for shifting (automatic
t ransmiss ion ) .................. .
In strument cluste r:
- Instru
ments ... ...........• ...
- Dis pla y ..
-Warning lights ............... .
Lever for Windshield wiper and washer ........................ .
Air outlet for in d irect ventilatio n or storag e compartment ........... .
Emerge ncy flasher sw itch ....... .
Warning light for front passenge r airbag switc hed booklet 2.1
Fron t passenger airbag bookle t 2.1
G lo ve compartment handle and lock ........................... .
F u e l flap re lease button and chapter the
H ear lid re lease .......... .
® w indow switches for
windows ...................... .
Swit ches for adjus ti n g the outs id e power mirrors ................. .
l) no t for market 32
43
46
9
1
8
4
49
45
35
38
53
Engine hood re lease lever booklet3.2 and c h a pter in the engin e compartment"
Instrument cluster light switch . . . 44
control lever, . . . . . . . . . . . . 96
Driver airba g 2.1 chapter
Horn (works o nly when the ig niti on
i s on)
Leve r for adjus table steering column . . . . . . . . . . .. . . . . . . . . . . . . 25
Ignit ion lock ...... 00............ 84
Thumb wheel for left seat heating 59
for
-. . . . . . . . . . . . . . . . . . . . . 75
- Climatro nic . . . . . . . . . . . . . . . . . . 78
A ddit iona l s torage compartment
-
outle t . . . . . . . . . . . . . . . . . 68
bilization or slip regulatio n booklet3.2 and chapte r
Parki ng brake lever . . . . . . . . . . . . . . 94
Button for switc hing tire moni-toring p ressure systemll booklet3.2 chapter
holder . . . . . . . . . . . . . . . . . . . . . 67
Se lecto r lever fo r automatic trans-missio n or gears h ift lever ( m anual
transmissi o n) . . . . . . . . . . . . . . . . . . .
Thumb w heel for right seat
heatin g . . . . . . . . . . . . . . . . . . . . . . . . 59
Sound syste m booklet3.4
Page 303 of 444
Improper us e of power was hers can ca use riou s, invisib le and permane nt tir e damage leading to tire failure and los s of vehicle
Neve r wash tires with a jet that sprays the water out in a direct strea m eve n from a ta n ce or fo r a v ery sh ort time.
3.2 Tips and Advice
tances.
Carefull y apply brakes for a te st.
few cautious brake applicat ions.
A lwa ys read and heed all 13,
The underbody of the ve hicl e is coated to help prot ect it from corrosion and
damage.
The undercoat ing could be da m age d during
normal use but, particularly when dri vin g
road. recommend th at the undercoa ting un
th e ve hicle and the prot ective coat ings on th e
s u sp en sion be in sp ec te d, an d re paired if n eces
sary, bef o re and after the winter season.
R
epair wo rk and additio nal undercoating
s hou ld be carried out onl y by an a uth orized Volkswage n deale r or qualified workshop .
the engine compartment
The sys tem gets very ho t when the hicle is drive n and can cause fir e res ultin g in serious pe rso na l injury.
Neve r a ppl y additional undercoating or rust proofin g on or near the exl ta u st manifold,
exl ta ust pip es, catalytic conve rter or heat shie ld s.
Be especially carefu l w hen cleaning the engine compartment!
Anti-corrosion treotment
The engine compartment is treated at t h e page 39.
Good corro sion protection is pa rti cularl y impor
tant in th e w inter where road salt is used. To ve nt salt damage , th e en tir e e ng in e ment should be th orou ghly cleaned befor e and after th e salt ing perio d.
Your authorized
Volk swag en dealer has th e right cleane rs and prese rva tives and th e
ommend hav ing this w ork perform ed by an thorize d Volkswage n dea ler.
Corr osio n prot ection i s re mov ed when th e engin e compart m ent is cleaned with grea se
s ol ve nts. th e engin e is cleaned , m ake s
ur e th at corrosion protec
tion is app lied to surfaces, seams, jo in ts and co mponents in the
e n g in e compartment.
Plenum
Remove leaves from th e plenum in front of the w indshie ld unde r th e e ngin e hood. Hcmovi ng
l eaves and d ebris reg ularl y he lp s preve nt th e
wate r dr ain ho les from beco min g bloc ke d, and it
h elps to preve nt debris from gettin g in sid e th e
ve hicl e throu gh th e heati ng and ventilation ducts.
The en gin e compartment of any motor ve hicl e
is a potentially dangerous area and can cause seriou s perso nal injury .
Page 312 of 444
Booklet 3.2 Tips and Advice
display come s on, turn off the engine and
t ig ht en th e fuel filler cap prop erly.
the cap is prop erly and comple te ly closed
a nd the ig nition has been switc h ed on agai n th e
wa rning message will disappear after abo ut
Improper refueling or handling of fuel can
cause fire, e xplosion and severe burns.
Always make sure the fuel cap is sc rewed
o n
Fuel is hi ghly flammable and can cause
eling and/or to insert the pump nozzle fully
into the filler neck could cause fuel flow and fuel s pray. Fuel spray and flowing fuel are dangerou s beca use they can cause fire or serious injury.
For safe ty reason engine must be turned off when refueling .
Never use a ce llular te lephon e or radio w hile refueling. The electrom ag ne ti c tion can caus e sp arks that can ig nite fuel pors and cause a fire .
Never get back into your ve hicl e while eling. If in exceptional circumstances you must ge t back in your vehicl e while refu eling, make ce rtain that you close door and touch metal to di scharge stati c electricity for e tou chin g the filler nozzle again. electricity can cause sparks can ignit e fuel
vapors released during refuelin g.
Never smoke or h ave an open flame where in or near you r vehicle when refu elin g or fillin g a portable fuel container.
36
For your safety, we strongl y recommend that you do not travel with a portable fuel
cially in cras h.
If , under exceptional circum stances, you must transport a portable fuel co ntain er,
pl ease observe the foUowing:
- Never
fill a portable fuel container while
it is anywhere in or on the ve hicl e (for ampl e, in the lu ggage compartment, or on the trunk). electricity can build up while filling and can ig nite fuel vapors
ca usin g a fire.
- Always pl
ace a portabl e fuel container on ground b efor e
-Alway s keep the filler nozz le co mplet ely
in side the portab le container b efo re and during fillin g.
- If filling a
portable container made of
metal , the filler nozzle must a lway s be in
contact with the container. This will help prevent static e lec tricity from disc ha rgin g and ca use a fire.
- Never
cial laws regarding the use, storage and transporta tion of fuel containers .
- Make certain
the fuel container meets
industry standa rd s F852-86).
Remove fu e l spills f rom the paint ately to prevent pai nt dam age.
Never run the tank completel y dry. An ular gas supply co uld cause misfiring. A s res ult ,
u n burn ed ga s co uld get into the ca ta lytic vener a nd cause damage .
For the sake of environm ent
Do no t try to p ut in more fuel after the au to m atic fille r no zzle has switched off; this may ca use fuel to over flow and pollut e th e enviro nment parti c-
ularl y when it ge ts hot outside.
Page 315 of 444
Booklet 3.2 Tips and Advice
be taken working on
(Automatic tran smissio n).
2. Apply th e parkin g brake firmly.
3. off the eng in e and remove the
k
ey f rom the ignition.
4. Wail
for the engine to cool down.
5. Keep chi ldren and othe rs away from the
ve hicle .
6.
the e ngin e hood.
All serv ice fluids. sp ark plugs . batteri es etc. are
constantly being develo ped and improved. kept up-to-da te
by the manufactur er. For thi s reaso n mend that you have these replaced by an rized Volkswage n dealer. A lways read the notes
b elow . Th e e ngin e or any motor vehicle is a hazardous
WARNING
E ngine
fo rni a cause cancer and birth defec ts and reproduc tive harm. In additio n, certain fluid s
containe d in vehicl es and cerlain products of component wea r co ntain or emit ch e m ica ls
kn ow n to th e to ca use
ca ncer a nd birth defect s o r o th er r eproductive
h arm.
Ba ttery pos ts,
th e of to
(continued)
cause ca ncer and reproductive harm. hands after handling.
WARNING
T he e ng in e comparlmenl of any m olo rvc hicl c
is a polcnli ally dangero us area ca n ca use seriou s pe rso nal inju ry.
Alwa ys use extreme ca ution when doin g
any work in he e ng in e compartment. Always
follow commonl y acce pled p rac tice s and usc common se nse. Neve r risk perso nal
injury.
Never perform any work in the e ng in e
compartment unless you know exactl y how to
ca rry ou t th e job
ni cal info rm ation and th e correcltools ! you arc uncerla in w hat to have the wo rk
p erformed by an aulhorized Volkswage n
d ealer or works hop. Se rious
form ed work.
Neve r o pe n the engine hood if you see stea m or coola nl escap in g fro m the en g in e comparrment. I-Iots team orcoolanl ca n cause serious burns. Alw ays wait until yo u no longe r sec or hear stea m or coolant escap ing fro m the engine.
Alwa ys le t th e en g in e cool do wn pl ete ly before care full y opening the engine
h ood. I-lo t compone nt s will burn sk in on tacl.
th e e ng in e has coo le d down and you
selecto r mati c transmi ssio n).
- Rem ove th e k
ey from the ign ition.
- K
eep children and others away from
Page 317 of 444
Booklet 3.2 Tips and Advice
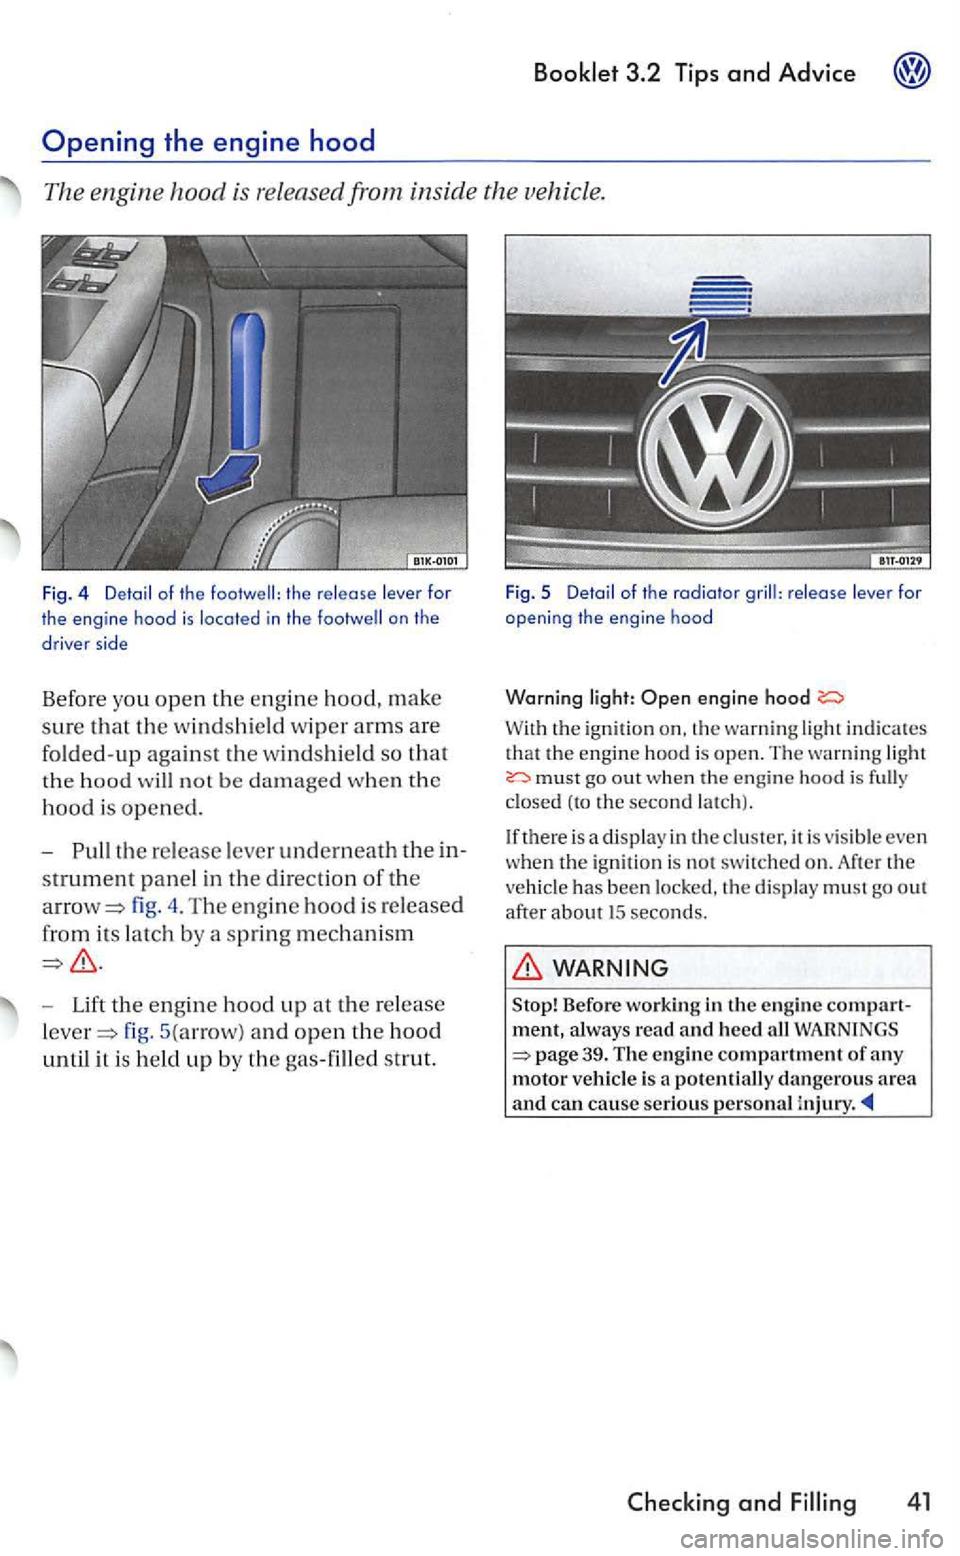
th e release lever for
the engine hood is located in the on the
d rive r side
Befor e you open the engine hood, make
sure that the w indshi eld wiper arms are
folded-up against the winds hi eld so that
the hood will not be damaged when the
hood is opened.
fig . 4 . The engi ne hood is released
from its latch by a s
pring mechanism
Lift the engin e hood up at the re lease
fig. 5(arrow) and open the hood
until it is held up by the gas-filled strut.
Fig . 5 Detail of the radiator release lever open ing the en gine hood
Warning engine hood
With the ignition on, the warnin g light indicate s
that the engine hood is open. The warning light must out when the engine hood is closed (to the second latch ).
If there is a displa y
in the cluster, it is visible even
when the ignit io n is not switched on. After the
vehicle has been locked, the disp lay must go out after about 15 seconds .
WARNING
Before working in lhe engine compartment, always read and heed all WARNINGS 39. The engine compartment of any motor vehicl e is a potentially dangerous area and can cause se riou s personal injury.