2006 VOLKSWAGEN GOLF engine
[x] Cancel search: enginePage 325 of 444
Always protect face, hands and arms from hot escaping coolant or steam by covering the cap with a large, thick rag.
(contin ued)
Turn th e cap slow ly and very carefully in a
counter-clockwise direction while applying
light
down ward pressure on the top of th e cap.
Never spill antifreeze or coolant on the haust system or hot eng ine parts. Under some conditions, the ethyle n e glyco l in en gin e
coolant can catch fire.
Checking the
The correct coolant level is important for correct functioning of the engine cooling
system.
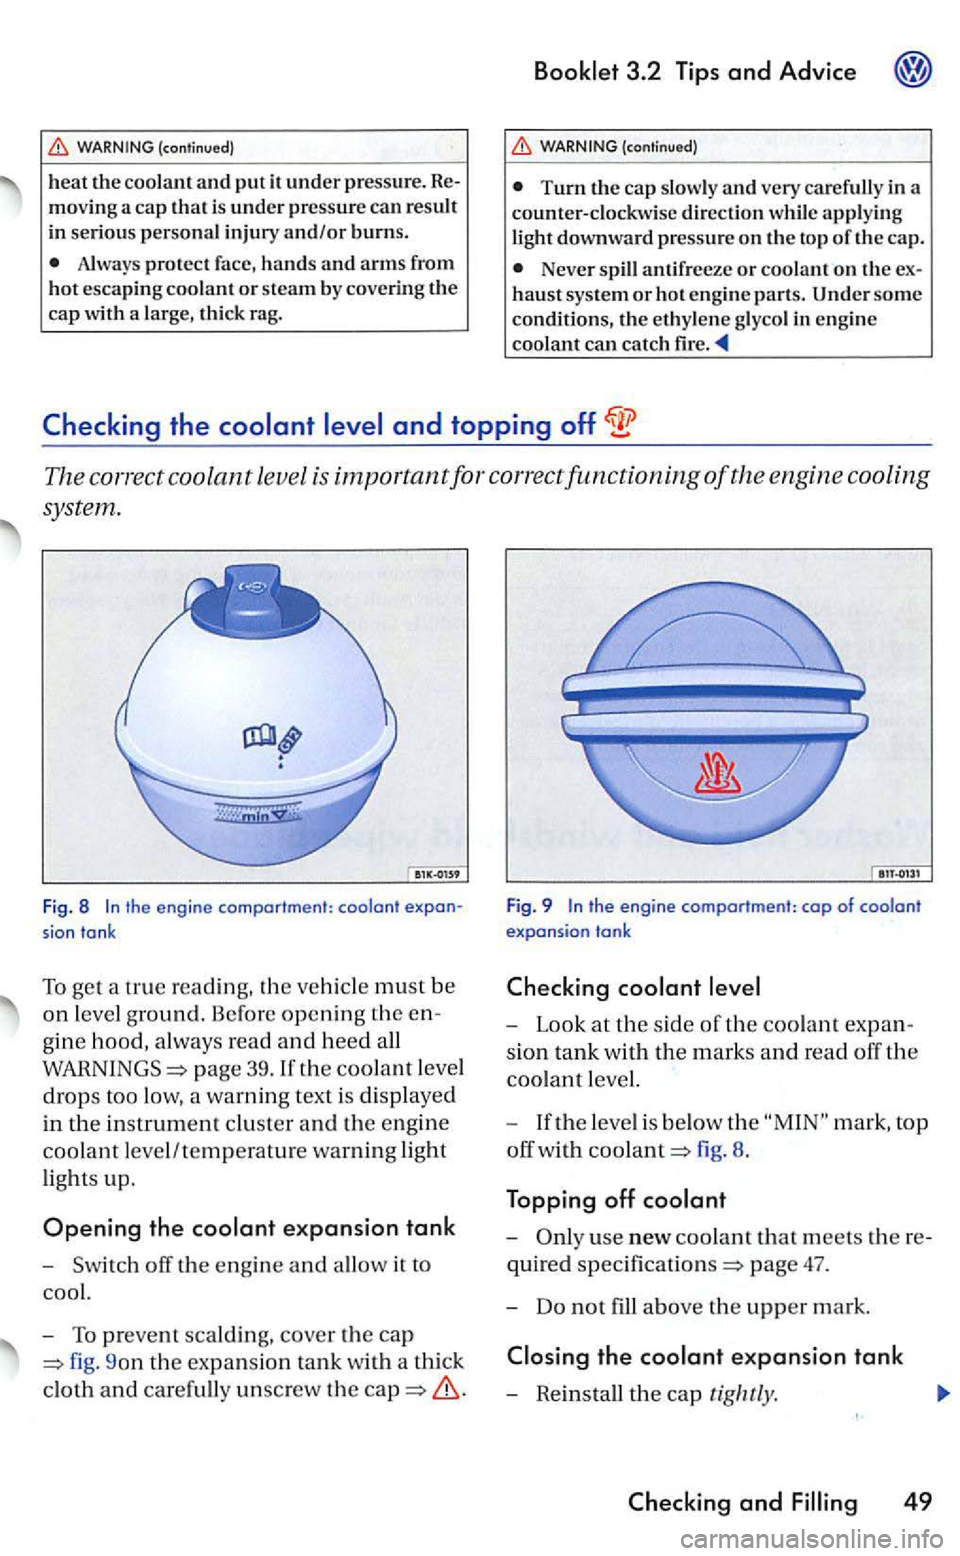
Fig. 8 t h e engin e compartment: coolant
sian tank
To get a true reading, the ve hicle must be
on l eve l ground. Before opening the
gine hood, always read and heed all
page 39.1f the coolant level
drops too low, a warning text is displayed
in the in strument cluster and the engine
coolant leve l/temperature warning ligh t
lights up.
Opening the expansion tank
- Switch
9on the expansio n tank with a thick
cloth
and carefully unsc rew the
Fig. 9 the engine compartment: cap of coolant expansion tank
- Look at the side or the coolant
sion tank w ith the marks and read off the
coolant level.
-
If the level is below the mark, top
off wi
th fig. 8.
Topping off
-
the
and
Page 326 of 444
booklet 3.3 ''Te chnical
page 47. Do not use a diffe rent
t y p e of additive if p lu s is not available. t his case use only wate r a nd bring the coolant concen trat ion back up correct level as soon a s poss ible by topping off wit h s pecified page 47 .
Alway s
mark. the
excessi ve coola nt will b e presse d out of cooling syste m when
Stop! Before working in the engine compartment, always read and heed all
W hen mixed w ith other incorrect additives co lo rofG 12 plus w ill ch a nge brown.
w ill res ult in engine damage!
has been engine coo l engine.
L arge coolan t lo sses are sig n of leaks in the cooling sys tem. Have th e cooling sys tem check ed
Do not add any type of leak sealant
t o your ve hicle's engine coolant. Adding radiator re pair fluid may adversely
The water for cleaning th e windshield shou ld alway s be mixed with windshield
washer fluid.
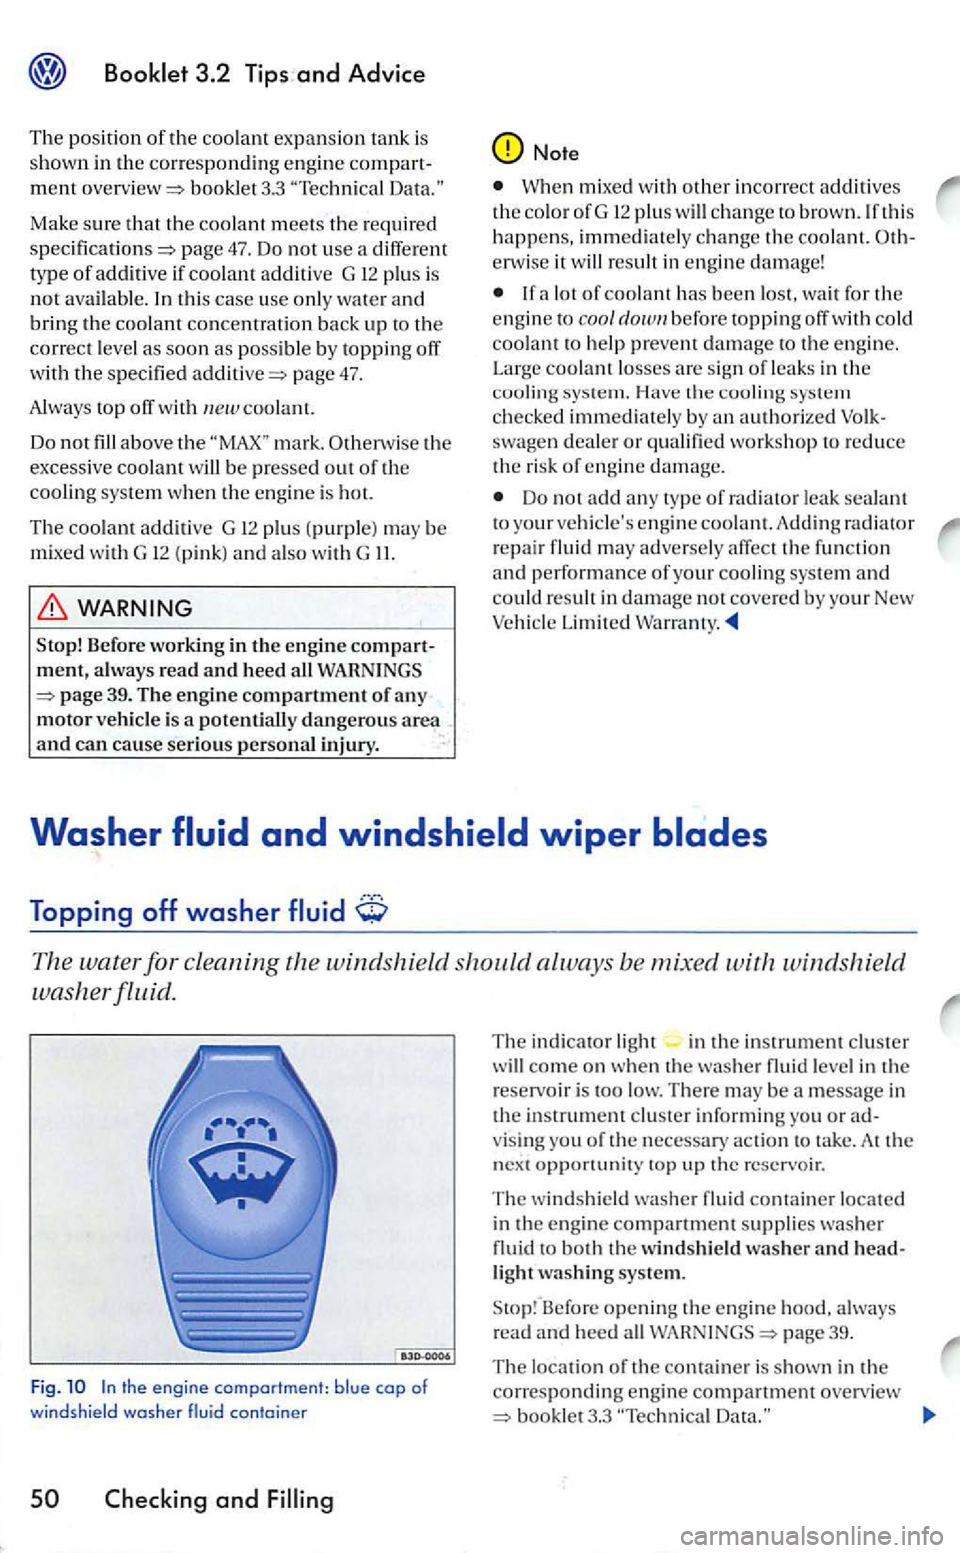
Fig. the engine comportment: b lue cop of w indshie ld washer container
The in dicator ligh t in cluster come on w he n the was her fluid leve l in th e
r eservoir is
cluster informing you or a d
v is in g yo u of the next opportunity top up the reservo ir.
The wind shield washe r flu id locat ed
i n engin e compartment suppli es was he r fluid t o both windshield washer and hea d
li ght washing system.
Before opening the engine page 39.
T he loca
tion of th e conta iner is shown in th e
corresponding engine bookle t3.3 "Tec hnica l
Page 327 of 444
Sin ce regular water is usually not adequate for
clean ing the win dshield, add a cleaning solution
to th e wa ter. follow the dilution instruc
t io ns on the package.
Sto p! Befo re wor king in the e ngine comp art
m en t, always read and heed WARNINGS 39. The engine co mpartment of a ny motor ve hicle is a po tentially dan gero us area an d can cause serious personal in jury.
Changing windshield wiper blades
3.2 Tip s and Advice
Note
Do not use engine coolant, anti-freeze or any other so lut ions that can damage th e ve hicle
Damag ed
wip er
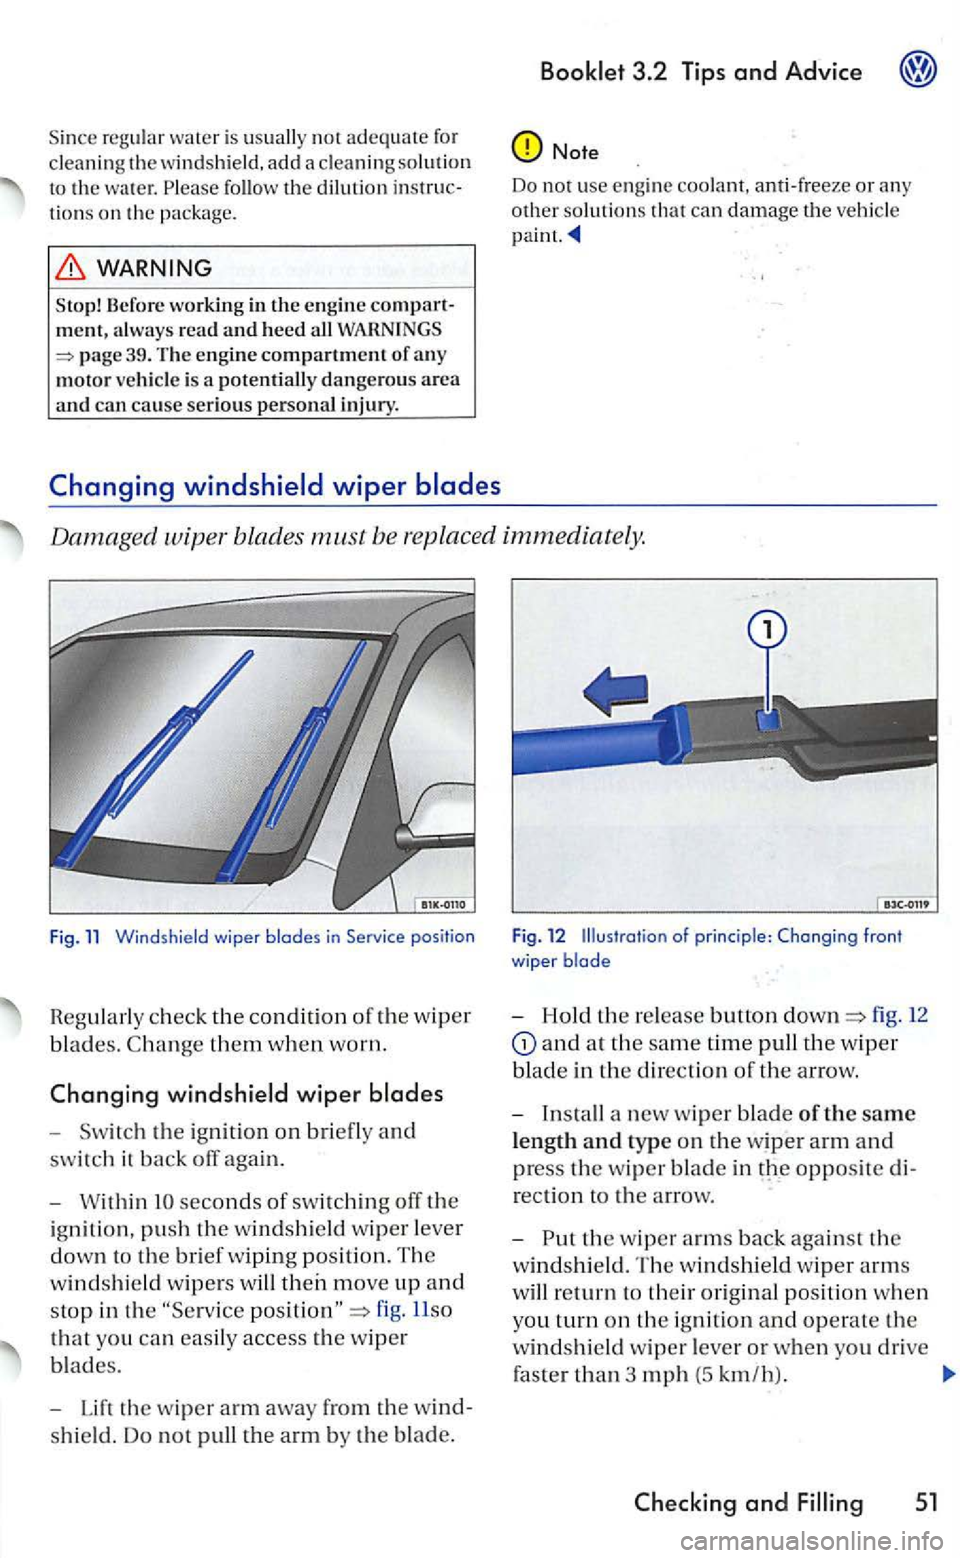
- Switch the ig nition on briefly and
swit ch it back off again.
-
Within seconds of swit ch in g off the
ignition , push th e windshi eld wiper leve r
clown to the brief wipin g positi on. The
winclshie l
cl wipers will
fig. Llso
t h a t yo u can easily access the w iper
b l
ades.
- Lift the wiper arm away from the w ind
s
hie ld. Do not pull the a rm by th e blade.
Fig. 12 Illustrat io n of princi ple: Changing fron t
wiper blade
- Hold the re lease button fig. 12
and a t th e sa m e time pull the w iper
b l
ade in the d irection of the arrow.
- Insta
ll a new wi per blade of th e sam e
l
ength and type o n the wiper arm and
press the wiper blad e in
th e w iper arrn s back aga inst the
w
indshiel d. The windshield wi per arms
will r
eturn to their orig in al positio n when
you turn on th e ig n ition and operate th e
windshield wiper le ver or when you dri ve
fas t
er than 3 mph (5 km/ h).
Ch ec king and 51
Page 329 of 444
drive if you have clear vis io n through all the windows.
A defect ive or d irt y w iper blade can scratch
t h e rear glass.
Never clean gla ss panel with fuel. nail polish remove r, p aint thinn er o r similar flu ids.
Thi s ca n damage th e w iper bla d es.
Never move the w iper or the wiper arm your hand can dam age it.
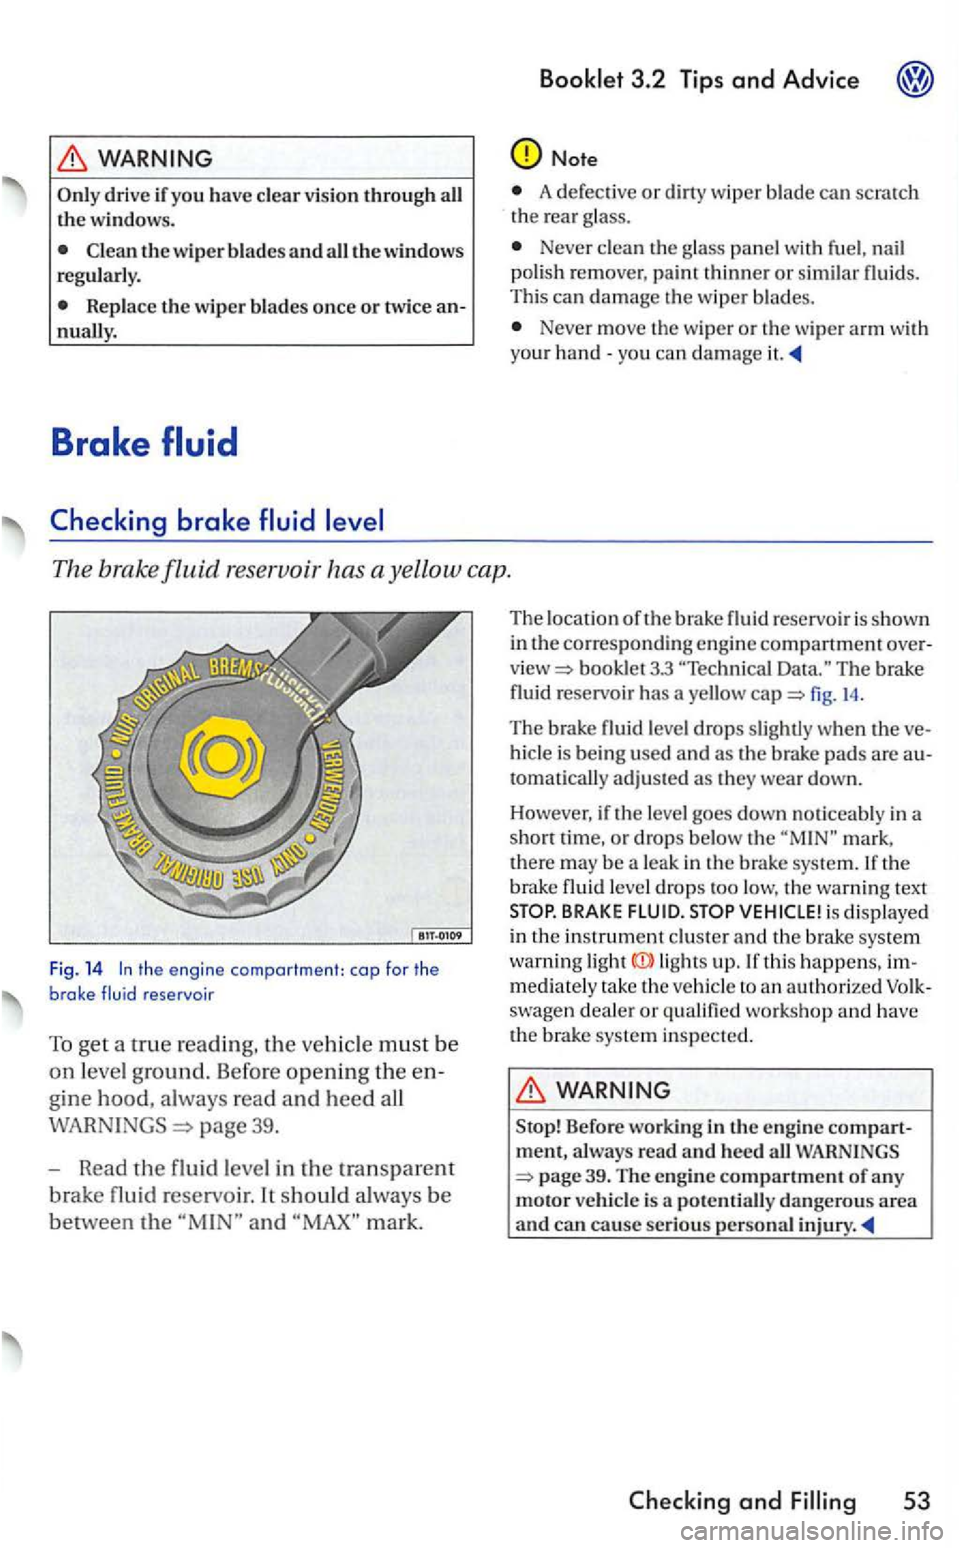
The brak e fluid reservoir has a ye llow cap.
Fig. 14 the engine compartment: cap for the brake fluid reservoir
To get a true reading, the m ust b e
on leve l ground. Before opening th e en
g
ine hood, a lways read and heed all
page 39.
- Read
the fluid leve l in the tra nsparent
bra ke fluid re servoir. It should always be
between the and mark.
Th e lo cation of th e brake fluid reservoi r is shown
in
bookl et 3.3 The brake
fluid reservoir has a yello w fig. 14 .
The brake fluid lev el drops s lightl y when th e ve
hicl e is bein g used and a s th e brake pad s are autom atically adju sted a s they wear down.
Ho wev
er, if th e le ve l goes down noticeably in a
s ho rt time, or drops below th e mark ,
th ere may be a leak in the brake system. If the b rake fluid leve l d rops too low, the wa rnin g text BRAKE FLUID. is displayed
in the instrument clu ste r and th e b rake system warni ng ligh ts up. If t his happens, immediately rake th e ve hicle to an au thorize d swage n deale r or q ualifi ed wo rkshop a nd have
th e brake system inspected.
Stop! Before wo rkin g in th e engin e compartment, a lways read and heed all WARNINGS
53
Page 330 of 444
3.2 Tips and Advice
The brake fluid be changed every two years.
We recommend that you have the brak e changed b y an authorize d Volkswagen dealer.
S top! Be
fore openin g th e e ngin e hood, always
read and heed all page 39.
Brake fluid
absorbs m oisture. time, it will absorb wate r from the air. the wa ter content in the brak e fluid is too high, the brake sys te m
c
ould corrode. Too much wa te r in the brak e fluid
a lso consid erably reduces the boilin g point of the brake fluid. Very heavy use of th e brak es with
old brake fluid may cause vapor lock . Vapo r lock
reduces braking power, in cre ases stopping tances and can eve n cause total brake failu re.
For this r
eason the brake fluid must be repla ced
every two years.
use brak e fluid the s pecification U S standard 116 4. The brake fluid must be new.
Stop ! Befor e working in the engine compartment, always read and h eed all WARNINGS 39. The engine compartment of any motor vehicl e is a potentiall y dangerous area and can cause seriou s persona l injury .
Brake failure can result from old or incorrect brake fluid.
fica tio n
(continued)
A lwa ys check with your authorized swage n deale r to make sure that you arc u sing the correct brake fluid.
The correct brake fluid is also listed on the
labe l on the brak e fluid reservoir.
Always store brake fluid in the closed
To reduce th e risk of poisoning, neve r us e empty food or beverage containers that mi ght mislead someone into drinking from them.
A lwa ys keep bra ke flu id out of the reach of childr en.
Alway s change th e b rake fluid as required in the maintenance bookl et. Heavy braking w ith old brake fluid may cause a vapor lock that reduces braking power, increases ping distances and can even cause tota l brake failure.
Note
Brake fluid can damage the pai nt. Wip e off any
brake fluid from rh c paint immedia tely.
For the sake of environment
B rake fluid
must be drained and disposed of in
th e proper manner obse rv ing env ironmental
Page 362 of 444
3.2 Tips and Advice
(continued)
knock the vehicle ofT the jack or hid e under a
vehicle.
Never support your body weight on the hicle when it is up on the jack.
Never allow anyone to stay in the vehicle when raising the ve hicle with th e jack or when it is up on the jack.
Never let anyone place any part of their body underneath the ve hicle when supported by th e jack.
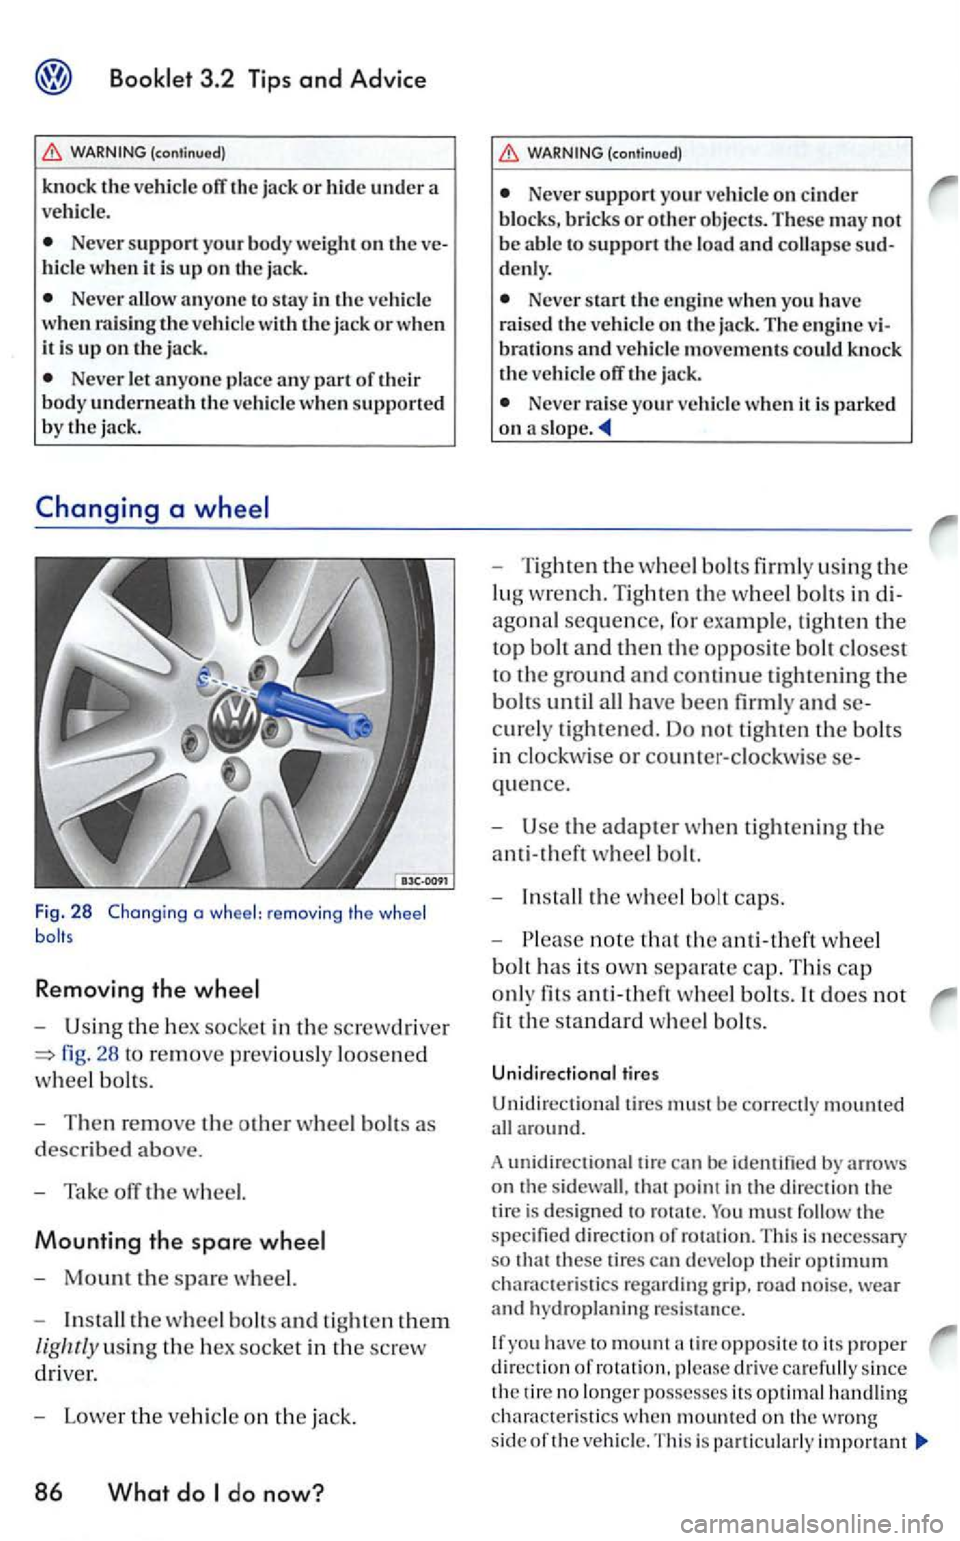
Fig. 28 Changing a wheel: remov ing the wheel
Removing the
U sing the hex socke t in the screwd rive r
fig. 28 to re move pr ev iously loosened
w
hee l bolts.
Then remove th e o ther wheel bolts as
d
escribed above.
Tak e off the w heel.
Mounting the spare
Mount the spare wheel.
In stall the wheel bolts and tight en them
lig hrly using the hex socket in the screw
driv er.
Lower the vehicle on th e jack.
86 What do do now?
(continued)
Ne ver support your vehicle on cinder blo ck s, bricks or ot her objects . These may not
b e abl e to support the load and collapse denl y.
Neve r start th e en gine when you have
rai sed the veh icle on th e jack. The engine brations and ve hicle movements could kno ck
th e ve hicle off the jack.
Neve r raise your ve hicle when it is parked on a s lope .
Tighten the w hee l bolt s firml y using th e
lug wre n ch. Tighten
the w heel bolt s in
agonal sequence, fo r exa mple, tighten the
top bolt and then the opposite bolt closest
to th e ground and continue tight ening the
bolts until all have been firmly and
quence.
Use the adapter w hen tight enin g th e
anti-theft wheel bolt.
In stall the w heel bolt caps.
note that the anti-theft w heel
bolt h
as its ow n separate cap. This ca p
o nl y
fits whee l bolts. It does not
fit the standard wheel bolt s.
Unidirectional tires
Unidirectiona l tires must be correctl y mount ed
all around.
A unidir
ectional tire can
must follow the specifie d direction of ro tatio n. T his is necessary
s o these tire s can deve lop their optimum chara cte ristics regard ing gr ip. road noise. wear and hydroplaning resis ta nce.
you have to mount tir e opposite to its proper d ire ction of rotati on, please drive carefull y since
th e tir e no lo ng er posse sses its optimal ha ndlin g
c h arac te rist i
cs when mounted on th e wro ng
s id e of th e ve hicl e. T hi s is particu larly impo rtant
Page 366 of 444
left side of the instrument panel and behind fu se box covers in
the engine
compa rtment.
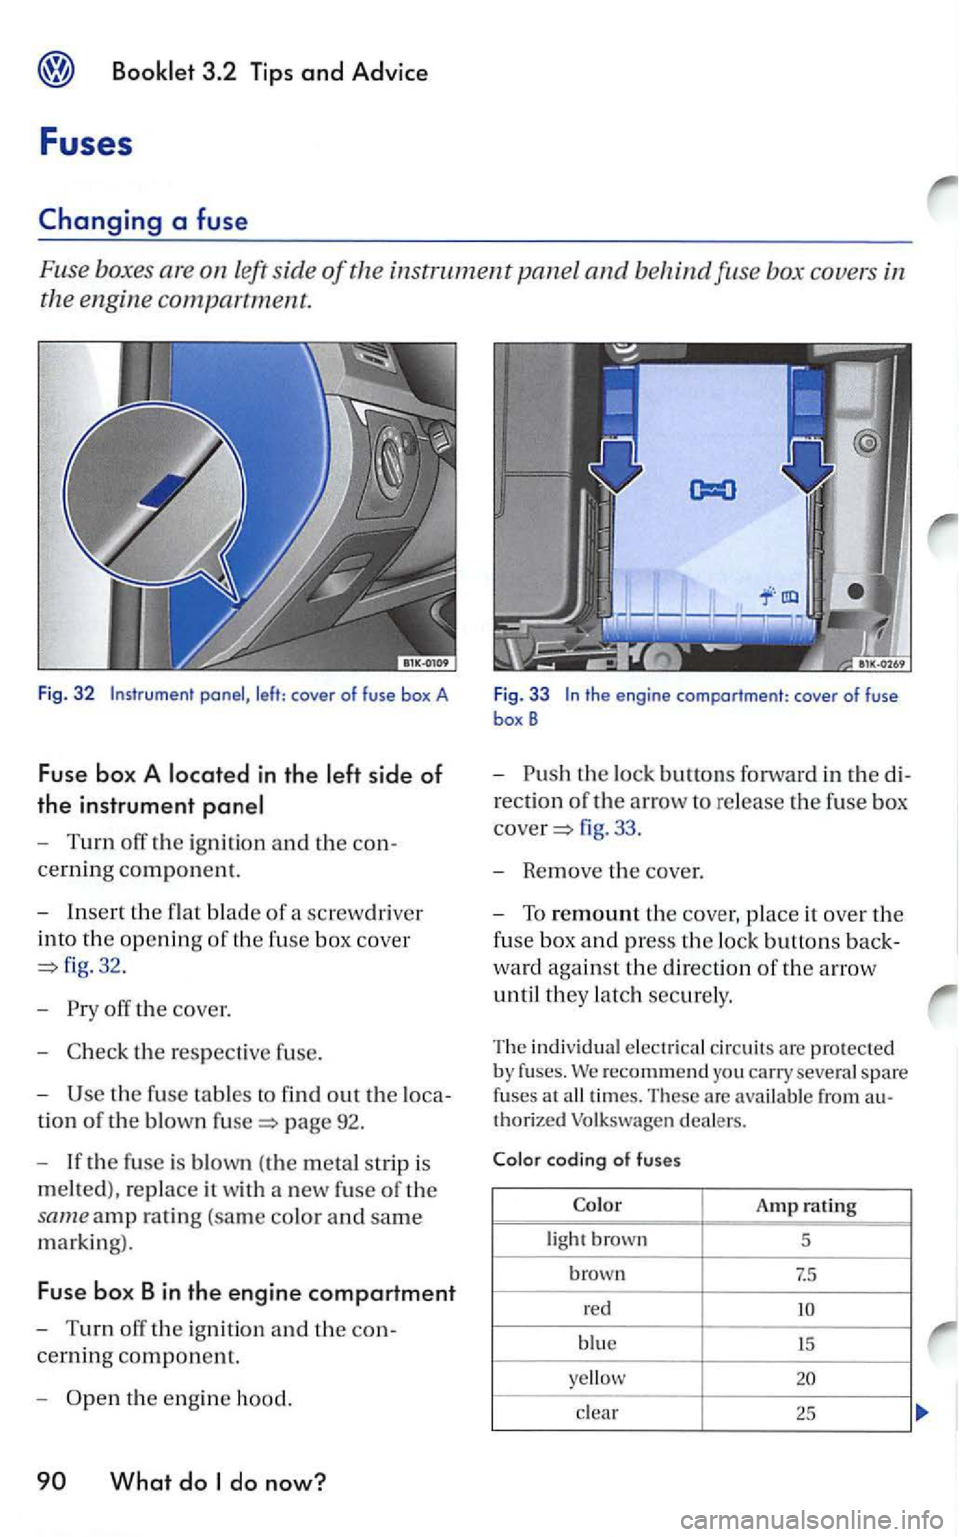
Fig. 32
- Turn off the igni tion and the con
cerning component.
-
Insert the flat blade of a screwdri ver
into
the openin g of th e fuse box cove r
32.
-
the respeclive fuse.
-
the fuse tables to find out the loca-
tion of the blown page 92.
- If
the fuse is blown (the m etal strip is
melted) , replace it w ith a new fuse of the
same amp ra tin g (sa m e co lo r and sam e
marking).
Fuse bo x Bin the engine compartment
-Turn off the ign ition an d the con
cerning component.
-th e eng in e hood.
fig . 33 .
- Remove
the cover.
-To remount the cover, place it ove r the
fuse box and press th e lock buttons back
ward aga inst the directio n of the arrow
until
they latch securely .
Th e indi vidual electric a l c ir cuit s are pro tected by fuses. recommend you carry severa l spare
f uses at
clear 2 5
Page 370 of 444
Booklet 3.2 Tips and Advice
Changing
Light bulbs should be changed by a qualified technician
m an y cases changing a light bul b
invol ves remov in g other pa ns of the car to
recommen d light bulbs o nl y be chan ge d
b y an authorized Volkswage n dea le r or qual ified workshop.
Before changin g a light bulb. yo u must sw itch ofT the light (lig ht switch in
tical light bulbs w ith sam e s pecificati o ns. The
s p ecifi catio ns arc prime d on the lig h t bulb . ther on the glass bulb or o n th e m eta l base.
is advi sable to alw ay s carry a box of
for traffi c safe ty. swage n dealer for re comm ended light bulbs.
Additional light specificati o ns
light bulbs in the headli gh ts or in verse lights can hav e fac tory-set s pecifi cntion s that diffe r fro m conventi onnllight bulbs. Th e corresp onding model identifi cation is either on the bulb bas e or on th e bulb itself.
LL = LongLife bulbs w ith a lo nger life compared to con ve ntional light bulb s.
Blue =
Light bulbs w ith blui sh -w hite abl e for di scharge light s (Xenon/Bi-Xcno n light s).
Stop! Before workin g in the engine always read and heed all
94 What do
(cont inued)
page 39. The engine compartment of any motor vehicl e is a p otentiall y dangerous area and can cause serious personal injury.
Gas discharge la m ps (Xen on) get power from a high voltage source that can cause rious personal injury and even death if dled improperly.
bulbs arc under hi gh pressure and can exp lode if handled improperly.
Always have a qualified technician r eplace burnt-out light bulbs, especially gas discharge
lamp s (Xenon) and bulbs.
Neve r remove the headlight unless you know exactly how to carry out the job and have the correct tool and li ght bulbs.
yo u arc uncertain about what to do, have the work performed by an auth orize d swagen d ealer or a qualified workshop. rious personal injury m ay result from erly performe d work.
There arc parts w ith sh arp edges on the headlight h ousin g in the en gi ne compartment and on the rear light h o usings.
Do not touc h glass bulb with bare hands. can clo ud the o uter surface of the bul b when thus afTccting the refle ction , and th us reducing the power of illuminat ion.
A bulb can only be re placed b y a bulb of the sam e ty pe . The m odel identifica tion is either o n the bulb base or on the bulb itself.