2006 VOLKSWAGEN GOLF MK5 clock
[x] Cancel search: clockPage 93 of 444
inches (25 em) between your breastbone and the steering wheel.
Always hold the s teering wheel on the
Never hold the steering wheel at the 12 o'clock position or with your hands at other positions inside the steering wheel rim or on the steering wheel hub. Holding the steering
wheel the wrong way can cause serious
2.1 Safety first
(continued)
Always sit in an upright posit i on and never lean against or place any part of your body too
close to the area where the airbags are located.
strained.
Never adjust the seats the vehicl e is mov ing. Your seat may move unexpecte dly and yo u could lose control of the vehicle.
Never drive wit11 the backrest reclined or tilted far back! The fart her t11e backrests are tilted back, the greater the risk of injury due to
incorrect positionin g ofthe safety belt and
Children must always ride in child seats
page restraints on t11e front seat some important things to
Move the front passenger seat back as
far as possible. There must be a minimum
of
Adjust th e angle of the seat back so that
it is in an upright position and your back
comes in full contact with it whenever the
veh icle is moving.
Adjust the head restra int so that the
upper edge is as eve n with the top of your
h
ead as poss ible but not lower than eye
leve l
and so that it is as close to the back of
your head as
Keep both feet flat on the floor in the
footwell in fron t
of the front passenger
seat.
Fasten and wea r safety belt s co rrectly
13.
For detail ed inform ation on how to adju st the
front passenger bookl et 3.1 and s torage.""
WARNING
Front seat passengers who are unbelted, out of posit ion or too close to the airbag can be
risk of serious
Passengers must always sit in an upright position and nev er lean against or place any part of their body too clos e to the area where the airbags are located.
Passengers who are u nbelted, out
Safe driving 5
Page 178 of 444
and Equipm ent
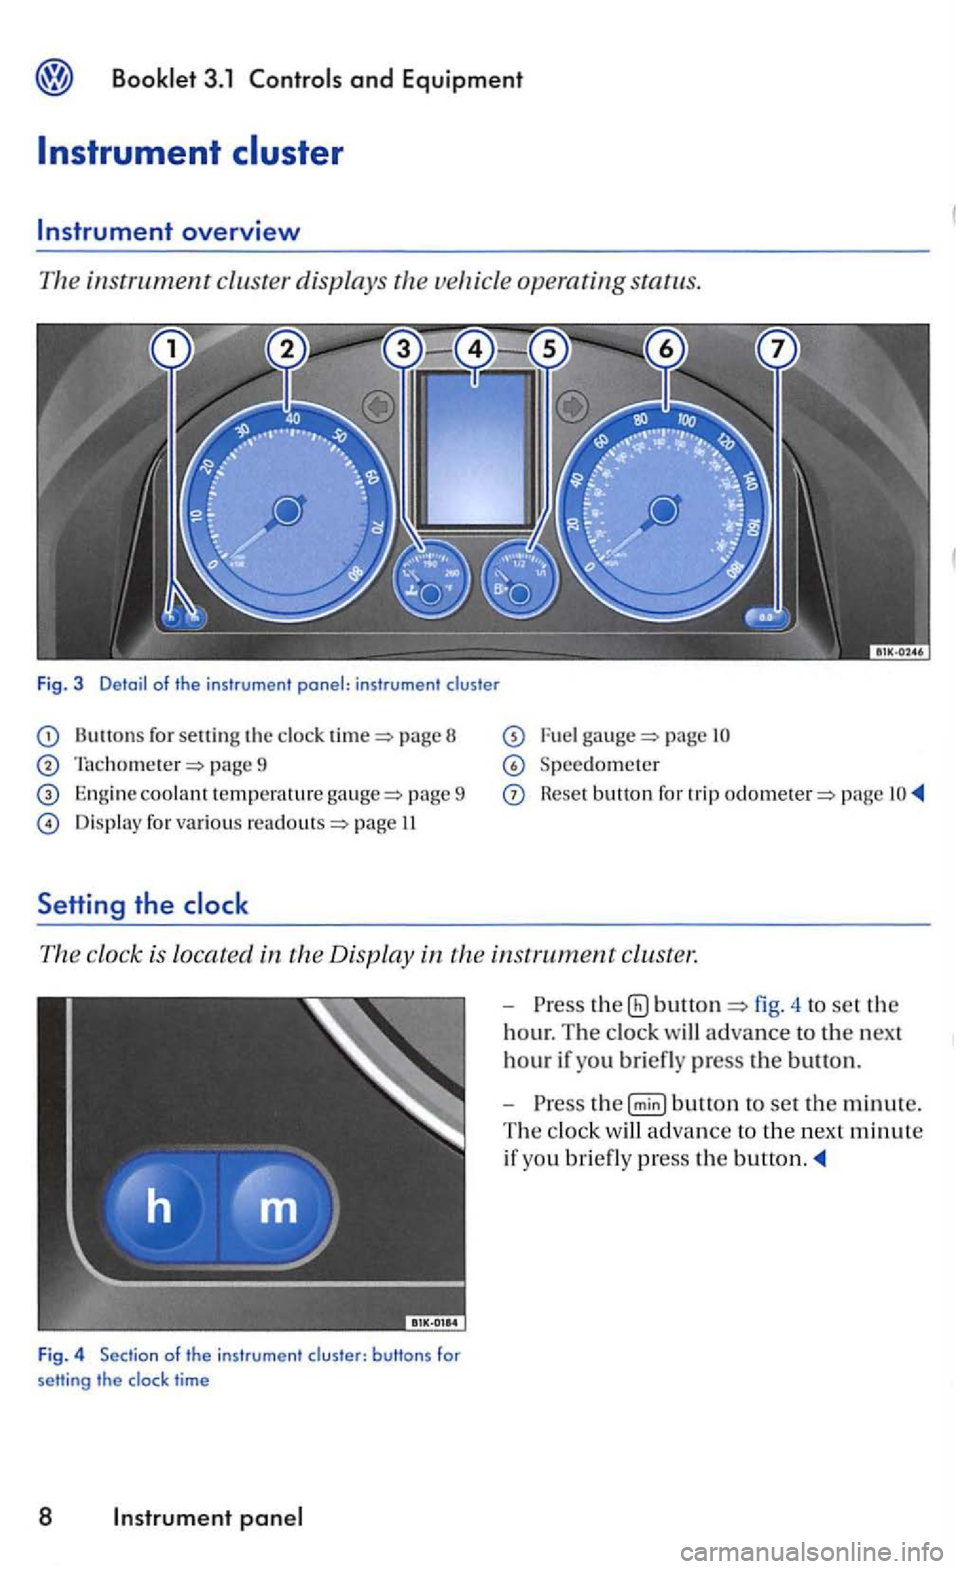
Instrument
for sett in g the page 8
page 9
Engine coolant te mpera tu re pa ge 9
Display for various page II
Setti ng the
page
Speedometer
Reset button for trip page
The clock is locat ed in the Display in
time
8 Instr um ent
-the fig. 4 to set the
hour. The clock will advance to the next
hour if you briefl y press the button.
-
Page 181 of 444
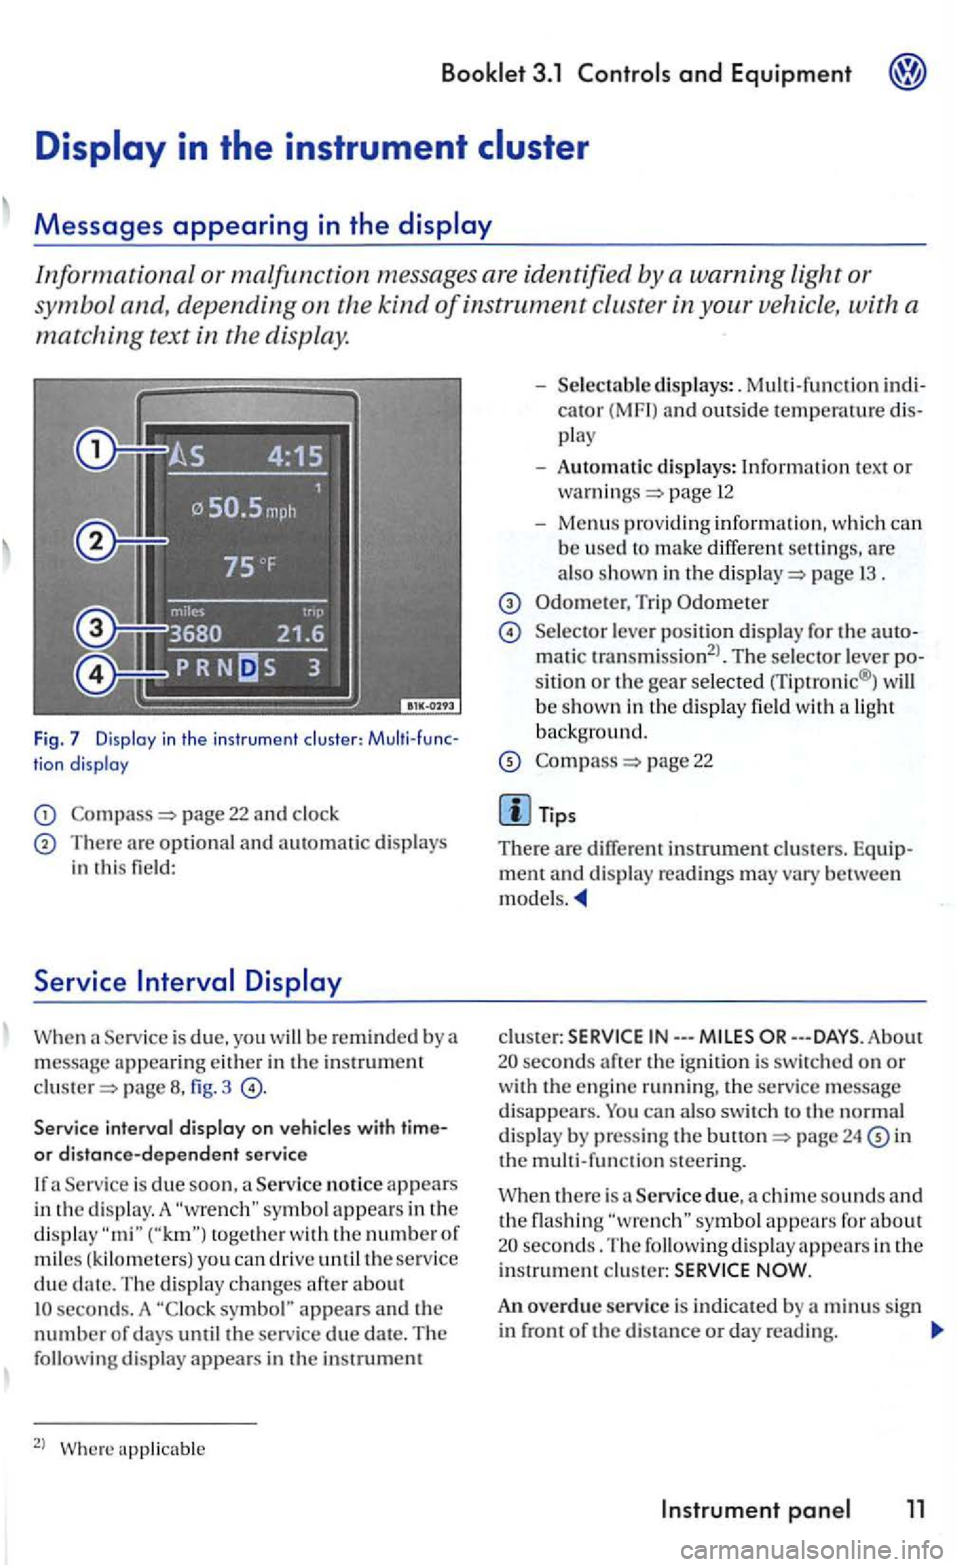
Informational or malfunction messages are identified by a warning light or
symbo l and, depending on the
kind of instrument cluster in your vehicle , with a
matching text in the display.
Fig. 7 Display in the in str umen t clu ste r: tion display
page 22 and clock
There are optional and automatic displays in this field:
Serv ice
page fig. 3
Service interval display on
Service is due soon , a Service notice appears
i n the d is play. A togeth e r with the numbe r of miles ( kilom ete rs) you can driv e until the service due seconds. A symbol" appears and the number of days until the service due date. The following display appear s in the instrumem
2
l
cator (MF I) and outside temperawre play
- Automatic displays: Information tex t or page 12
-Menus providing informatio n, w hich can b e used to make differ ent are also shown in the page 1 3 .
Trip Odometer
Selecto r lever positio n di splay for the matic transmission2
l. The selector lever sitio n or the gear selected rriptronic® ) will
b e show n in th e display field wit h a light backg round.
page 22
m ent and disp lay rea dings may vary between models.
clus te r: IN---
24 in the m ult i-function steering.
Service due, a chime sounds and the flashing seconds. The following display appears in the i nstrument c lu ster:
An overdue service is indicated by a m inus sign in front of the di sta nce or day reading.
Instrument 11
Page 195 of 444
Applies to vehicles' with
and drive 1:
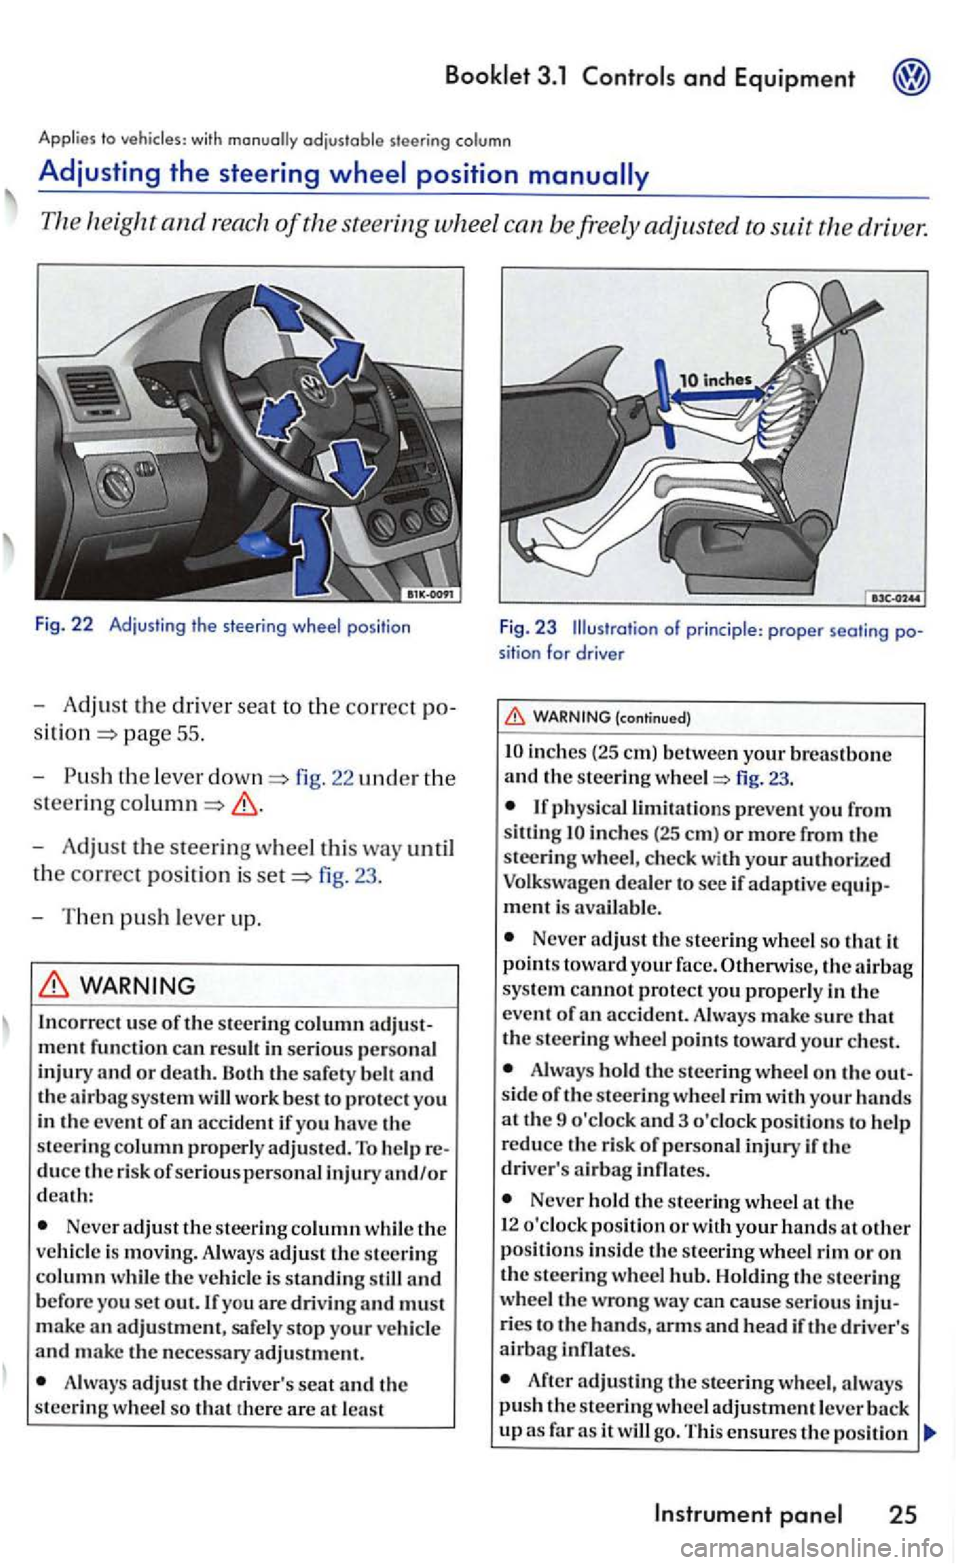
Fig. 22 Adjust in g t he s tee ring wheel pos itio n
-Adjust the dri ver seat to the correct po
pag e 55 .
- Push
the leve r fig. 22 uncl er the
steering
-Adjust the steering wheel this way until
t h e
correct posit ion is fig. 23 .
- T hen
push lever up.
WARNING
In correc t use of the stee ring column
Neve r adjust the steer ing column while th e
ve hicl e is movin g. Always adjust th e steering column w hil e th e veh icle is standing still and b efore you set out. If you are drivin g and must
m ake an adjustment, safe ly stop your ve hicl e and make the necessary adjustment.
A lways adjus t th e driv er's seat and th e
steering w hee l so that th ere are at lea st
F ig. 23 Illustration of princi ple : proper seati ng position for drive r
(continued)
inch es (2 5 em) betwe en your breastbone and th e s teering fig. 23.
inches (25 em ) or more from the
steeri ng w heel, c hec k with your authori ze d
Volkswagen deale r to see if adaptive equipment is avai la ble .
Never adjust the steering wheel so that it
p oin ts toward your face. Otherwise, the sys te m cannot protect yo u properly in the
e ve nt of
Alwa ys hold the s teering wheel o n the out
s id e of the s teering whee l rim with your hands at th e 9 o'clock and 3 o 'clock pos itions to help
r educe th e risk of p ersonal injury if th e
driver' s
Never hold the stee rin g wheel th e
1 2 o'clock pos ition or w ith your hands at other position s in side th e s teering wheel rim or on the steerin g wheel Holdin g th e s teerin g
wheel the wrong wa y ca n cause serious inju
ries t o the hands, arm s and hea d if the driver's airbag infl ates.
After adjusting the stee rin g wheel, a lwa ys push the s teerin g wh eel adjustment leve r
Instrument
Page 225 of 444
Booklet 3.1
passe nger's seat can
b e adju ste d in many ways to suit the physical
need s of the vehicl e occ upants. position is
very important for:
fast and easy operat ion of all control s on the instrument panel,
safe driving ,
optimum prote ction from the s afet y belts
and airb ag booklet 2.1
Driv ers or passengers who are unbelted, out of position or too close to the airb ag can be seri
ously injured or killed by an airbag as it unfolds. To help reduce the risk of serious personal injury:
Always adjust th e driver's seat and the steeri ng whe el so that there are a t lea st in ches (25 em) betwe en you r brea stbone and the ste erin g w heel.
Always hold the steering wheel on the out
s ide of th e s teering wheel rim with your hands at the 9 o'clock and 3 o'clock position s to he lp
reduce the risk of personal inju ry if the driver 's airbag inflates.
Never hold the steering wheel
Passengers must always sit in an upright position and never lean agains t or pl ace an y
(co ntinued)
part of their body too close to the area where the airbags are loca ted.
Alway s make sure there are at least inch es (25 em) between instrument panel.
Eac h passenger must always sit on a sea t of their own and prope rly fasten and wear the safety belt belon ging to that scat.
Before driving, always adjust the front
seats and head r estraints properly.
Never adju st th e sea ts while the vehicle is
moving. sea t may move unexpec tedly and yo u could lose control of the vehicle.
Always keep your feet on the floor in front of the sc at. Never rest on tl1e in strument panel, out of the window, etc. The airbag
s ystem and safety belt will not be able to pro
te ct you properly and can even increase the
ri sk of injury in
Never drive with backres t reclined or tilted far backJ The the backres ts are t ilted back, greater risk of injury due to
incorrect positioning ofthe safety belt and im
proper seating position.
b elts only offer maximu m prot ec
tion when the se atback is securely lat ch ed in
Children must alway s ride in child seats.
Seats and storage 55
Page 311 of 444
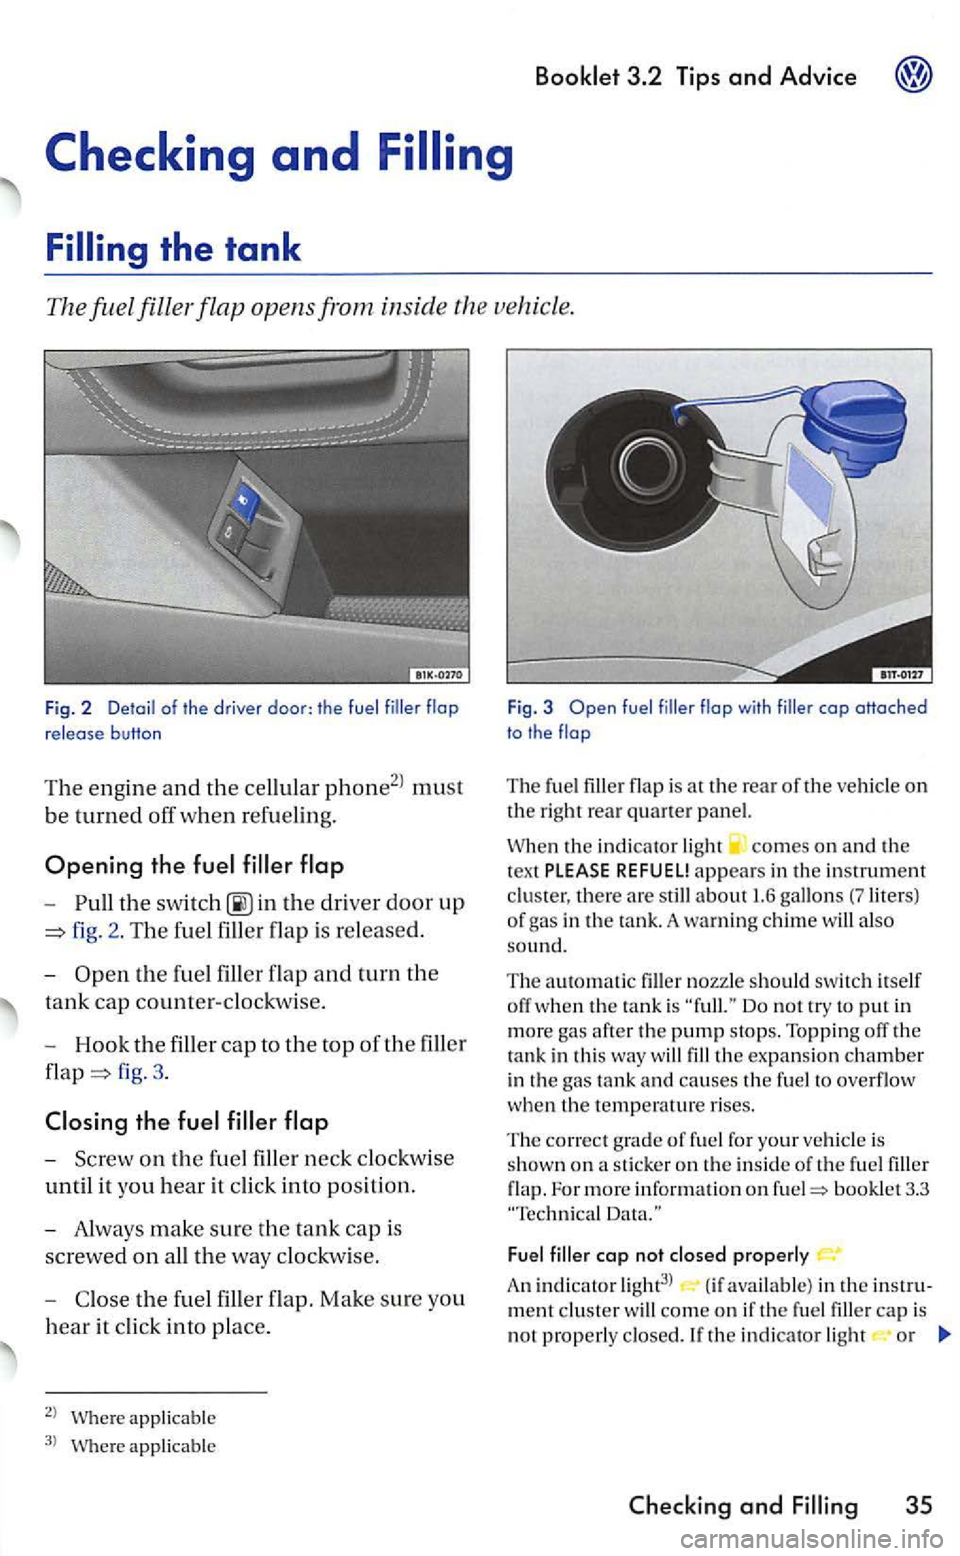
-in the driver door up
fig. 2. T he fuel filler flap is re leased.
-
Open t h e f uel filler flap and turn the
tank cap counter-clockwise.
- Hook
the fille r cap to the top of th e filler
fig. 3.
the
-Screw o n the
applicable
applic able
Fig . 3 fue l flop with cop oHoched
to the
The fu el flap is a t the rear of the vehicle on the right rear quarter panel.
th e indi cator light comes on and th e
t ex t PLEASE REFUEL! appears in the in strume n t
clu ster, there are s till ab out 1.6 gallo ns (?liters) of g as in the tank. A warning ch im e will also so und.
The automatic nozzle shoul d swi tc h itself off w hen the ta nk is
the expansion chamber
i n the gas ta nk and causes the fuel to overflo w when the temperature rises.
T
he correct g rade of fu el for your vehicle is
show n on a stick er o n th e inside of the fu el flap. For m ore informatio n on bookle t 3.3
Fuel filler cop not closed prope rl y
A n in d ic a to r light3l (if available) in the
Checkin g and 35
Page 325 of 444
Always protect face, hands and arms from hot escaping coolant or steam by covering the cap with a large, thick rag.
(contin ued)
Turn th e cap slow ly and very carefully in a
counter-clockwise direction while applying
light
down ward pressure on the top of th e cap.
Never spill antifreeze or coolant on the haust system or hot eng ine parts. Under some conditions, the ethyle n e glyco l in en gin e
coolant can catch fire.
Checking the
The correct coolant level is important for correct functioning of the engine cooling
system.
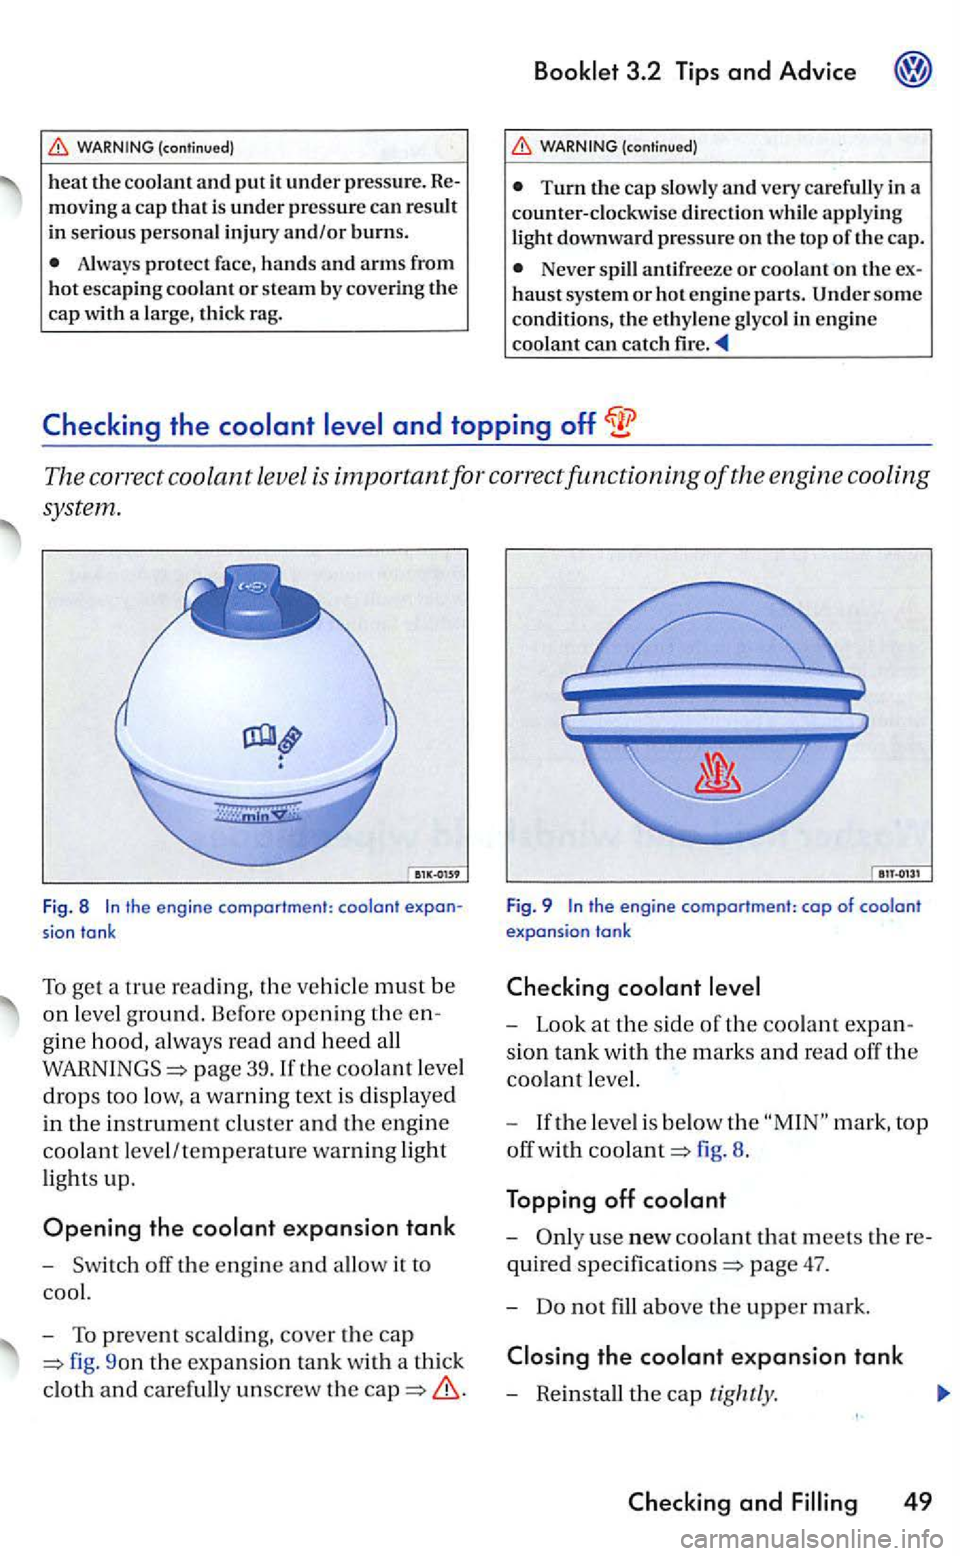
Fig. 8 t h e engin e compartment: coolant
sian tank
To get a true reading, the ve hicle must be
on l eve l ground. Before opening the
gine hood, always read and heed all
page 39.1f the coolant level
drops too low, a warning text is displayed
in the in strument cluster and the engine
coolant leve l/temperature warning ligh t
lights up.
Opening the expansion tank
- Switch
9on the expansio n tank with a thick
cloth
and carefully unsc rew the
Fig. 9 the engine compartment: cap of coolant expansion tank
- Look at the side or the coolant
sion tank w ith the marks and read off the
coolant level.
-
If the level is below the mark, top
off wi
th fig. 8.
Topping off
-
the
and
Page 378 of 444
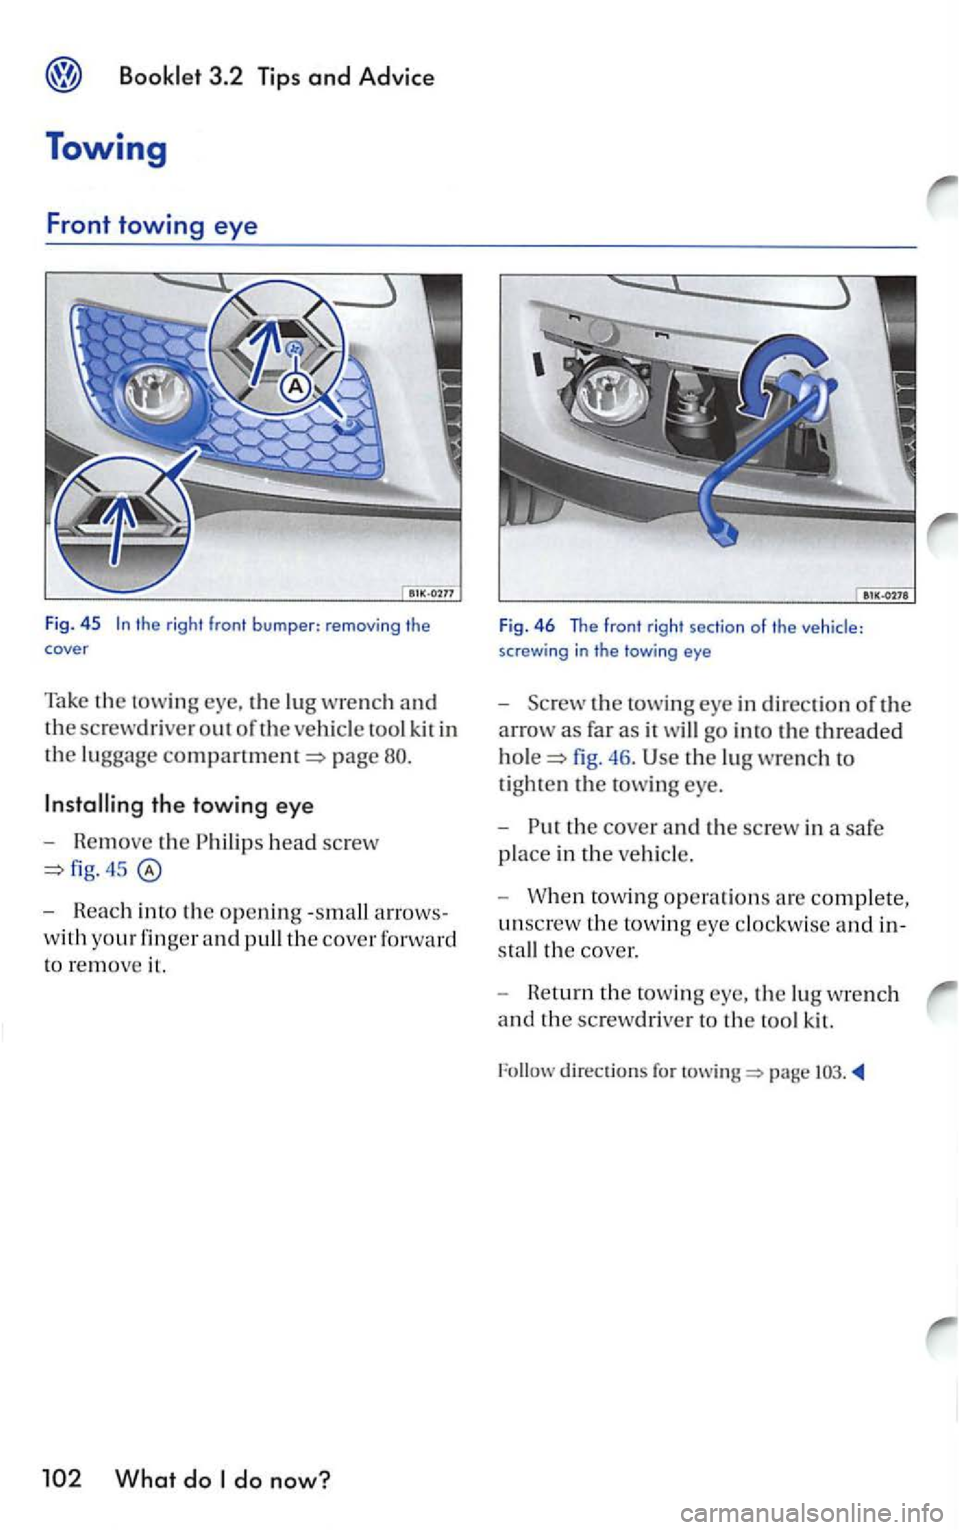
the right front bumper: removing the cover
Take the towing the lug wrench and
the screwdriver out of the vehicl e tool kit in
the luggage page
the towing eye
- Remove the Ph ilips head screw
- Reach into the opening -small arrows
with your finger and pull th e cover forward
to remove i l.
the towing eye in direction of the
arrow as far as it will go into the threaded
46. the lu g wrench to
tighte n the towing eye.
-
the cover and the sc rew in a safe
p l
ace in the ve hicl e.
-
When towin g operations a re complete,
unsc rew the towing eye clockw ise and in
s ta
ll the cover.
-
He turn the to wi ng the lu g w re n ch
a
nd the screwdrive r t o the to ol kit.
Follow directions for