Page 260 of 527
’06 TUNDRA_U (L/O 0508)
248
2006 TUNDRA from Oct. ’06 Prod. (OM 34458U)
Radio
AM mode
When you select the AM mode, “AM” will
appear on the screen.
FM mode
When you select the FM mode, “FM1” or
“FM2” will appear on the display.
If the front audio system receives a traffic
announcement (TA) while the rear seat
audio system is in the radio mode,
“TRAF” will flash on the screen and the
rear seat audio system will turn off. When
the front audio receives a traffic an-
nouncement (TA), the rear seat audio sys-
tem cannot select the AM/FM mode.
Tape mode
“TAPE” appears on the screen while this
mode is selected. Compact disc mode
“CD” appears on the screen while this
mode is selected.
The screen shows the track, or track and
disc number currently being played.
Error messages
If the player malfunctions, your audio sys-
tem will display following error messages.
“WAIT”:
The compact disc player unit
may be too hot. Allow the player to cool
down.
“ERR 1”: The disc may be dirty, damaged
or inserted incorrectly (up −side down).
Clean the disc and re −insert it.
“ERR 3”: There is a problem inside the
system. Eject the disc. Set the disc again.
“ERR 4”: Over−current. Ask your Toyota
dealer to inspect.
If the malfunction still exists, take your
vehicle to your Toyota dealer.
4. “OFF” button
Push “OFF” button to turn off the rear
seat audio system. REPLACING CONTROLLER BATTERY
For replacement, use a CR2025 lithium
battery or equivalent.
CAUTION
Special care should be taken that
small children do not swallow the re-
moved battery or components.
NOTICE
�
When replacing the battery, be care-
ful not to lose the components.
� Replace only with the same or
equivalent type of battery recom-
mended by a Toyota dealer.
� Dispose of used batteries according
to the local regulations.
Page 261 of 527
’06 TUNDRA_U (L/O 0508)
249
2006 TUNDRA from Oct. ’06 Prod. (OM 34458U)
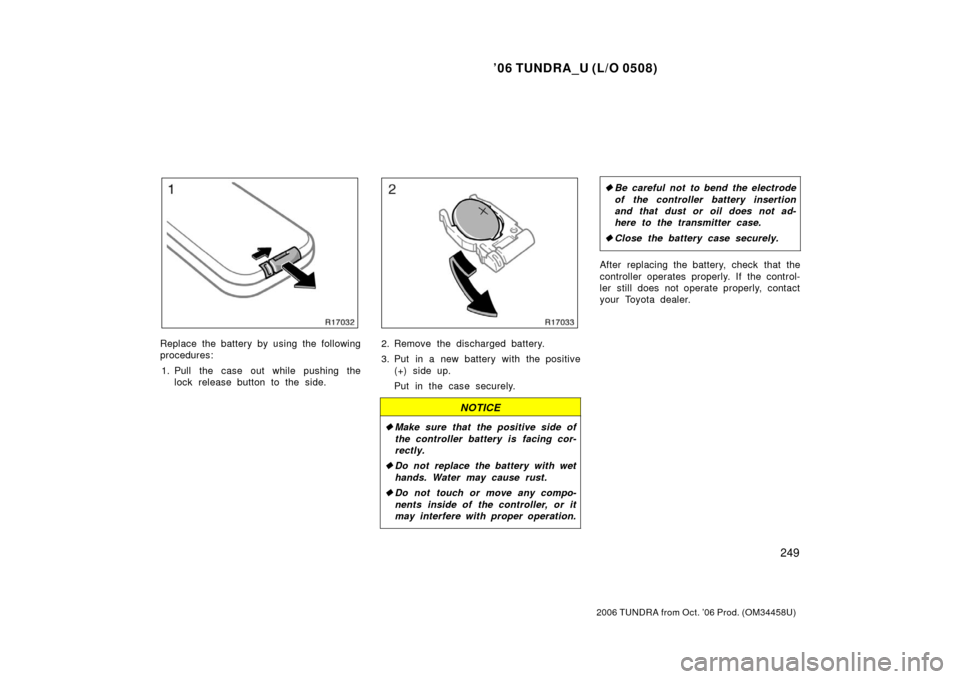
Replace the battery by using the following
procedures:
1. Pull the case out while pushing the lock release button to the side.2. Remove the discharged battery.
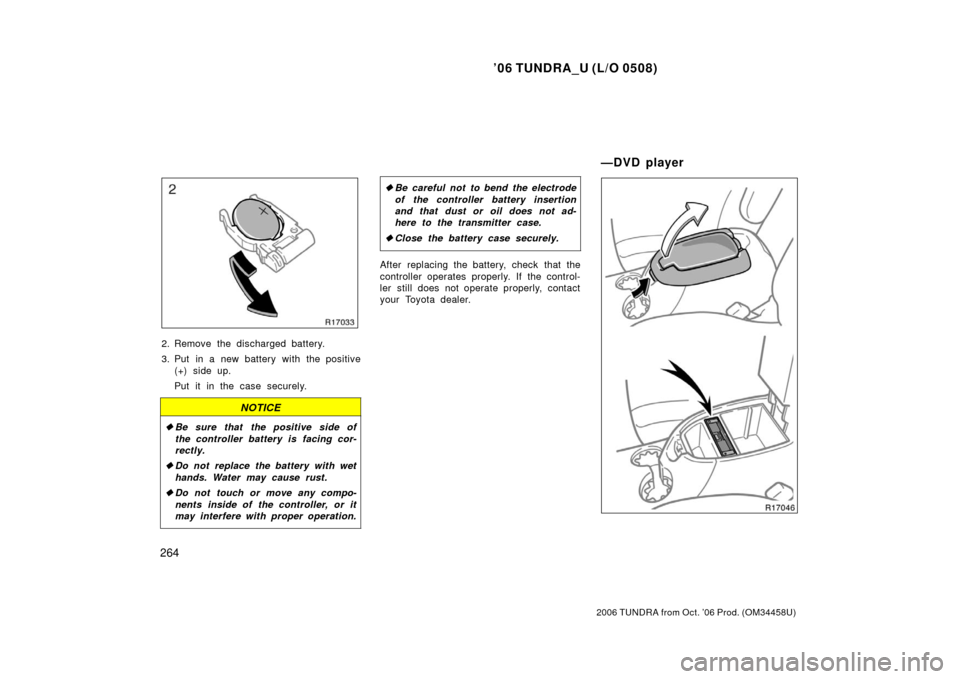
3. Put in a new battery with the positive
(+) side up.
Put in the case securely.
NOTICE
�Make sure that the positive side of
the controller battery is facing cor-
rectly.
� Do not replace the battery with wet
hands. Water may cause rust.
� Do not touch or move any compo-
nents inside of the controller, or it
may interfere with proper operation.
�Be careful not to bend the electrode
of the controller battery insertion
and that dust or oil does not ad-
here to the transmitter case.
� Close the battery case securely.
After replacing the battery, check that the
controller operates properly. If the control-
ler still does not operate properly, contact
your Toyota dealer.
Page 266 of 527
’06 TUNDRA_U (L/O 0508)
254
2006 TUNDRA from Oct. ’06 Prod. (OM 34458U)
NOTICE
�The screen should be cleaned with
a dry soft cloth. If the screen is
pushed by hand or wiped with a
hard cloth, the surface of the
screen may be scratched.
� Benzene or alkaline solutions may
damage the coated surface of the
screen .
� To prevent the battery from being
discharged, do not turn on the rear
seat entertainment system longer
than necessary when the engine is
not running.
The rear seat entertainment system can
be operated with the rear seat entertain-
ment system controller. The system can-
not be operated by touching the switches
on the screen directly.
CAUTION
Do not disassemble or modify the
controller. It may cause an accident,
fire or electric shock.
NOTICE
Keep the controller away from direct
sunlight, high heat and high humidity.
These conditions could cause the
case to deform or the battery to ex-
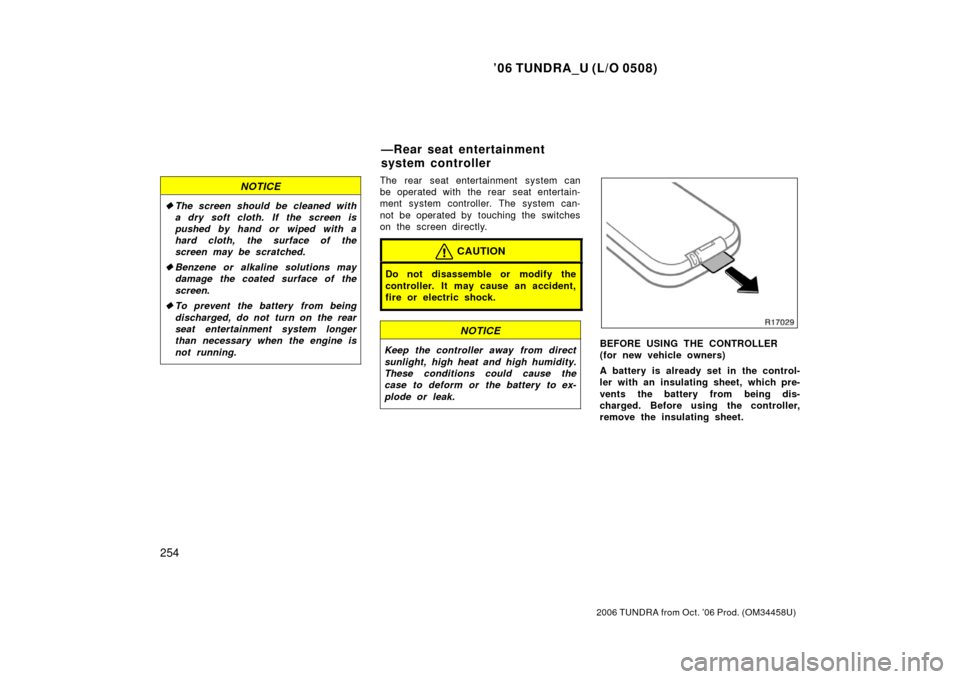
plode or leak.BEFORE USING THE CONTROLLER
(for new vehicle owners)
A battery is already set in the control-
ler with an insulating sheet, which pre-
vents the battery from being dis-
charged. Before using the controller,
remove the insulating sheet.
—Rear seat entertainment
system controller
Page 275 of 527
’06 TUNDRA_U (L/O 0508)
263
2006 TUNDRA from Oct. ’06 Prod. (OM 34458U)
In addition, the feature may not work well
with some spoken, live, or classical re-
cordings.
Compact disc player
This button has the following features—
To skip up or down to a different track:
Push the “
” or “” (TUNE/TRACK) but-
ton until the number of the track you want
to listen to appears on the display. If you
want to return to the beginning of the
current track, quickly push the “
”
(TUNE/TRACK) button one time.
To fast forward or reverse:
Push and hold the “
” or “” (TUNE/
TRACK) button to fast forward or reverse
within a compact disc. When you release
the button, the compact disc player will
resume playing. REPLACING CONTROLLER BATTERY
For replacement, use a CR2025 lithium
battery or equivalent.
CAUTION
Special care should be taken that
small children do not swallow the re-
moved battery or components.
NOTICE
�
When replacing the battery, be care-
ful not to lose the components.
� Replace only with the same or
equivalent type of battery recom-
mended by a Toyota dealer.
� Dispose of used batteries according
to local regulations.
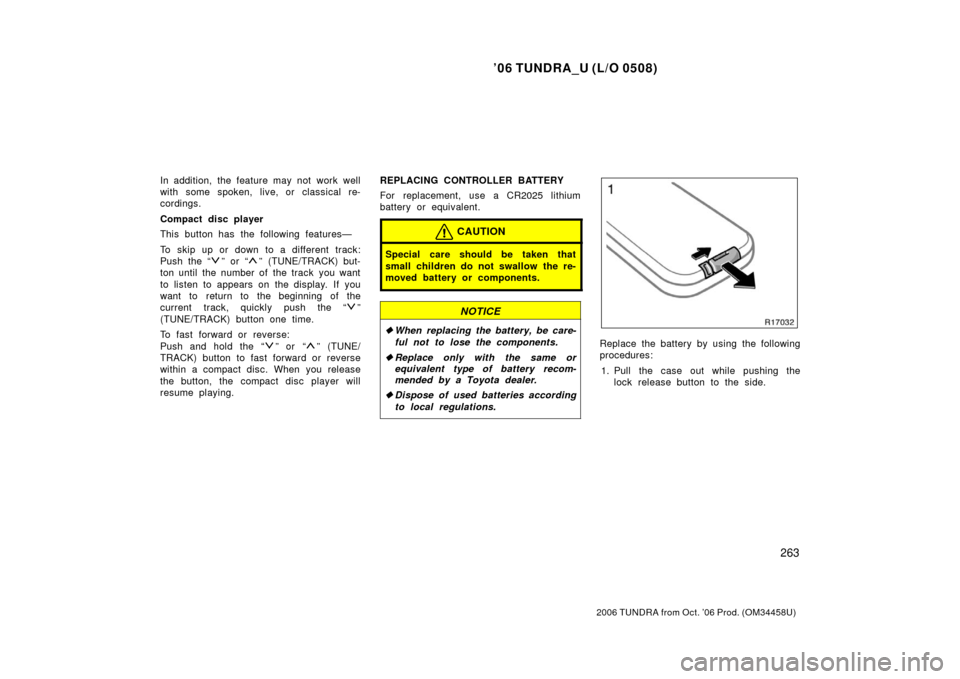
Replace the battery by using the following
procedures:
1. Pull the case out while pushing the lock release button to the side.
Page 276 of 527
’06 TUNDRA_U (L/O 0508)
264
2006 TUNDRA from Oct. ’06 Prod. (OM 34458U)
2. Remove the discharged battery.
3. Put in a new battery with the positive
(+) side up.
Put it in the case securely.
NOTICE
�Be sure that the positive side of
the controller battery is facing cor-
rectly.
� Do not replace the battery with wet
hands. Water may cause rust.
� Do not touch or move any compo-
nents inside of the controller, or it
may interfere with proper operation.
�Be careful not to bend the electrode
of the controller battery insertion
and that dust or oil does not ad-
here to the transmitter case.
� Close the battery case securely.
After replacing the battery, check that the
controller operates properly. If the control-
ler still does not operate properly, contact
your Toyota dealer.
—DVD player
Page 309 of 527
’06 TUNDRA_U (L/O 0508)
297
2006 TUNDRA from Oct. ’06 Prod. (OM 34458U)
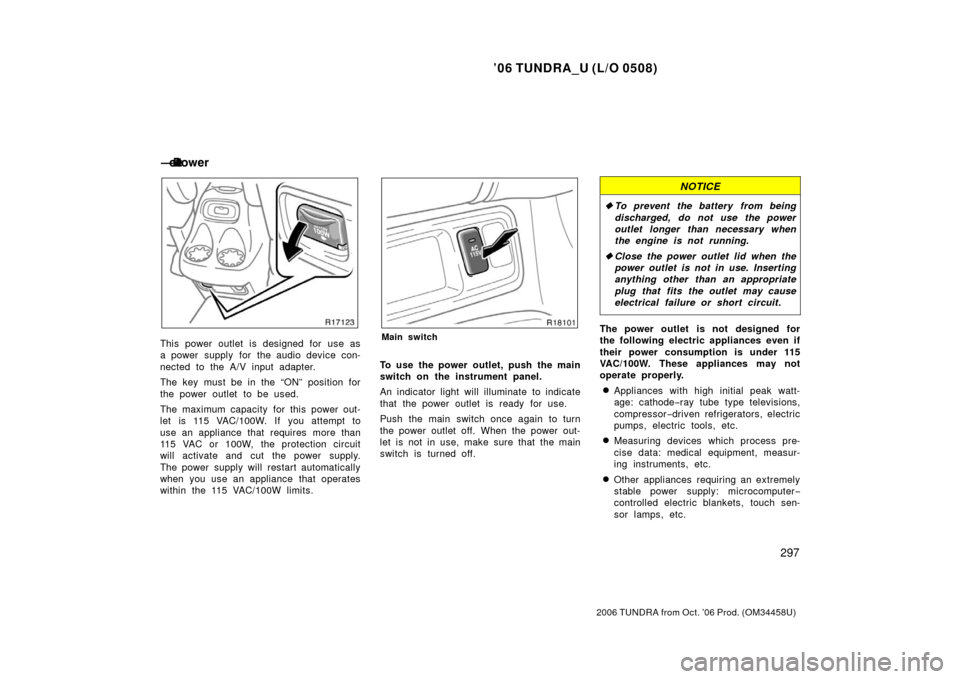
This power outlet is designed for use as
a power supply for the audio device con-
nected to the A/V input adapter.
The key must be in the “ON” position for
the power outlet to be used.
The maximum capacity for this power out-
let is 115 VAC/100W. If you attempt to
use an appliance that requires more than
115 VAC or 100W, the protection circuit
will activate and cut the power supply.
The power supply will restart automatically
when you use an appliance that operates
within the 115 VAC/100W limits.Main switch
To use the power outlet, push the main
switch on the instrument panel.
An indicator light will illuminate to indicate
that the power outlet is ready for use.
Push the main switch once again to turn
the power outlet off. When the power out-
let is not in use, make sure that the main
switch is turned off.
NOTICE
�To prevent the battery from being
discharged, do not use the power
outlet longer than necessary when
the engine is not running.
� Close the power outlet lid when the
power outlet is not in use. Inserting
anything other than an appropriate
plug that fits the outlet may cause
electrical failure or short circuit.
The power outlet is not designed for
the following electric appliances even if
their power consumption is under 115
VAC/100W. These appliances may not
operate properly.
�Appliances with high initial peak watt-
age: cathode− ray tube type televisions,
compressor −driven refrigerators, electric
pumps, electric tools, etc.
�Measuring devices which process pre-
cise data: medical equipment, measur-
ing instruments, etc.
�Other appliances requiring an extremely
stable power supply: microcomputer −
controlled electric blankets, touch sen-
sor lamps, etc.
— ���
� �\b��
�
Page 330 of 527
’06 TUNDRA_U (L/O 0508)
318
2006 TUNDRA from Oct. ’06 Prod. (OM 34458U)
The garage door opener (\b
Universal Transceiver) is manufactured
under license from HomeLink\b and can
be programmed to operate garage
doors, gates, entry doors, door locks,
home lighting systems, and security
systems, etc.
(a) Programming the HomeLink
\b
The HomeLink\b in your vehicle has 3
buttons and you can store one program
for each button.
To ensure correct programming into the
HomeLink
\b, install a new battery in the
hand− held transmitter prior to program-
ming.
The battery side of the hand −held trans-
mitter must be pointed away from the
HomeLink
\b during the programming pro-
cess.
For Canadian users, follow the procedure
in “Programming an entrance gate/pro-
gramming all devices in the Canadian
market”.
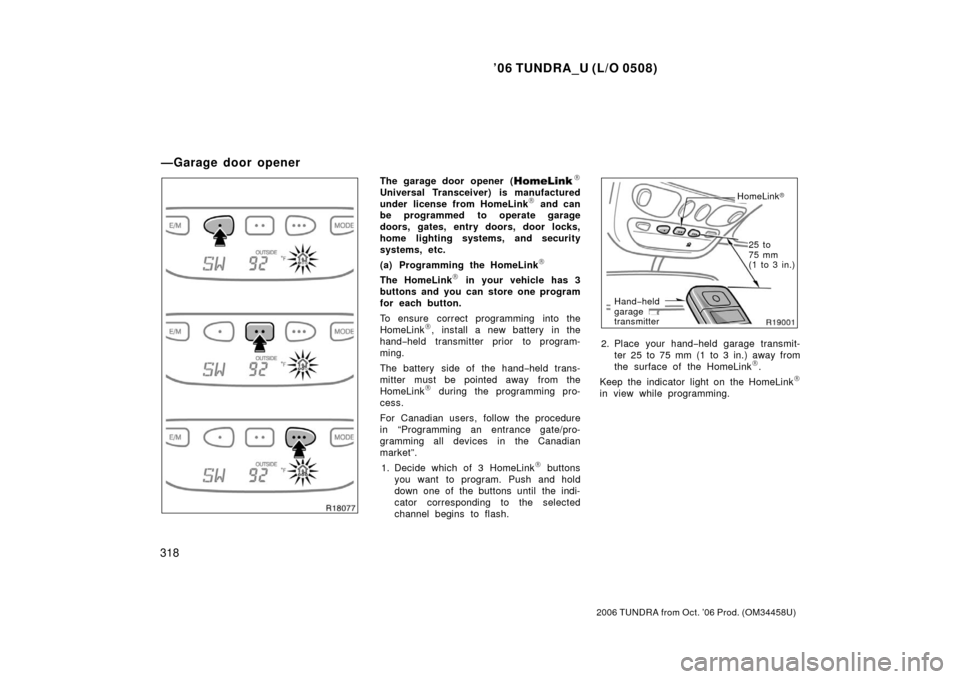
1. Decide which of 3 HomeLink
\b buttons
you want to program. Push and hold
down one of the buttons until the indi-
cator corresponding to the selected
channel begins to flash.
HomeLink �
Hand −held
garage
transmitter
25 to
75 mm
(1 to 3 in.)
2. Place your hand −held garage transmit-
ter 25 to 75 mm (1 to 3 in.) away from
the surface of the HomeLink
\b.
Keep the indicator light on the HomeLink
\b
in view while programming.
—Garage door opener
Page 335 of 527
’06 TUNDRA_U (L/O 0508)
323
2006 TUNDRA from Oct. ’06 Prod. (OM 34458U)
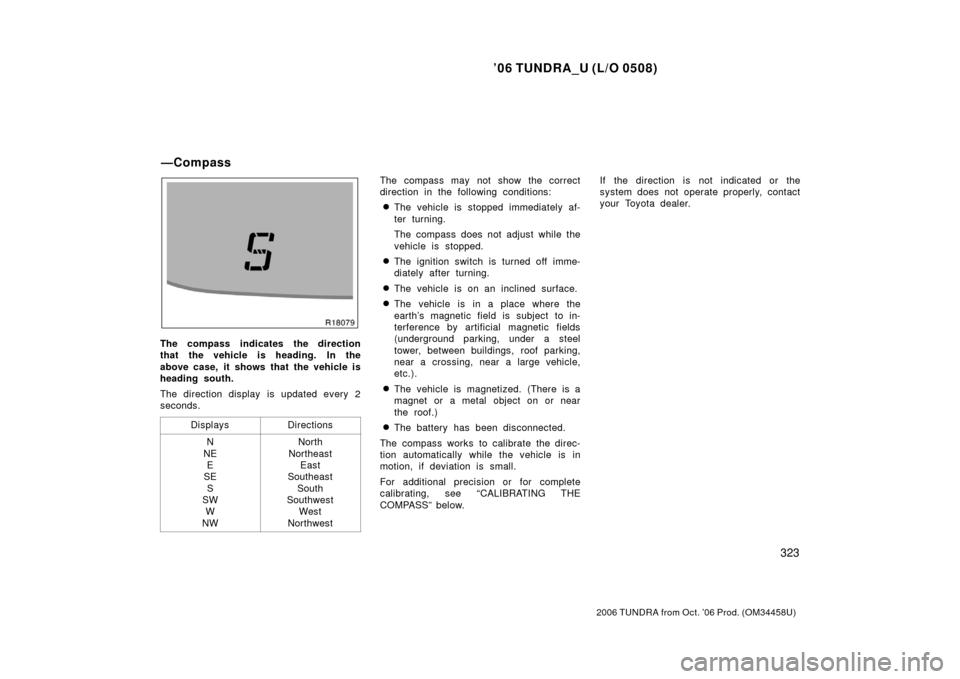
The compass indicates the direction
that the vehicle is heading. In the
above case, it shows that the vehicle is
heading south.
The direction display is updated every 2
seconds.
Displays
Directions
N
NE E
SE
S
SW W
NWNorth
Northeast East
Southeast
South
Southwest West
Northwest
The compass may not show the correct
direction in the following conditions:
�The vehicle is stopped immediately af-
ter turning.
The compass does not adjust while the
vehicle is stopped.
�The ignition switch is turned off imme-
diately after turning.
�The vehicle is on an inclined surface.
�The vehicle is in a place where the
earth’s magnetic field is subject to in-
terference by artificial magnetic fields
(underground parking, under a steel
tower, between buildings, roof parking,
near a crossing, near a large vehicle,
etc.).
�The vehicle is magnetized. (There is a
magnet or a metal object on or near
the roof.)
�The battery has been disconnected.
The compass works to calibrate the direc-
tion automatically while the vehicle is in
motion, if deviation is small.
For additional precision or for complete
calibrating, see “CALIBRATING THE
COMPASS” below. If the direction is not indicated or the
system does not operate pr
operly, contact
your Toyota dealer.
—Compass