Page 107 of 158
97
3. Touch the desired color for day and/or
night map and then touch the
“OK”switch to return the map screen.
Touch the
“Normal” switch to return to the
default map color.
Screen animation
When the “Screen Animation” feature is
turned on, some switches and screens be-
come animated. (e.g.: change map guid-
ance on the map screen)
To turn the “Screen Animation” mode on:
1. Push the
“MENU” button.
2. Touch the “Setup” switch. Then
touch
switch three times to display
page 4 of the “Setup” screen.
3. Touch the “On” switch of “Screen
Animation” and touch the
“OK” switch.
Page 115 of 158
105
(c) Delete dealer
1. Touch the “Delete Dealer” switch
on the screen.
2. A message will appear on the screen.
To delete, touch the
“Yes” switch. To
cancel the deletion, touch the
“No” or
“Back” switch.
(d) Set as destination
Touch the “Enter ” switch on the “Set
Dealer” screen. The screen changes and
displays the map location of the registered
dealer and the “Route Preference”. (See
“ — Entering destination” on page 42.)
Calendar with memo
This system informs you of a memo entry.
At the specified date, the memo informa-
tion will be displayed when the navigation
system is in operation. The memo infor-
mation screen will appear every time the
system is turned on. To disable this
screen, touch the
“Do not display this
message again.”
switch.
Page 131 of 158

121
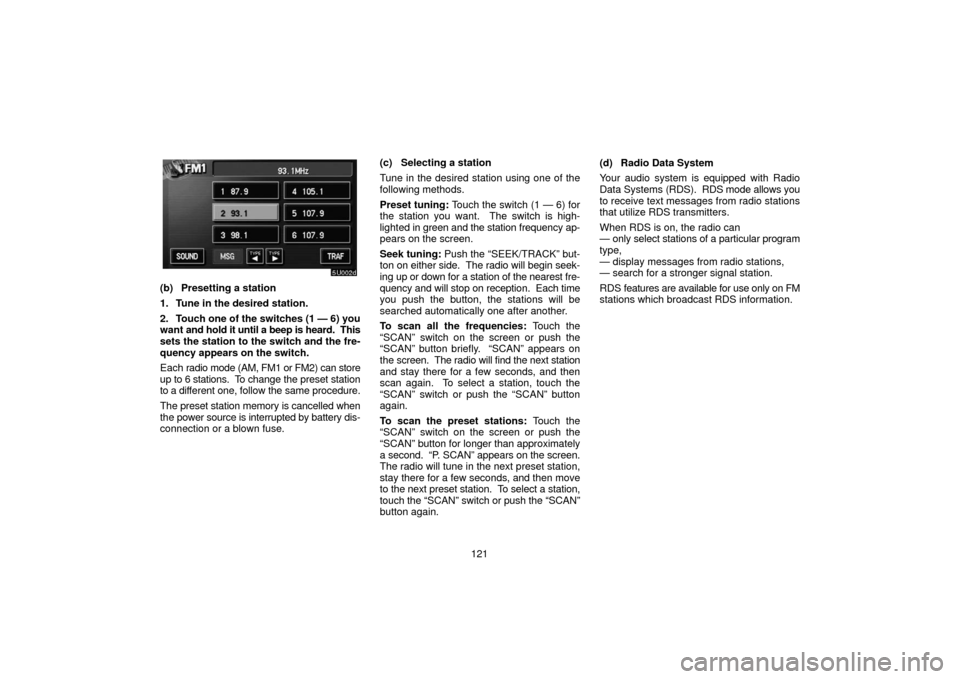
(b) Presetting a station
1. Tune in the desired station.
2. Touch one of the switches (1 — 6) you
want and hold it until a beep is heard. This
sets the station to the switch and the fre-
quency appears on the switch.
Each radio mode (AM, FM1 or FM2) can store
up to 6 stations. To change the preset station
to a different one, follow the same procedure.
The preset station memory is cancelled when
the power source is interrupted by battery dis-
connection or a blown fuse. (c) Selecting a station
Tune in the desired station using one of the
following methods.
Preset tuning:
Touch the switch (1 — 6) for
the station you want. The switch is high-
lighted in g reen and the station frequency ap-
pears on the screen.
Seek tuning: Push the “SEEK/TRACK” but-
ton on either side. The radio will begin seek-
ing up or down for a station of the nearest fre-
quency and will stop on reception. Each time
you push the button, the stations will be
searched automatically one after another.
To scan all the frequencies: Touch the
“SCAN” switch on the screen or push the
“SCAN” button briefly. “SCAN” appears on
the screen. The radio will find the next station
and stay there for a few seconds, and then
scan again. To select a station, touch the
“SCAN” switch or push the “SCAN” button
again.
To scan the preset stations: Touch the
“SCAN” switch on the screen or push the
“SCAN” button for longer than approximately
a second. “P. SCAN” appears on the screen.
The radio will tune in the next preset station,
stay there for a few seconds, and then move
to the next preset station. To select a station,
touch the “SCAN” switch or push the “SCAN”
button again. (d) Radio Data System
Your audio system is equipped with Radio
Data Systems
(RDS). RDS mode allows you
to receive text messages from radio stations
that utilize RDS transmitters.
When RDS is on, the radio can
— only select stations of a particular program
type,
— display messages from radio stations,
— search for a stronger signal station.
RDS features are available for use only on FM
stations which broadcast RDS information.
Page 132 of 158

122
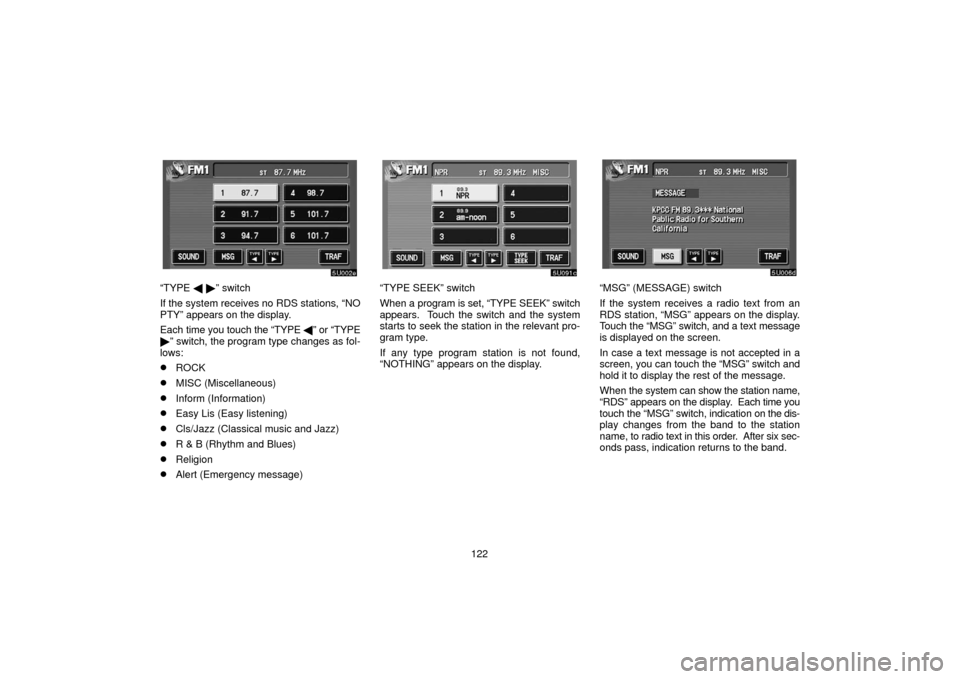
“TYPE � � ” switch
If the system receives no RDS stations, “NO
PTY” appears on the display.
Each time you touch the “TYPE �” or “TYPE
� ” switch, the program type changes as fol-
lows:
�ROCK
�MISC (Miscellaneous)
�Inform (Information)
�Easy Lis (Easy listening)
�Cls/Jazz (Classical music and Jazz)
�R & B (Rhythm and Blues)
�Religion
�Alert (Emergency message)
“TYPE SEEK” switch
When a program is set, “TYPE SEEK” switch
appears. Touch the switch and the system
starts to seek the station in the relevant pro-
gram type.
If any type program station is not found,
“NOTHING” appears on the display.“MSG” (MESSAGE) switch
If the system receives a radio text from an
RDS station, “MSG” appears on the display.
Touch t he “MSG” switch, and a text message
is displayed on the screen.
In case a text message is not accepted in a
screen, you can touch th e “MSG” switch and
hold it to display the rest of the message.
When the system can show the station name,
“RDS” appears on the display . Each time you
touch the “MSG” switch, indication on the dis-
play changes from the band to the station
name, to radio text in this order. After six sec-
onds pass, indication returns to the band.
Page 141 of 158

131
(e) Operating a DVD video disc
NOTE: The playback condition of some
DVD video discs may be determined by a
DVD video software producer. This DVD
player plays a disc as the software pro-
ducer intended. So some functions may
not work properly. Be sure to read the in-
struction manual for the DVD video disc
separately provided. For the detailed in-
formation
about DVD video discs, see “(h)
DVD player and DVD video disc informa-
tion”.
Precautions on DVD video disc
When recording with a DVD video or video
CD, audio tracks may not record in some
cases while the menu is displayed. As audio
will not play in this case, verify that the video
tracks are playing and then activate playback.
When playback of a disc is completed:
�If an audio CD is playing, the first track
starts.
�If a DVD video or video CD is playing,
playback will stop or the menu screen will
be displayed.
The title/chapter number and playback time
display may not appear while playing back
certain DVD video discs.
CAUTION
Conversational speech on some DVDs
is recorded at a low volume to empha-
size the impact of sound effects. If you
adjust the volume assuming that the
conversations represent the maximum
volume level that the DVD will play, you
may be startled by louder sound effects
or when you change to a different audio
source. The louder sounds may have a
significant impact on the human body or
pose a driving hazard. Keep this in mind
when you adjust the volume.
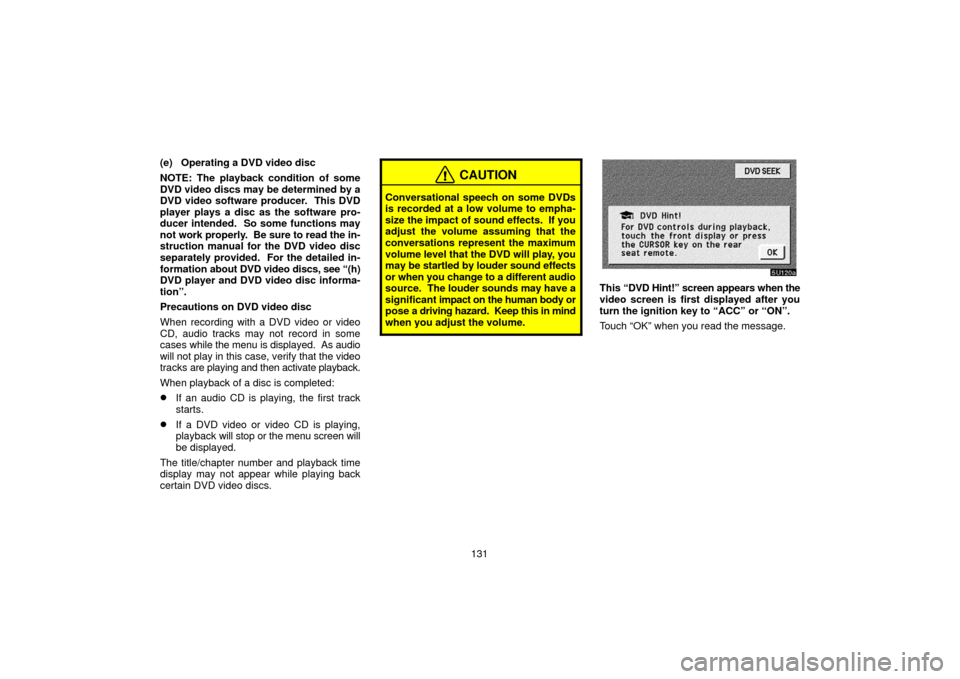
This “DVD Hint!” screen appears when the
video screen is first displayed after you
turn the ignition key to “ACC” or “ON”.
Touch “OK” when you read the message.
Page 145 of 158
135
SELECTING THE BONUS GROUP
DVD audio only —
Enter the bonus group number on the search-
ing group screen and touch the “Enter”
switch. The “Enter Key Code” screen will ap-
pear. To enter the number of the group you
want to play, touch the group number. If you
enter the wrong number, touch the “Clear”
switch to delete the number.
Touch the “Enter” switch on the screen. The
player starts playing the disc from the se-
lected bonus group number.CHANGING THE STILL PICTURE
DVD audio only —
Touch the “Still Prev.” or “Still Next” switch on
the screen to forward or reverse the still pic-
tures.CHANGING THE SUBTITLE LANGUAGE
Each time you touch “Sub Title”, the lan-
guage is selected from the ones stored in
the discs and changed.
To turn off the subtitle, touch “Hide”.
When you touch “Back”, the previous screen
returns.
Page 146 of 158
136
CHANGING THE AUDIO LANGUAGE
DVD video only —
Each time you touch “Audio”, the lan-
guage is selected from the ones stored in
the discs and changed.
When you touch “Back”, the previous screen
returns.CHANGING THE AUDIO FORMAT
DVD audio only −
Each time you touch “Audio”, another au-
dio format stored on the disc is selected.
When you touch “Back”, the previous screen
returns.CHANGING THE ANGLE
The angle can be selected for discs that
are multi�angle compatible when the
angle mark appears on the screen.
Each time you touch “Angle”, the angle
changes.
When you touch “Back”, and the previous
screen returns.
Page 147 of 158

137
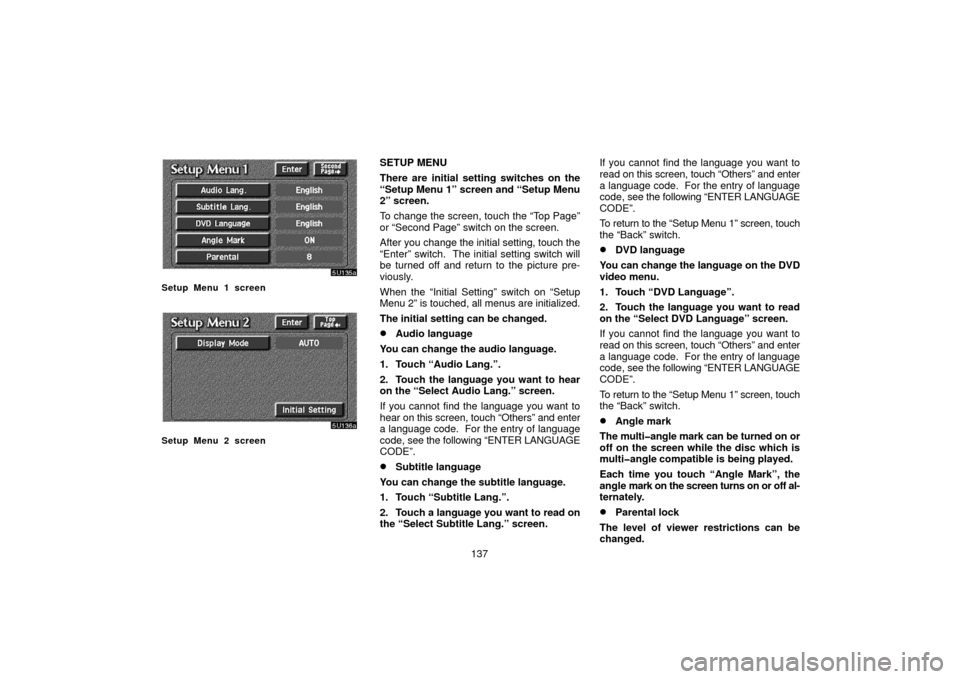
Setup Menu 1 screen
Setup Menu 2 screen
SETUP MENU
There are initial setting switches on the
“Setup Menu 1” screen and “Setup Menu
2” screen.
To change the screen, touch the “Top Page”
or “Second Page” switch on the screen.
After you change the initial setting, touch the
“Enter” switch. The initial setting switch will
be turned off and return to the picture pre-
viously.
When the “Initial Setting” switch on “Setup
Menu 2” is touched, all menus are initialized.
The initial setting can be changed.
�Audio language
You can change the audio language.
1. Touch “Audio Lang.”.
2. Touch the language you want to hear
on the “Select Audio Lang.” screen.
If you cannot find the language you want to
hear on this screen, touch “Others” and enter
a language code. For the entry of language
code, see the following “ENTER LANGUAGE
CODE”.
�Subtitle language
You can change the subtitle language.
1. Touch “Subtitle Lang.”.
2. Touch a language you want to read on
the “Select Subtitle Lang.” screen. If you cannot find the language you want to
read on this screen, touch “Others” and enter
a language code. For the entry of language
code,
see the following “ENTER LANGUAGE
CODE”.
To return to the “Setup Menu 1” screen, touch
the “Back” switch.
�DVD language
You can change the language on the DVD
video menu.
1. Touch “DVD Language”.
2. Touch the language you want to read
on the “Select DVD Language” screen.
If you cannot find the language you want to
read on this screen, touch “Others” and enter
a language code. For the entry of language
code, see the following “ENTER LANGUAGE
CODE”.
To return to the “Setup Menu 1” screen, touch
the “Back” switch.
�Angle mark
The multi�angle mark can be turned on or
off on the screen while the disc which is
multi�angle compatible is being played.
Each time you touch “Angle Mark”, the
angle mark on the screen turns on or off al-
ternately.
�Parental lock
The level of viewer restrictions can be
changed.